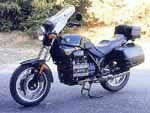
I no longer own my 1994 BMW K75, but I had taken some photos of the conversion process from the low seat to the regular, or “high” seat.
I apologize in advance for the rather poor quality of these photos; they were taken with a film camera and scanned in before I knew much about web photo quality.
But I thought they may come in handy for someone considering this switch, so here they are. I occasionally receive emails asking about the process of exchanging the K75 low seat for the regular height seat, and this information and photos may help.
I used to have a list that described all of the parts necessary for the conversion, but I seem to have misplaced it. I’ll list the parts from my memory.
But let me say this: if I had to do it over again, instead of converting from the low to high seat, I’d probably send the low seat out to Sargent Cycle or somewhere for modification. I believe it would be a bit cheaper, and I’d have ended up with a better seat.
A local BMW club member had Sargent re-pad and re-cover the low seat on his identical K75, and the seat ended up looking good and feeling great. You can spend a lot of time and money on the conversion illustrated below, and you’ll still end up with a fairly cheesy seat that’s actually narrower and, for some, more uncomfortable than the low seat.
By the time you gather all of the necessary parts, you’ll have spent a wad of cash. Here is a list of the parts you will need to convert from the low to the high seat:
-
The regular (or high) seat; I ended up having to buy 2 of them, sight unseen, to find a good one; only the second one was worth using. A decent used seat may cost $125-$200.
-
A replacement lock set for the high seat; the low seat’s lock set will not work; if you can find one used, it could cost around $25.00.
-
The hinge assembly; maybe another $20 if you’re lucky enough to find one used?
-
The battery side covers. These can be the most expensive parts — even if you do find them used, you’ll probably still need to get them repainted. I bought a new set from BMW Motorrad in St. Louis, Missouri (now known as Prestige Motor Sports). They were recommended to me as a good source for BMW painted body parts. They have an excellent paint shop, and they painted the covers to match. The finish and color were perfect, but the total bill was near $180.00.
Notice that so far, we’ve probably spent more than a brand-new seat would cost!
By the way, if you were going in the opposite direction, i.e., from the high seat to low, you’ll need the rubber/foam tank surround and the clips with the double-sided tape that hold the surround to the tank.
You’ll also need a couple of hooks that screw in under the seat and hold the low seat on (see photo 2 below). The low seat doesn’t work on a hinge, it is removed whenever you want to get under the seat.
Converting the seat isn’t that difficult, once you have all the parts. I didn’t have any reference for how the hinge assembly bolted to the bike, so I contacted a club member and took a look at his K75RT to see how it was attached. Unfortunately, these photos are pretty bad, so you can’t really tell in photos 5 or 6 exactly how everything goes together. But once you see it, it becomes pretty obvious.
Corbin has some information on the regular height seat parts needed and some assembly instructions on their website. If anyone has any questions on this, feel free to email me at ![]()
![]() , or if you have any other information, comments or photos, let me know and I’ll add them to this page.
, or if you have any other information, comments or photos, let me know and I’ll add them to this page.
Here are the photos with some description about what needs to be changed:
|
|
|
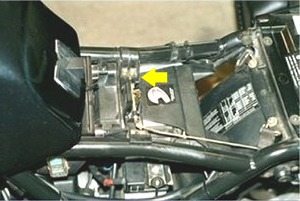
| Photo 1 – This latch mechanism (yellow arrow) from the low seat must be removed. | Photo 2 – Remove 2 hooks that hold the back of the low seat in place. |
|
|
|
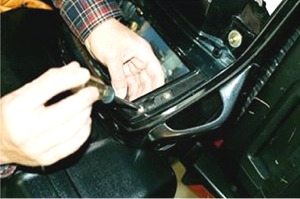
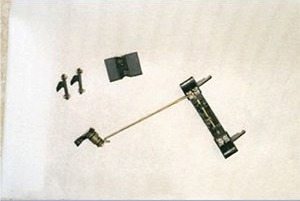
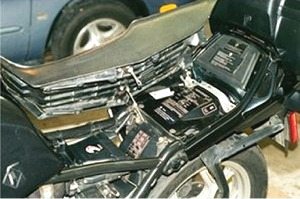
| Photo 3 – Here are most of the parts you should end up with after removing the low seat; the hooks, the latch, and one of the stick-on hooks for the rubber tank surround. Missing are the rubber tank surround and the low seat’s key/latch mechanism, which will have to be replaced. | Photo 4 – Remove all of the stick-on hooks that held the rubber tank surround. I used dental floss to work my way behind them, then gripped them with a pair of needle nose pliers and slowly pulled them off. Use WD-40 or Goo Gone to get the crud off. |
|
|
|
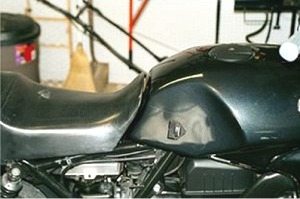
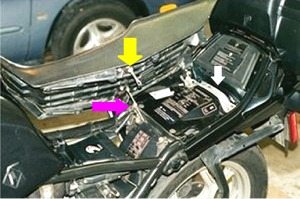
| Photo 5 – The high seat in place. Notice the hinge assembly and the new male post that goes into the new lock assembly. Getting the old lock out takes some doing, but it can be done without removing the rear fender. | Photo 6 – Here’s another view of the regular seat: the white arrow on the right points to the strap that is part of the new hinge assembly. The yellow arrow indicates the new post for the replacement lockset. The pink arrow points to one of the hinges that is part of the hinge assembly. |
Note: For informational use only. All material and photographs are Copyright © webWorld International, LLC – 2000-2011. All rights reserved. See the webBikeWorld® Site Info page. NOTE: Product specifications, features and details may change or differ from our descriptions. Always check before purchasing. Read the Terms and Conditions!