
Over the past few years, action cameras have come way down in price and steadily up in quality. These small cameras are great for motorcyclists who want to capture their rides. Most of the cameras are limited of course to showing just the one view in which you have the camera pointed.
More recently, a wider range of action cameras are available that shoot a full 360 degree sphere around the camera. These typically use two lenses back to back that capture two 180 degree videos—and then, through software, combine them into a single video that can capture everything around it.
Having footage of everything surrounding the camera means a rider can now choose what to show throughout the video by changing the displayed portion of the video, or “re-framing”. This can make for a much more interesting video and it can be done with one device instead of multiple ones.
Insta360 recently sent me one of their One X2 cameras for a review. Since I’ve never worked with a 360 type camera, I was concerned that this might have a steep learning curve. As it turns out, even if one is only somewhat familiar with video editing and processing, getting the hang of this doesn’t take much time at all.
Who is Insta360?
Insta360 was founded in 2015 by JK Liu and Insta360 is the DBA for Arashi Vision Inc. In 2016, Insta360 released their first hardware in the form of the Insta360 Nano. This was an add-on camera module for mobile devices (Apple iPhones specifically) and from there, the lineup has continued to grow.
The current camera lineup includes the tiny Go 2 wearable action camera all the way up to the Titan which is an 11K, 360 degree capturing, monster of a camera designed for professional VR/Cinema production.
In a short time, Insta360 has made a real name for themselves—and I admit, even though I have had very little interest in 360 video cameras, I was already familiar with some of their products. There must be a reason that in a few short years Insta360 has made such a well recognized name for themselves. Since I was recently asked to review one of their cameras, I’m hoping to answer why that is. Let’s dig in!
The Design of the One X2 Camera
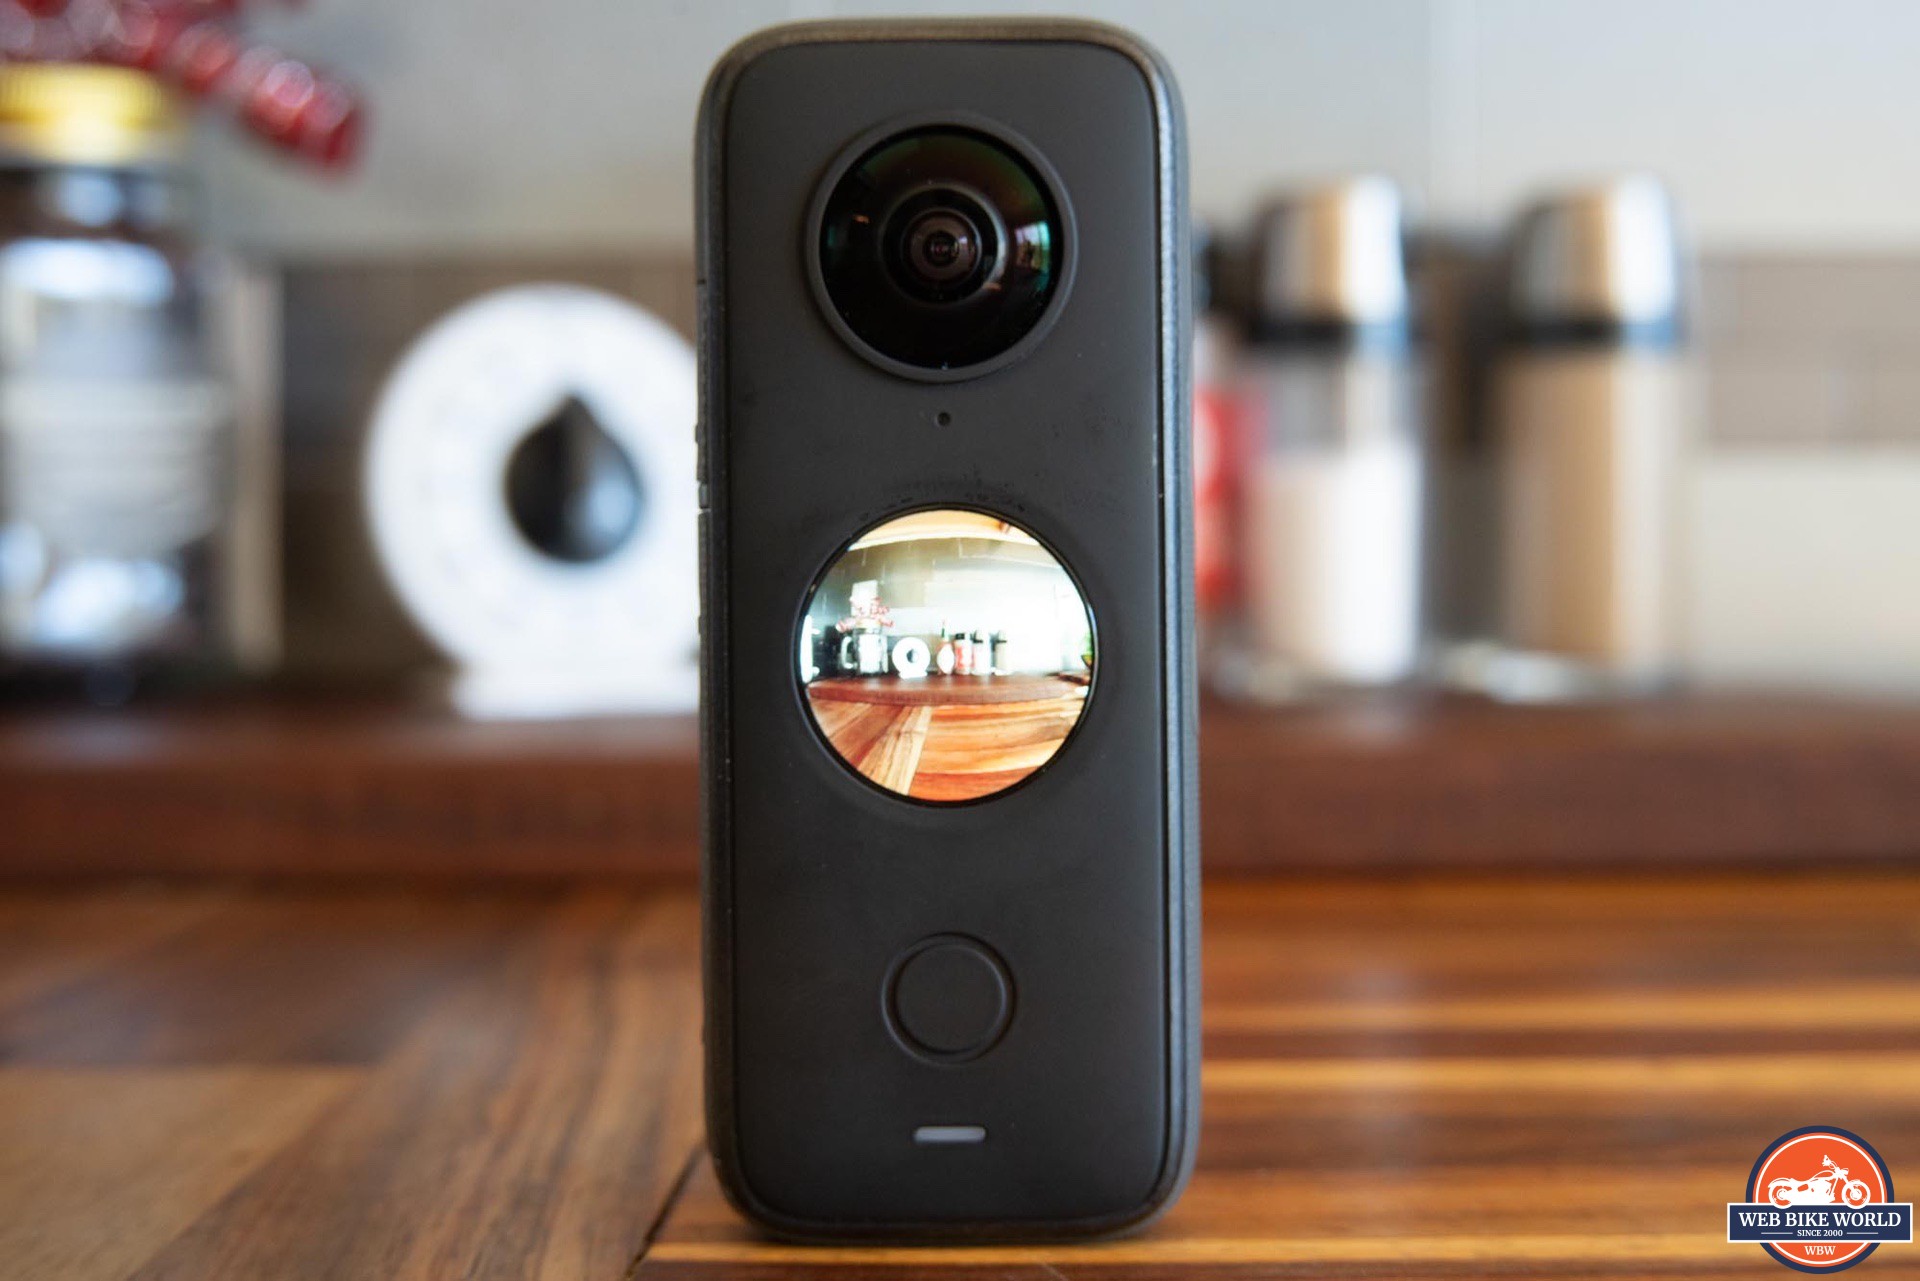
A clean and simple design is how I’d characterize the One X2 camera. Roughly the size of a microcassette recorder (remember those?), the One X2 fits easily in the hand and should fit in most pockets—even in motorcycle jeans or an adventure jacket.
The only caveat to carrying the camera in a pocket is the exposed lenses on the front and rear of the camera body. One should use the included pouch or other cover to prevent damage.
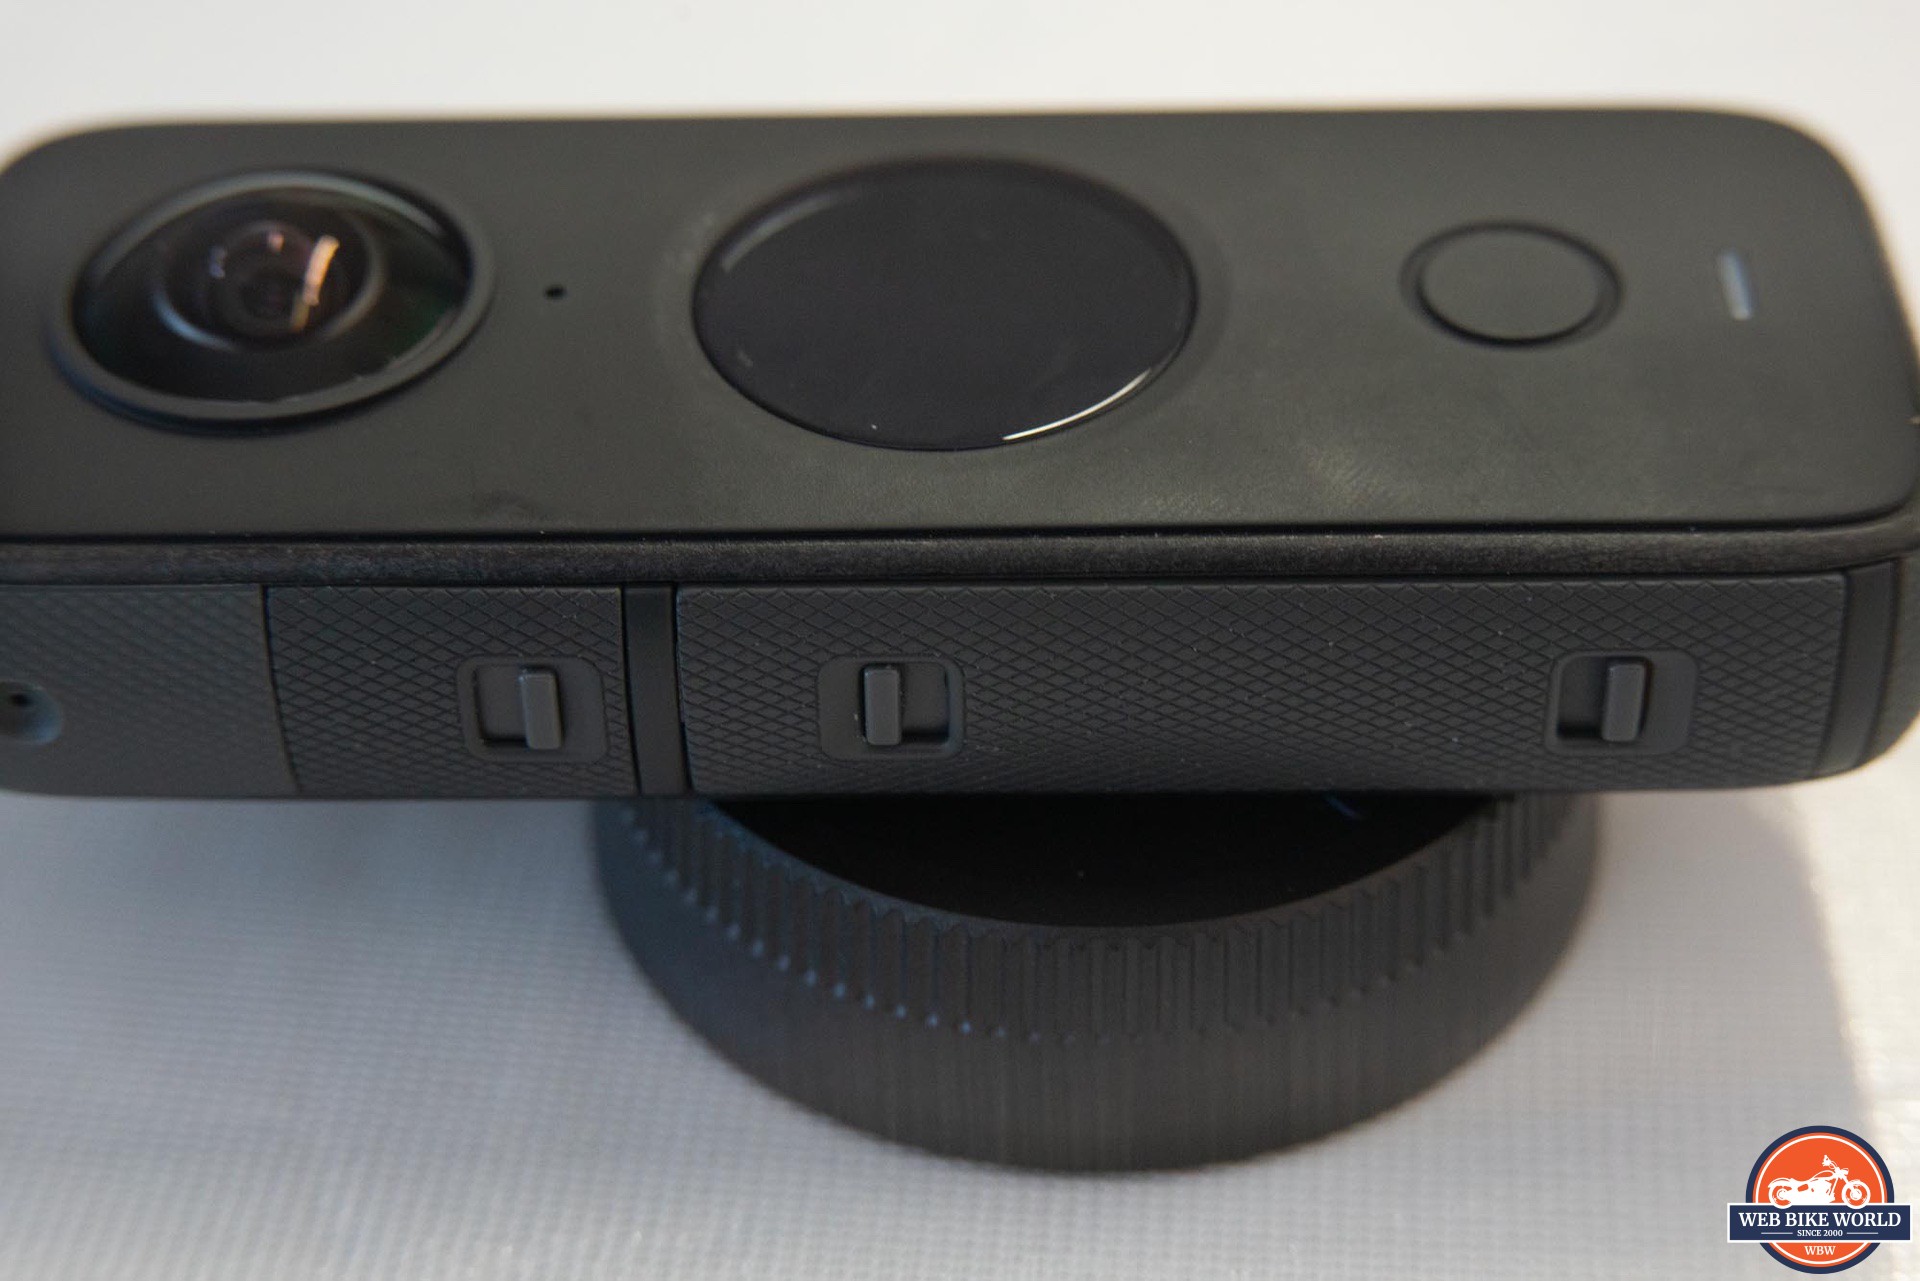
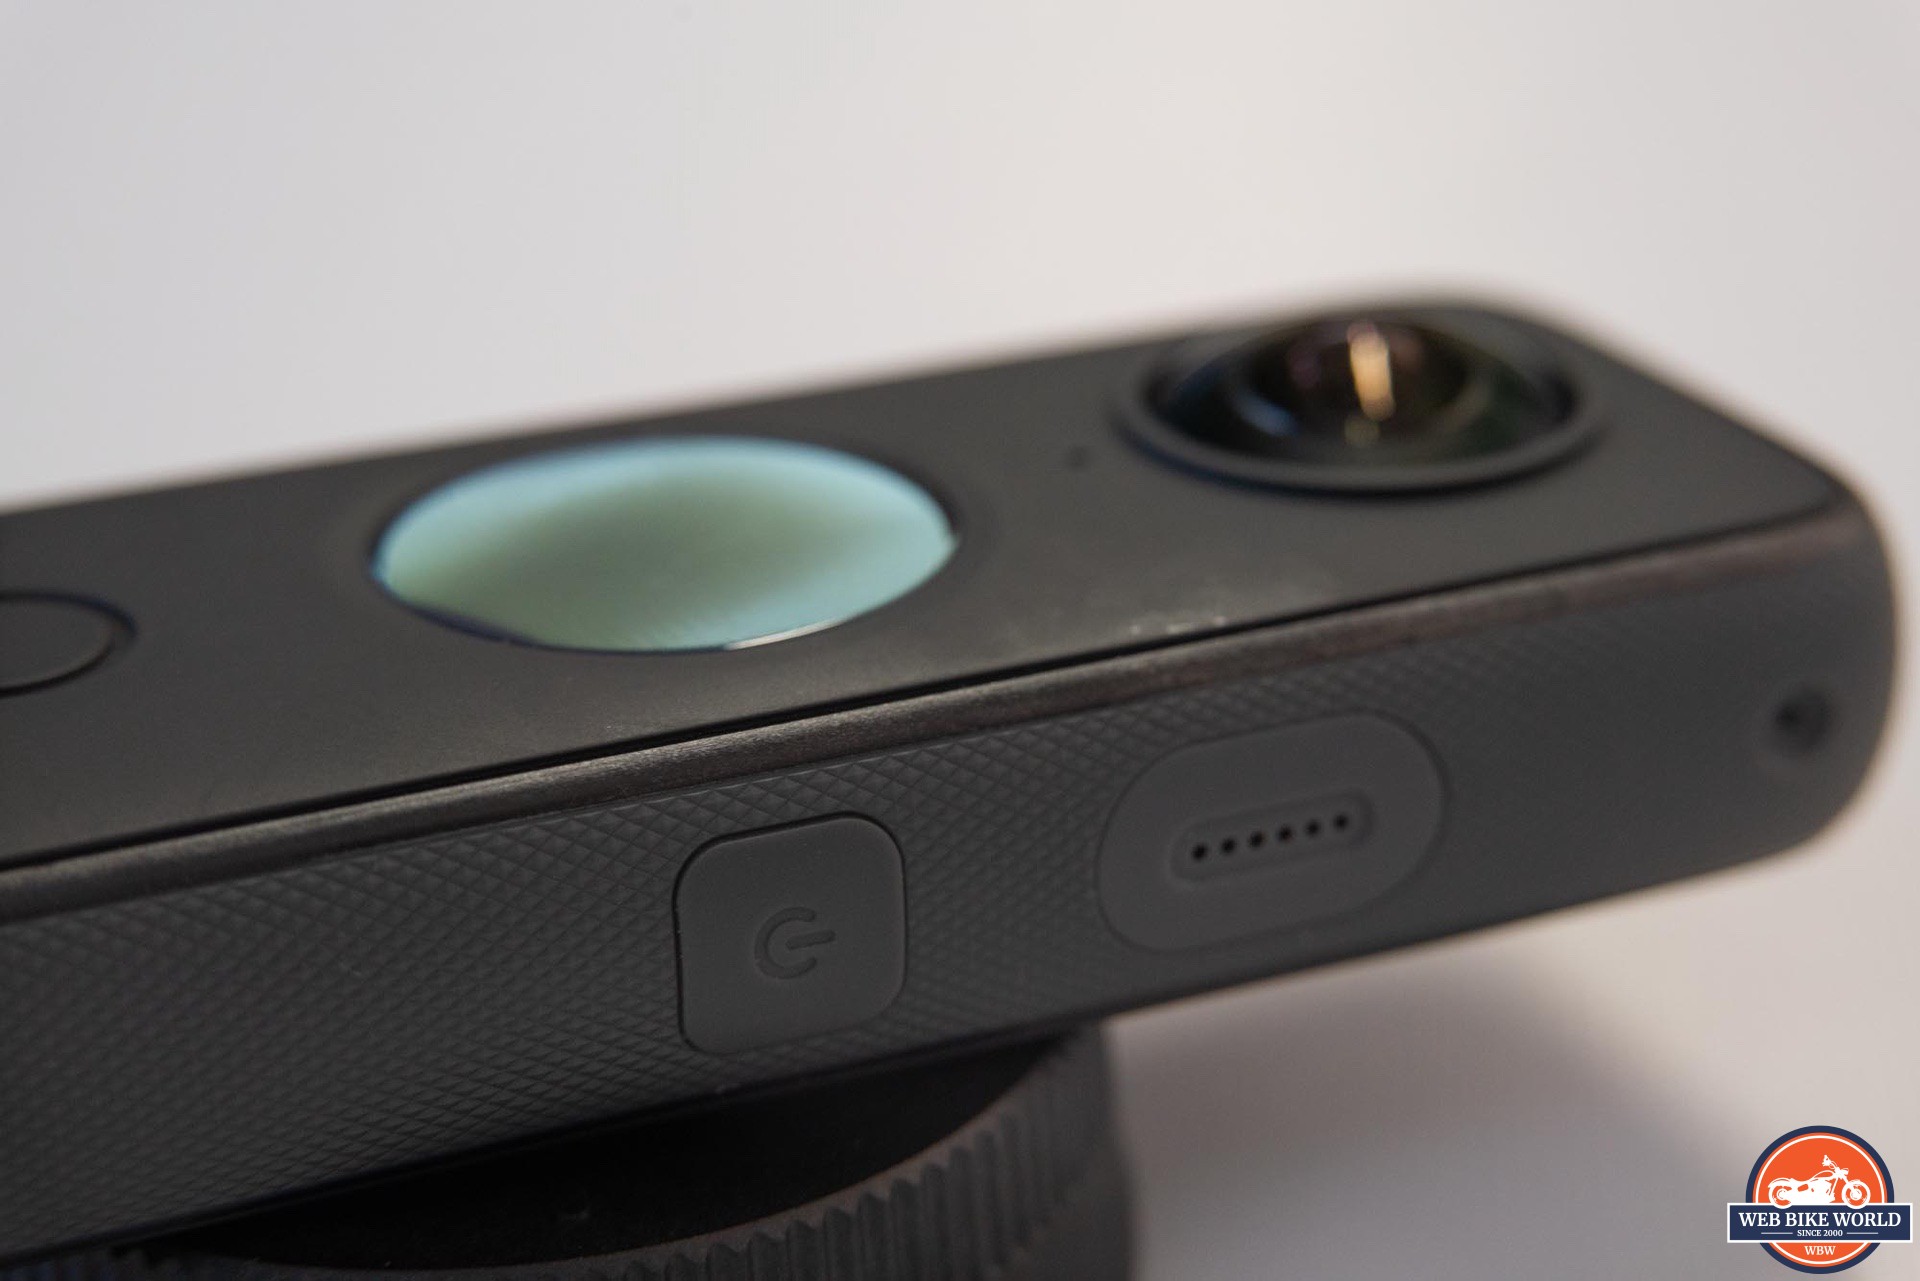
In terms of optics, there are two lenses on the camera body itself, and these are set in the same position on opposite sides of the device. They could be referred to as forward and rear facing cameras, but the nature of a 360 camera makes those terms somewhat meaningless. Both lenses are about an inch in diameter and stick out from the camera shell by about .25 inches.
Other than the bulge of the twin lenses, the rest of the camera shell is relatively smooth. The front and rear panels have a dark gray, smooth, satin finish while the sides, top and bottom, are covered with a lighter gray finely textured rubber.
The front and rear panels, though not glossy, still manage to acquire fingerprints—so even a few minutes of handling can make these areas look less than tidy.
Color
The two-tone gray color is the only color option available, but that might be by design. Seeing as the lenses “see” wide enough to nearly view the camera body itself, having bright colors on the device could cause some artifacts at the very edges of the lens view limits.
What’s In the Box?
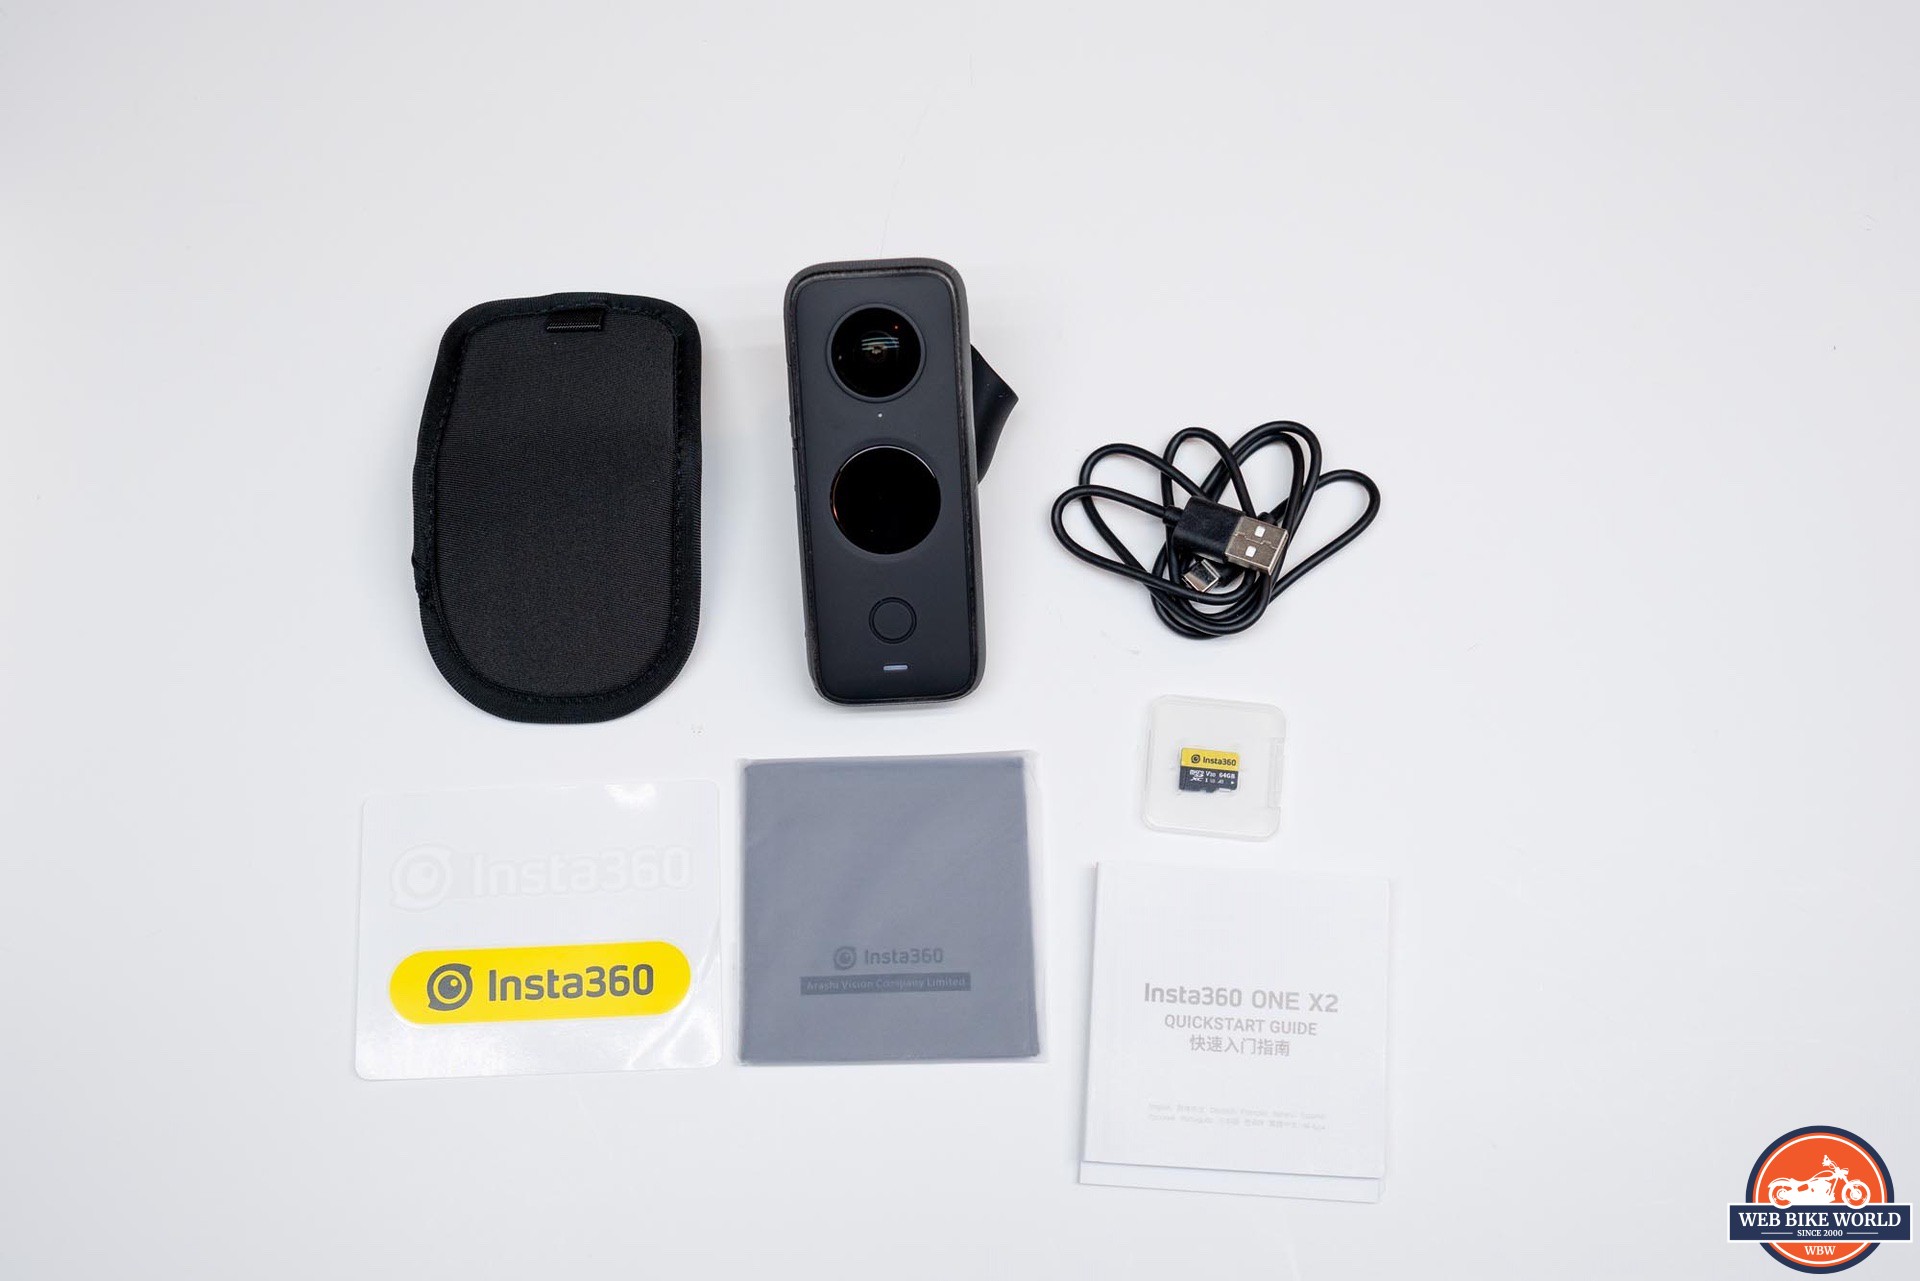
In the box, Insta360 provides a USB-C charging cable, a protective nylon pouch, a printed quick start guide, and the battery. No charger is provided, so one is expected to use the included cable with whatever USB port one has available. I would say it’s odd not to include a charger, but this is becoming more and more often the case with USB charged devices.
Motorcycle Mounting Kit + Selfie Stick
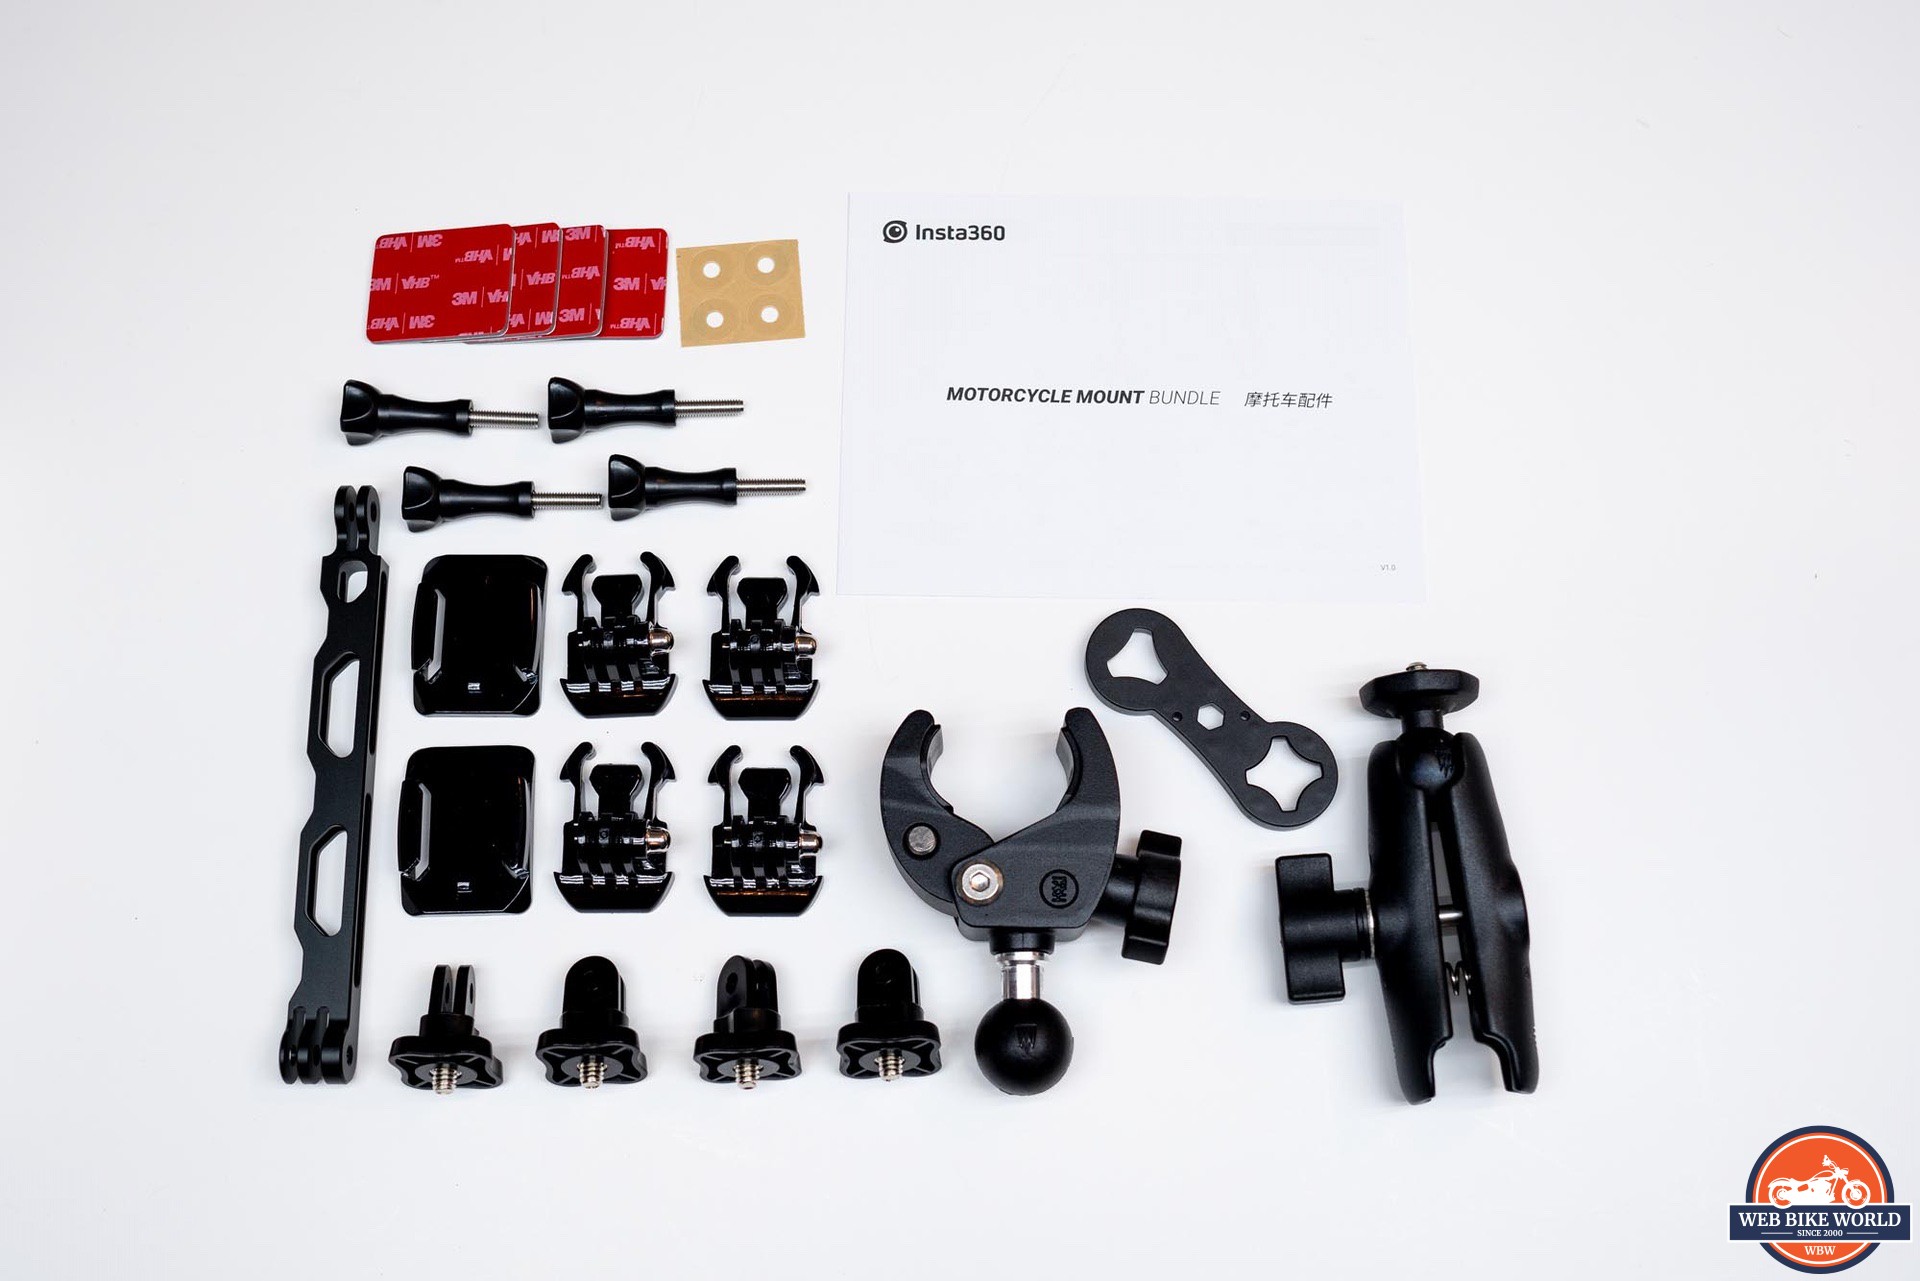
Seeing as this review is for webBikeWorld.com, Insta360 shipped their motorcycle mount bundle to me along with the camera. This kit includes several pieces of Go-Pro compatible hardware like the adhesive bases with snap-in connectors, multiple (4) ¼ 20 thread adapters, 3M adhesive pads, a 6 inch extension rod, and a small wrench for tightening the fasteners.
In addition to those pieces, a “claw” mount and double ball mount, and ¼ 20 thread plate with 1” ball are included in the kit. These are RAM Mount compatible pieces, made from metal, and they have a nice, heavy-duty feel to them.
The “invisible” selfie stick is a telescoping rod that starts at 11.2 inches (28.5cm) and extends to 47.24 inches (120cm). It has a textured grip handle and is tipped with a ¼ 20 standard tripod/camera stud. The base of the stick also has a ¼-20 threaded socket for attaching the stick to bases such as a tripod or other compatible mount.
Construction & Build Quality of the Insta360 One X2 Camera
The camera body is made from plastic but it feels very robust. Since the camera is waterproof, it’s not surprising that it would need to be built to tight tolerances. Taking the large battery out and squeezing on the open space it leaves behind, I found the case to be quite rigid—so overall, the One X2 seems very durable.
The most prominent features are the two 7.2mm (35mm equivalent) lenses located on the front and rear of the camera. Since they have to protrude from the camera body in order to see a full 180 degrees each, it leaves the glass “exposed”. I was concerned that these could be easily damaged riding on the street with fast moving dust and small rocks as a possible hazard.
I expressed this concern to our representative from Insta360 and he assured me it should be fine and they only recommend protective coverings when using them in off-road riding or other similar situations. If one does want to protect the lenses, there are available stick-on protectors as well as heavy duty protectors for use in more hazardous situations.
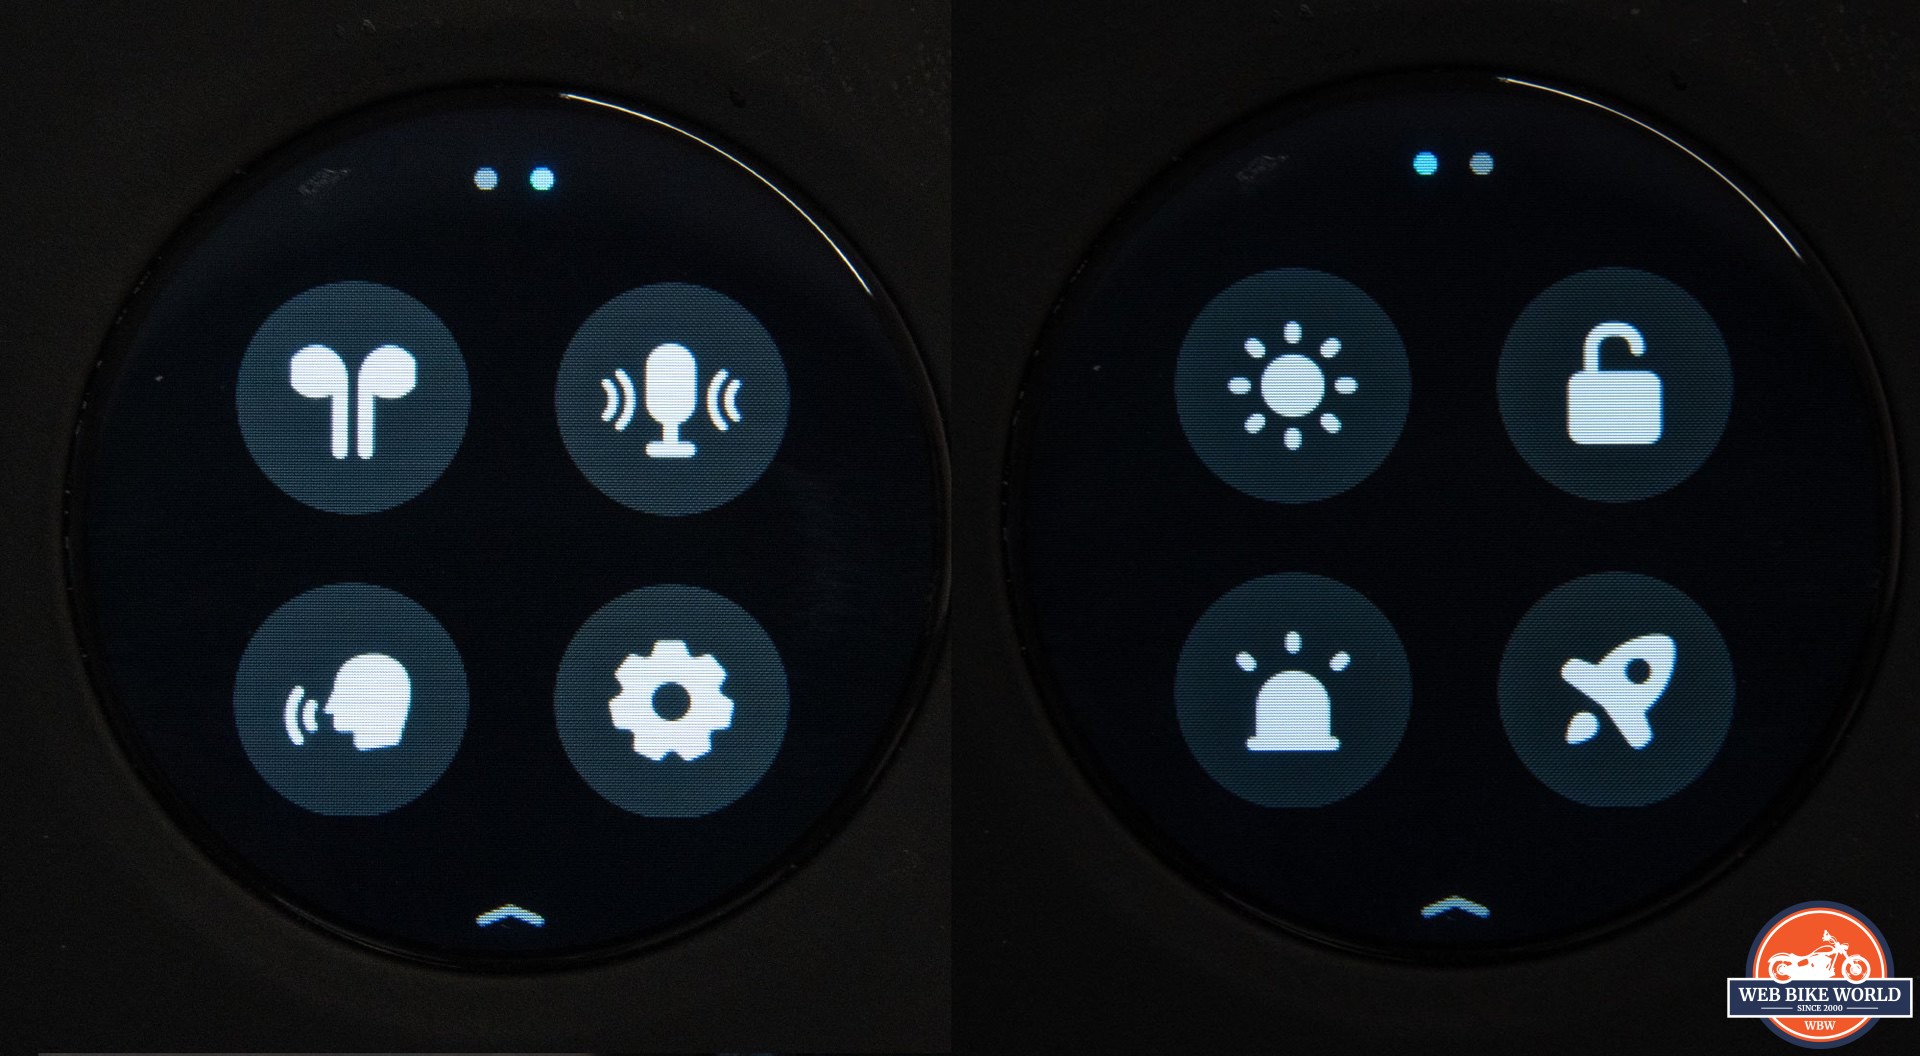
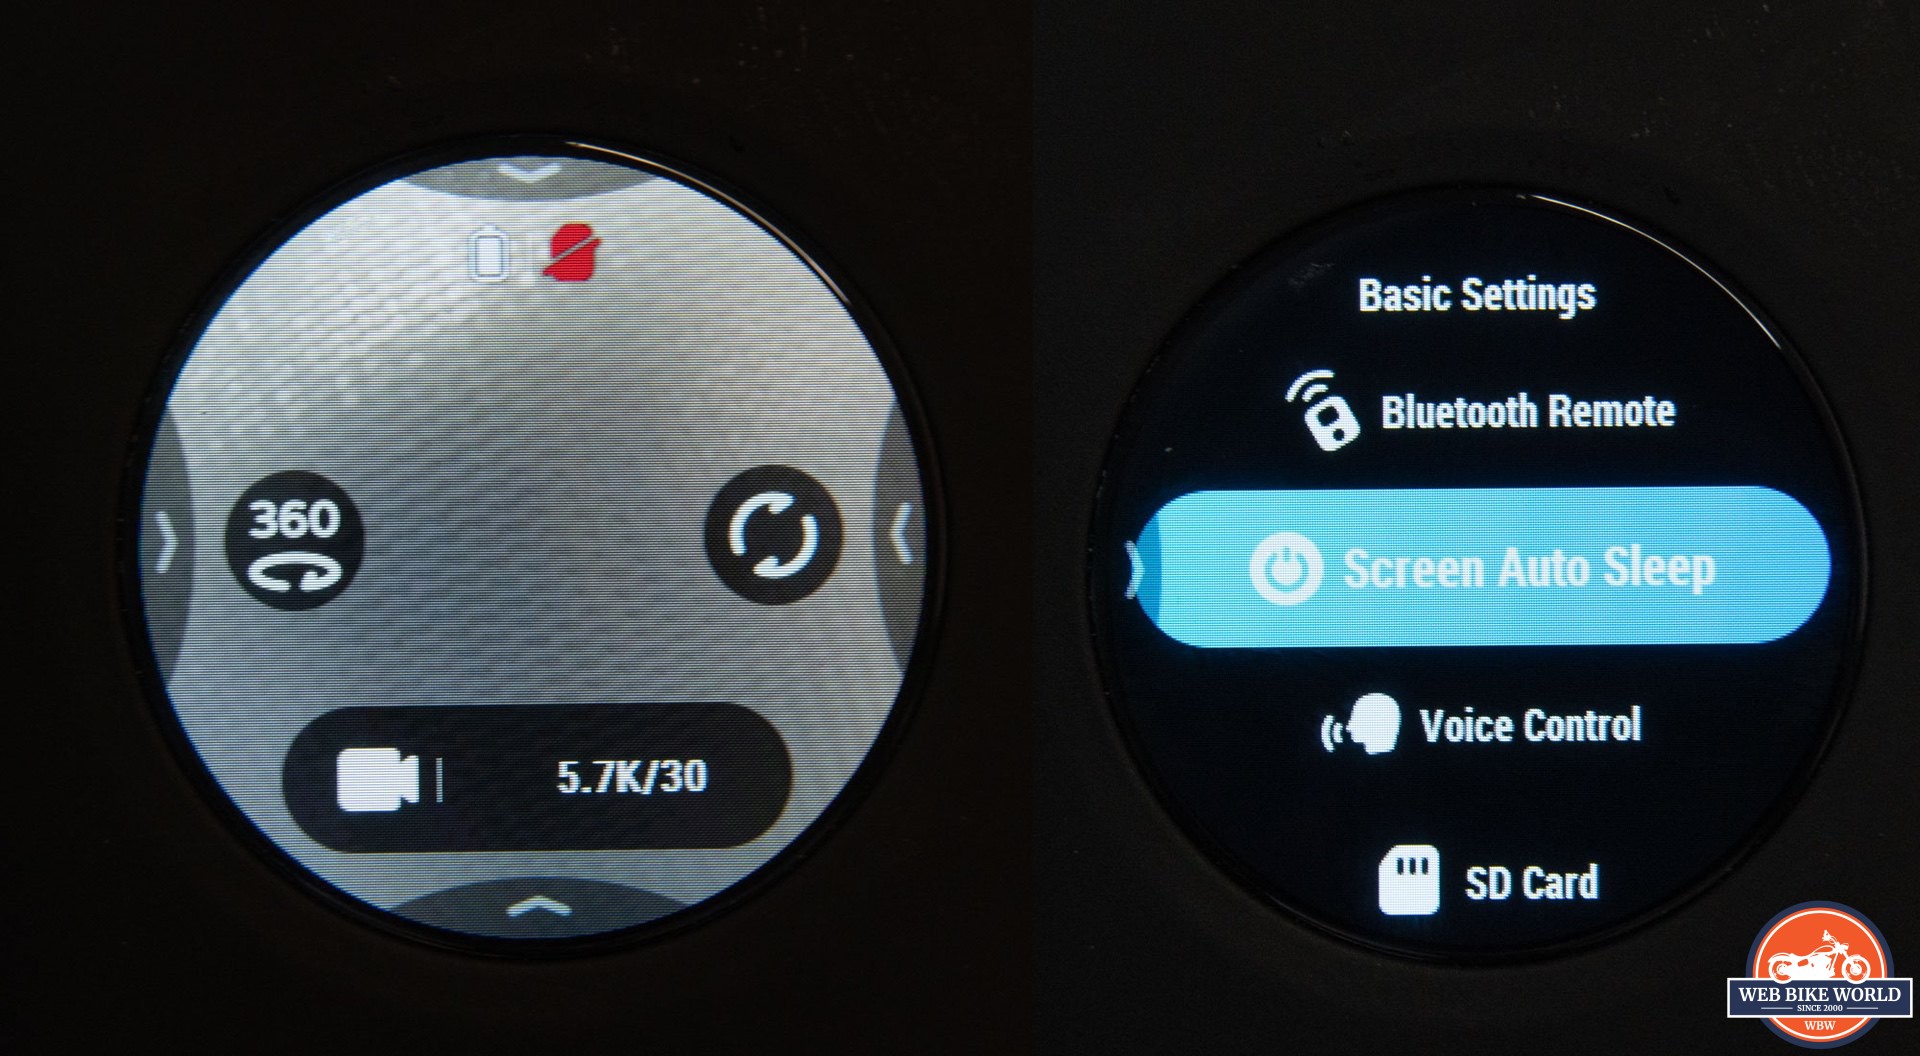
On the back of the camera (facing the user) is a 1 inch (24mm) round screen with touch sensitivity. This screen provides a view for the user and swiping across the screen can change the angle one sees and is useful for getting the desired shot. The touch screen is also used to change the vast array of settings on the camera itself.
Below the screen is a small button used to start and stop recording. This button will also wake up the camera from sleep, and an additional press will begin recording. The button has a very shallow travel and a soft clock so when wearing thicker gloves it is important to look at the screen to see the large red “recording” message to be sure you’re capturing footage.
On the right side of the device there is a small port at the top for one of the built-in mics. Below that is the built in speaker that sits under several small holes in the surface. Further down is a flat power button. The button takes a deliberate press to activate, making it unlikely one will activate the switch accidentally.
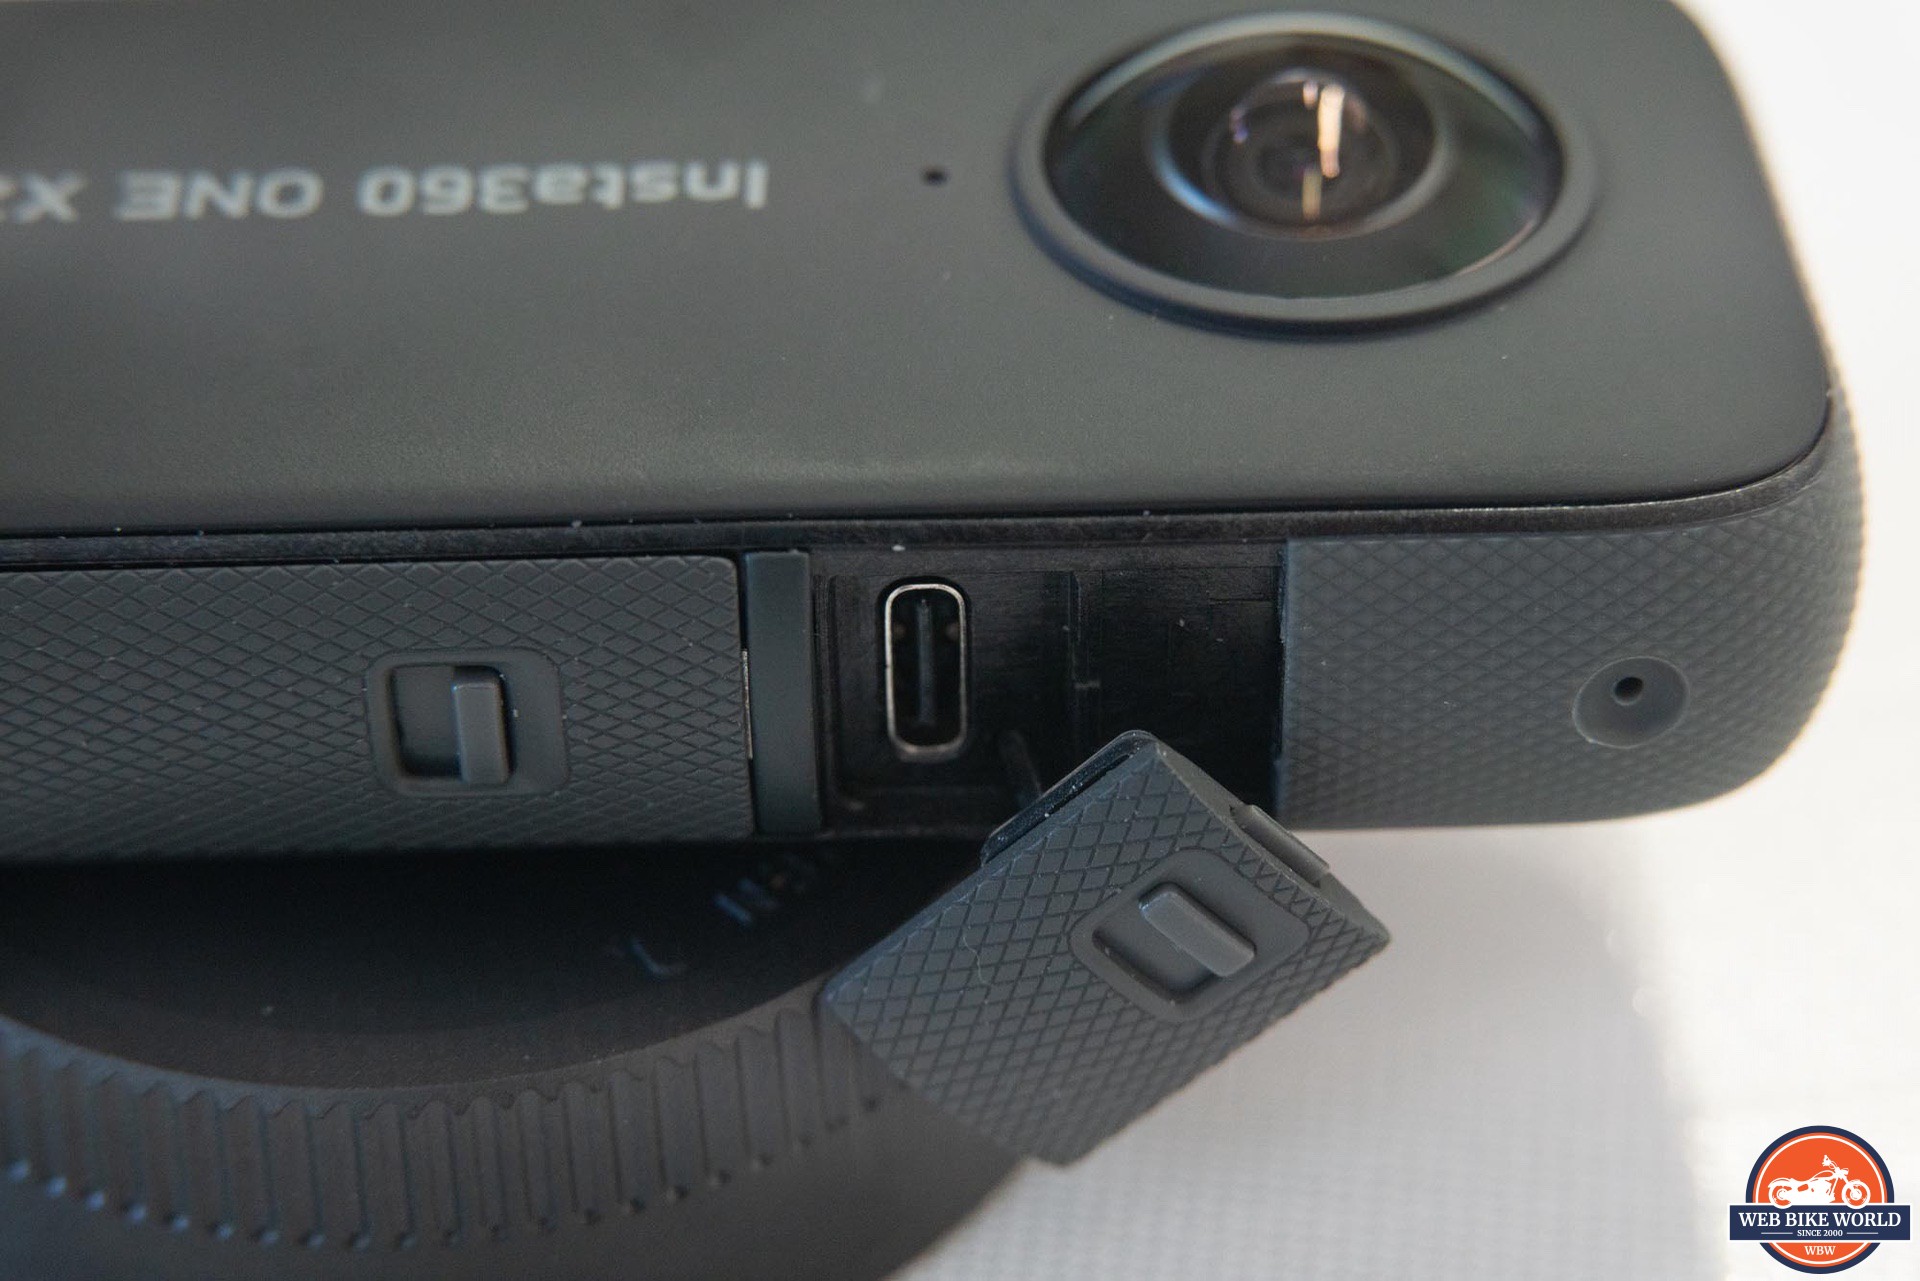
Moving to the left side of the device, we have a small port for another built-in mic. Below that is a sliding latch that reveals a USB-C port used for charging, file transfer, and an add-on external microphone adapter. The cover has a small tether that attaches to the body of the camera from underneath keeping the cover from being lost.
This cover can be removed with a small tug—which is necessary for using the microphone adapter. Reinserting the tether is done by inserting the tapered end of the tether back onto the camera body.
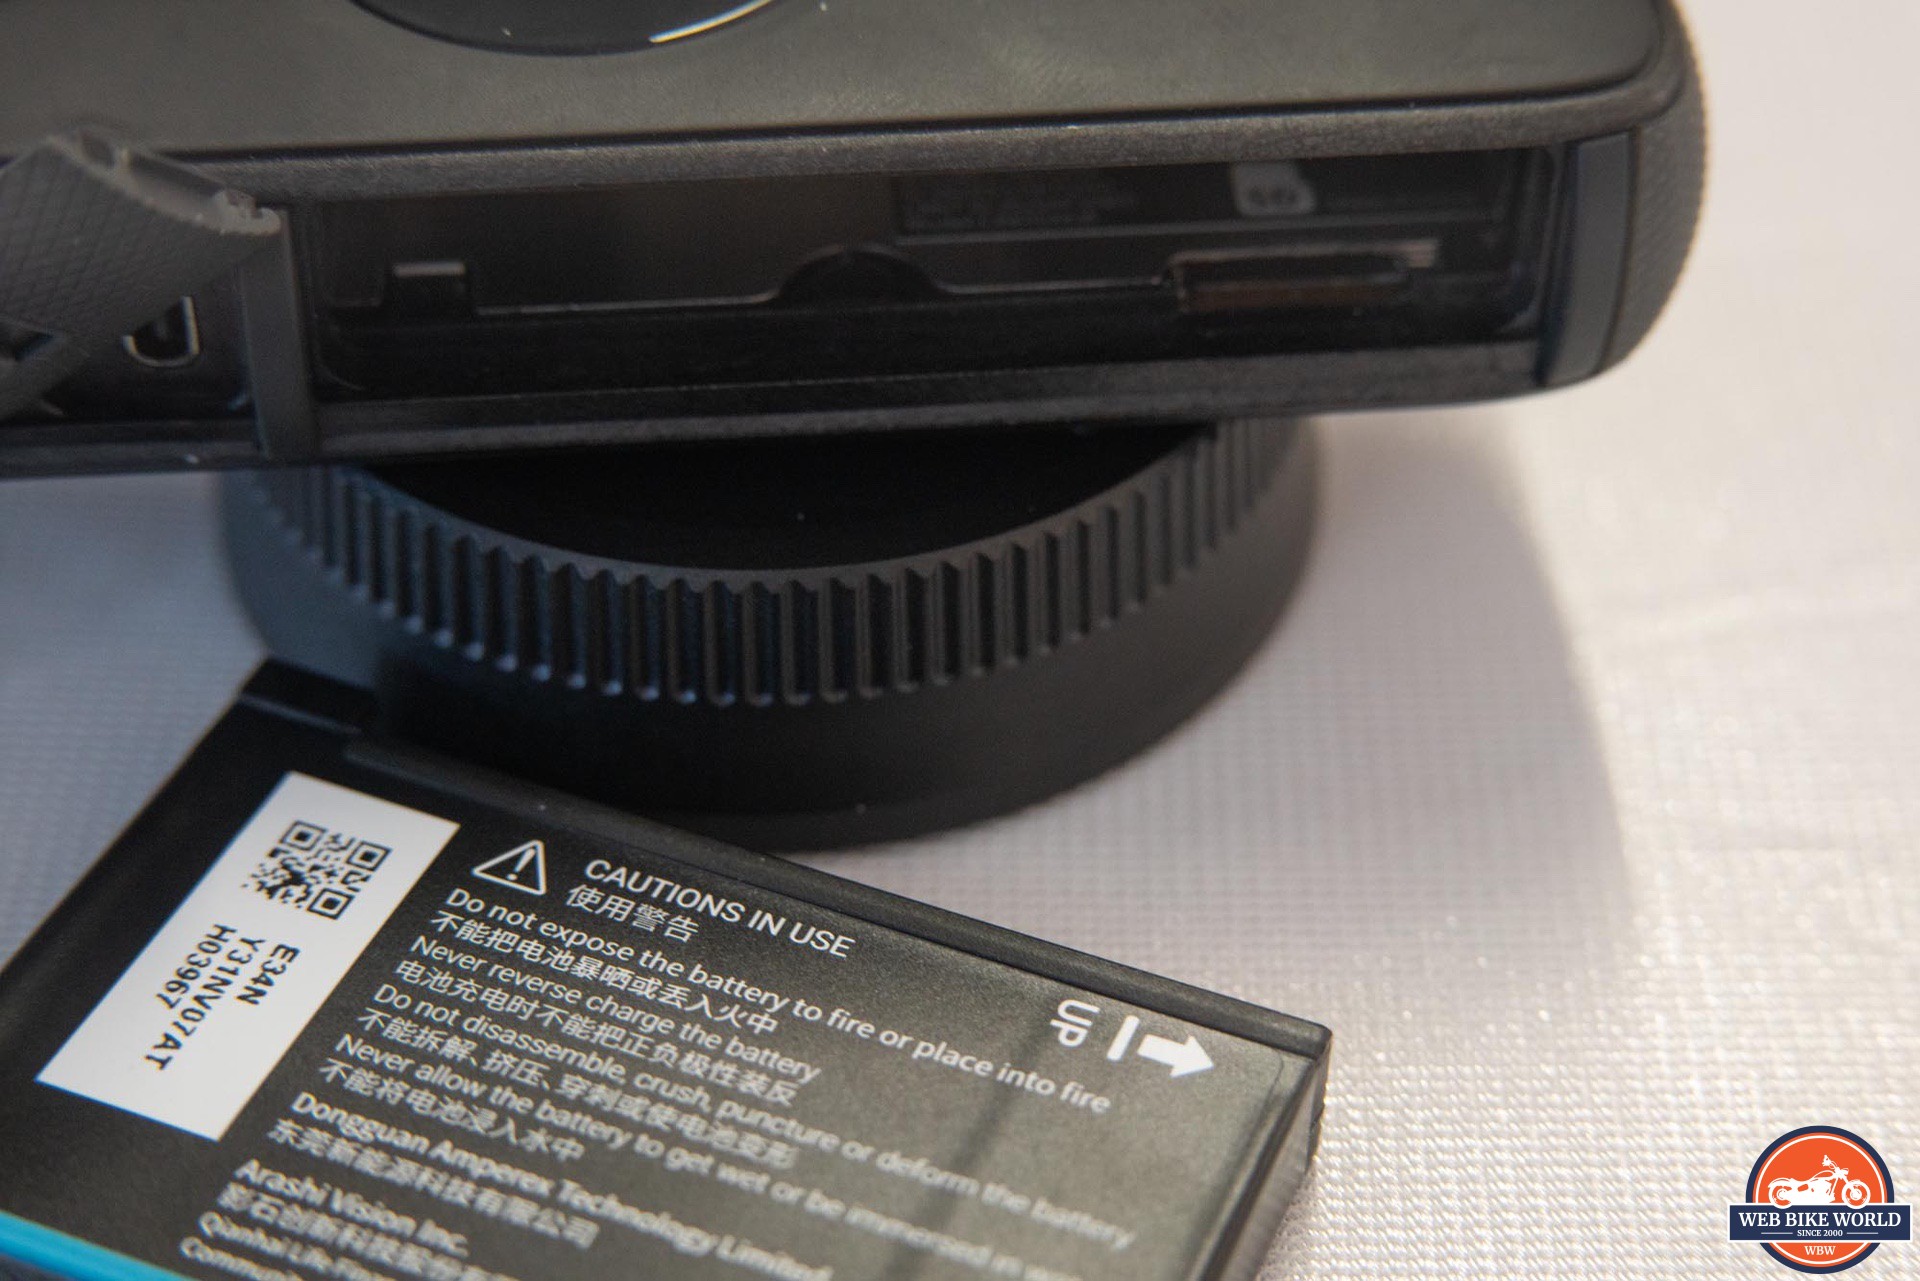
Below this port are two latches that release the battery. In what I find to be a bit of a strange design, the cover and latches are part of the battery itself. In a way, I like how it removes the chance of losing the cover—but it also means that the cost of the battery has to include the cover piece, as well as the o-ring seals, to keep the space waterproof. It works well enough but seems like an odd design choice.
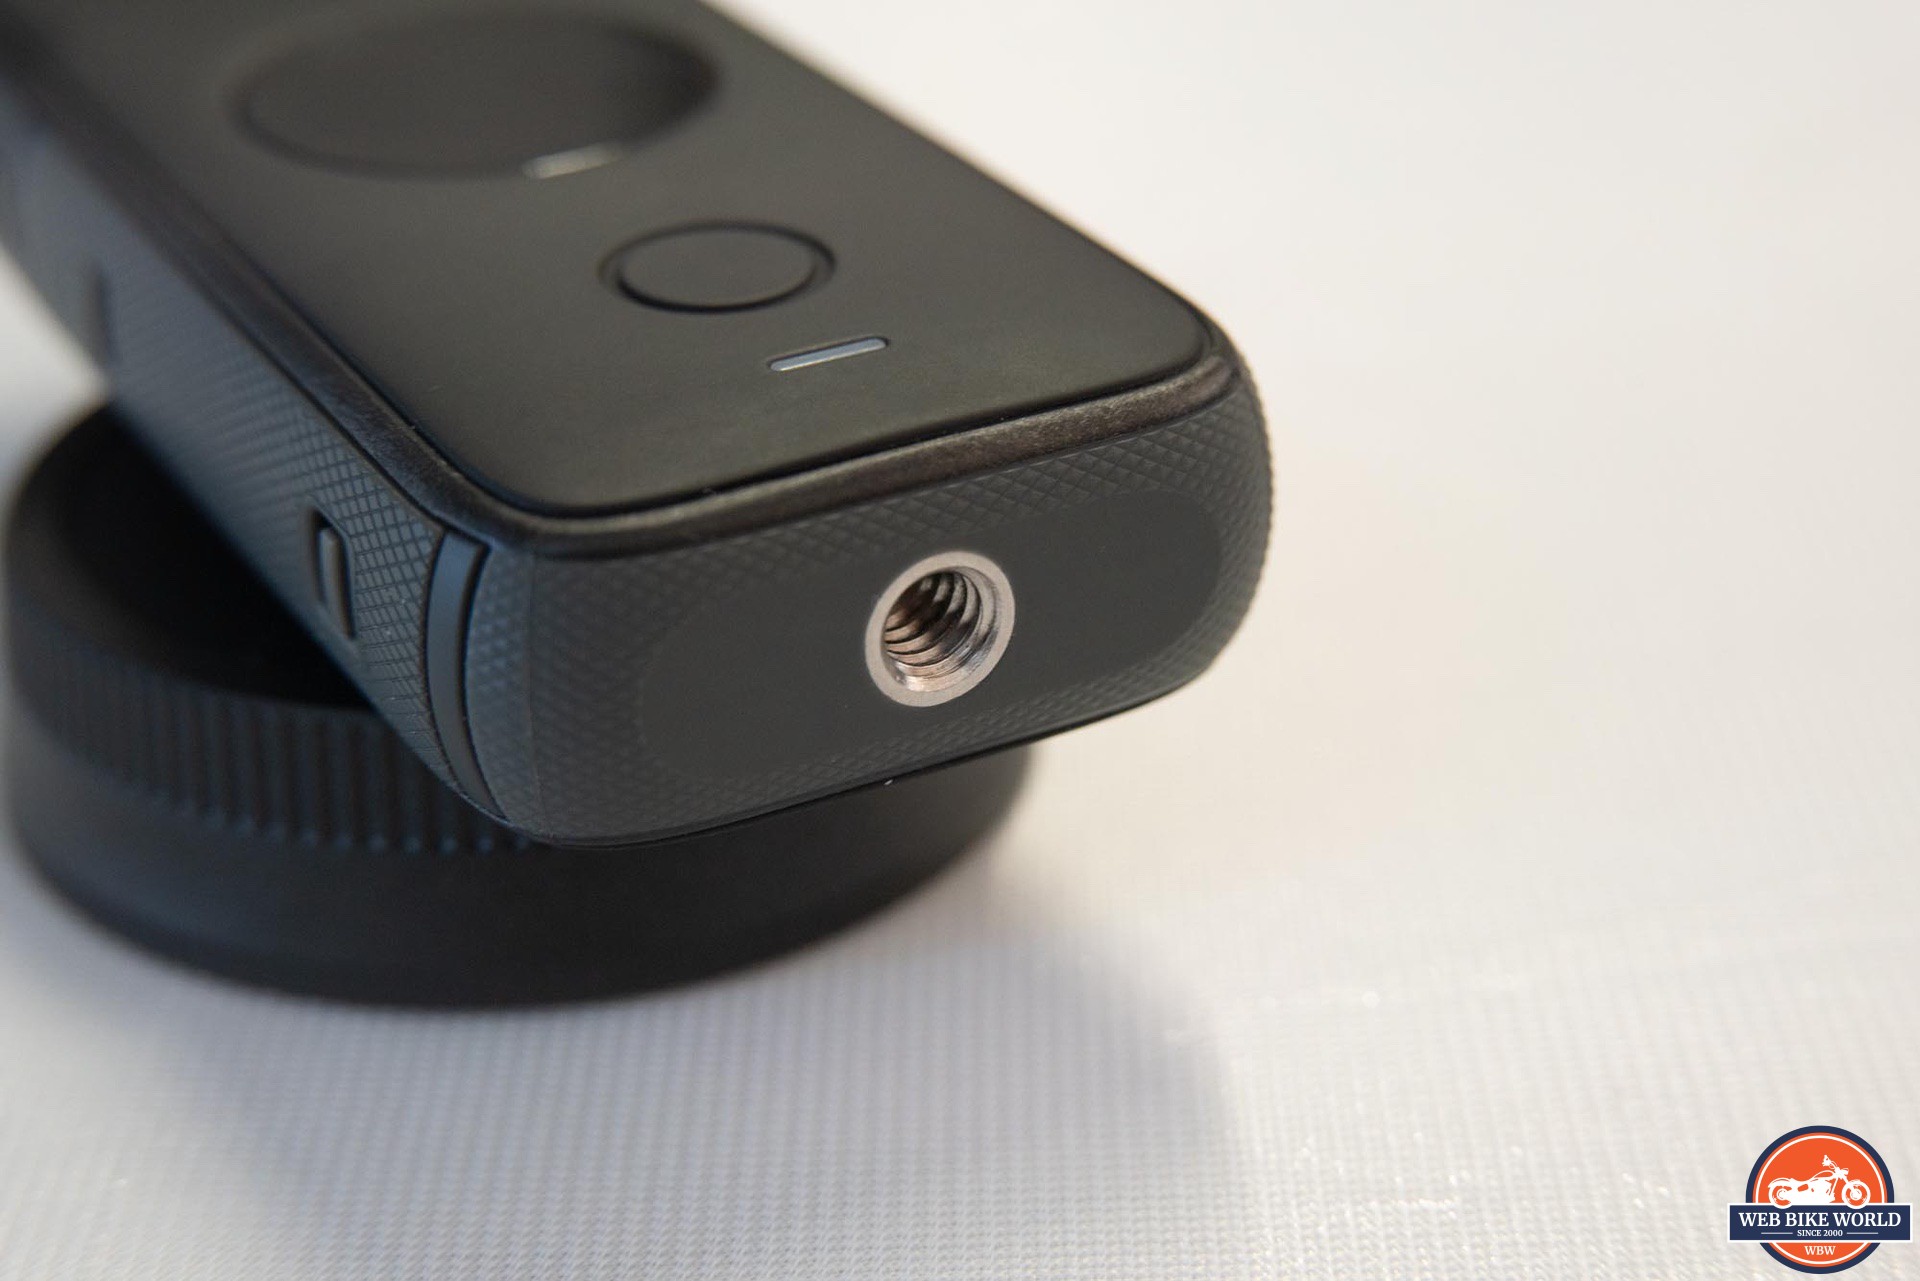
At the base of the camera body is a ¼-20 threaded socket for mounting the camera on a tripod or other similar mounting device. This is something a lot of action cameras in the past have not included and would require some kind of add-on to provide. Video shooters that already have gear to hold a camera will appreciate this.
Overall I think the design works well—but there is one thing I believe is missing. A strap lug or other type of anchor point on the body of the camera would be extremely useful for this device. Considering the intended use of a camera like this, not being able to connect a wrist strap is practically asking for it to be dropped.
For my own use, I prefer to put some type of safety line on a camera mounted on my motorcycle. Engine vibration is the enemy of threaded mounts on small devices like this, and it could cause the camera to loosen on the mount.
To be clear, I’m not saying it will definitely happen and I didn’t have it loosen up during my testing, but it only has to happen once to be enough to damage or completely break the camera.
A note on durability:
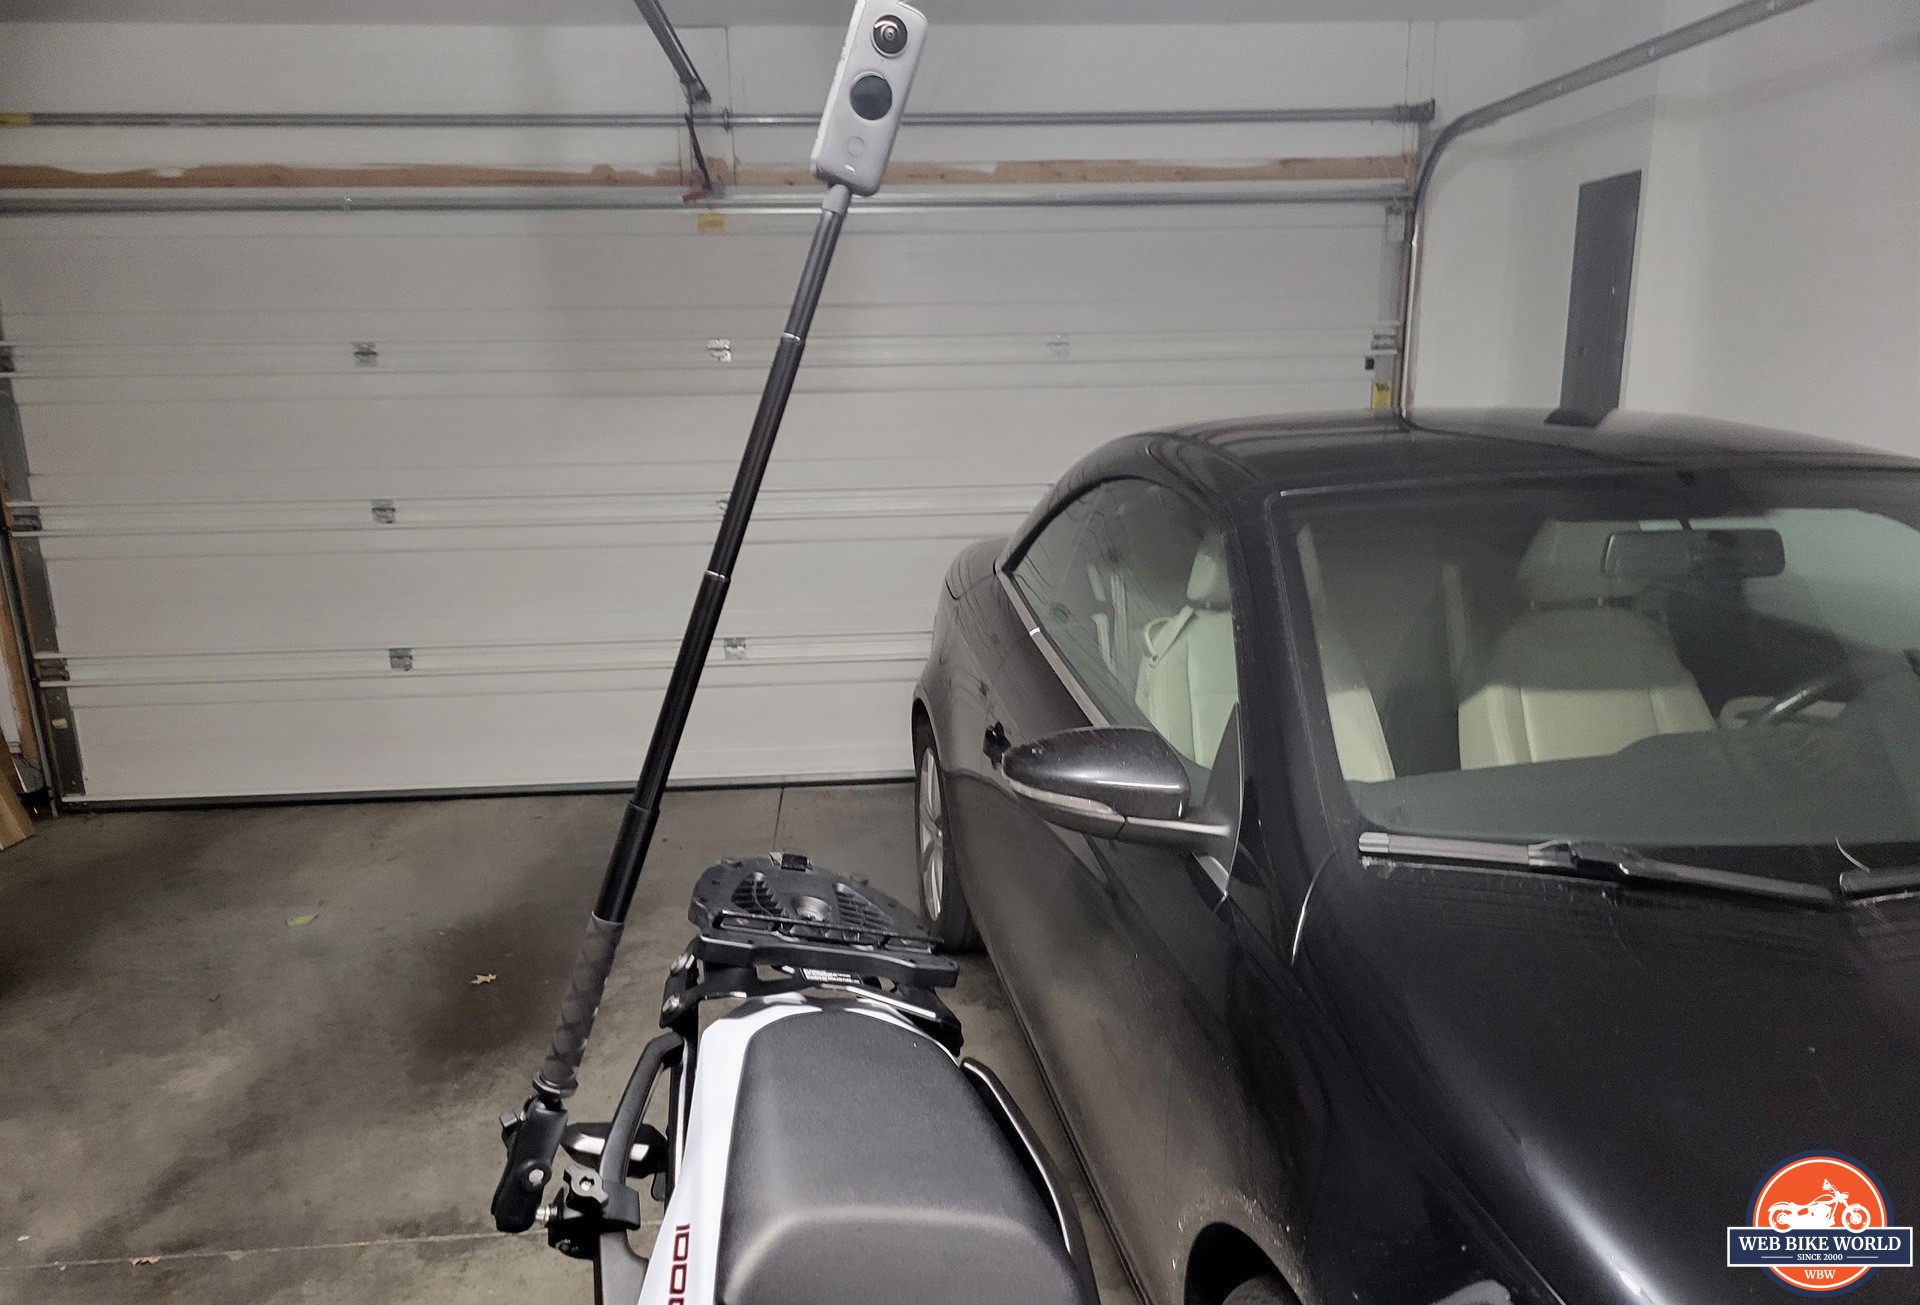
The very day I was wrapping up this review, we had some great weather—so I decided to go for a quick ride and get some fresh footage to add to the review (as well as get the Scorpion EXO-T520 on video to use in a different review for that product). Unfortunately, the clamp gave way ( I think engine vibes worked the clamp loose) and the camera and mount hit the ground at around 45 mph.
I was sure the camera was toast and as far as the lenses were concerned, they were pretty heavily damaged. The camera itself, however, still worked and kept recording after the fall. The usb port cover and battery were still firmly in place, and once I got it home (after circling back to pick it up) it still functioned. While obviously not what you want to do to this camera, I’m impressed with how tough it was.
Image of the questionable setup. I wasn’t sure if this was a good idea. It wasn’t. The selfie stick was actually straight up and down but the bike is on its side in this photo.
Mounting Options for the Insta360 One X2 Camera
The camera itself doesn’t come with any mount options in the box, but Insta360 sent along their motorcycle mounting kit for me to test as well. That kit includes some plastic curved base mounts, some 3M double sided tape pieces for use on helmets, and four snap-in adapters that slip into the mounts. These mounts use GoPro style hinges that should be familiar to most action camera users.
There is also a six inch (15.25cm) aluminum extension arm to move the camera away from the mount point for more space. The arm is lightweight but very stiff and stronger than it looks. This has the same hinge connector that can be used with the included mounts.
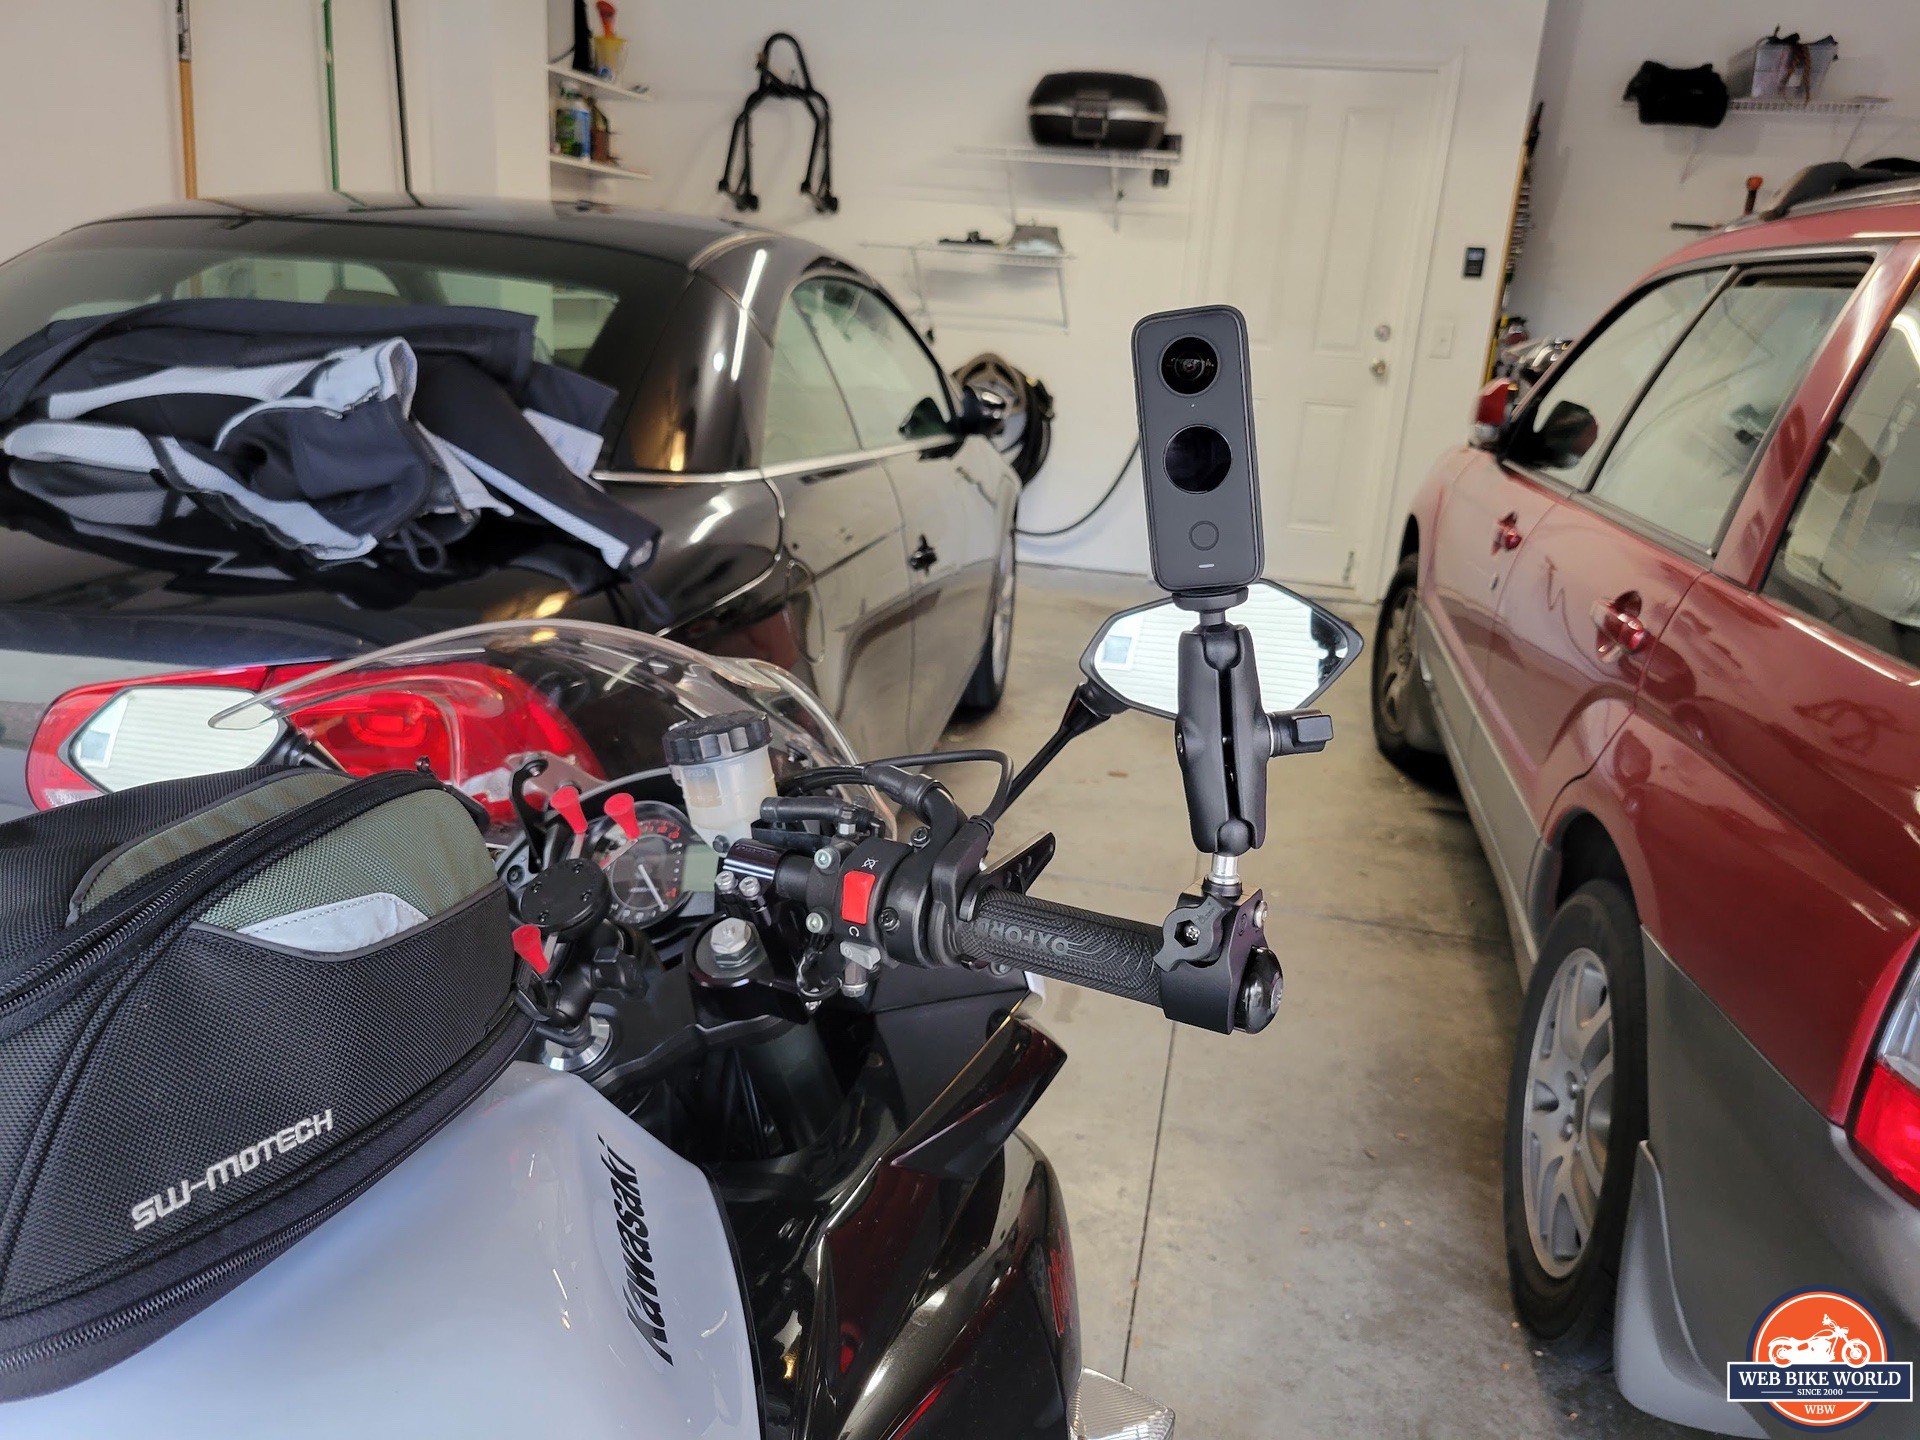
What had my attention was the heavy duty claw mount. This clamp has a two inch (5cm) wide opening that can be closed down to about ⅝ of an inch (1.6cm). The jaws are rounded and are perfect for mounting on tubes or other similar mounting points on the. This works in conjunction with the double ball extension and ¼-20 ball mount to create a very solid and versatile mount.
This is the mount I used for testing and found it easy to attach to my bar-ends, my SW-Motech rear luggage hardware, and even the mirror mounts on my bike. In each position the clamp was very secure and easy to adjust for the best position. For those who have some RamMount compatible hardware, these will work with other 1” RamMount compatible mounts.
Battery Life and Recording Time of the Insta360 One X2 Camera
Insta360 claims the included 1630 mAH battery is good for 80 minutes of recording time. My own experience showed this to be a bit conservative as I was able to get 103 minutes of video recording before the camera shut off from a depleted battery.
Insta360’s rating is based on shooting only 360 video for that 80 minutes. My shooting was a mix of 360 and single lens wide angle footage. This could account for the extra battery life as I’m betting that shooting with both sensors probably uses more power than just one.
Extra batteries are available from Insta360 in both the original 1630 mAH size as well as a 1425 mAH option. For the $5.00 difference, I’d get the bigger one.
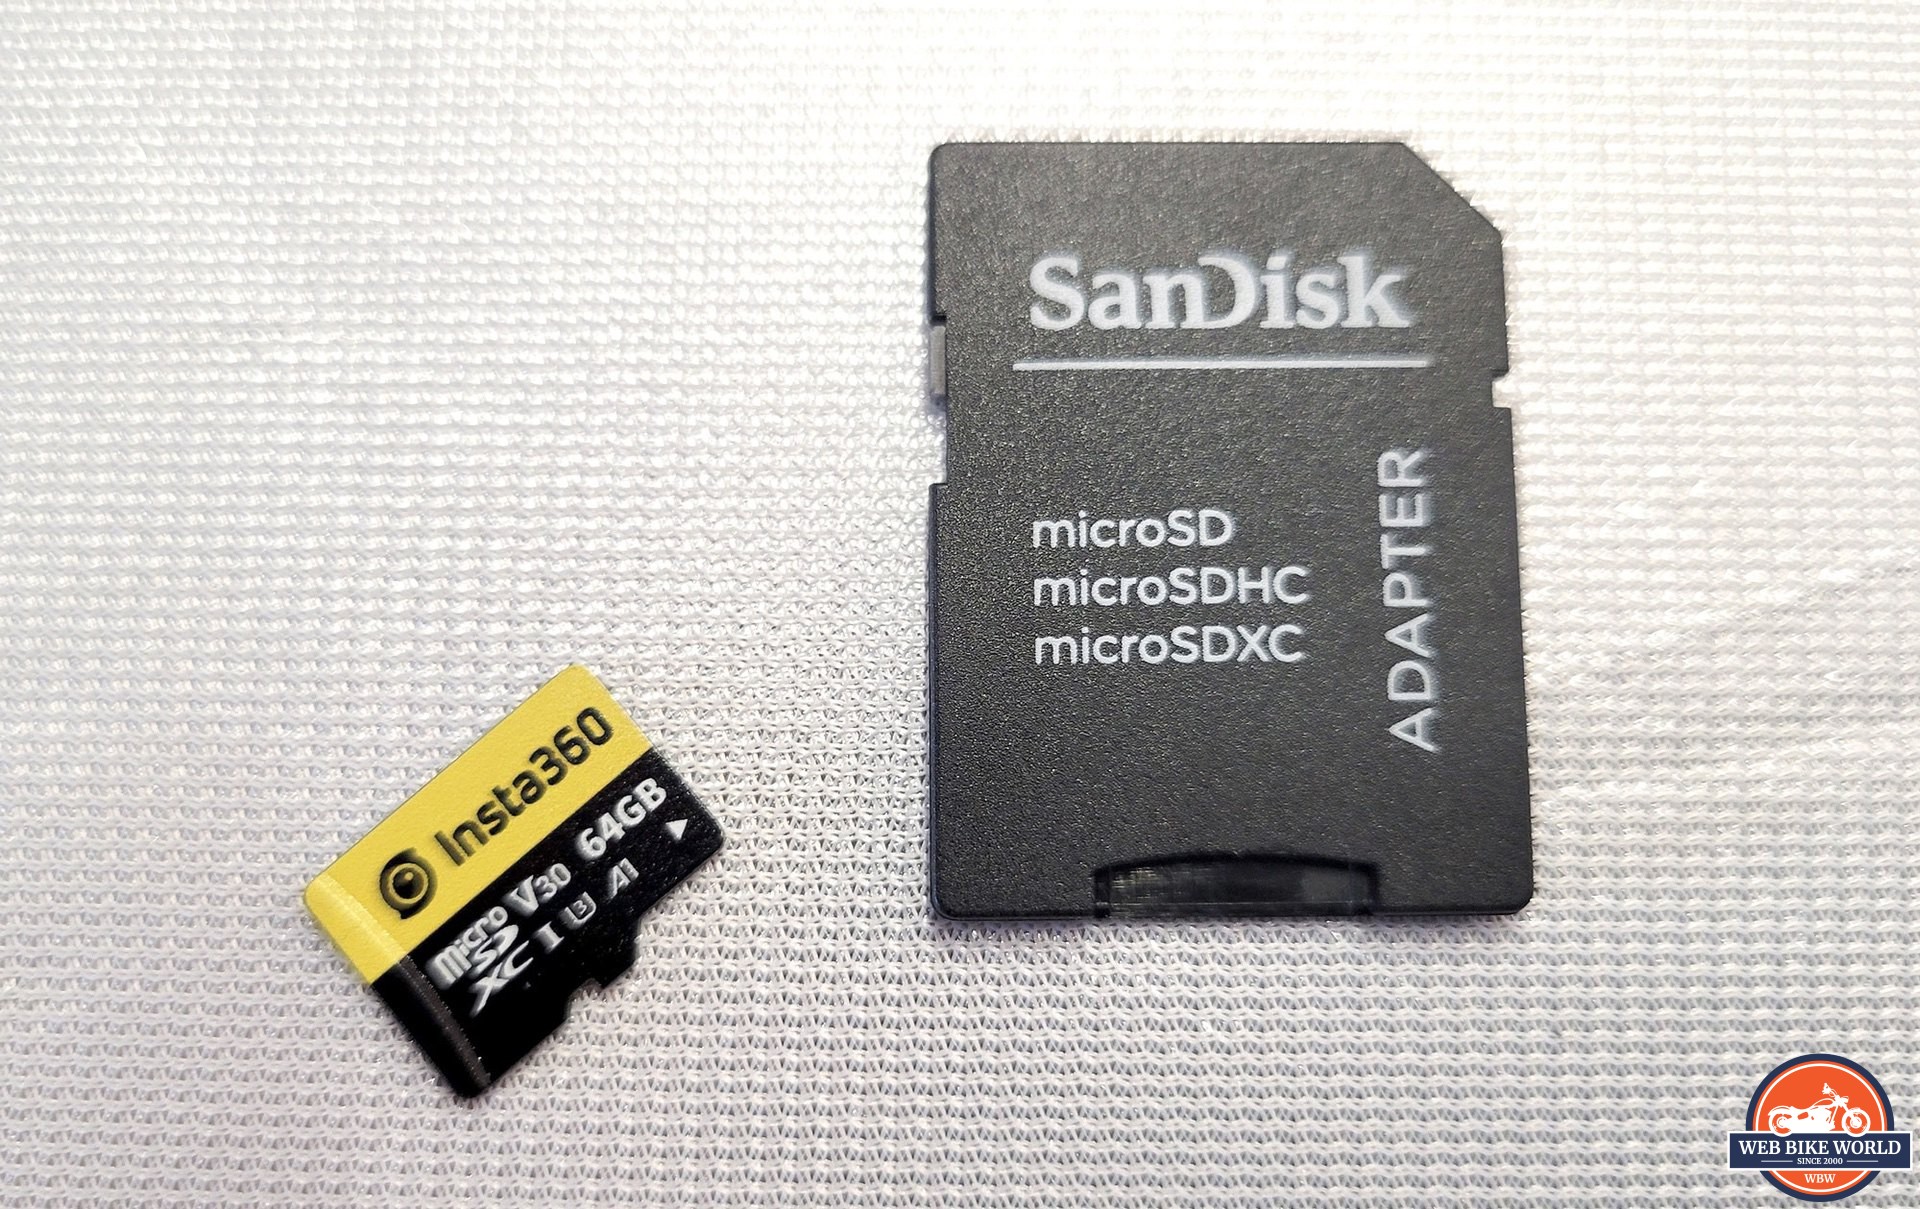
The One X2 uses Micro SD cards to store video and photos and I was sent a 64G card along with the camera for testing. Keep in mind that a card is not normally included with the camera.
This card is a UHS-I V30 rated card and is the minimum spec required, so be sure any card you purchase for this camera meets this spec or better to be able to shoot at the highest resolutions/quality settings.
With a 64G card, one can get 1 hour and 19 minutes of 5.7k 360 degree footage. Switching it to “Steadicam” mode, which just shoots with one lens/sensor, I got 3 hours and 45minutes of footage. You can use cards up to 1TB in this One X2 if desired.
Note that 360 degree footage obviously eats up a lot of storage, so make sure your computer is prepared to ingest that much footage on a regular basis if you plan on using this camera often.
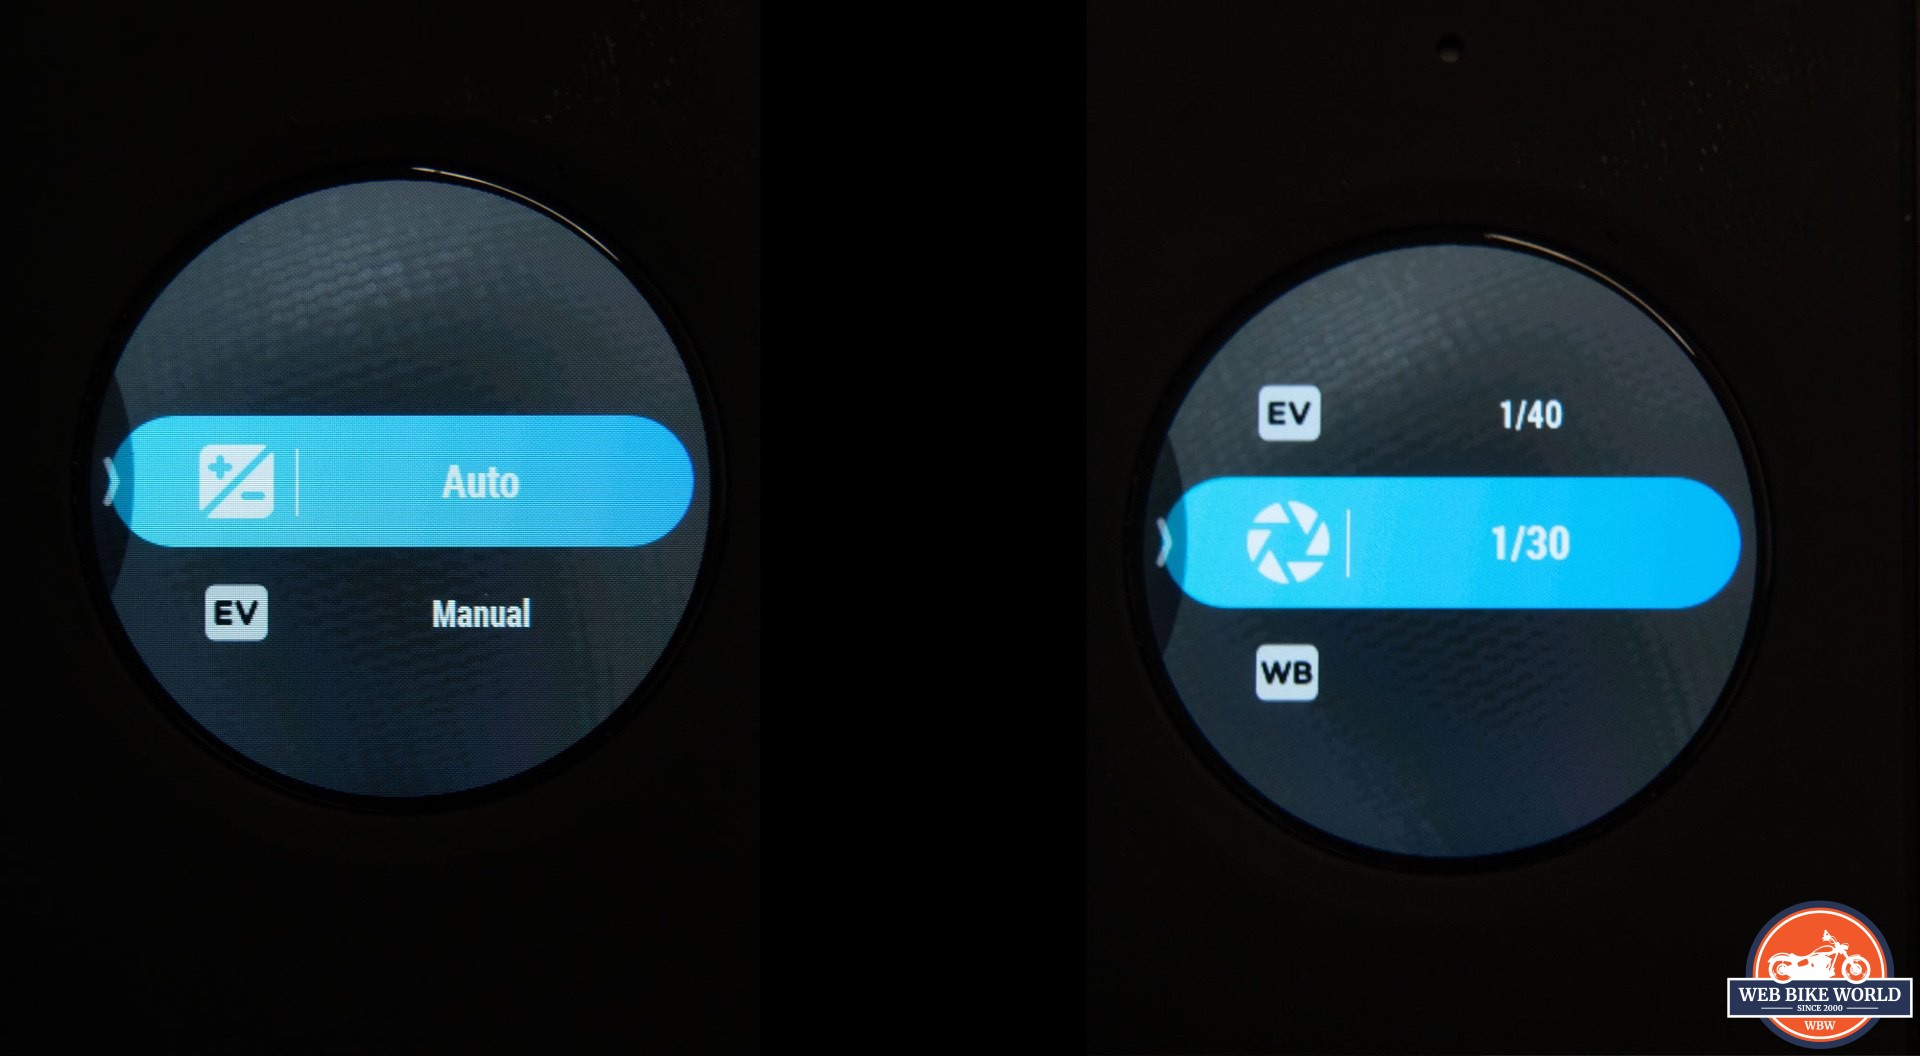
Insta360 One X2 Camera Settings
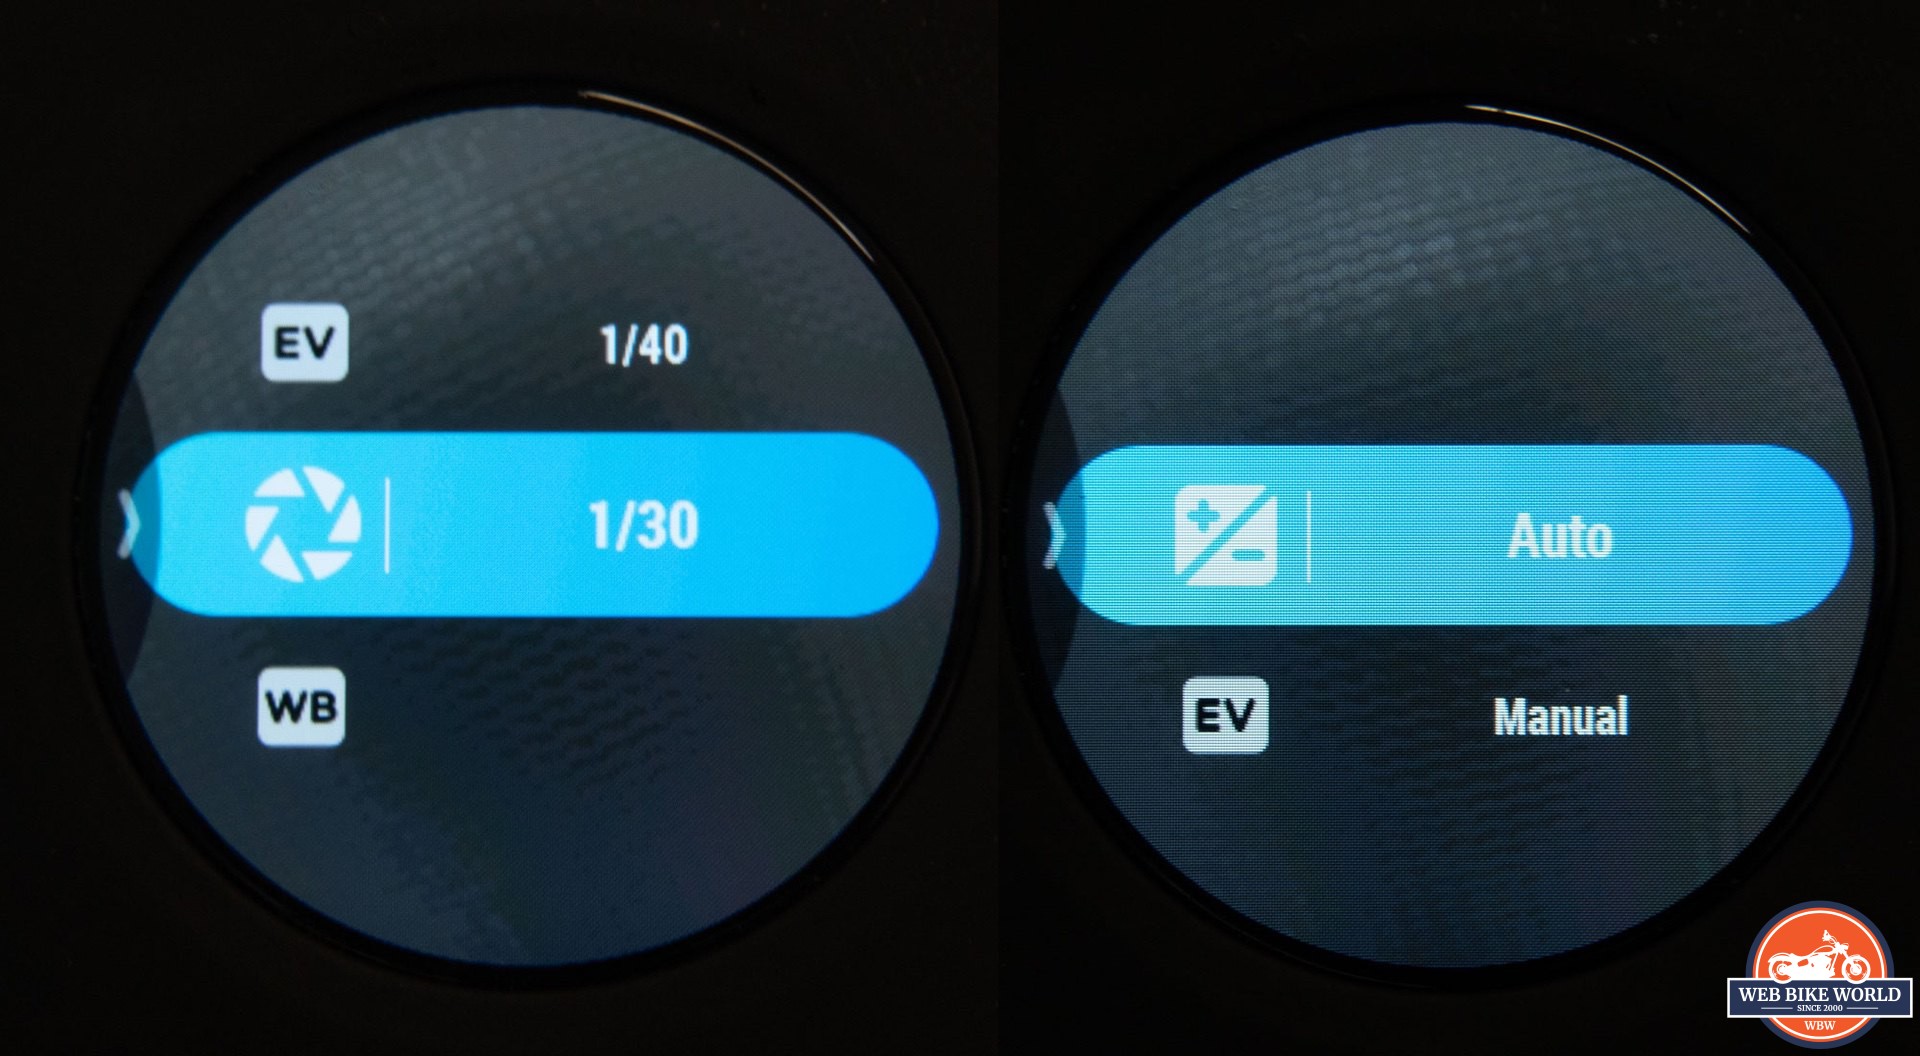
The One X2 can shoot in full auto mode, but if one wants more control over the footage, there are a lot of manual settings available. White balance can be set to auto and several manual options to fine tune the overall color.
There is even a setting to adjust the color from “vivid” to shooting in Log format. Shooting Log produces a “flatter” video with lower contrast and less saturated colors which is useful for color grading the footage after the fact.
The lens f-stop is not adjustable (as I assume there is not an adjustable aperture in a lens like this). However, one can still adjust shutter speed and exposure compensation to further adjust the captured video. The available settings are well fleshed out for a camera of this type.
Other settings include adjusting audio capture, setup for airPod audio capture (very cool if one has them) and even a setting for voice control where one can have the camera listen for a phrase to stop/start recording. Not useful on a motorcycle, but otherwise handy for taking selfies and vlogging without having to touch the camera to start it.
Video Samples from the Insta360 One X2 Camera
Now that I’ve talked about the camera itself, let’s have a look at some videos. The first video below was shot in the camera’s “steadicam” mode, which basically means it shoots with one lens and offers a 150 degree angle of footage much like a standard action camera.
This was shot in full auto mode and I feel it did a decent job here. The colors are vibrant and the exposure looks a little dark, but this day was pretty cloudy—so while the video isn’t “pretty” it’s accurate. Overall, the video looks a bit “over-processed” but part of what you’re seeing is compression from YouTube and the video output processing from my edits.
I’ve shown some back and forth in this video with the “flowstate” processing on, then off for comparison. Keep in mind this video was shot with the camera attached to my mirror stalk at the far end, so I was expecting a lot more camera shake. The Flowstate stabilization does a really good job here. You can also see how the stabilization levels the view in addition to reducing shake.
This next video was exported from 360 degree footage and “re-framed” using the free Insta 360 Studio software on my computer. Here I edited the video and changed the view in the editor to show what I wanted visible at a particular time.
You can see where the view changes from straight ahead, to the sides, and then behind me while in a turn followed by quickly looking forward again. Being able to create this from one file is a real time saver.
Next is a short clip of the full 360 video where the viewer can change the angle and look all around the full view of the footage. This was shot using the claw clamp and the selfie stick extended above my head.
The footage looks great played locally on my computer (using VLC) but when I uploaded it to YouTube to test before I submitted the review, it looked very compressed. Hopefully it will look better when webBikeWorld uploads it to their account 🙂
Go ahead and try using the 360 view function while the video is playing.
Editing and Outputting Videos Shot with the Insta360 One X2 Camera
Insta360 offers a mobile device app and a desktop application for editing videos from the One X2 camera, called Insta360 Studio. The desktop application can handle the trimming and reframing needed for final export of the videos. This includes being able to adjust the stabilization type, stitching adjustment, audio processing, and a simple “aquavision” setting for underwater color correction.
For many users, these options will be enough to get good results from their footage, however, there are no multiple track options for video or audio, and one cannot separate the audio and video tracks for more advanced editing. Also, beside the color correction for underwater footage, there are no color grading tools.
Video makers wanting more control will want to export their footage at the best quality options and then bring their footage into their preferred color grading application. That being said, there is a plugin included with 360 Studio that works with Adobe Premiere, as well as a beta plug-in for Final Cut. Since I don’t have access to either application, I can’t say how well it works.
For my own video editing, I use Davinci Resolve from Blackmagic Design. I was able to find a set of instructions using some open source plug-ins that would allow re-framing of 360 videos, but the process was convoluted and I never got it to work well. I’m sure it was my fault, so this isn’t a knock against Insta360 or Resolve.
The first sample video above was exported from Insta360 Studio and then brought in to Resolve in order for me to correct the color as the camera was set for daylight and during the ride it got cloudy. Making sure one has the correct white balance set on the camera at the time of shooting would have made this step unnecessary.
Below is a quick look at the Insta360 Studio application and a run-through of how I used Insta360 Studio to reframe my footage.
Phone App for the Insta360 One X2 Camera
The Insta360 app on the phone is rather feature filled and includes not just an editor but also includes tutorials on camera features and special transition effects. It even allows you to livestream using the One X2 camera. The feature I’m going to focus on is the “Snap” edit function.
While the editor can be used like the desktop application where one can change the view using keyframes, the “Snap” editor lets one change the view by moving the phone. This is a much more streamlined and easy way to make all the virtual camera movements captured in real time as you “look” around with your phone.
The final movements are captured and a new video file can be exported onto your device—and from there, it can be uploaded to social media or YouTube. One can even download the footage to your computer for further editing.
“Snap” editing is a real time saver if you have a lot of movements and/or complex view changes. I created a clip of me editing a video using this technique which you can see below. This clip was captured with a cheap action camera clipped to my shirt, so I apologize for the poor quality.
It might be hard to tell, but the video is reframing as I physically move around. You can see that one needs a little room to move around and you might also need to tilt up or down to show the angle you want to record.
This is much quicker than the keyframe method, but it does take practice to become skilled at this. You can probably tell I’m not very skilled with it yet. 🙂
And here is the complete video using the reframed footage made with the “Snap” editor. The reframed footage was exported from my phone to my computer and then finally edited in Davinci Resolve. The latter was used to add a new audio track for demonstrating the sound quality, as well as placing the webbikeworld logo.
One downside to editing and exporting using the phone is that the stitching of the two 180 degree videos that create the overall 360 effect is not great. You can see the line where the two halves meet as I move around the camera.
When pulling this video footage to be edited using Insta360 Studio on the computer, the stitching is very clean and hard to see at all. I think this is likely a limitation of the processing power of a mobile device.
I have asked our representative about this to see if they are aware of this issue. It is a very recent new feature as of the time of this writing, so maybe this will be improved in a future update.
A Note About Footage Files
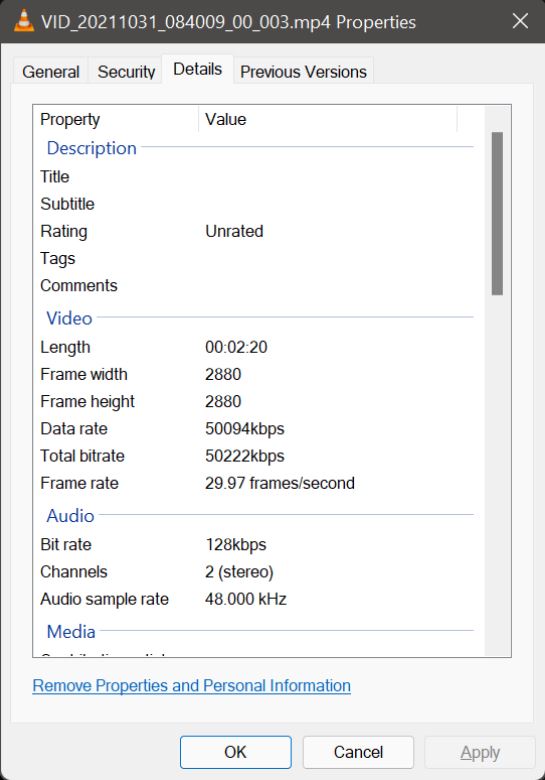
For those who want to be able to access the raw 360 footage from the camera and process it without using Insta360 studio, this can be easily done by simply changing the file name extension from “insv” to “mp4”. This needs to be done to both the videos comprising the 360 footage so one ends up with two 2880×2880 video files (when using the camera’s 5.7k setting) that can be edited with most video NLE’s (non-linear editor).
One loses the gyroscopic data for all the rotational correction, so rotational positioning needs to be done manually, and the two video clips will need to be stitched together for a final video. That can be a lot of work, but the fact one can easily get access to the “raw” footage means with the right editor and plug-ins, one can have as much creative control over the final video.
The non-360 footage (steadicam mode) is captured as mp4 right out of camera, so it is ready to be edited directly. However, when opened in an application other than Insta360 studio, the video ends up being the same 180 degree, 2880×2880 footage one would see out of the insv files after changing the extension.
Basically, steadicam mode gives the Insta360 Studio application the info telling it to display the footage as a 150 degree wide angle, 2560×1440 video.
The One X2 camera can capture the footage as H.264 or H.265, and one can adjust this setting in the camera.
Final Thoughts on the Insta360 One X2 360 Camera
The One X2 is a nice compact companion for the motorcycle vlogger or anyone wanting to capture some footage of their ride. Of course, there are a lot more uses for a camera like this, but I want to keep this review limited to its applications for motorcyclists.
Hardware-wise, the camera seems durable and well thought out, with only the lack of a spot on the body of it for a tether or strap being something I would like to see changed. And while the camera can interface with a mobile device, the ability to access so many settings and adjustments via the built-in touch screen is great.
Audio from the built-in mics is adequate, but being able to use Airpods or plugging in a mic (with the extra accessory) goes a long way to capturing better sounding narration. I would like to easily plug in a mic without an adapter, but I understand this would affect the waterproofness of the camera.
The desktop editing tool is adequate for basic editing and reframing needs. The built-in stabilization tools work very well and process very quickly. The real star of the show is the ability of the smartphone app to make edits, reframe using “Snap”, and other effects that really help one finish the video without ever having to turn on your computer.
If they can adjust the stitching issue I experienced using the phone to edit a video, then “Snap” would be a very useful tool for producing videos on site.
Pros
- Compact size
- Exceptional build quality
- Straightforward use
- Effects and edits can be done on mobile device
Cons
- Battery and battery door are one piece
- No lug or other means of attaching strap or safety cable
- Lens protectors not included
Specs
- Manufacturer: Insta360
- Price (When Tested): $429.99
- Made In: China
- Review Date: December, 2021
Important Links / Where to Buy:
Insta360 One X2 Specifications
- Aperture: F2.0
- 35mm Equivalent Focal Length: 7.2mm
- ISO: Auto, 100-3200
- WB: Auto, 2700K, 4000K, 5000K, 6500K, 7500K
- Photo Resolution: 360: 6080×3040 (2:1) | Pano: 4320×1440 (3:1)
- Video Resolution: 360 – 5.7K@30fps, 25fps, 24fps | 4K@50fps, 30fps | 3K@100fps
- Wide Angle (Steady Cam Mode): 2560×1440@50fps, 30fps | 1920×1080@50fps, 30fps
- Photo Modes: Standard, HDR, Burst, Interval, Night Shot, PureShot, InstaPano
- Video Modes: Standard, HDR, Timelapse, TimeShift, Bullet Time, Steady Cam
- Photo Modes: Auto, Manual (Shutter 1/8000s-120s, ISO 100-3200), Shutter Priority (1/8000s-1s), ISO Priority (100-3200), Isolated Exposure
- Video Shoot: Auto, Manual (Shutter 1/8000s-1/30s, ISO 100-3200), Shutter Priority (1/8000s-1/30s), ISO Priority (100-3200), Isolated Exposure
- Video Coding: H.264, H.265
- Video Bitrate: 100Mbps
- Bluetooth: BLE 4.2
- Wi-Fi: 802.11a/b/g/n/ac
- USB: Type-C
- Micro SD Card: UHS-I V30 speed class, exFAT format SD cards with a max storage of 1TB are recommended.
- Battery Capacity: 1630mAh
- Weight: 149g (5.25oz)
- Dimensions (W x H x D): 4.62 x 11.30 x 2.98 cm (1.82 x 4.45 x 1.17in)
- Run Time: 5.7K@30fps—80 minutes
- Color Profiles: Vivid, Standard, LOG