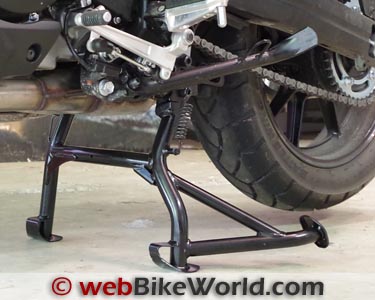
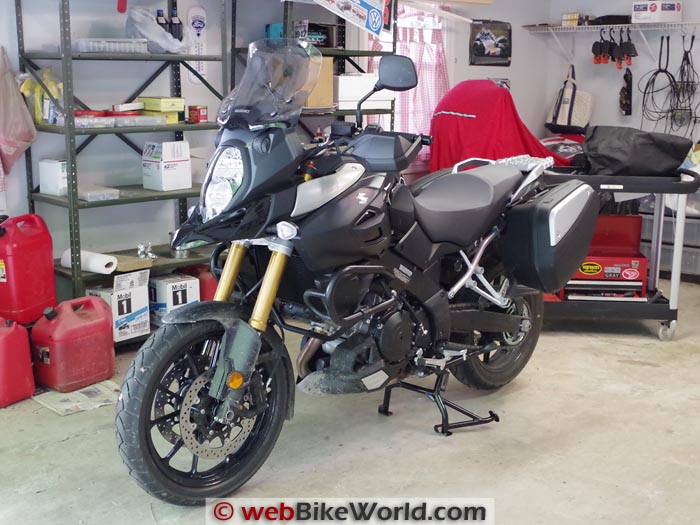
The Suzuki V-Strom 1000 ABS center stand accessory is another very nicely made part and it’s a perfect fit on the bike.
Just like the Suzuki GW250 center stand (review), the V-Strom kit is easy to install with only an 8 mm hex wrench and a torque wrench required.
Installing the return springs is tricky however, but I have a tip on that.
Also like the GW250, the V-Strom was designed for a center stand and the parts are an exact fit.
This is a welcome evolution and long overdue; too many motorcycles still don’t have a bolt-on center stand option from the factory.
The V-Strom is a pretty hefty bike and it’s much taller than the GW250, but the Suzuki center stand kit has the right leverage.
All it takes is a strong press on the foot lever to lift the bike up on to the stand. You’ll need about 150 or so pounds minimum of body weight though to do it!
A center stand is a very useful accessory, especially for normal maintenance like a chain lube or oil change. The Suzuki center stand kit has a list price of $284.95, which seems about $100.00 more than it should be, but I guess I’m still living in the past.
For a tall bike like the V-Strom, a center stand can help a “height challenged” owner (like me) climb on board.
A good example of that would be the Suzuki DR650 (blog). I installed an SW-Motech center stand kit (review) on that bike and it’s a good thing I did, because putting the bike on the stand was about the only way I could swing my leg over the panniers and get seated.
The V-Strom 1000 ABS center stand kit is actually very easy to install…other than mounting the return springs, which took me a couple of hours to figure out. But, I have a tip for you on that.
The instructions that come with the Suzuki kit are very thorough, but I’ll walk you through the process in the photos below>
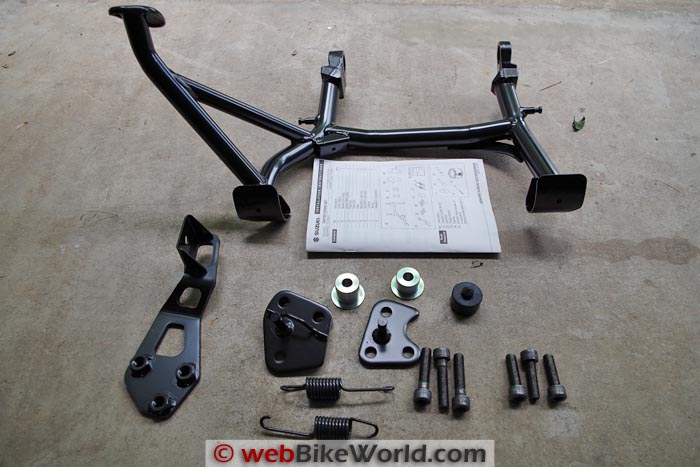
The parts included in the Suzuki V-Strom 1000 ABS center stand kit.Tools Required
Because Suzuki designed the V-Strom 1000 ABS for a center stand, the installation is easy and can be accomplished by anyone with basic tools and general mechanical knowledge about motorcycles.
All you need is an 8 mm Allen wrench, although an 8 mm hex socket on an extension with a ratchet works best. You’ll also need a torque wrench and a screwdriver comes in handy to lever the springs into place (see below).
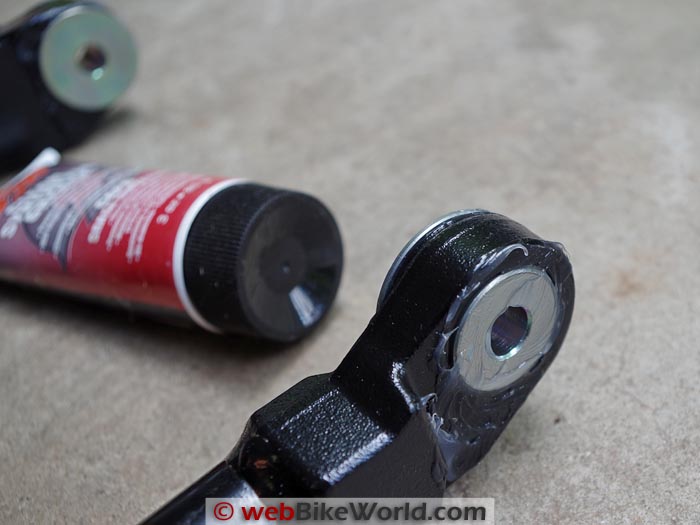
Suzuki specifies their “Super Grease A” or equivalent; in my case, the equivalent is the excellentTri-Flow Clear Synthetic Grease (review) with Teflon, which is good stuff; waterproof and a bit sticky, so it stays in place.
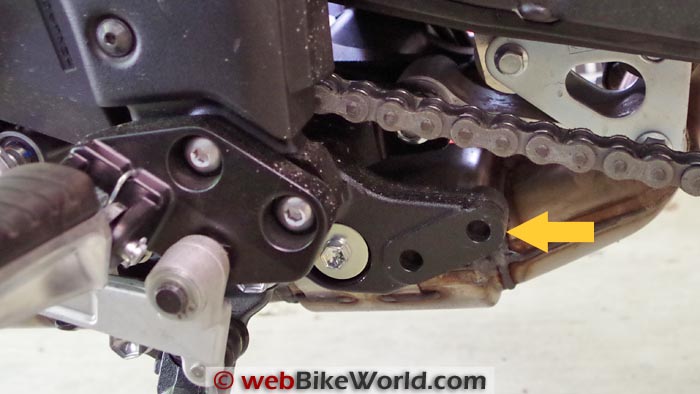
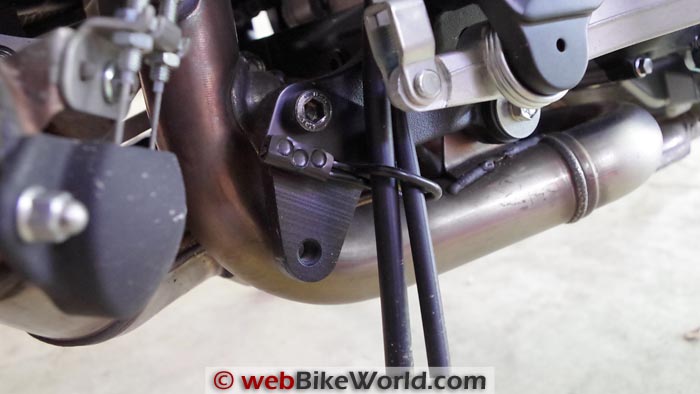
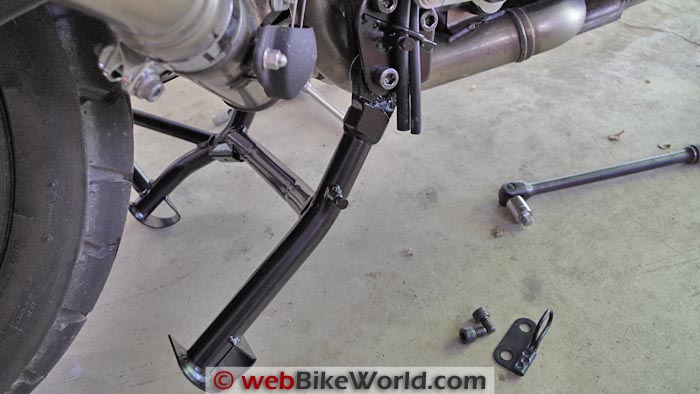
Here’s the left-hand side of the bike showing the stock mounting bracket (arrow). Install the center stand bracket with two bolts but don’t tighten the bolts.TIP: Install the rubber stop in the bracket BEFORE you install the bracket on the bike — it’s much easier!
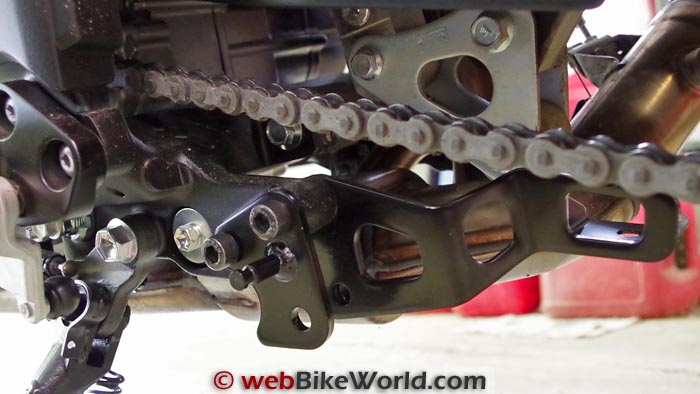
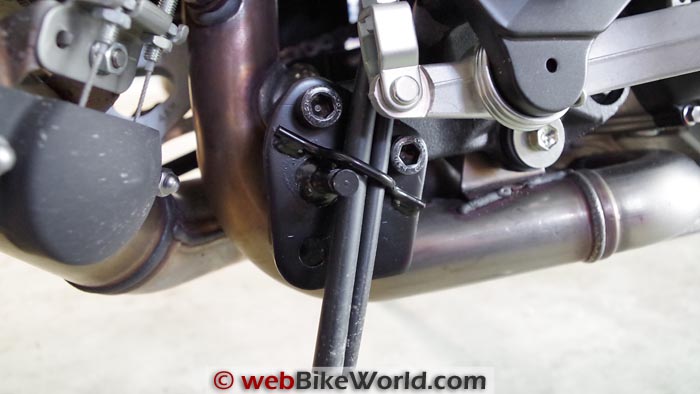
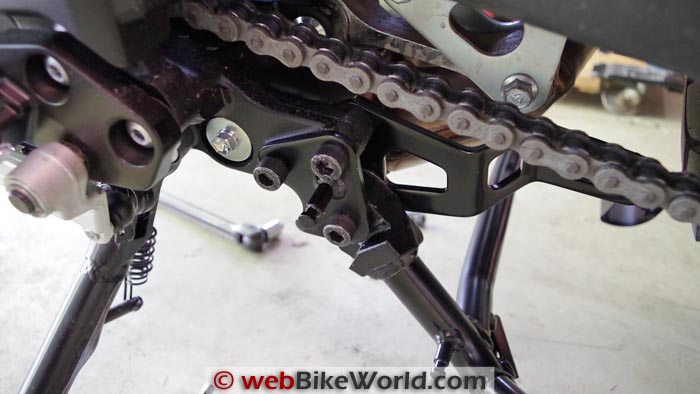
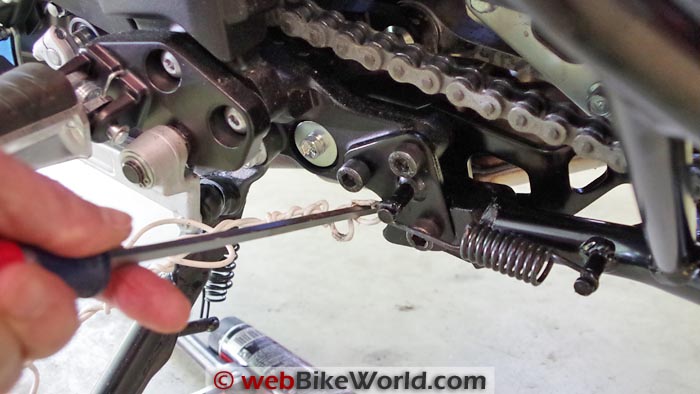
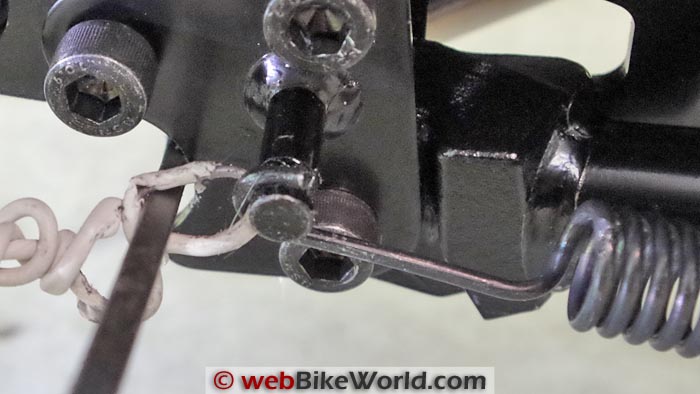
Right side stock mounting bracket with overflow hoses in holder. Install the right side center stand mounting bracket with two bolts but don’t tighten the bolts. Grease the bushings and slide them into the center stand holders. Grease the inside and outside of the holders. Slide the center stand into the new brackets and loosely insert the third bolt on each side. Torque to specs (36 ft. lbs.). Center stand from the right side with the third bolt inserted. Torque to specs. Note old parts on the floor. Installing the Springs: The distance is shortest if the center stand is folded all the way up. I used a cable tie to hold the stand up by threading the tie through the foot on the left-hand side of the bike.TIP: I twisted a coat hanger into a small loop, then looped it around the spring hook, then used a screwdriver to lever the hook on to the spring post. Note the spring hooks have a specific direction for installation as noted in the center stand instructions.
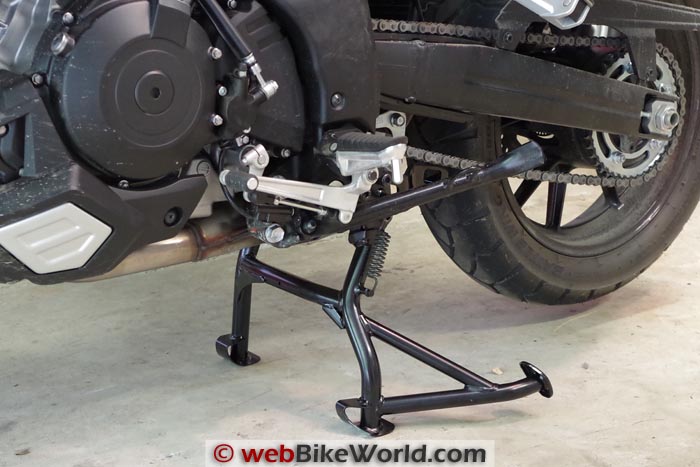
Here’s a close-up of leveraging the spring hook on to the post. I cut the coat hanger wire and removed it on each side after the spring was correctly installed. You’re done! Here’s the V-Strom on the center stand.Conclusion
The Suzuki V-Strom 1000 ABS center stand is very easy to install, although the list price of $284.95 is well over twice the cost of the GW250 center stand kit, which lists for $115.95. But, the V-Strom kit makes up for it because it’s even easier to install.
Either way, it’s a very well made piece that adds a lot of utility to the bike and I can highly recommend the option.
More wBW: Suzuki V-Strom 1000 ABS Blog | wBW Motorcycle Reviews
Owner Comments and Feedback
See details on submitting comments.
From “I.B.” (May 2014): “This works with most centre stand springs: Place spring on bench and using a large flat blade screwdriver push blade into spring to spread coils.
Once spread insert a thick washer (or coin if you’re a BMW owner) between the coils and remove screwdriver blade. Continue along spring inserting washers until spring is extended to required length.”
Rick’s Reply: Thanks for the tip, I tried a variation of this, on the workbench I inserted several washers into the coils but couldn’t get the spring spread open enough to fit.
The coat hanger trick worked once before so I tried it again and it worked. Sometimes you have to twist the wire into a figure 8 to lengthen the loops enough to get leverage on some other piece of the bike.