The Suzuki GW250 center stand accessory is a very nicely made part and it’s a perfect fit on the bike.
The kit is easy to install with a bit of patience and some basic hand tools.
The GW250 was apparently designed for a center stand, because the parts are an exact fit and the stand pivots on a tube welded into the frame.
Suzuki probably kept the cost down on the GW250 by offering the center stand as an option but the kit with all the parts is reasonably priced.
Every street motorcycle should come with a center stand, right? It’s a very useful accessory, especially for normal maintenance like a chain lube or oil change.
But not every bike is designed for a center stand and some stands are clumsy beasts that look awful and alter the ground clearance.
Fortunately, the Suzuki GW250 Inazuma was designed with a center stand mount — surprising, actually, on a motorcycle of this type (i.e., 250cc).
It’s just one more feature that makes this bike more useful than you might think by just looking at its engine size.
The only catch is that the center stand kit is sold as an accessory and not included with the bike.
That means you have to buy the kit for $115.95 (list price in the U.S.) and install it yourself, or buy the kit and pay your dealer to install it.
I’d estimate 2 hours of shop time, which would probably double the cost, so DIY is called for here.
Fortunately, it’s pretty easy to DIY and I’ll explain how in this article and the operation of the center stand is illustrated in the video below.
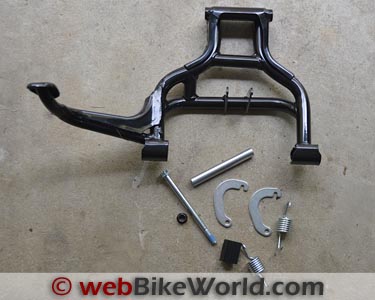
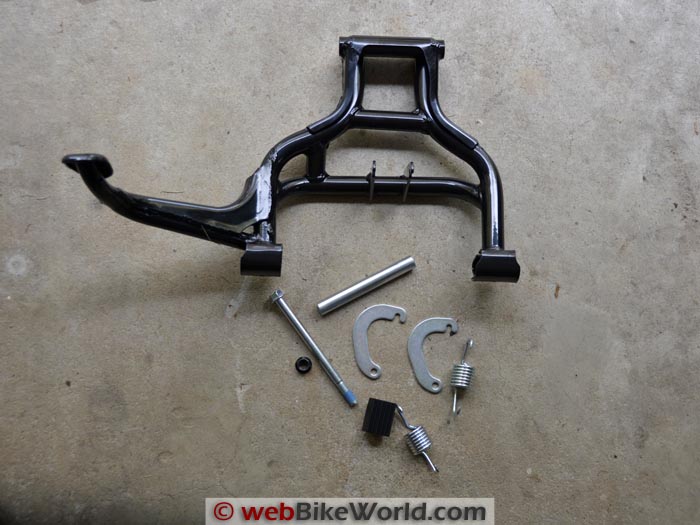 The parts included in the Suzuki GW250 center stand kit.
The Suzuki GW250 Center Stand Kit
I ordered the center stand when I bought the bike in October of 2013.
The GW250 was brand-new to the U.S. market at that time, so the accessories weren’t immediately available and it took about 2 months for the center stand to arrive.
I didn’t even open the box, thinking that it would be a complex and involved project that would require warmer weather before I rolled up my sleeves and got my fingernails dirty.
My experience with installing the Suzuki DR650 center stand (review) led me to believe this would be a difficult job…although that bike was not designed for a center stand, which makes the kit and its installation quite a project.
One day not long ago, I had some spare time (a luxury) and decided to tear open the heavy box and at least take a look inside. To my surprise, there were only a few parts and the instruction manual.
As is my custom, I sat down and opened the manual and studied it carefully before starting the job.
It seemed pretty easy — too easy, actually. So I decided there was no time like the present and I cleared a space in the garage, lit the kerosene heater and got going.
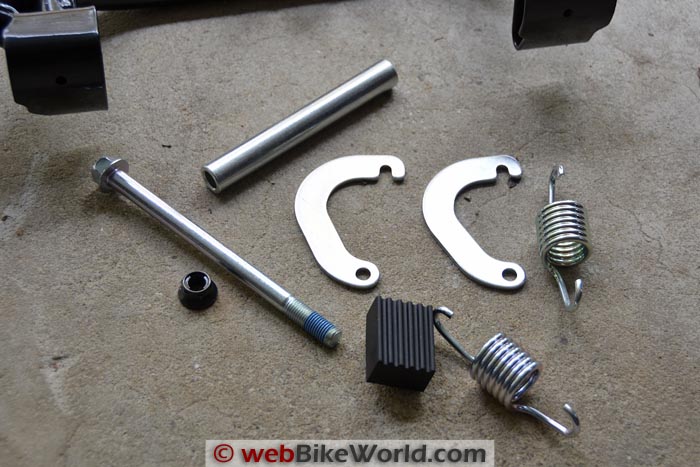
Close-up of the parts in the center stand kit, including the rubber stop.Tools Required
Because Suzuki designed the GW250 for a center stand, the installation is actually pretty easy and can be accomplished by anyone with basic tools and general mechanical knowledge about motorcycles.
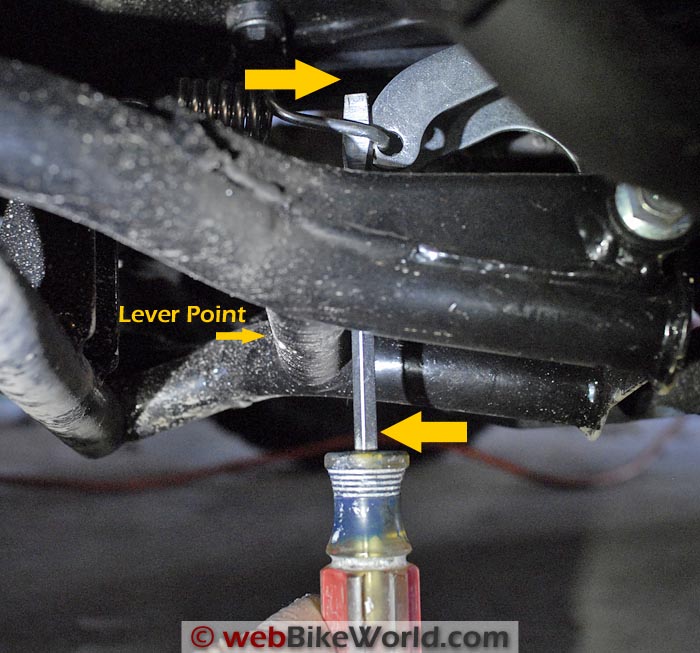
You’ll need a 12 mm and 14 mm box wrench and sockets (with ratchet, of course), a torque wrench and a bit of grease (elbow and the other kind). A screwdriver comes in handy to lever the springs into place (photo below).
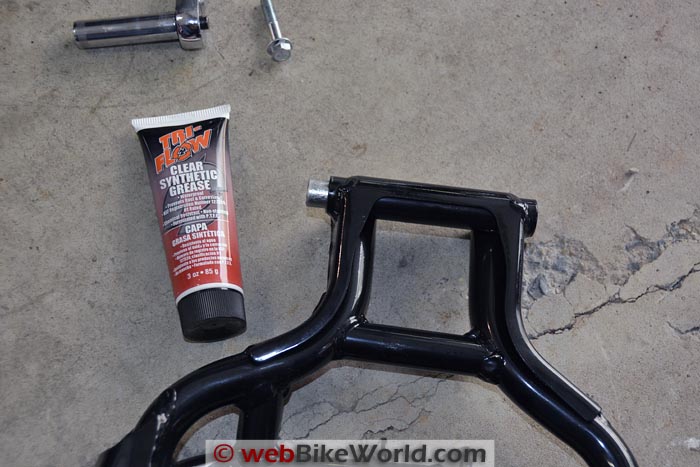
Suzuki specifies their “Super Grease A” or equivalent; in my case, the equivalent is the excellentTri-Flow Clear Synthetic Grease (review) with Teflon, which is good stuff; waterproof and a bit sticky, so it stays in place.
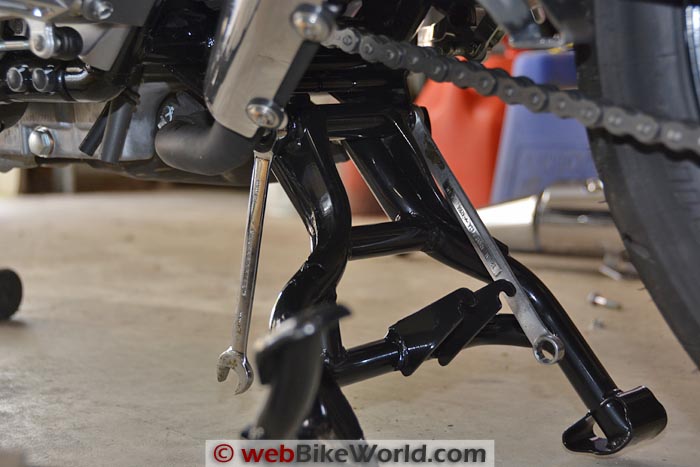
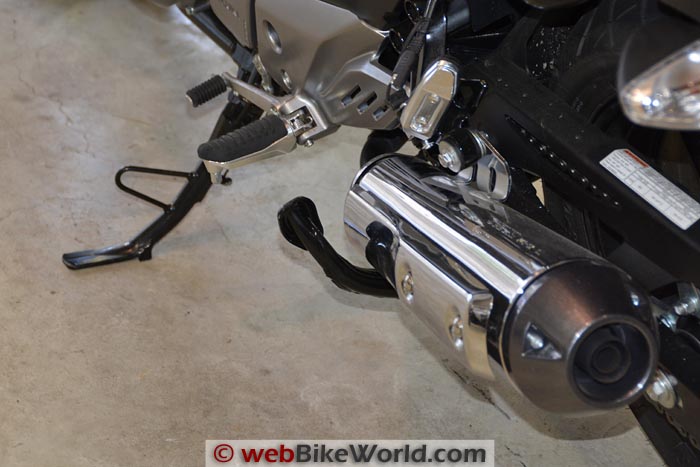
First, remove the right side exhaust on the GW250. Next, grease the bushing and insert it through the tunnel/hole in the top of the center stand. Here you can see it just peeking out on the left-hand side. One person can tighten the bolt and nut; set one wrench against the center stand on one side while tightening the other. Here’s the trick to levering the second spring hook on to the stand: use a screwdriver with the center support bar of the center stand as the lever point. It took some head-scratching before I figured this out.Installing the Center Stand
The basic installation procedure is to first remove the right side exhaust can, which attaches to the bike at the exhaust header and with a bolt up along the back.
It’s easier to remove than I anticipated by simply unfastening the two bolts.
Next, there’s a bushing that goes through the hole or tube in the center stand. The stand rotates on this bushing and a long bolt holds it in place in the GW250’s frame.
Coat the bushing with the grease and slide it into the center stand. Then slide the stand up between the two tabs on the GW250 frame and slide the bolt through. Tighten it to 60 Nm (43.5 ft. lbs.) and you’re half-way done.
Put some grease on the hooks of the springs and lay the “J” brackets on top of the tube of the center stand; there’s a notch for each.
Hold the center stand up and attach one spring, then the other.
There’s a trick to attaching the second spring, which will have quite a lot of tension.
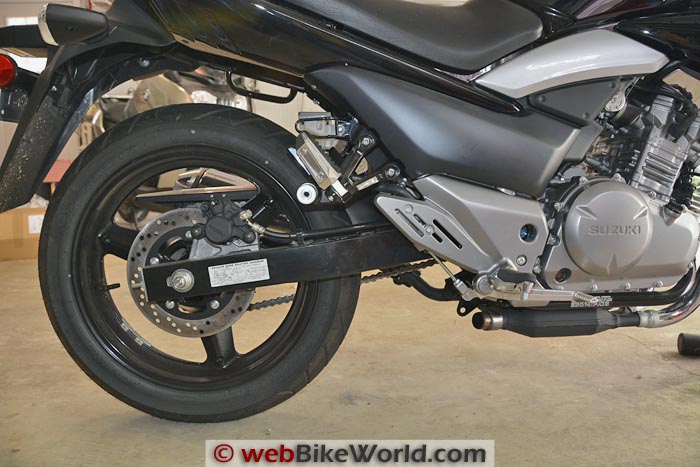
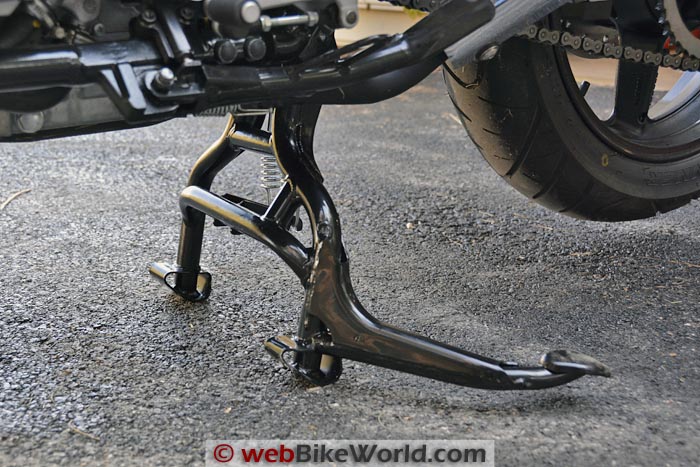
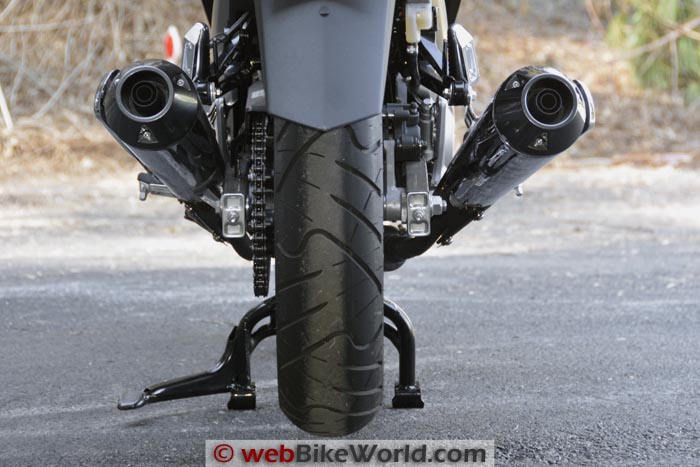
The installed GW250 center stand has a nice foot lever to lift the bike. Here’s a view from the rear. Another view from the side, showing the center stand folded up. The foot lever sticks out slightly.Final Steps
Insert the rubber stop in the hangar on the left side of the bike. This took some doing because it’s a tight fit. I sprayed it with WD-40 and levered it in with a screwdriver tip.
Re-install the exhaust and then make sure everything is tightened to specifications. The exhaust pipe bolt gets 17 Nm (12.5 ft. lbs.) and the muffler support bolt gets 23 Nm (16.5 ft. lbs.).
Be careful the first time you put the bike up on the center stand; make sure you have a good hand-hold on the grips, just in case.
The stand is easy to use; lower the stand to the ground and rock the bike side-to-side slightly to make sure it’s centered between the legs of the center stand.
Then step on the foot lever of the center stand and stand on it with your weight and the bike rocks up on to the stand.
The design is a good one because the bike doesn’t move much towards the rear, perhaps 20 cm or so.
Both the front and rear tires can rotate with the bike up on the stand, with about 30 mm of clearance to the floor.
You’ll have to put some weight or have someone hold down the rear of the bike to rotate the front tire, as the bias puts the weight towards the front slightly when the GW250 is on the center stand.
Conclusion
The Suzuki GW250 center stand is surprisingly easy to install and well worth it at the $115.95 list price. You can install it in about 1/2 hour or I’d guess the dealer will charge 1-2 hours shop time.
Either way, it’s a very well made piece that adds a lot of utility to the bike and I can highly recommend the option.
More wBW: Suzuki GW250 Blog | Suzuki GW250 Review | wBW Motorcycle Reviews
Owner Comments and Feedback
See details on submitting comments.