The tiny stock “pancake” horn on the BMW scooter is a wimp.
Pump up the volume with an easy-to-install trumpet horn.
Or add dual horns for a real blast!
Here’s how…
One of the first accessories I add to any new motorcycle in the stable is a more powerful horn.
I don’t know why, because (touch wood) I have never used a horn in anger.
I drive and ride defensively and assume that no one sees me and — so far — I have never had to blast the horn to warn away an errant vehicle.
In fact, I think it’s rather rude to blow a horn. It just seems to trigger bad vibes in people, and we have enough of that in the world, thank you.
So no need to create more of a ruckus by pounding on a horn button.
But that doesn’t mean that if and when I really do need that horn that I won’t want the biggest, loudest, most obnoxious-sounded tone I can find.
Hypocritical? Oxymoronic? Maybe… But nobody said humans are logical.
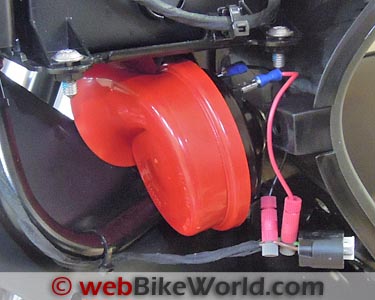
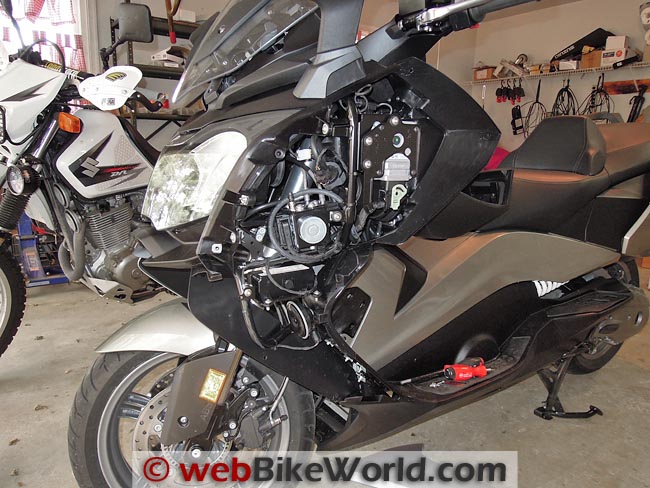
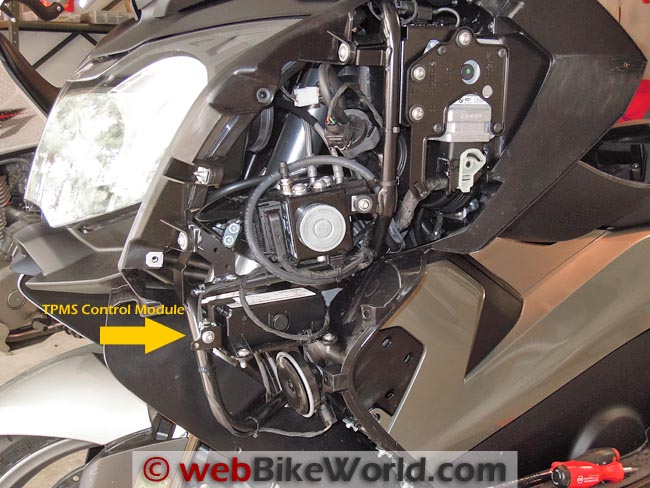
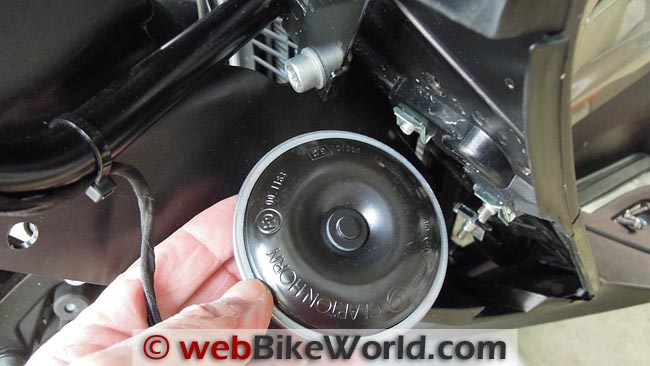
BMW scooter with upper and lower side panels removed on both sides. Close-up of under the left side panels. Note TPMS control module (scooters with the Highline package). The stock horn location. Close-up of the wimpy stock horn. Instant horn upgrade for the BMW scooter. This is the Stebel trumpet horn mounted in the stock horn location.BMW Scooter Horn
BMW is usually pretty good about adding a nice horn to their motorcycles, but the OE (original equipment) horn on the new scooter is about as weak as they get.
Not only is it small, and not only does it have that pathetic “mmmeeeeeep” sound, it’s located under the lower plastic panel on the left-hand side of the scooter. And it’s surrounded by plastic — the inner fender liner covers the inside of the horn, which greatly reduces what little noise comes out of the thing.
Once you figure out how to remove the top body panel, which I described in my brief article on the BMW scooter battery, you’re half-way there. Pull out the plastic friction plugs on the inside of the fender liner, then remove three more Torx fasteners and the lower body panel can be removed also.
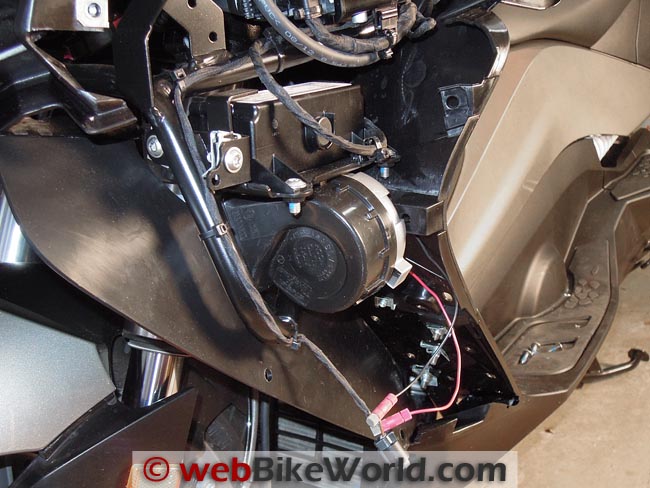
Underneath on the left-hand side, you’ll find the stock BMW horn. You can instantly upgrade it by simply unscrewing the stock horn and adding a trumpet horn, with the open end pointing out towards the wheel. I tried it and this makes a big difference.
It’s a very easy project and all you need is a couple of Posi-Taps (available from wBW) and some crimp-on female spade connectors to connect the new horn. Put a touch of blue Loctite on the nut, replace the panels and fender liners and you’re done.
Which Horns?
I had some horns left over from the webBikeWorld mega-horn comparison review, including a pair of Stebel “Magnum” trumpet horns (review) that just aren’t very loud and the Hella trumpet horns from that comparison, which I ended up using here because they have a higher-pitched tone and are pretty loud.
You can buy the Hella trumpet horns I used on the scooter for about $27.00 for the pair here.
I also still have a brand-new pair of Hella Supertone “pancake” horns (review), like I used on the horn installation for the Ducati GT1000, but those won’t fit on the scooter.
Besides, the trumpets can be oriented to point outwards towards the front of the scooter, which points the sound forward. Anything is louder than the stock meeper, so if you can find a horn or two in the junkyard, you’re all set.
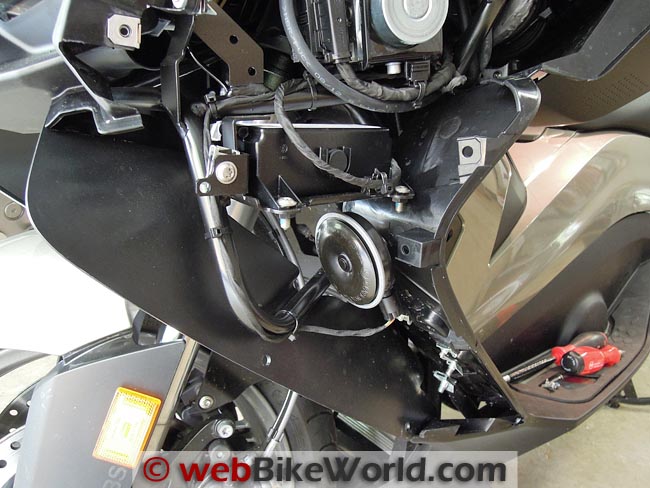
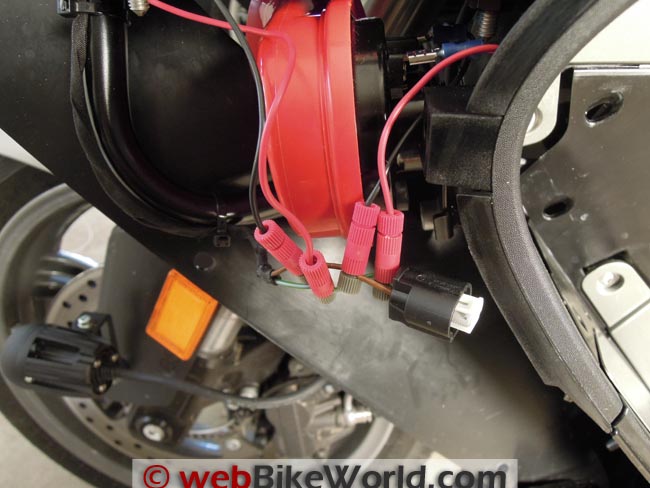
Single Hella trumpet horn mounted in the stock horn location. Here’s a close-up of the single Hella trumpet horn, spliced into the system with Posi-Taps.Dual Horns for the BMW Scooter
In fact, that’s exactly what I did at first, because after studying the scooter and peering all around under the front fender with my trusty Princeton Tec Impact XL flashlight (review), I just couldn’t find another good spot to install a second horn. It’s crowded in there! BMW really packed that scooter body tight.
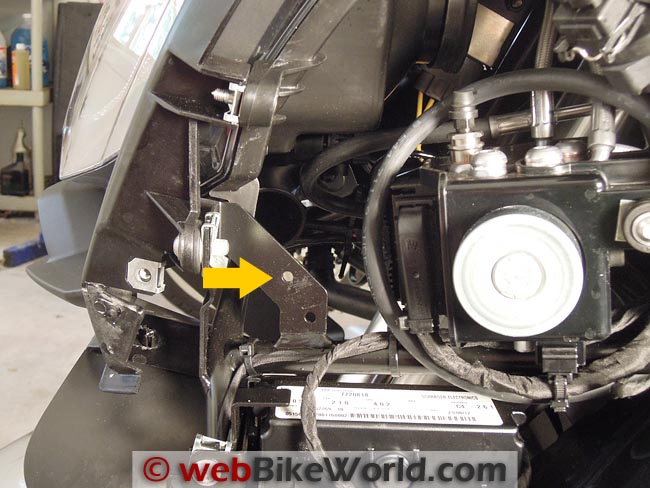
So I replaced the lower side panel and was just about to replace the upper panel when all of a sudden, it jumped out at me — the spot!
Here it is:
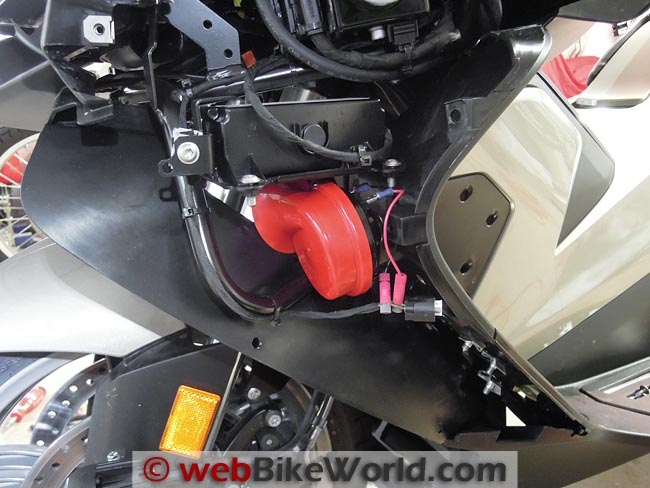
Mounting location for second horn under the left upper side panel.I don’t know what this bracket is for and why it has two holes in it, but…thank you BMW! It’s a perfect location for the second horn and the open end can be pointed down and outside of the inner fender liner, giving open access to the outside and good sound transmission.
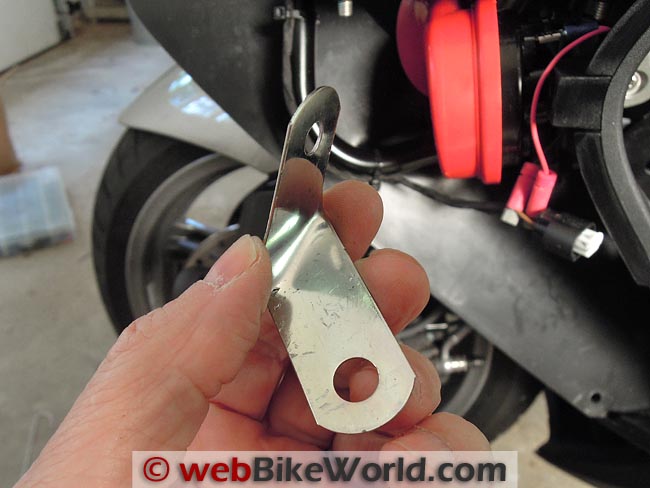
I bent one of the metal brackets that comes with every horn and everything fits. It’s tight, but it just fits:
BMW C 650 GT battery compartment with battery removed.I then spliced this horn into the OE wiring harness — everything is temporary just now, as I was fresh out of Eastern Beaver dual horn relay harnesses (review) and Jim Davis told me he’s no longer making them. Too bad! But, I found another dual horn relay harness so when that arrives, I’ll add it.
In the meantime, I buttoned everything back up and it works just fine. I put the sound meter on it again at exactly the same distance and came up with a 103.4 dB reading at 10 feet, compared to 101 in my original BMW scooter horn report.
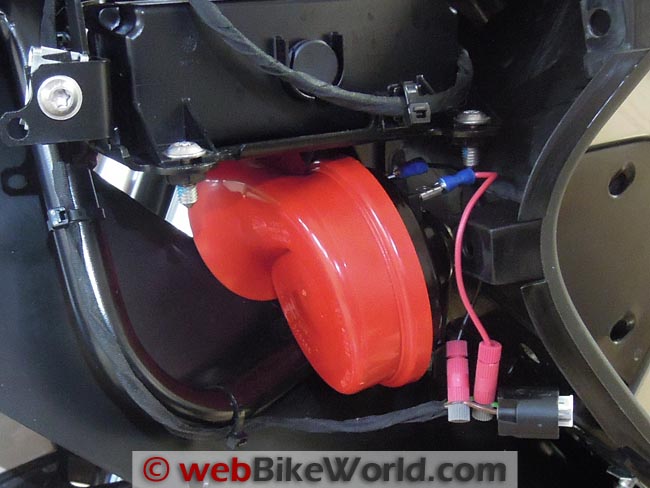
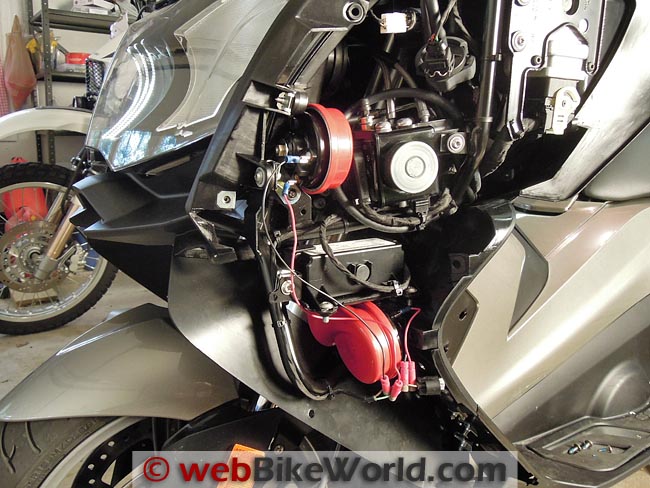
20-22 gauge Posi-Taps for power and ground for two horns.Here’s a photo of the scooter with the panels removed and both horns installed. It’s a tight fit but the top panel will attach with no problems when the upper horn is in this position:
BMW C 650 GT with dual Hella horns. Wiring looks messy, but won’t once the dual horn relay kit arrives.Stock vs. Upgraded Horn Sound Comparison
So how does it sound?
- Here’s the .mp3 file of the stock BMW horn.
- Here’s the .mp3 of the dual Hella trumpet horns.
- Here’s a link to buy the Hella Trumpet Horns for around $24.00 the pair.
The OE horn registered 101 dB on the Exetech sound meter at 10 ft. The dual Hella horns register 103.4, a significant improvement and the tone is deeper, more authoritative and much more noticeable.
Conclusion
Once I figured it out, it wasn’t very difficult to add a couple of horns to the BMW scooter that greatly improve its street presence. Let’s hope I never need to use them in anger! Buy your set of Hella trumpet horns here.
More: wBW BMW C 650 GT Blog | Motorcycle Horn Reviews
Publication Date: December 2012
Owner Comments and Feedback
See details on submitting comments.
From “B.G.” (December 2014): “I just completed the dual horn install (using the Murph’s dual-horn wiring harness).
It’s pretty cramped in there and I found a surprise along the way: the BMW service department snapped off some of the mounts on one of the lower fairings. Never would have known if I hadn’t done this project. I’ll deal with them after the holidays. I couldn’t believe it. They used two small tie-wraps where the friction plugs are supposed to be.
Anyway, the horns sound fantastic; exactly as they do in that mp3 file you posted. It wasn’t easy, but it’s done.
Two things that I would comment on for the article:
First, is the wiring from Murph’s wiring harness to the bike electronics. What I found that I had to do was to snip off the connector that the original horn plugged into. Then carefully stripped back the outer wrap/insulation on the electronics cable, and finally stripped about 0.3 inches on each of the wires.
I then crimped on female spade terminals on each of the wires and connected to Murph’s wiring harness with the male spade terminals on the harness. I simply electrical taped the ends of the female terminals that were on the Murph’s harness and left them intact (rather than snipping off these un-needed female terminals and wires they connect to).
As to the bracket bending for the upper horn, probably the hardest part of the job. I ended up throwing in the towel and used two heavy tie wraps.
I have un-bent horn bracket attached to the horn and used the bolt hole at one end of the bracket as a tie-wrap point to the bracket on the bike that you used as the attachment point for your upper horn.
A second tie wrap took advantage of the second bolt hole on the bike’s bracket and used that as a second anchor point and tie-wrapped around the horn bracket. It’s very solid. Plus it’s so snug in that area where the upper horn is, there’s little chance it could go anywhere even if it was left to ‘float’.
Also ended up tie-wrapping the relay that came on Murph’s harness so it wouldn’t float. I think I would have saved a couple of hours of torturous bracket bending attempts if I had just gone the heavy-duty tie wrap route.
So, thanks again for the procedures and photos on the horn upgrade project.”
From “J.W.” (December 2012): “I like what you did with the horn(s). My question for you is the Hella horns you used call for 2×6 amp fuses. What fuse is used with the original horn and as you mentioned somewhere else on your page about a relay do we need one or will we burn out the switch.”
Rick’s Reply: I don’t know which fuse is used because I don’t have a wiring diagram. But I’ve never had problems with horn fuses before and I’d guess there should be no problem. Once the dual horn wiring harness arrives, I’ll be using that anyway and it has a separate fuse, wiring that goes directly to the battery and dual relays
Follow-up From “J.W.” (December 2012): (J.W. contacted PIAA and this is their response): “All of our single horns will work on your motorcycle. Our horns use your factory wiring and do not require you to change the fuse size.”