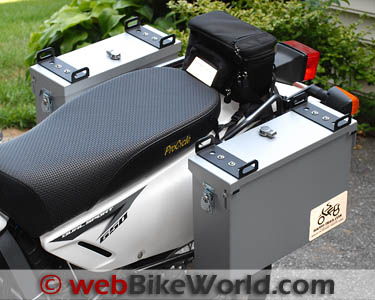
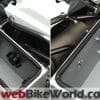
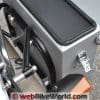
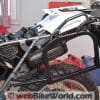
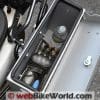
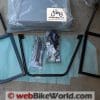
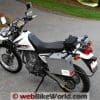
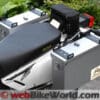
Happy Trails makes several different types of panniers and the Imnaha version is the smallest and lightest.
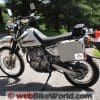
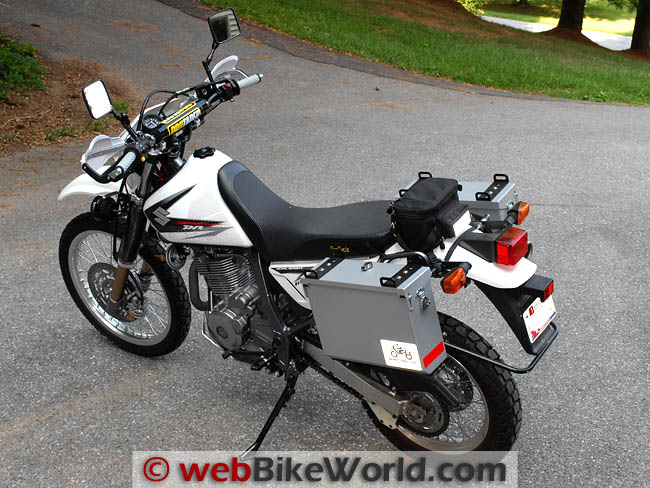
The Imnaha bags are probably too small for true long-distance adventure touring, but they’re rugged and waterproof and their light weight is barely noticed on the DR650.
The mounting rack system makes it all work, and it’s as solid as a rock
The mounting rack is fairly easy to install on the DR650 but the pannier removal system is cumbersome.
The Imnaha bags are also pretty expensive; you can get larger panniers for about the same money…but bigger isn’t necessarily better for the minimalist adventurer.
Another wonderful advantage of owning a Suzuki DR650 or a Kawasaki KLR650 is the huge — and I mean huge — number of accessories available from any number of retailers.
Choosing the next juicy piece of gear to install is like trying to pick a flavor at the Original Hawaiian Island Snoball stand (Randallstown, Maryland).
Everything is good and your brain quickly spins into overload trying to decide.
This goes double — or triple — when it comes to panniers, otherwise known as luggage or more simply as bags.
Besides the retailers who are focused solely on adventure touring accessories — like Happy Trail, Pro Cycle and others — there are dozens of motorcycle luggage manufacturers who would be happy to sell you a set for your ride.
But first things first — will it be “soft” or “hard”? Luggage, that is…
Each has its own advantages and disadvantages. Soft luggage is usually much less expensive, it’s easier to install and easy to remove and some of it can even be used for general purpose, off-the-bike civilian duty.
Hard luggage means installing a frame, which adds work and expense. You’re also depending on the designer to make sure they took into account your particular year, make and model of motorcycle.
Murphy’s Law comes into play here; you can pretty much bet that all of the correct hardware will be included…for every motorcycle made except yours.
Choosing the Right Panniers
Even though this is a “Budget Adventure Tourer” project (more), “budget”, in this case, means $7,500.00. But that includes the motorcycle! A hefty 10%, or $750.00 of that was budgeted for luggage, anticipating a set of good quality hard stuff and maybe a tank bag.
The $7,500.00 figure was finger-in-the-wind arbitrary — as was the $750.00 for luggage.
But to think that in the year 2011 you can buy a nearly-new motorcycle and then farkleize it for adventure touring for what amounts to a down payment on most motorcycles is pretty amazing.
And guess what? You’ll end up with what really is a serious adventure touring ride, not to mention a super-fun and economical street bike and a nice off-road plunking machine.
In my way of thinking, the cost savings alone adds a lot to the overall enjoyment factor.
I’m sure I’d be expecting a lot more out of a $25,000.00 motorcycle — a LOT more — and I know I wouldn’t be getting it, which would be a huge disappointment.
But with a $5,000.00 motorcycle, I don’t expect much and I ended up with way more than I thought. In my book, that’s a super deal and it’s partly responsible for the smile on my mug every time I climb aboard.
I’m still surprised at how much fun it is to ride the DR650, how much power that big, simple, air-cooled single cylinder puts out and how nicely this bike handles.
Combine this with the fact that this is one incredibly easy motorcycle to work on, accessorize and maintain, with all the parts right out in the open, and you have a real winner. I’m lovin’ it!
Pannier Criteria
OK, back to the bags… There was enough money in the budget for a good set of bags, anticipating a set of the hard stuff right from the beginning.
I looked at some soft options but my biggest problem with most of the soft luggage is that it can look pretty saggy-baggy if they’re not stuffed full.
Yep, I know there are some semi-hard luggage options, but after thinking it over, I wanted that rugged all-metal look and something that was also fully waterproof.
Many webBikeWorld visitors chimed in with their picks for luggage choices, but I had a few specific criteria of my own.
First, I was looking for the slimmest and lightest hard luggage I could find. After all, I’m more of an “armchair” adventure tourer and I travel very light no matter where I go.
Since I don’t plan on taking off for Tierra del Fuego any time soon, small was just fine with me.
Second, since I have to live with the bags on a daily basis, hanging something the size of a 55-gallon drum off the back of the bike was out of the question.
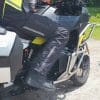
Think about this: with a 30″ inseam, I have enough trouble stretching my legs over the top of the DR650’s saddle.
A set of 10″ wide bags would probably make that task impossible — something you definitely need to consider when choosing luggage.
One more criteria — and also something to consider — is the quality and construction of the mounting rack and brackets.
Most of us probably don’t want to be messing around with TIG welders, cobbling together our own bespoke mounting system or drilling holes in the bike’s frame.
I wanted something that was specifically designed for the DR650 and which would bolt up with a minimum of fuss while looking good and performing flawlessly.
Finally — and actually one of the most important for me (and a criteria which definitely limited my choices), was my desire to keep the excellent Suzuki DR650 rear hand-holds in place.
There are some luggage and frame kits for this bike that eliminate the use of the hand-holds and those brands were crossed off my short list.
The Happy Trail Imnaha Panniers
I looked at just about every hard luggage option available for the DR650 and I also read through the many pages of user comments on the various forums and elsewhere.
One thing led to another, and after considering each luggage type with an eye on my list of criteria, I ended up at the Happy Trails website.
The photos on their website aren’t the most illustrative of the product and that is puzzling, as it costs basically nothing to upload zillions of full-sized photos showing every angle possible.
So it was a bit difficult to see some of the details of their luggage.
Even the dimensions — something that you’d think would be critical information for potential customers — isn’t listed for some of the luggage versions.
Instead, there’s a separate link for a “Luggage Wiki” that lists some of the details and dimensions.
So they don’t make it easy, but owner comments were positive and Happy Trails makes a variety of pannier sizes, many which fit the DR650.
They’re also a dedicated off-road/adventure touring retailer, so I figured they probably knew what they were talking about.
(By the way, the company refers to itself as “Happy Trail” and “Happy Trails” and the invoice says “Red Nine Inc.”, which is a bit strange.)
Choosing which version of the Happy Trails luggage to buy wasn’t easy. Going with my criteria, I almost bought the Happy Trails “Owyhee” panniers, which are 14″ tall by 16″ long. They are available in 6″, 7.5″ and 9″ widths and they cost $275.00 each bag (Note that you’ll need the mounting kit for the bags also, along with the bike-specific hardware package).
Then I discovered the Imnaha panniers, which are the smallest bags made by Happy Trail.
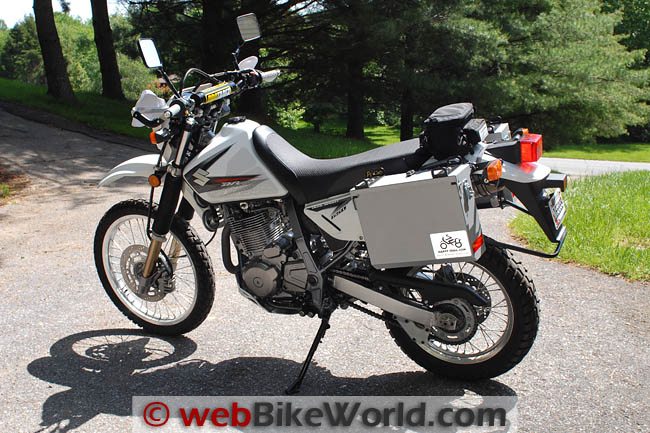
They’re just 12″ high by 15″ long (front to back) and only 5″ wide. Again, the photos on the Happy Trail website made it difficult to judge the sizing, so it was hard to tell how they’d actually look on the DR650.
So I cobbled up a reasonable facsimile, using a cardboard box shaped to the dimensions of both the Owyhee and Imnaha bags. I then used it on the DR650 to estimate the sizes.
In the end, I went with the smaller Imnaha bags at $234.50 each.
They met each of my criteria and the very rugged-looking frame made by Happy Trails bolts on to the outside of the existing hand-holds on the DR650 without eliminating them completely.
In fact, the hand-holds are actually required for mounting the Happy Trails frame rack on the DR650, so if your DR650 doesn’t have the hand-holds, these panniers may not be a good choice.
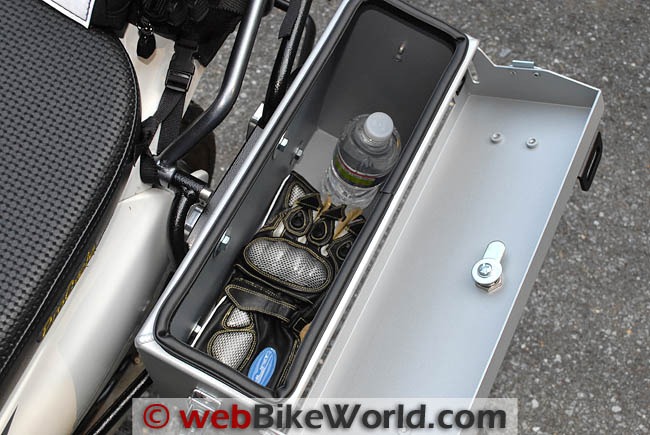
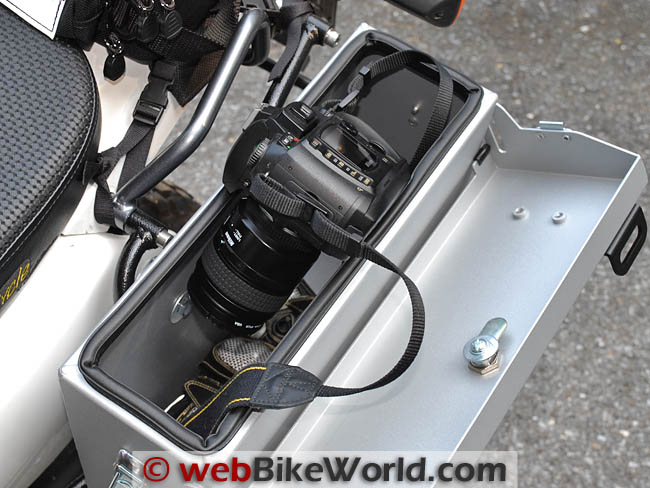
It’s easy to second-guess yourself after doing this, and had I realized that I wouldn’t be able to fit a DSLR camera body in the Imnaha bags, I probably would have gone for the slightly larger Owyhee bags, which are 2″ taller and 1″ longer (front to back) and 1″ wider (for the 6″ version).
But for daily non-touring use, at least the Imnaha bags are out of the way and barely noticed at all when I’m riding the bike — something else I was worried about on the slim and single-cylinder DR650.
Don’t forget that a big, wide and heavy set of panniers has the potential to dramatically affect handling and wind buffeting, especially on a bike like the wispy DR650.
The other panniers in the Happy Trails lineup include the Teton model, which is 15″ tall and 18″ long. They can be had in 7.5″, 9″ and (yikes!) 10.5″ widths.
The Cascade is 18″ tall by 18″ long and 7.5″ wide and the Happy Trails Denali bags are 20″ tall by 18″ long and 7.5″ wide. If you need that much storage, buy a pickup truck!
By the way, the bags are available either as bare aluminum (not recommended because they oxidize black powder all over your gear); “Hammertone” black or textured aluminum.
I went with the textured aluminum for its lighter neutral color and good looks.
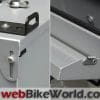
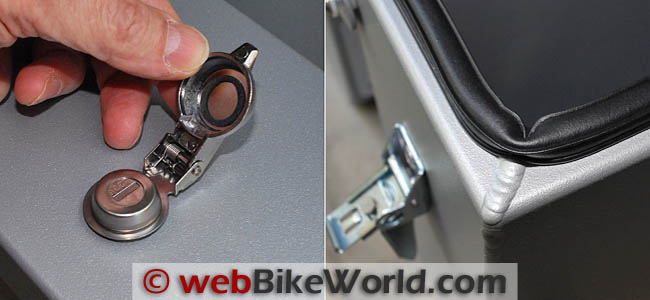
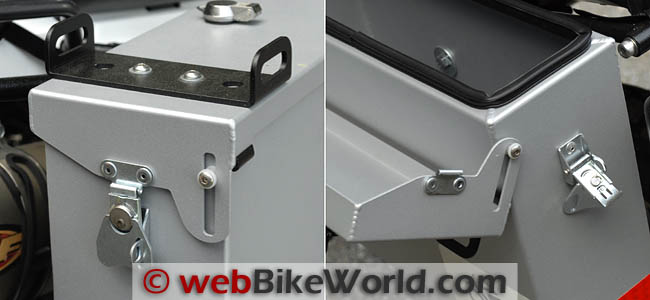
The panniers are made from 0.80″ thick aluminum and all of the seams are TIG welded, according to Happy Trails. The cam latches, full-length gasket, inner lip and unique sliding cover hinges are all first-class engineering.
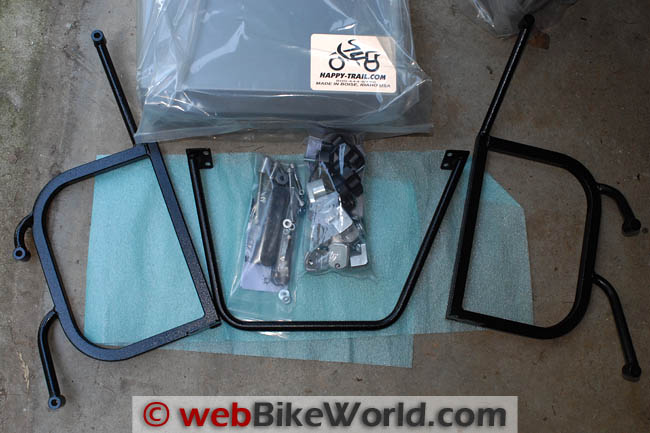
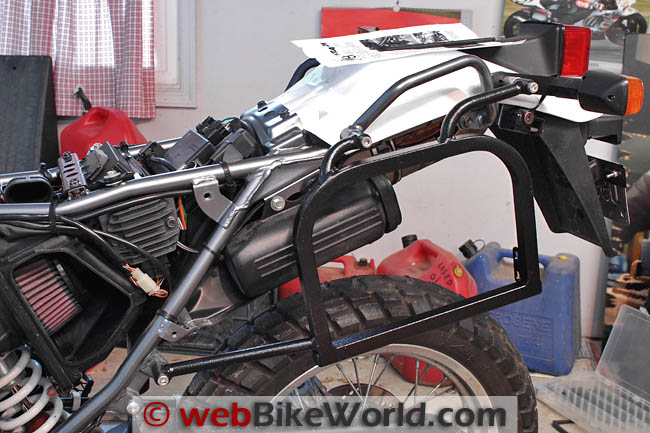
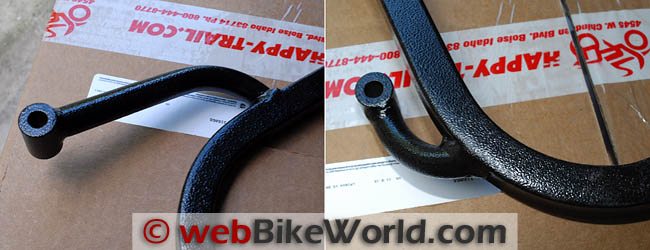
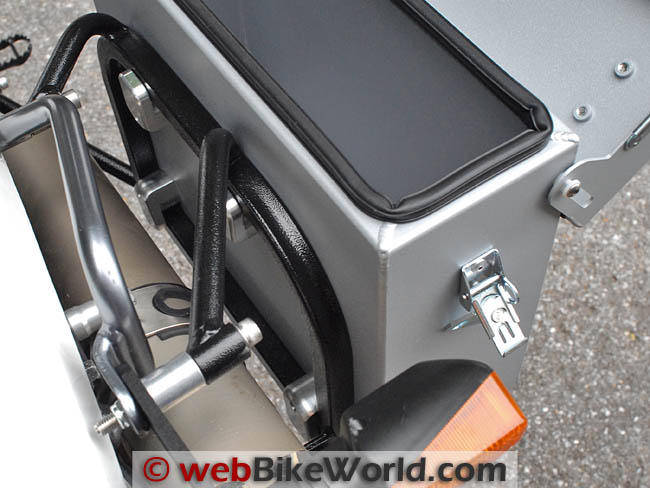
The mounting frame or rack is made from a combination of 5/8″ round tubing (arms, see photo) and 3/4″ square tubing.
Everything is very nicely machined, welded and powder-coated. This is high-quality stuff — you’ll pay for it, but it should last forever.
In fact, if you get in a crash bad enough to destroy these bags, you won’t have to worry — you’ll be taking your next adventure in the great beyond!
Total Cost
You can end up playing some mind games with yourself, trying to figure out which bags offer the most bang (i.e., volume) for the buck. But like I said, bigger isn’t always better — especially if you can’t even wrap your legs around the bike.
My suggestion is to think hard and long about how you will use the bags for 90% of the riding you do and buy for the 90%, not the 10% (or less) of the time that you may indeed take that trip to Bolivia…
The Imnaha bags cost $234.50 each if purchased separately (will anybody buy just one bag?), so that’s $469.00 for the pair. The powder coating option is $45.00 and I also had them drill the bags for the mounting pucks ($18.00).
More on the pros and cons of the pre-drill option in the next section…
Don’t forget, you’ll also have to buy the frame and mounting assembly that is specific to your bike.
Fortunately, Happy Trails has total kit package that can save a good chunk o’ change.
The Imnaha package, which includes the two bags; your choice of powder coating; the side and top locks; the top “roof racks”; and the pannier mounting rack and all the hardware costs $619.95.
This represents a savings of $155.55 over the cost of the individual parts, according to Happy Trail, and although the package is still expensive, it was well under our luggage budget of $750.00.
Happy Trail Pannier Liners
Just a quick note on the Happy Trails pannier liners. I originally ordered a full set of the internal and external liners when I placed the order for the Imnaha bag kit.
Happy Trails will discount the bags if they’re ordered with the package.
Unfortunately, the bag liners just did not seem to fit correctly in the Imnaha bags; my suspicion is that the liners are designed for other Happy Trails panniers.
I ended up returning the entire set of liners and I don’t really miss them as these bags are really too small to require liners anyway.




Installing the Panniers
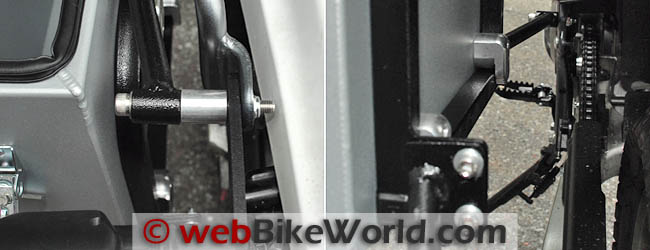
Installation of the Happy Trails frame is straightforward on the Suzuki DR650. Note that when you order the mounting rack kit for this particular bike, you must note the distance between the front and rear mounting holes of the rear hand-holds.
Apparently, Suzuki changed the dimensions from 9″ to 12″ between centers on the hand hold, lengthening the hand holds at some point during the long and glorious production run of this bike.
The instructions are simple: basically, you remove the passenger foot pegs (which I had removed anyway). The bottom part of the rack bolts into the passenger foot peg holes.
The pegs can be replaced if you’d like; I left mine off.
The upper rear part of the rack is mounted with supplied bolts that replace the bolts that originally mounted the hand-holds. The rear bolt uses a supplied spacer and it mounts to the holes that hold the tail lights on the DR650.
Finally, a large rear frame is bolted into place on the back of the rack. It surrounds the rear tire and fits below the rear fender.
I think this distributes the weight and stress across each side and acts as a support to either bag to prevent pannier frame damage if the bike is dropped.
Here are photos of the mounting points:


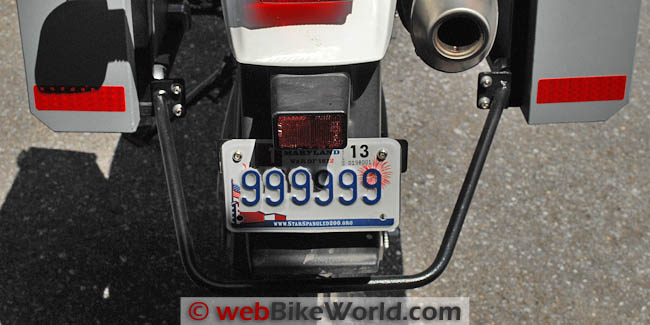


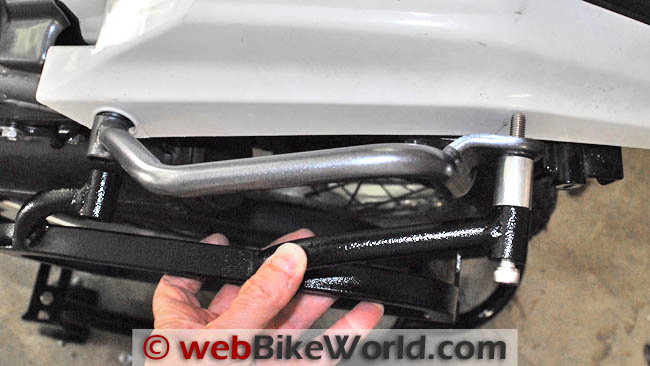


Everything bolted up in good order — with a bit of persuasion needed here and there.
I talked to Happy Trails about this and apparently the Suzuki factory tolerances can vary, so some pannier fitments may take more fettling than others and this may differ, even among DR650’s of the same model year.
I did find it necessary to cut and lengthen the turn signal wires on the left hand side and this was an easy job with the help of Posi-Lock connectors which, of course, you can buy right here on webBikeWorld!
The right side needed a Posi-Lock (I used the 18-24 gauge red connectors) but I didn’t have to lengthen the wire.
By the way, you can make a simple wire lengthening harness by using two Posi-Lock connectors and any length of wire in between.
Fasten the Posi-Locks to either end of the cut wire, then splice your longer length in between and presto! you have a custom-made wiring harness splice.
Mounting the Panniers on the Racks
Since I opted to have the bags drilled by Happy Trails, all that was necessary once the rack was mounted was to fasten the panniers to the rack.
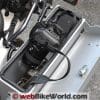
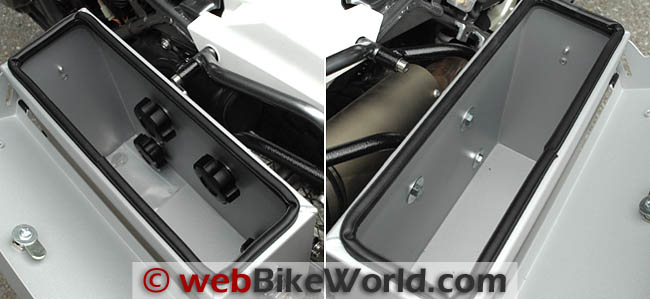
The system that is used to mount the panniers on the racks is the only part of the Happy Trails panniers that is disappointing. The panniers are supposed to mount using four bolts through the drilled holes on the inside of the bags.
The bolts connect to eccentric cams that hold the pannier to the rack on the outside, towards the bike.
The top two holes use two huge knobs on the inside and the knobs are supposed to allow a semi-easy on and off procedure for removing the panniers from the racks when desired.
There are a couple of problems with this design. First, the knobs are way too big, especially in the narrow Imnaha bags. They take up too much room, so I quickly eliminated that option.
Also, the system just doesn’t make it easy to put the bags on or take them off the racks. Happy Trails says you can leave the bottom eccentrics slightly loose and then all you have to do is loosen the top knobs and turn the top eccentrics and you can remove the bags.
I was not able to get this arrangement to work without a lot of messing around each time and I didn’t want to leave the bottom eccentrics too loose.
I think it would be an easy engineering fix to come up with some type of Dzus-like or clip fastener that would allow the bags to snap on and off the rack quickly and efficiently. I ended bolting the bags to the eccentrics with all four holes, so the bags are now semi-permanently mounted.
By the way, the eccentrics are also poorly designed, in my opinion.
They are eccentric in name only; they could and should have a broader radius, which would allow a lot more adjustment for the bags.
As it is, depending upon how the holes are drilled inside the bags, there may only be a couple of millimeters of play, and that’s what also was the case in my bags.
Combined with the too-sharp radius of the eccentrics, the design basically defeats the purpose of the eccentric cam design and its adjustability, which is supposed to allow some freedom of movement to adjust the position of the bags and allow them to be more easily removed.
The bottom line here is that if you need to easily and frequently remove the bags, the Happy Trails system may not work for you.












Conclusion
The Happy Trails Imnaha panniers and the mounting rack system are tough, solid, waterproof and built like a rock. Yes, the system is expensive, but it’s basically the Cadillac of motorcycle luggage.
It’s too bad the quick removal system isn’t up to the standards of the rest of the system — I really think Happy Trails needs to rethink this design, and I bet without too much trouble someone could figure out something ingenious.
Perhaps our webBikeWorld readers already have?
Thinking it over, I may have been better off going for the smallest of the Owyhee panniers, but overall I’m happy with the Imnaha bags and for my local riding adventures, so far they’re just fine. I sure wish I could carry that DSLR though…
Master Listing of All wBW Motorcycle Product Reviews
Owner Comments and Feedback
See details on submitting comments.


