Checking the Coolant Level on the BMW C 650 GT
Here’s another quickie: checking the coolant level on the BMW scooters.
The coolant level indicator is located on the lower right-hand side of the scooter, just below the right foot rest.
It’s not easy to see without getting down on your hands and knees.
The owner’s manual calls for the scooter to be placed on the center stand, then to do a visual check of the coolant level.
There are “min” and “max” indicators molded into the white translucent plastic that is the coolant overflow tank.
But the plastic is too thick and/or too white, making it very difficult to see the coolant level.
Chris and I messed with it for quite a while, pointing a flashlight at the coolant level indicator and rocking the scooter back and forth to determine if we could see the upper level. Nope.
Here are two photos of the coolant level indicator on the BMW C 650 GT scooter:
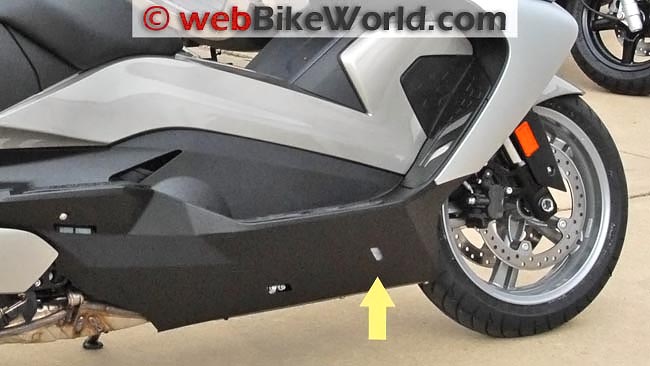 Yellow arrow indicates the coolant level check point on the BMW scooter.
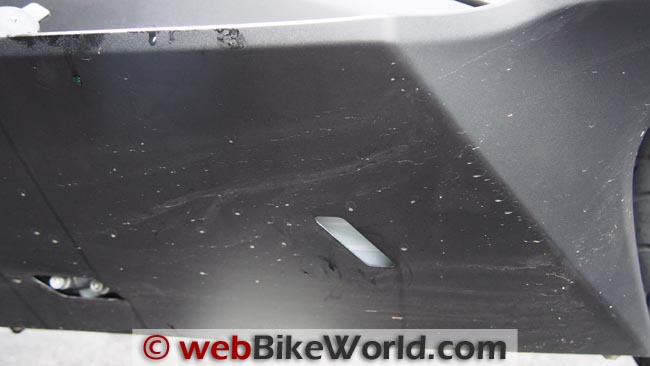 Close-up of the coolant level check. Note the “min” and “max” lines, but there’s not enough contrast to see the coolant level. A flashlight didn’t work either, nor did shaking the scooter back and forth on the center stand.
Coolant Overflow Tank
The next day, I first read the owner’s manual (which describes very few maintenance tasks for the BMW scooter) and followed the instructions for adding coolant.
First, the right side rubber foot rest scuff pad must be removed. All of the foot rest pads are held to the scooter floorboards by rubber nipples on the underside; I’m sure these will eventually break, so my tip to any BMW scooter dealer parts department is to order several sets of these.
Here are two photos showing the foot rest and the underside:
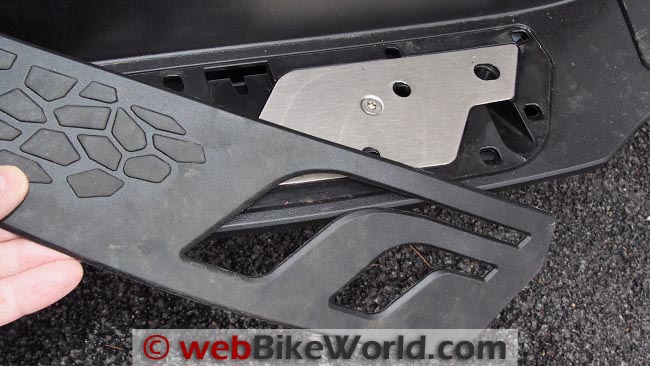 Rubber foot rest scuff pad removed from the right-hand side. The coolant cover can be seen in the background.
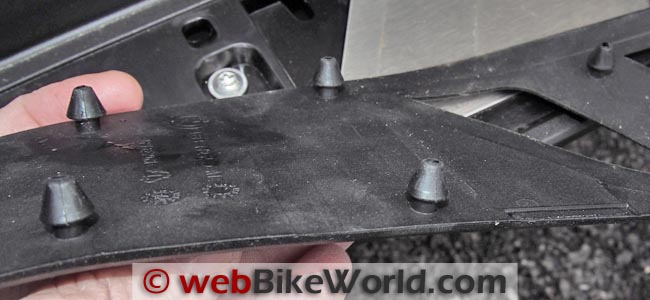 Underside of the rubber foot rest pad, showing the rubber nipples that will surely break eventually.
Next, remove the aluminum plate, which covers the coolant overflow tank. Almost all of the fasteners on the BMW scooters are of the Torx type, so you’ll need a good selection of Torx bits and screwdrivers from about T15 to T50.
The fastener that holds the plate is a T30 and it doesn’t need much torque; hand tight is fine because the fastener isn’t going anywhere, gravity is holding it in the correct orientation and it is covered by the rubber scuff pad.
Remove the plate to reveal the coolant overflow tank and filler:
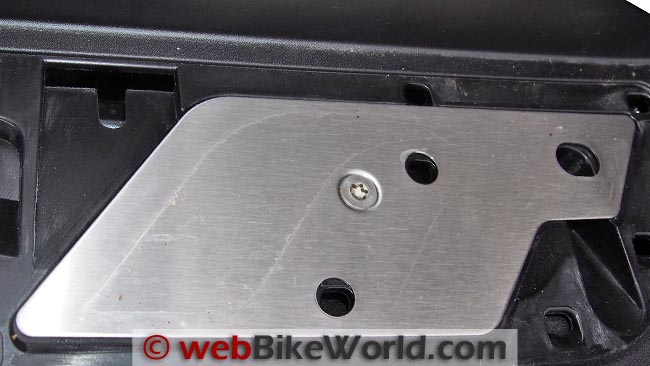 Aluminum coolant overflow tank cover plate with T30 Torx fastener.
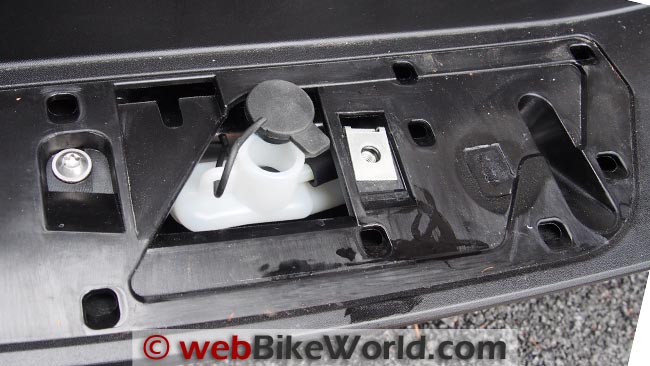 Coolant overflow tank is located under the foot rest on the right-hand side of the scooter.
Checking, Adding and/or Removing Coolant
I broke out the ultra-powerful, 3,000 lumen Fandyfire flashlight (review) and blasted it down the coolant filler spout, hoping that the light would illuminate the coolant level in the indicator, but I was still out of luck.
Why BMW made the plastic so opaque is beyond me, but until the coolant gets dirty, upping the contrast, it’s going to be difficult to check the level.
I looked down into the coolant filler spout and I could see coolant, so I figured it might be overfilled and perhaps if I suctioned out some coolant, the level would drop so it would appear in between the “min” and “max” bars on the level indicator, which looks like it’s below the upper level of the overflow tank.
So I used a suction device I had on hand with a long clear plastic tube attached to the tip. I put it down into the coolant and pulled out about 200 cc of fluid, checking the level each time.
Finally, it looked like I could see the proper coolant level between the “min” and “max” lines on the coolant level indicator, but only when I used the flashlight and shook the scooter back and forth (carefully) with one hand as I was on my hands and knees peering into the indicator. I’m still not 100% confident it’s correct though…
Checking the coolant level shouldn’t be this difficult, but I’ll check it a few more times as the scooter gains mileage, to make sure everything is ok.
UPDATE: See the comments from “T.P.” below with a tip on checking the BMW scooter coolant level.
More: BMW C 650 GT Blog
Publication Date: November 2012
Owner Comments and Feedback
See details on submitting comments.
From “T.P.” (January 2014): “Here’s a tip that may make checking the coolant level in your BMW scooter a little easier. There is a cut out in the plastic beneath the coolant overflow tank — shining a strong flashlight from the bottom of the scooter up through that cutout will make the tank ‘glow’ and the coolant level will be visible through the coolant level indicator located on the lower right-hand side of the scooter, just below the right foot rest. It helps if you are in the shade or inside the garage but this trick makes the level much easier to see.”
From “D.R.” (December 2012): “I did the same thing you did with a flashlight and everything trying to see if I had any coolant in the bike while the bike was parked in the garage and I couldn’t see it. I then checked it when I had outside in sunlight and I could see the coolant.
What I have been trying to find out is which coolant they recommend. The coolant in the bike is blue so I assume that is the BMW coolant with no Nitrates? The engine is made by Kymco and most of the Asian bikes recommend no Silicates. Some coolants like Prestone has no Silicates, no Nitrates, and no Phosphates. The owners manual does not mention the proper coolant. I will stick with a blue no Nitrate coolant and assume that the Silicates in it won’t harm the bike.”
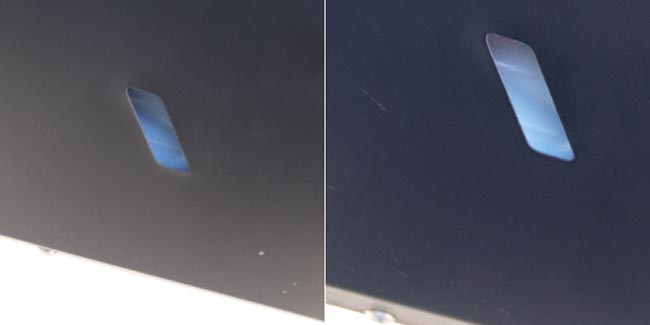
UPDATE From “D.R.” (December 2012): “I attached a couple of pics of what I see in daylight when I look at the coolant window. The position of the sun seems make a difference whether or not I can see it or not and how it looks, but the sun can’t shine directly at it or you will see nothing
When I shake the bike I can see it move but I can’t explain why it looks like it is slanted between the markings. One pic was taken on the center stand and the other on the side stand. It would be nice if they corrected this.
My biggest complaint so far are the mirrors. One other note: I filled my bike for the first time since I got it and I put the nozzle into the filler pipe and it only went in a couple of inches. I thought it was like the Burgman 650 with a bar in the filler pipe so you can’t put the nozzle in to far so I squeezed the nozzle handle and got quite a bit of splash back.
There is a hole in there so anyone with a new bike and filling it for the first time make you put the nozzle in the hole in the filler pipe before squeezing the handle, I’m sure you will figure it out real quick if you don’t.”
Rick’s Reply: Same thing happened to me on the first fill-up! If the nozzle isn’t pushed down correctly in the hole, it will cause a lot of splash-back.
Other WebBikeWorld Articles Posts