

Tiny LED lights that are amazingly bright for their size, the BikeVis Bullets add a lot of visibility and they’re relatively easy to install.
The theory says that adding a “triangle of light” to the front of a motorcycle will enhance visibility.
Others say that adding lights on either side of the motorcycle to make it appear wider can also help.
I’ve noticed this effect when a cruiser with the classic three-across headlights approaches on the opposite side of the road.
Not only does the bike stand out from the background traffic, it’s also easier to judge the approach speed.
But who’s going to mount a 10 kilo light rack across the front of an 1198R?
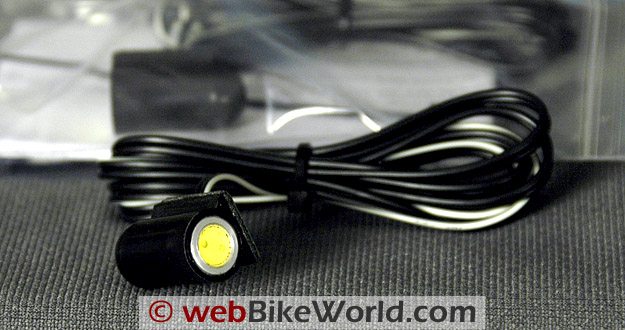
That’s where the BikeVis Bullets come in. These are small LED lights inside a plastic housing. Each light measures 23 mm long by 9 mm tall from the base to the top of the housing.
The lights are designed to work as forward-looking accent lights that help make the motorcycle more visible; they are not driving lights.
Each BikeVis Bullet includes strong 3M double-sided tape on the bottom. The lights can be attached just about anywhere on the bike and they add a surprising amount of visibility for their size.
Installing the BikeVis Bullet LED Lights
The BikeVis Bullets are also easy to install. There are just two wires coming out of the bottom; a power and ground.
The double-sided tape is very strong and claimed waterproof, and it “sets up” in about a day to make a very strong bond. So the BikeVis lights can be added just about anywhere on the bike.
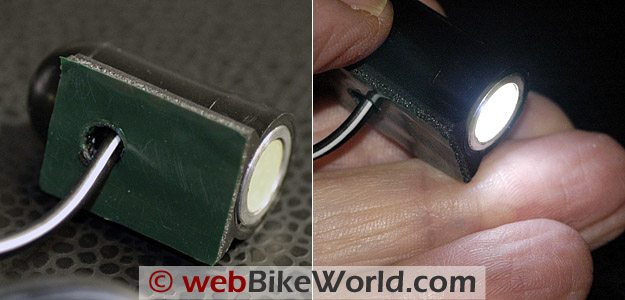
The only issue I have with the design of the BikeVis light module is that the wires come directly out of the bottom of the BikeVis Bullet housing, through the center of the double-sided tape as you can see in this photo:
The wiring comes out of the bottom of the light housing, making for a somewhat difficult installation.This works only if the lights are flush-mounting on a fairing, as suggested in the instructions. To do this, a hole must be drilled through the fairing for the wiring so that the housing will lay flush on the surface.
The Editor wasn’t too keen on drilling holes in the Multistrada test mule and I can’t blame him, and I’m not sure how many owners are going to want to start drilling into their bikes either.
Fortunately, the Multistrada has a nice horizontal grill up front which is perfect for mounting the BikeVis Bullets without having to drill through anything.
The wires come out of the middle of the BikeVis light, so I could only use the front half of the sticky tape.
This would not work if I wanted to mount them on the sides of the fairing.
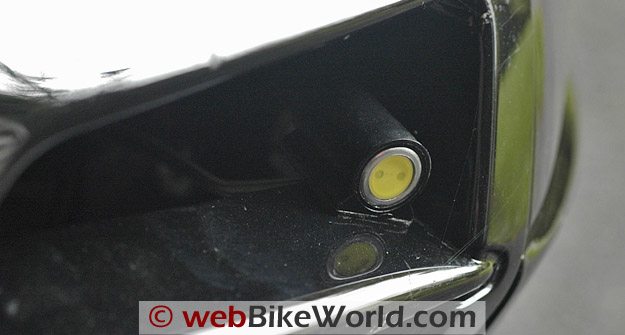
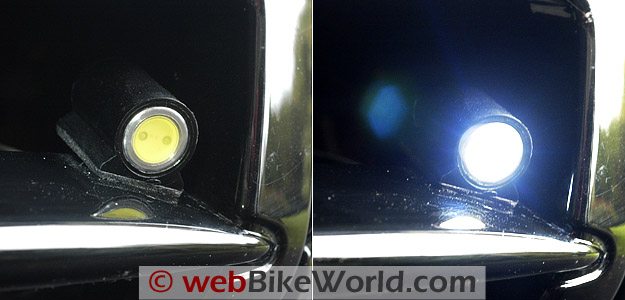
 Yellow headlight bulb (see text) and BikeVis lights. Close-up of the BikeVis Bullet.
Not everyone wants to drill a hole through their fairing or plastic bits, and since most fairing surfaces are curved or angled, I’d argue that this may not be the best location for a BikeVis light either.
So here’s my suggestion to the BikeVis folks: either offer a version with the wires coming out of the back of the housing, so that the bottom surface of the BikeVis Bullet is flat.
Or better yet, have the plastic housing molded with a groove in the center so the wires could be pushed up into the molded groove and made flush with the bottom.
Also, the wires used on the light are probably about 5 times the diameter that are really necessary anyway for a less than 0.02 milliamp light that draws 0.25 Watts.
So I think they could lighten up on the wiring and it could be very easily hidden in a groove underneath the housing. This would allow the BikeVis Bullet to be mounted flush with the wires hidden out the bottom or with the wires coming out the back.
In any case, mounting the BikeVis lights on the flat front surface of the Multistrada was easy, so if your bike has something similar, it shouldn’t be an issue.
I also think that BikeVis should include a couple of Posi-Tap connectors (review) in the kit, which would make it much easier to tap into the correct wiring on the bike. The kit currently comes with a few cable ties and a special 3M surface cleaner for the 3M double-sided tape.
The BikeVis lights come in a pair. Each light has approximately 1 meter length of paired wiring.BikeVis Bullets in Action
The BikeVis lights are available with either white or blue LEDs; we chose white.
Now remember that these are not designed or sold as driving lights in any way, shape or form; they are accent lights that are designed to add some light to the front of a motorcycle to help make it more noticeable to oncoming traffic.
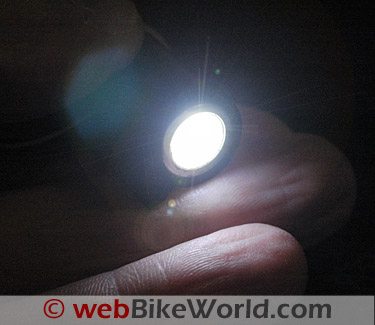
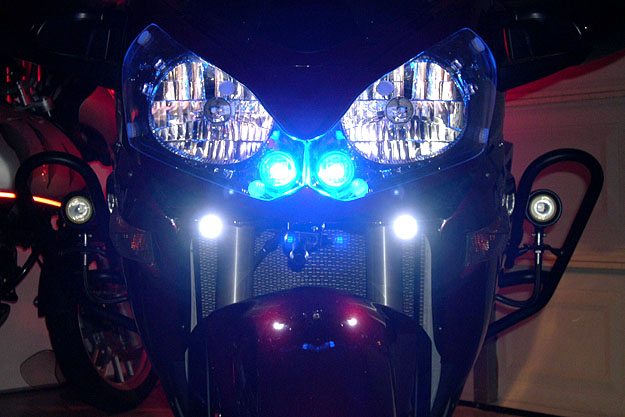
However, the white lights are way brighter and more visible than any of us imagined they would be.
I’m not sure if BikeVis uses special LEDs or if LEDs have gotten much better recently or if it’s the Bullet housing, but slap a pair of these on and all of a sudden the front of the bike really stands out.
No reason to use only a pair either — I could imagine maybe, oh, a half-dozen or so on each side, up and down the fairing! Take that, left-turn bandits!
The light is also visible from a very wide angle, again probably due to the design and the housing.
So I stood back about 30 feet to sort of line up the lights in the front, but it’s not like they have to be dialed in to some exact focal point — they’re very visible if placed reasonably close to pointing forward.
In fact, the BikeVis Bullets work so well, I’m now wondering why something like this shouldn’t be standard on every motorcycle made to help improve visibility.
It used to be that you could leave the headlight on for improved visibility to other traffic, but now many other vehicles also have DRL’s, or Daytime Running Lights. This dilutes the effect of noticing a motorcycle.
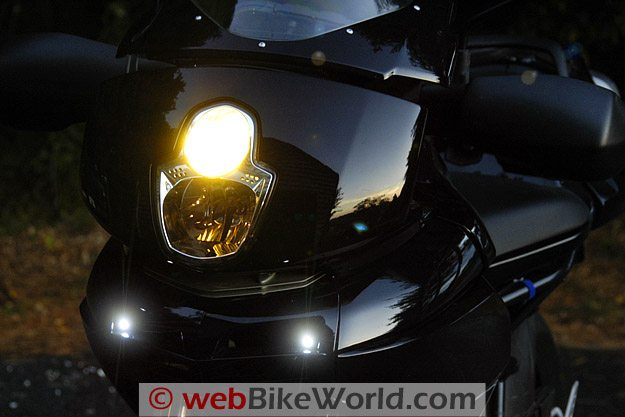
By the way, the BikeVis lights are more visible during the day than at night.
At night, the headlight glare overpowers the light from the small BikeVis Bullets, although it’s possible that on some motorcycles, the lights could be mounted somewhere that would avoid this effect.
But at night, you don’t really need running lights anyway, because the motorcycle’s headlight and auxiliary lights mark the bike’s presence.
The BikeVis lights come into their own during the daytime, when the headlight glare gets “lost” in the background ambient lighting and the small but bright BikeVis lights are very noticeable.
The effect at night and during the day is nearly impossible to illustrate in photos.
At night, the headlight way overwhelms the camera’s ability to pick out the BikeVis lights, while during the day, the same thing happens and the camera isn’t sensitive enough to distinguish the contrast between the BikeVis lights, the headlight and the ambient lighting.
So in other words, you’ll have to take my word for it!
We installed yellow headlight bulbs (review) in the motorcycles here (review) in an effort to stand out from the crowd. We haven’t used headlight modulators in some time for a number of reasons.
After more than 8 years’ of experience in using and experimenting with headlight modulators, we’ve become concerned that a modulated headlight may interfere with an oncoming vehicle’s ability to recognize that the motorcycle’s turn signal is on.
This is especially the case if the modulator is modulating the high beam, which we now do not recommend, because using and/or modulating the high beam can dazzle the oncoming traffic and make seeing the bike’s turn signals almost impossible.
That’s why the BikeVis lights are so intriguing. They add visibility without dazzling; they’re noticeable without being overpowering.
They’re easy to install, they’re inexpensive and they also have the ability to blend in to just about any motorcycle type or style.
The BikeVis lights also draw very little power as noted, and the LEDs are claimed to last at least 50,000 hours. 50,000 hours is a lot of seat time, because 50k hours equals 5.7 years of riding — that is, if you rode for 24 hours a day, 365 days a year for the duration!
The rear of the BikeVis light extends off the back of the flat surface of the Multistrada’s front grill, which can just be seen in the photo on the left. So only the front half of the double-sided tape is holding the light, up to the point where the wire sticks out the bottom.BikeVis also offers lifetime support for the product, which is a pretty safe bet, as I can’t see what could possibly go wrong; there are no moving parts. The BikeVis Bullets also have a one-year warranty.
The lights come in pairs and the white lights cost £12.95 + £3.25 shipping in UK or £12.95 + £8.95 International shipping. The blue lights are £2.00 extra.
BikeVis uses a PayPal shopping cart, which works very well.
The company sends an email with a notice of shipping and the lights were received about as fast to the East Coast of the U.S. as they would have been if the company was located on the West Coast.
Conclusion
The BikeVis Bullet LED lights are a really nice way to improve a motorcycle’s visibility to oncoming traffic. Of course, there’s no magic solution here, so as always, we recommend a layered approach to safety by carefully considering all options.
But in our real-world subjective experiences and experiments with the BikeVis lights, we think they really do help.
They’re small enough to be mounted in many different locations on any type of motorcycle, unlike some other types of accent lights which may fit one motorcycle type better than others.
Also, since we purchased the BikeVis lights a couple of months ago, BikeVis now has something called a BikeVis Bullet ModPod, which is spliced into the BikeVis Bullet wiring and creates a glimmer or glinting effect to the light.
We just ordered one of these and I’ll run a follow-up to let you know how they work.
UPDATE: Here’s our review of the BikeVis PodMod modulator system for the BikeVis Bullets LED lights.
webBikeWorld has been featuring motorcycle visibility lighting reviews and articles for many years.
Be sure to read our many reviews of motorcycle auxiliary lights, LED brake and tail lights and other devices for improving visibility.
More information is also available on the webBikeWorld Motorcycle Lights page and the LED Motorcycle Lights page.
See Also: BikeVis Bullets V2 Review | Blue BikeVis Bullets Review | BikeVis PodMod LED Modulator
Owner Comments and Feedback
See details on submitting comments.
From “P.L.” (12/09): “I read your excellent review on the BikeVis LEDs, and on the strength of that bought a pair along with the ModPod (and also some Posi-Tap connectors) to fit to my Multistrada.
I’d like some guidance on where you made the connection in the wiring circuit. I’ve looked round and under the fairing and headlight, but can’t really see the run of the wiring.
Did you have to remove the fairing/side panel/front grill to get to the loom? Did you make the connection near the back of the headlight unit, or is there a convenient place somewhere under the side panel?
I assume I must find the parking light or rear light circuit, which is always on, or did you connect into the dip beam circuit and accept that the LEDs will go out when on full beam?
I’m reasonably competent as a mechanic, but am a poor electrician and so am quite nervous about getting into the wiring. Any and all help gratefully accepted.
Incidentally, I think your website is very well presented, with sensible and very useful articles and reviews. Please keep up the good work.”
Editor’s Reply: Thanks for visiting webBikeWorld and for your support. We wired the BikeVis lights at the same time as the Clearwater LEDs, so you may also want to refer to that article for more info.
There are only two wires to connect for the BikeVis LEDs: a positive and a ground. All you need to do is connect the ground wire of the BikeVis lights to a ground anywhere on the bike — the ground wire is black and the positive wire is black with a white stripe.
Then splice the positive wire into a wire from your headlight or other electrical item that comes on only when the key is on. We had already found the wire that feeds the headlights, having used that for the Clearwater LED light installation.
So we simply tapped into that wire with a Posi-Tap connector (review). It’s helpful also to refer to your bike’s wiring diagram.
Follow-up from P.L.: “Many thanks, it did help. I decided to remove the left side upper panel and go into the back of the fuse holder. I tapped into the heated glove wire out (5A), which is switched by the ignition key, and the wire is thin enough to fit the size of PosiTap I had.
Also, I ground two small slots in the front inlet vents to accommodate the wires and allow the whole of the LED to be stuck down, and fitted spade connectors in the feed wires so I can disconnect easily if the inlet grill ever needs to come off (tank removal etc).
I also fitted the modulator, which does as advertised and causes the lights to flicker, which will hopefully will further help car drivers over their myopia……….
One more thank you for the tip on the Posi-Taps – very useful and neat connectors.”
From “K.V.” (11/09): “Just a note of applause for BikeVis. I have the BikeVis LED’s installed on my new Concours 14, and I am very pleased with the results.
When I don’t have all of the auxiliary lighting activated, they do a great job, especially the modulator, of adding attention getting and distinctive auxiliary and high-intensity lighting to my bike – see the attachment.
I recommend them to anyone wanting effective high-intensity lighting on their bike at a reasonable price.”
From “M.H.” (11/09): “I’ve checked with the Ontario Provincial Police (just to confirm) and blue lights are only allowed for emergency vehicles in this province. Of the two, only white is legal here. Perhaps they could make an amber version?”
Editor’s Reply: I checked with BikeVis, they are aware of the fact that the blue lights may be illegal in some countries. They are working on an amber version at this time.
From “B.L.” (11/09) (Reference M.C.’s comments below): “Those blue tail lights are only legal, in California, for Law Enforcement.
See: 24003 CVC Unlawful Lights – Clear rear lenses, coloured headlamps, blue bulbs, etc. And, 24600(e) CVC Tail Lamps – Must be RED.”
From “M.C.” (11/09): “I just thought I’d mention that when it comes to night vision, the human eye is much more sensitive to blue light than white light so blue LEDs stand out much better at night than little white ones.
To test this, take something that has a blue led into your bedroom at night and see for yourself. Then try the same with a white led.
Finally, the California Highway motor officers have little blue LEDs on the backs of their rides and I am able to see those 2 little blue lights from at least a half mile behind (maybe more), and that’s on a well lit, crowded downtown freeway…that blue glow is unmistakable.