I was planning a ride across the Trans-Labrador Highway in Canada in the summer of 2011.
While planning for this trip, I was concerned about riding my 2002 BMW R1150GS (review) on the hundreds of miles of gravel roads.
I don’t ride off-road very often, so I had a real fear of losing control and an “off” that could possibly result in injury to me and/or damage to the bike.
Having read several ride reports where this had happened to other riders while on the Trans-Labrador Highway, I felt it was only for me to prepare the bike — and myself — for that possibility.
I was confident my Cycleport Kevlar riding gear (review) would provide me with more than adequate protection. And I was working on improving my riding skills with the BMW GS Off-Road Riding Skills video (review).
So the question was, what should I do to the bike in preparation? If I did have an un-intended get off, what would be the most likely damages incurred by “Beaker”, my GS?
Shortly after purchasing the GS I installed a set of SW-Motech crash bars (review) to protect those enormous cylinder heads sticking out on each side.
These bars were quickly called into service — coincidently on a gravel road — and performed marvelously.
The factory side cases and/or their mount brackets were also a concern, since one bracket was broken in that incident. But I just wasn’t willing (nor afford) to spring for the kind of green-backs it would cost to replace them with something more durable for this trip (I did take a pair of ratchet straps along just in case though).
Add in the cost of the new Continental TKC 80 tires (review) we would be installing, which would be trashed by the time we got home, and the trip alone was going to incur sufficient costs.
I had long since equipped the bike with a Touratech oil cooler and headlight shields. Headlight stone guards had come with the driving lights I had installed, so these items were, pardon the pun, “covered”.
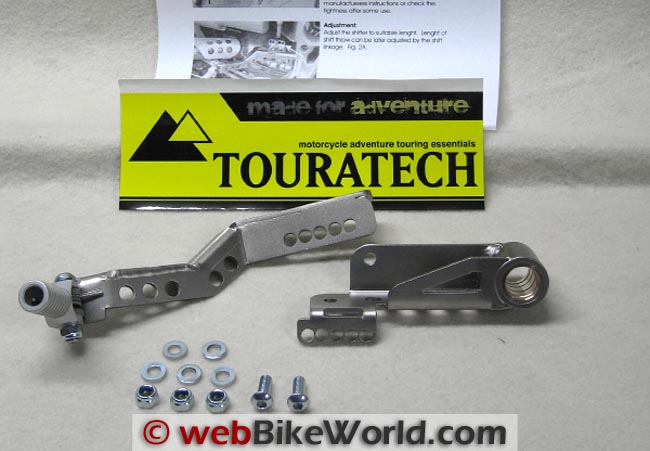
The Touratech adjustable shift lever kit for the BMW R1150GS.Why a New Shift Lever?
I had read that if a bike falls on its left side and catches the shift lever, the tip can break off, making it extremely difficult to continue. I then began to notice that most off-road bikes came with a shift lever that had a folding tip, so I figured there must be some truth to it.
With that in mind, I looked around for a shift lever with a folding end to replace the original cast metal lever on the BMW GS. My search yielded only one, from Touratech. The replacement Touratech adjustable/folding shift lever had both a folding tip and it was adjustable in length. Cool…..just what I was looking for!
The stock BMW GS shift lever is made from a solid casting.Touratech
For those readers not familiar with the Touratech (short for Touring Rallye Racing Technology), they specialize in providing aftermarket accessories for the ever increasingly popular large touring and adventure bike market.
Their catalog contains many name brands, but many of the products have been designed by Touratech and manufactured in Germany to their specifications. Touratech is a familiar name to BMW owners; just stop by a BMW dealer on a weekend and take a look at any of the GS models parked outside and I can assure you, you will find Touratech items on more than one ride.
Whether any of these bikes ever leave the pavement or not is beside the point; they look ready to take on the world.
Browsing through their catalog is like being a kid looking in a candy store window for any budding adventure bike rider. Even if you have no plans of riding around the world, armed with only a credit card and an internet connection you can outfit your ride to at least look like it.
Don’t get me wrong, I’m not knocking ’em…..heck, before this upcoming trip there were only a few dirt roads that my GS had seen. But, if you’re going ride an adventure bike, it’s got to look ready to tour the world, right?
The Touratech Adjustable Shift Lever
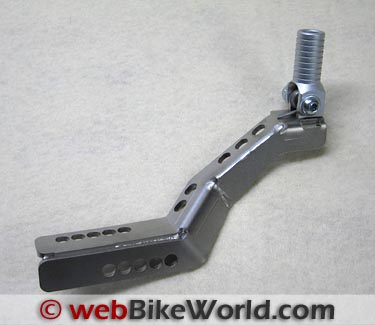
My adjustable shift lever from Touratech arrived in just a few days and I set to installing it in short order. The lever itself is two parts (with some Stainless Steel fasteners) and is made of malleable stainless steel with a spring-loaded aluminum folding tip. Since it’s made of malleable steel, if it bends, it can be twisted back into position, unlike the OEM cast lever, which is more likely to just snap off.
Note that the Touratech “Folding Shift Lever” ($51.40 list) for the BMW R1200GS looks quite different from the “Adjustable Gear Lever” ($66.90) for the BMW R1150GS.
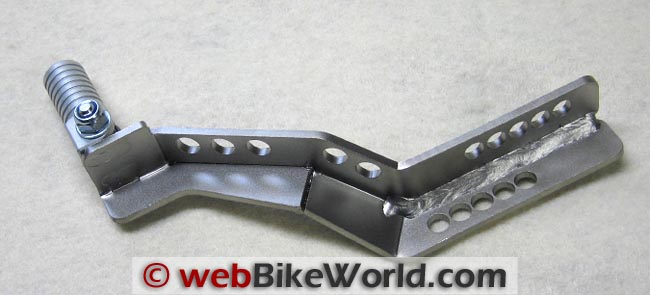
In addition to the holes for length adjustment, the body of the Touratech folding shift lever has been drilled in that never-ending quest for weight reduction. The pivot point on the lever is fitted with a brass bushing with a spiral groove which helps lubricants better reach the inner surfaces. All components were nicely finished and appeared very well made.
The Touratech folding shift lever.Removing the Stock BMW Shift Lever
Before beginning disassembly you might want to take the time to record some measurements of your bike’s shift lever height and length which will take a lot of the guess work out of setting up the new lever. I simply used the distance from the floor and foot rest while the bike was on the center stand.
To replace the stock shift lever on the BMW GS, you have to remove the left foot rest mount bracket which is held on by three bolts. The bottom two are 8 mm bolts with 6 mm Allen heads and the top one is a 10 mm bolt with an 8 mm Allen head.
Prior to removing these bolts the pre-load adjuster needs to be unbolted, and be sure to remove the small locking circlip on the ball-and-socket joint on the shift rod and disconnect the rod.
NOTE: The top bolt bears additional weight on it because the rear sub-frame is fastened at this point also, so be prepared to lift the sub-frame just enough to take the stress off of the bolt during removal and installation. Failure to do so could result in damage to the threads on the bolt and/or the transmission housing into which it is threaded, and could make for the beginnings of a really bad day…
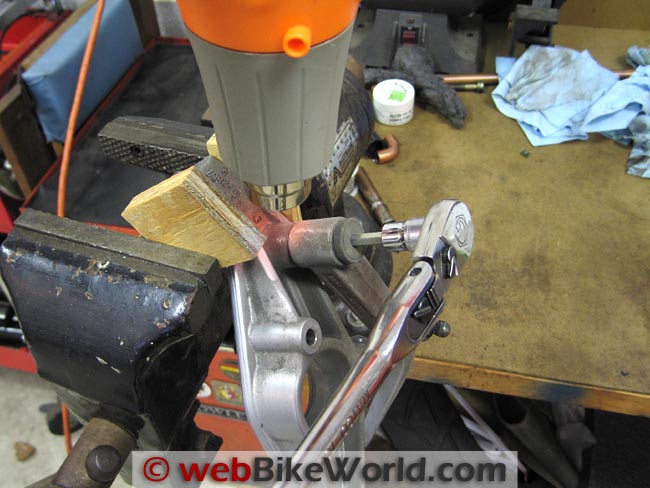
With the footrest off, you can now see that the lever actually pivots on a bolt that’s threaded into the backside of the bracket. To remove the bolt you’re going to have to hold the bracket tight, preferably in a vice with “soft jaws” (aka scraps of wood between the jaws and the footrest bracket), because the pivot bolt was installed with thread locker and will probably require use of a heat gun (see the Steinel heat gun review), as I had to do, to get it to release its grip.
Direct the heat onto the bracket where the pivot bolt is threaded in order to soften the thread-locker and remove the bolt with a 6 mm Allen bit. Be careful, because the bolt, bracket and lever will all be HOT! You can set them aside for a few minutes and they’ll cool off, but if you’re in a hurry you could dip them in cold water.
The ball for the shifter link has to be removed from the old lever and transferred to the new lever. It’s threaded into the stock lever and will be bolted onto the Touratech lever and secured with a self-locking nut and washer included in the kit.
There are five holes in the lever for a variety of locations to mount the ball. While taking my measurements before disassembly, I noted that the shift link was vertical, so I opted to wait until I had the lever on the bike to determine which hole to use that would duplicate that position.
Removing the stock BMW foot rest pivot bolt with the heat gun.Installing the Touratech Folding Shift Lever
The pivot bolt was cleaned; a thin film of lubricant applied to the bearing surface of the bolt and inside of the bushing; a drop or two of removable thread-lock was placed on the bolt threads and the pivot portion of the new Touratech folding shift lever was reassembled and torqued to specs.
At this point, I reinstalled the foot rest assembly and torqued all three bolts to specs. Remember, you will probably have to raise the rear sub-frame a smidgeon to get the upper bolt to align with the transmission. I used my floor jack and a scrap 4×4 to lift it just enough to be able to start the bolt by hand.
OK, with the footrest back on, the forward section of the shift lever was mounted in a position, with the included stainless steel screws and washers, that best matched the stock length. I say “best matched” because I had to use the shortest length settings to even get close to the original distance from the footrest.
My first inclination was that I had assembled something incorrectly, but it’s pretty straight forward, so I was surprised that with the number of holes available in the lever I couldn’t make it any shorter, only longer.
I then held the lever near the height I had measured prior to removal and chose the hole that would keep the shift rod in a vertical orientation as before. In the end it wasn’t necessary to make any adjustments to the shift rod to keep the lever at the stock height, so I simply used the supplied self-locking nut to secure the ball to the lever. I cleaned both the ball and socket, put a dab of grease in the socket and popped the two together, remembering to re-install the funky locking circlip afterwards.
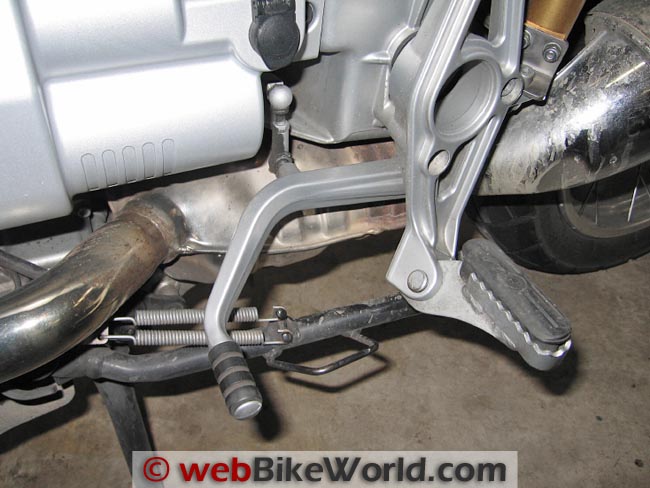
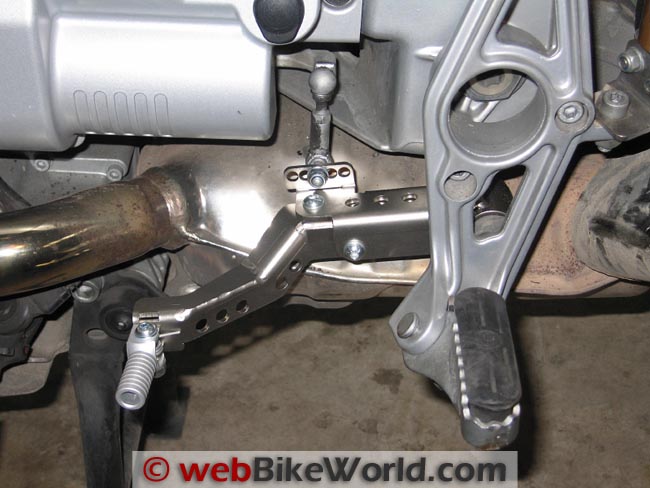
Touratech adjustable folding shift lever installed on the BMW R1150GS.Riding With the Touratech Folding Shift Lever
Time to try it out! With my riding boots on, I took note of where the lever end contacted the toe of my boot. I found it to be a little bit further forward than before, barely contacting the built in shift pad on the boot, whereas the stock one hit it about dead center.
Hmmm…..this could make for excessive wear on my boot, especially since this tip doesn’t have a rubber bushing on it! If you’ve got a smaller shoe size than my 11 US (45 EU, 10.5 UK, 28 JP) this might be a concern. Otherwise, there were no other fitment issues.
On the road I noticed no change compared to the stock shift lever, feel wise. It did what it needed to do…shift gears and I was never hunting for its location.
You can tweak the settings to better fit your riding style/position, should you need to, by varying the length of the lever or shift rod, both of which are easy to do. It’s even possible to vary the shift throw by changing the shift rod position on the lever.
Conclusion
A simple “get off” could result in a broken shift lever which could be a real pain if you’re far from home and don’t have the resources or the skill to repair it yourself.
A replacement shift lever with folding tip from Touratech could be one of those “An ounce of prevention is worth a pound of cure” items.
It’s well made, relatively inexpensive and easy to install, this is an item you might want to seriously consider if you’re going to be riding off of the pavement. Heck, I guess it could break on the pavement too!
As far as our trip was concerned, I managed to keep the bike upright the entire way, so the lever was never called into service; but as with the crash-bars I installed, you just never know when the road’s going to reach up and bite you…
| wBW Review: Touratech Adjustable Folding Shift Lever | |
|---|---|
| Manufacturer: Touratech | List Price: $51.40 USD |
| Colors: Silver. | Made In: Germany. |
| Review Date: January 2012 | |
Owner Comments and Feedback
See details on submitting comments.