
There are dozens of different bar riser, bar back and combination sets available for sale.
The question is, which one works for your bike?
Besides the problem of finding the correct fit, installing a set of bar backs or bar risers can also involve changing the brake hoses and control cables.
That can be a problem, but it becomes even more difficult if the entire handlebar is replaced also.
I took a chance on this SW-Motech bar back and bar riser set to see if it would fit the V-Strom 1000 ABS.
Since the bike was just introduced for the 2014 model year, the aftermarket is just catching up, probably waiting to gauge the popularity of the big “Adventure-Touring” bike.
At first, I thought I’d install a new handlebar, but having done that before on other bikes, I know it’s a lot of work.
So I searched high and low for a bar riser and bar back combination set that might fit the V-Strom and I found it in this SW-Motech set described below.
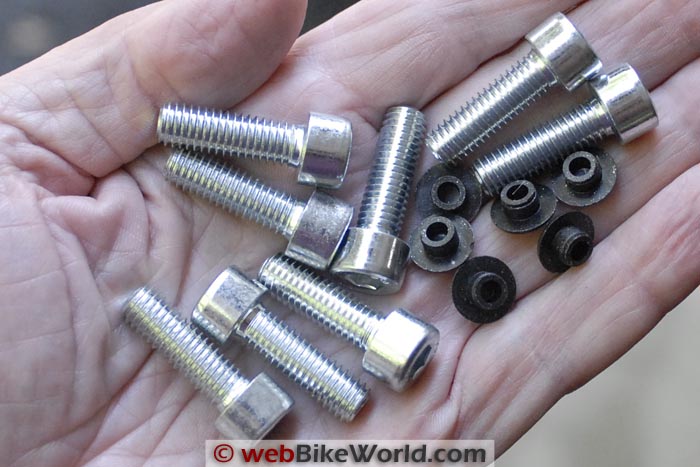
It’s a quality piece, as all SW-Motech accessories are, and it comes with upgraded hardware and a set of matching plastic plugs to cover the recess in the hex head cap screw bolts provided in the kit.
Bottom line, this set works on the big V-Strom and — like all the other changes I have made — makes a very positive difference in the way the bike feels and handles.
Small changes seem to make a big difference with the V-Strom and I have now cured nearly all of the problems I identified in my first impressions report to a point where I’m really starting to like the bike, if you can believe it!
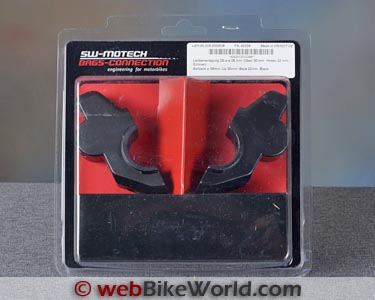
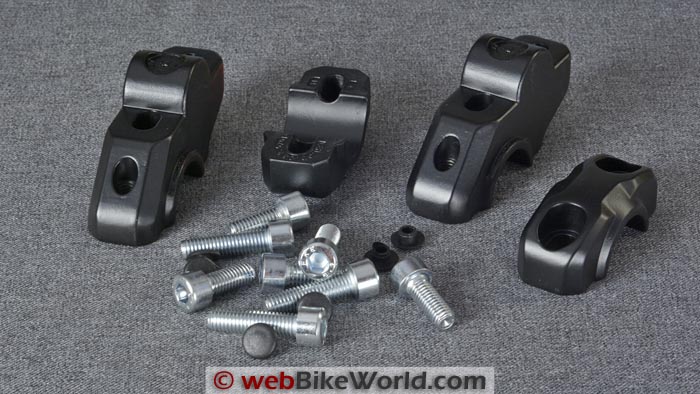
Contents of the SW-Motech bar back/bar riser kit, SKU: LEH.00.039.152. These are called the rather lengthy name of: “SW-MOTECH Handlebar Riser Barbacks & Top Clamps (BMW, Ducati, Gas-Gas, Honda, Kawasaki, KTM LC4, MZ, Suzuki, Triumph, Yamaha) – Pair, 1″ Rise & 1″ Pullback”. The set is available for 22 mm or 25 mm (7/8″ or 1″) handlebar and comes in your choice of black or silver.Background
Even with my 34″ sleeve length, it was a long stretch over the V-Strom’s tank to reach the stock handlebar and that meant I was putting weight on my wrists and on to the grips, which can upset handling.
Weigh on the bars can cause unwanted inputs, which translate to movement when the bike goes over bumps.
The advanced instruction classes I have attended have stressed the importance of maintaining a light grip on the handlebar but it was difficult to do that with the stock V-Strom setup and the long reach made me feel like the bike was too big for me.
I thought about it and couldn’t decide at first whether to go for a new handlebar or a set of bar backs/bar risers to try and cure this problem.
Installing a new handlebar can be a major headache though, because it involves removing and re-mounting the grip assemblies and controls. “Been there, done that”, as they say, way too many times and not really interested in doing it again.
Also, the stock handlebar is too low for any off-road work if you stand on the foot pegs.
I decided that I needed to raise the bars and bring them back towards me, so just a bar riser set or a bar back set alone wouldn’t do it — it had to be both.
I cast around for a set but couldn’t find anyone who would confirm that their set would actually work on the new V-Strom, because the bike is still pretty new.
After several trial-and-error sets (and racking up quite a bill in return postage) from different suppliers, I took a chance and ordered a set of the SW-Motech bar backs/bar risers from Twisted Throttle, the webBikeWorld affiliate and SW-Motech importer/distributor in the U.S.A.
The stainless steel bolts provided with the SW-Motech kit fit M8 handlebar mounting bolt holes with standard M8 thread pitch with an on-center distance of 31 to 37mm. Note that these are higher-quality, higher tensile strength HHCS bolts that replace the somewhat wimpy hex head bolts that are standard on the Suzuki. The kit includes plastic caps for the bolt heads, shown on the right.The SW-Motech Bar Back and Bar Riser Kit
Twisted Throttle didn’t have a listing for the new 2014 V-Strom 1000 ABS either, but I measured the handlebar at 22 mm and the bolt distance at 37 mm on the stock Suzuki clamps.
After looking through the dozens of bar risers and bar back sets on the Twisted Throttle website, I ordered the SW-Motech bar back/bar riser kit with SKU catalog number LEH.00.039.152.
These are made in both 22 mm and 25 mm (7/8″ and 1″) standard handlebar diameters. The 2014 V-Strom DL1000A has the 22 mm handlebar and the distance between the handlebar clamp bolts measures 37 mm.
The correct 22 mm sizes has a lengthy name on the Twisted Throttle website: “SW-MOTECH Handlebar Riser Barbacks & Top Clamps (BMW, Ducati, Gas-Gas, Honda, Kawasaki, KTM LC4, MZ, Suzuki, Triumph, Yamaha) – Pair, 1″ Rise & 1″ Pullback“. It is available in black or silver; I chose black.
When I ordered the set, the TT rep didn’t know if they would fit the V-Strom because they hadn’t tried it yet (and they install and try everything they sell first).
Again in the “interest of science”, I volunteered to give it a try.
I’ll be honest; I was doubtful that any bar riser, bar back or combo would work on the V-Strom, because it looks like Suzuki was trying to save a few more pennies by cutting the cables and hoses to a bare minimum.
I thought I’d probably have to buy a custom brake hose and maybe even custom cables and that would really start to add up, both to a hit on the wallet and in the complexity of this project.
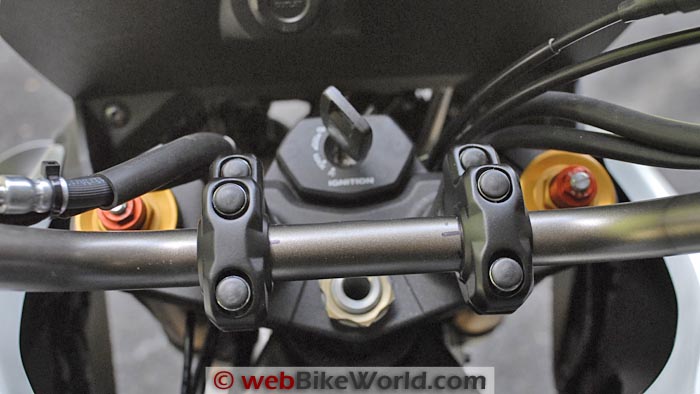
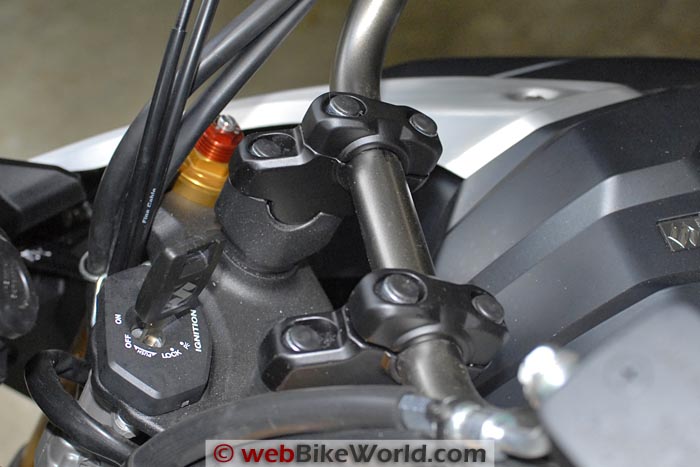
 This is the standard Suzuki handlebar clamp arrangement with hex head bolts. Before disassembling the stock handlebar mount, place a witness mark on the handlebar and the stock mounts so you can reassemble correctly if necessary. The mark on the handlebar then helps align the bars in the new SW-Motech bar back bar riser mounts.
SW-Motech Bar Back/Bar Riser Kit Details
The kit quickly arrived and I rolled up my sleeves (actually, it’s still T-shirt weather thankfully!) and got to work. As it turns out, this job is a piece o’ pie.
The kit is simple; it contains two bar back/riser mounts, two matching caps and 8 stainless steel, M8 hex head cap screws. Six black plastic bolt covers are also included to add a finishing touch.
The kit is available in either black (looks powder-coated) or silver and in 22 mm (7/8″) or 25 mm (1″) handlebar diameter sizes. The list price is $99.99.
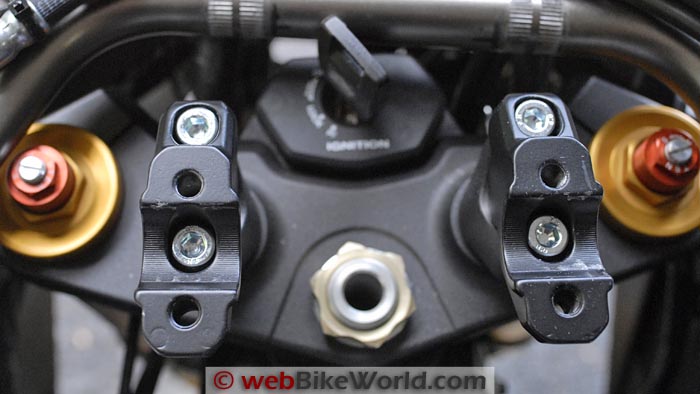
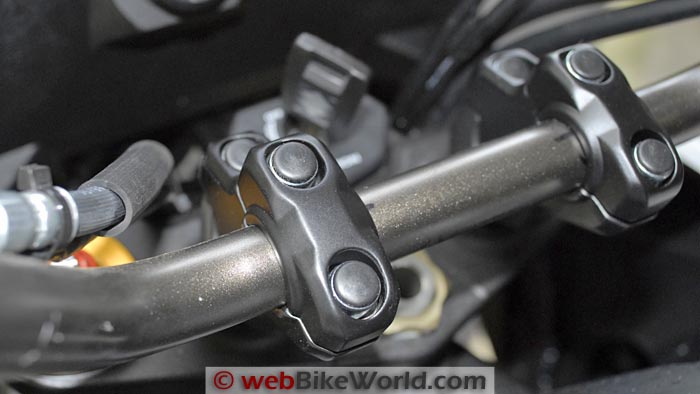
Here is a close-up photo showing how the bar back/bar riser fits into the stock Suzuki handlebar clamp mount.Installing the SW-Motech Bar Back/Bar Riser Set
The first thing I suggest is to make a horizontal mark on the handlebar, then a mark along the inside of the stock handlebar mount on the handlebar itself, then a vertical mark up the inside of the mount.
This is a “just in case” so you can re-install the handlebar to the exact same location if something goes wrong. It also helps to locate the handlebar in the new bar back/bar riser mount.
Next, I removed the four stock hex head bolts on the V-Strom’s handlebar, being careful to hold the handlebar with my left hand as the last bolt was loosened.
If you don’t do that, the bars will come crashing down on to the tank.
I carefully rested the bars in front of the handlebar mount base, up near the dash, to get them out of the way. Be careful to make sure no brake fluid leaks out of the master cylinder (it shouldn’t).
Next, insert the base of the new SW-Motech bar back and bar riser set in the “cradle” of the stock Suzuki mount base.
The SW-Motech instructions call for “medium strength” thread locker on the 8 mm stainless steel, HHCS (Hex Head Cap Screw) high-strength bolts provided with the kit. I used some blue Loctite.
The bolt distance on the V-Strom is 37 mm and the SW-Motech kit says it’s designed for 31 mm to 37 mm on center.
I then torqued the bolts to the SW-Motech recommended spec of 23 Nm, using the excellentCheck-Line DTW 100 Electronic Torque Wrench (review) that really is a “must have” for motorcycle use because of its accuracy, torque range and Nm-to-Ft. Lbs. electronic conversion.
Next, I located the handlebar in the cradle of the new bar back/bar riser set, using my witness marks as a guide for side-to-side and vertical positioning.
I hand-tightened the next four bolts provided with the SW-Motech kit and used a hex wrench to slightly tighten one, just enough to hold the handlebar.
At this point, you should sit on the bike and make sure the handlebar is oriented in a comfortable location for your particular needs.
Then all you have to do is remove each bolt, dab some Loctite on it and torque away. I tightened the four bolts in an “X” pattern.
Swing the handlebar through its entire turning range to make sure none of the cables or hoses are binding and if not, the job is finished.
The hose on the left is slightly tight when the handlebar is at full right lock, but doesn’t seem to be a problem. Next time I have the fuel tank off (it’s not easy to remove!), I’ll see if I can get a bit more slack but I honestly don’t think it’s an issue.
Otherwise, I’ll confess to being very surprised to find that all of the hoses and cables on the bike were fine and no additional fettling was needed.
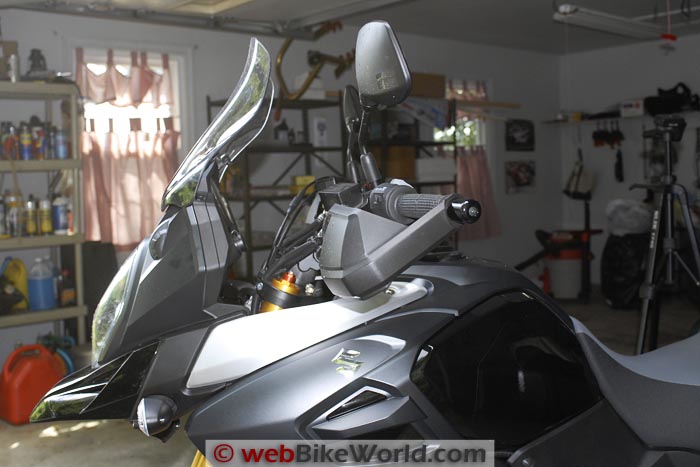
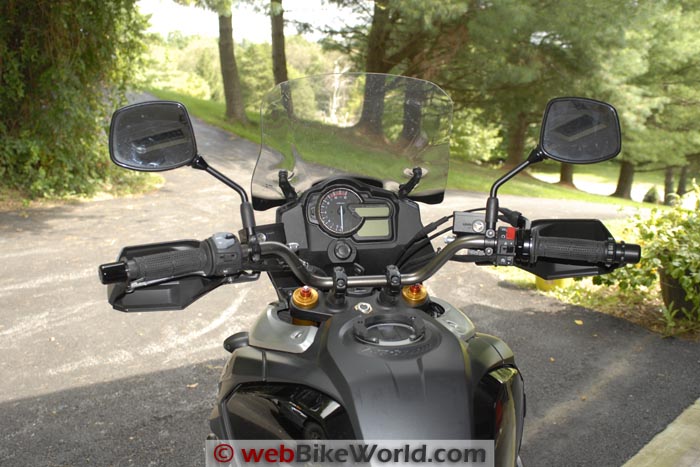
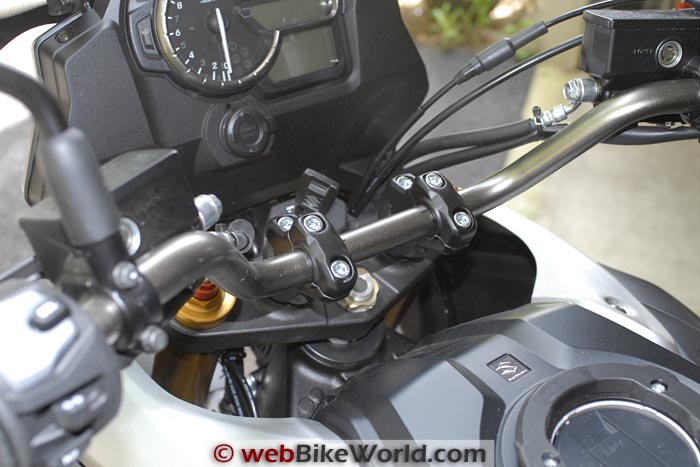
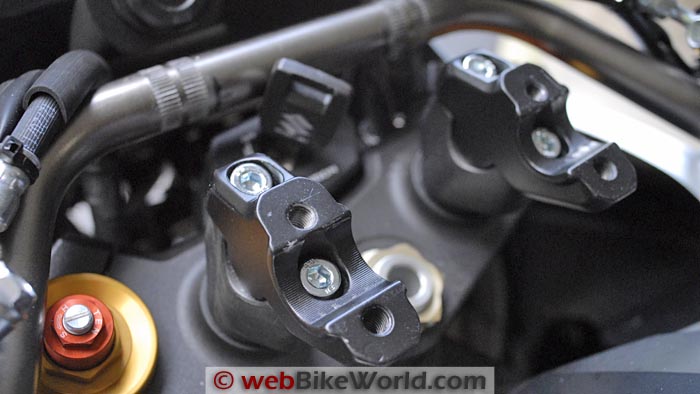
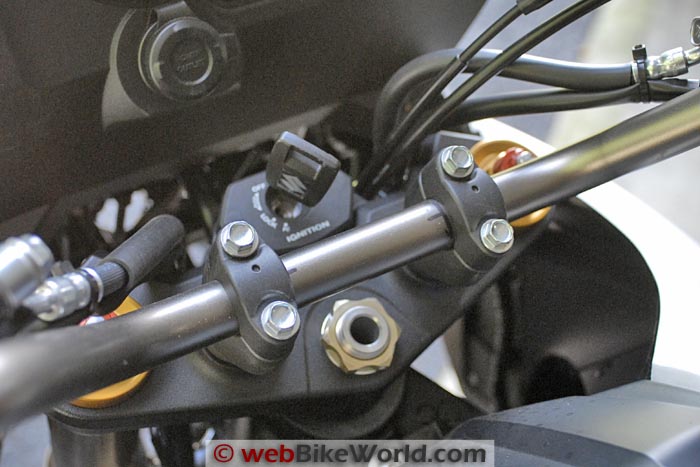
Remove the stock bolts and hold the handlebar firmly as the last bolt is loosened! Mount the SW-Motech bar back/bar riser base in the stock Suzuki handlebar clamp base. The instructions recommend using “medium strength thread locker” on the new bolts. Here’s another view of the bar back/bar riser base mounts installed, just before the correct torque is applied.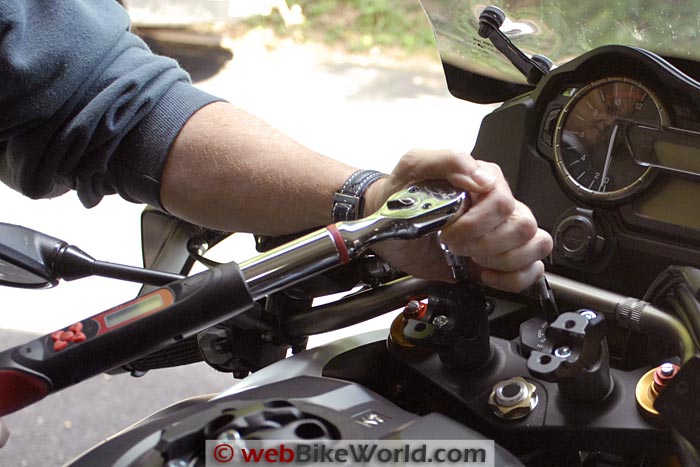 Don’t forget to torque the base mounting bolts before you place the handlebar in the cradle! SW-Motech recommends 23 Nm as the torque value. I use the excellent Check-Line DTW 100 Electronic Torque Wrench (review). Here’s where the marks on the handlebar comes in handy. Line them up at the center, then place the bar backs/bar riser caps on top of the bases and insert the bolts. I lightly tightened the bolts and sat on the bike first to make sure the bars were located in a comfortable position. Then torque to the recommended 23 Nm. SW-Motech gives you some nice little plastic covers for the cap screws. Note the Sharpie marks on the handlebar. Here’s another view from the seated position. The bar backs/bar risers raise the handlebar by about 25 mm (1.0″) and move them back 25 mm (1.0″). This creates moves the handlebar up and back by about 35.4 mm (1.4″) at a 45 degree angle from the original position, according to SW-Motech. On the V-Strom, this takes the weight off the bars and yields a more relaxed hand position, which translates into more secure-feeling handling. This is a side view of the bar back/riser, mounted and with the plastic bolt caps pressed in place. As a final step, I cleaned off the Sharpie marks using some electrical contact cleaner spray on a paper towel. This is a side view of the bar back/riser, mounted and with the plastic bolt caps pressed in place. As a final step, I cleaned off the Sharpie marks using some electrical contact cleaner spray on a paper towel. Side view of the handlebar with the bar backs/risers in place, although it’s difficult to see from this angle.
On the Road and Conclusion
I originally assumed the bar back/riser set would simply move the handlebar up and back to a more comfortable position. In other words, all I was thinking about was comfort.
But as soon as I took the V-Strom out for the first time with the set installed, I realized it does more than that.
Removing the weight from my wrists and hands and down into the handlebar has made yet another dramatic change in the way the V-Strom handles.
The bike feels more confident and “planted” in the corners and little bumps don’t get magnified by the weight on the handlebar like they did before. It’s like a completely new geometry for the front end.
The small changes I have made in the V-Strom now include the following:
- Installing the G2 Throttle Tamer (review) (see also Suzuki V-Strom ABS Review Part 3)
- Raising the forks in the headstock (report)
- Replacing the stock Bridgestone Battle Wing tires with the Metzeler Tourance Next (review)
And now also the bar back/riser set installation have each made a significant difference in the feel and performance of this bike.
This indicates to me that Suzuki should have spent a little more time perfecting the details to make it better. Perhaps they will in the next update.
In the meantime, these few simple changes are highly recommended to greatly improve the 2014 V-Strom 1000 ABS.
More wBW: Suzuki V-Strom 1000 ABS Blog | wBW Motorcycle Reviews
Owner Comments and Feedback
See details on submitting comments.
From “D.U.” (May 2015): “I recently traded my 2008 DL1000 on the 2015 DL1000. I’ve been busy farkling the new bike… a frequent flyer at Twisted Throttle and RevZilla to get the job done.
The one issue I hadn’t resolved was getting the handlebars up and back — a very easy process on the 2008.
With the new design of the V2, there is now very little room to install bar backs/risers on this bike, as you well know. I was struggling with a solution — new bars, new lines and cables — until I found your article on this project.
I can’t thank you enough for researching the topic and coming up with a solution.
A lot of articles dance around a topic, not quite getting the reader enough info to do the job correctly. I gotta tell you, I haven’t found a better researched and presented article that solved a problem for me, from front to back.
Listing the part number and description at Twisted Throttle was especially helpful.
I just finished the installation, and it went just as described. I removed the cable keepers on both sides (under the fairing) which eased things up just a touch more. Thanks again for the great work.”
From “G.B.” (September 2014): “Your review finally made me order and install a set for my ’06 V-Strom. Here are my comments:
1. The product, although a different model, is solid!
2. I followed O.S.’s idea (below). On paper it sounds like a good one, but the risers are a little wider and covered the tape. After the install what was covered ripped and there is blue tape showing underneath. It’s very little and I hope its not an issue structurally.
3. My 2 cents are to tie a cord between the mirrors and hang (the handlebar) from the garage ceiling. I used a pulley and set at the desired height. This also prevented the bars from falling on the tank during installation.”
From “S.O.” (September 2014): “I just wanted to add a helpful tip for others who install this or any other kind of riser package…
If you simply wrap the outer and inner side of the clamps with painter’s tape, you can accomplish two things. First, you have the centers for both clamps clearly marked.
Second, if you mark the top of the bars like the installer, you won’t have to remove the sharpie marks later. Some bars come painted, so you can damage the clear coat that is applied if using some kind of chemical.
Also, there’s always that little bit that always gets in the crack that inevitably bothers you every time you look at it.”