Upgraded stator provides 50 more Watts of power for the DR650.
That’s 25% more juice than the wimpy 200 Watts pumped out by the DR650 stock alternator at its maximum of 5,000 RPM.
Does it make a difference?
Hard to tell, but if you’re living on the edge, 50 Watts is 50 Watts…
One of the disadvantages of a single-cylinder motorcycle like the Suzuki DR650 (blog) is the relatively weak alternator output.
The DR650’s alternator is rated at a wimpy 200 Watts at 5,000 RPM.
Since 5,000 RPM is rarely achieved in normal street/trail riding (although without a tachometer, who knows?), figure on less than 200 Watts most of the time.
So let’s do a bit of calculating. As mentioned in the Clearwater Krista LED lights (review), the DR650’s headlight uses 55 Watts on low beam and 60 Watts on high.
The brake/tail light draws 21 Watts and the pair of Krista lights use up to 72 Watts on full power. Figure another 5W for the license plate light and 6W for the instrument lights.
Add in the 35W or so to run the ignition and that puts us around 195 Watts.
To reduce current draw slightly, an “SMT Tower” LED 1147 replacement was installed (from the article More LED Brake Lights and Tail Lights).
We also have an HID low/high beam headlight kit for the DR650 ready to install; it draws just 35 Watts, compared to the stock halogen headlight at 55/60W. When you only have 200 Watts to play with, every Watt counts!
Also by way of comparison, the BMW R 1200 GS (report) has a massive 720W output (14Ah battery) and the BMW K 1600 GTL (report) alternator puts out 580W (19Ah battery).
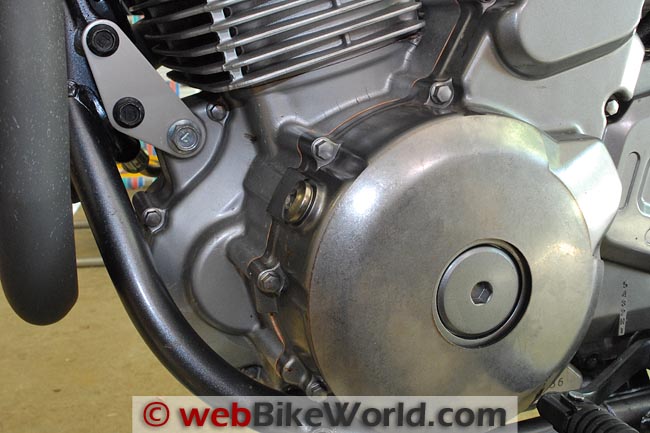
The stator is located on the left side of the Suzuki DR650 engine. The cover has 11 bolts of 8 mm sizeInstalling the Pro Cycle High Output 250 Watt Stator
You could, in theory, rewind your own stator to pump up the volume. I’ve never tried it and it seems beyond my very meager electrical skill level.
If you’re interested, here’s a story on the GS Garage website describing the procedure.
The way I figured it, by time I bought the special copper wire and figured this out, without blowing the DR650’s electrical system sky high, I may as well fork over the cash and buy the new Pro Cycle 250W stator for the DR650.
Also, since this is in the interest of science for webBikeWorld readers, I figured what the heck, even though it’s not cheap at $219.95 (plus shipping).
That makes it somewhere around $4.40 per Watt!
Replacing the stator isn’t too difficult — at least now that we’ve gone through the procedure a couple of times (don’t ask).
Basically, all you have to do is remove the 11 bolts (8 mm) from the alternator cover on the left-hand side of the engine, pull the cover and you’re in.
Before you do that though, it’s probably a good idea to drain the oil from the bike.
The stator on the DR650 runs in an oil bath, which seemed strange to me — an electrical system that runs in oil? I guess so…
You might be able to tilt the bike enough to minimize the amount of oil that drips out when the alternator cover is removed, but it holds about 3/4 of a quart, which is quite a bit.
And don’t forget — you’ll need a new alternator cover gasket, which can be ordered either through Pro Cycle or your local Suzuki dealer ($15.99, part number 11483-32E00 for the 2006 DR650).
You’ll also need to disconnect the wire harness from the original stator before you start, which clips in two places upstream at the voltage regulator and to an electrical harness under the seat.
One wire has a three-prong connector from the stator which mates with an intermediate connector that continues onto the voltage regulator/rectifier.
The longer lead that comes from the TDC (Top Dead Center) pickup, winds back along the left side of the frame before mating up a control unit under the seat.
And you disconnected the battery cables, right?
First, drain the oil (I’ll describe that in more detail in an upcoming article, along with a review of the Scott stainless steel filter, a magnetic filter ring and a magnetic drain plug).
Next, remove the 11 bolts holding the stator cover and carefully remove it.
Be careful, because the starter gear floats on a shaft inside and it can slide right off.
Also, you’ll need a drip pan underneath and some newspapers on the ground to collect any oil drips.
The stock stator is held on to the cover by three Allen head bolts, but before you remove the old stator, look carefully to see how the wires are located as they come out the back of the stator cover.
You also have to remove the two screws that hold the TDC pickup for the ignition.
Be sure to take note of the position of the wiring as it passes below the TDC mounting bracket and don’t pinch any wiring because it’s kind of tight in there.
You’ll have to carefully remove the old gasket and clean up any bits that are stuck to the case (Goo Gone works great for this).
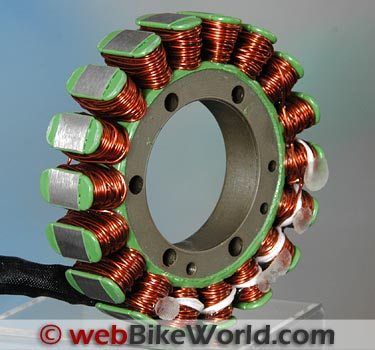
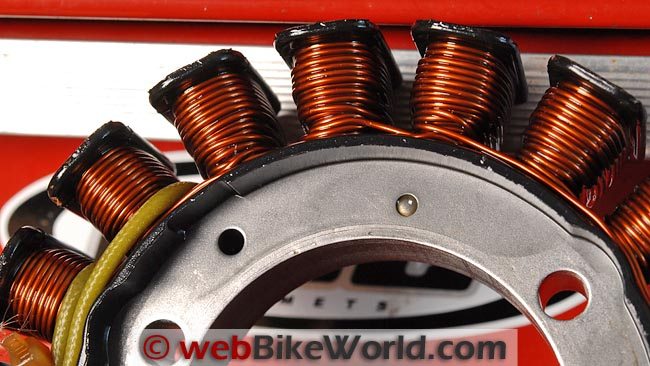
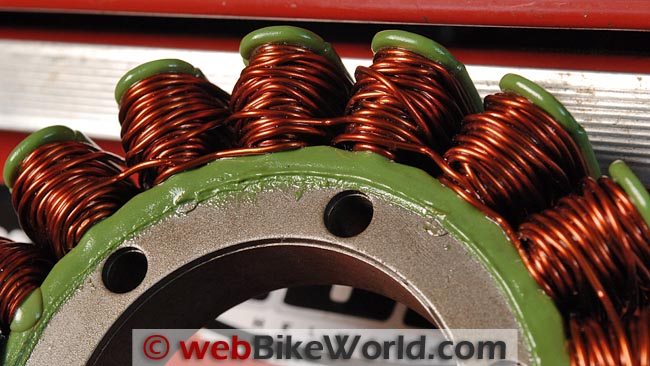
We also cleaned up the replacement 250W stator by carefully grinding and cutting off the bits of epoxy left over from the sloppy fabrication.
To reinstall the cover complete with new stator, first carefully install the new gasket (the engine has a locating pin to help hold the gasket).
Don’t let the strong magnets pull the cover out of your hands as you slide it on!
Then bolt everything back together (the bolts have an 8 mm hex head and take only 4 lb. ft. of torque), connect the harness and you’re done.
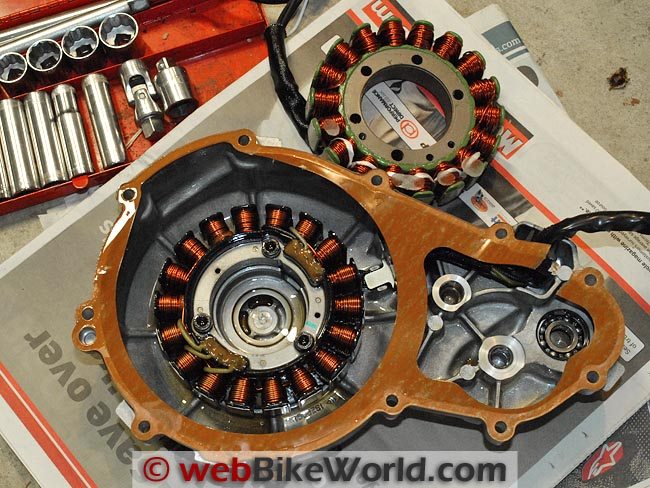
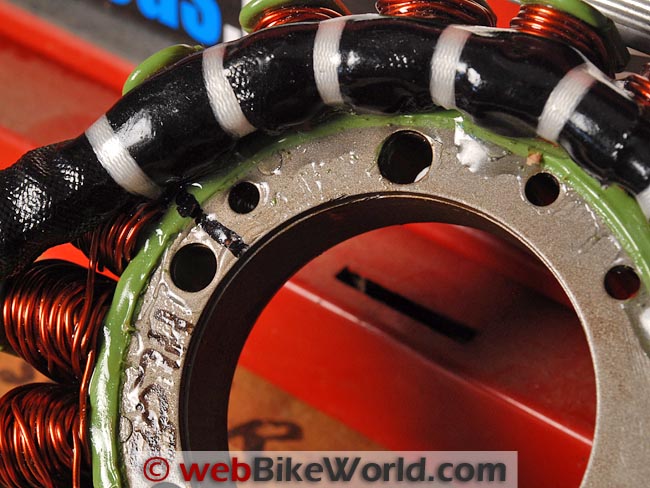
Stock stator inside the cover. Pro Cycle 250W stator on the left and the Suzuki stator on the right. Clean windings on the DR650 stock stator. Looks like hand windings and sloppy epoxy on the replacement stator. The flip side of the replacement stator with more sloppy epoxy.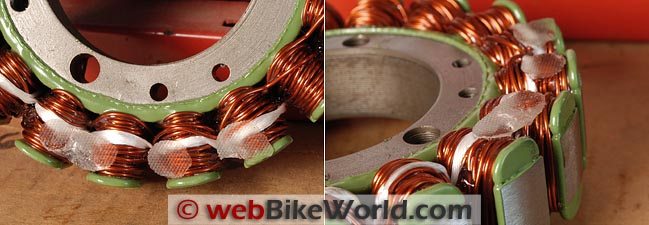 Close-up of epoxy stuck to the windings on the replacement stator.
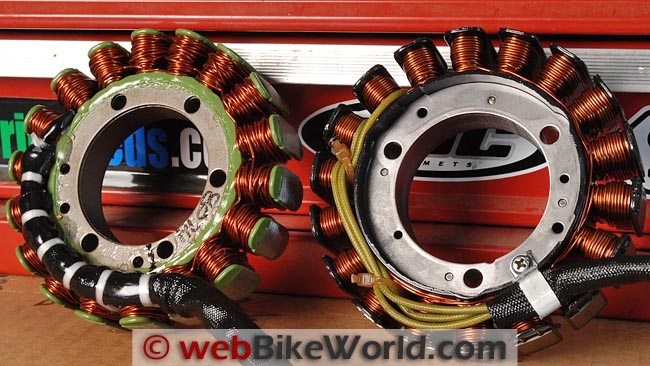
 Close-up of the Pro Cycle 250W stator on the left and the Suzuki stock stator on the right.
Does It Work?
We don’t have a fancy load tester, so we can only estimate the increased output of the new stator.
Also, we wanted to first check the output with the original equipment stator and then compare it to the 250W stator.
To test the output, we put a load on the bike’s electrical system by turning on the high beam and the Krista lights and by firing up an electrically operated tire air pump.
The Shorai LFP battery (review) proved to be too resilient for testing the output of the OE stator, as the voltage just doesn’t seem to drop much with that battery when the bike is started.
So we put the original Bikemaster battery back in the bike; it was being used to power an electric fence outdoors and the voltage had dropped down to 11.2 Volts.
This made it a good candidate for testing the alternator output.
We could measure volts and amps with Chris’ Fluke amp meter, so using Tracy Martin’s book“Motorcycle Electrical Systems” (review) as a guide, we figured the theoretical alternator output for the DR650 should be Watts ÷ Volts = Amps.
So in this case, the theoretical would be 200W ÷ 14.5V = 13.7A. Our reading was 13.5A, which is pretty close.
(Note: Tracy Martin says charging voltage should be “at least 1 volt over the battery’s open-circuit voltage”, thus the 14.5V).
Since the 250W stator would yield a theoretical 25% increase, the new reading should be about 17.125A [13.7A + (13.7 × 25%) = 17.125A].
But with the new stator installed, we got an actual reading of 17.6A, better than expected.
Plugging the numbers into the formula [14.5V × 17.6A = 255.2W] , we estimate the new stator at 255W. To be honest, we were surprised that it actually put out more than the original.
Does the increased output make a difference? Not that I’ve noticed…but then again, who would notice, unless the alternator light turned red?
The Clearwater Voltage Sentry (review) always showed green with the original stator, even with the Krista lights on full blast.
The bike does not have heated grips and I haven’t tried any heated clothing, so I probably wasn’t overloading the capacity of the electrical system.
But, it’s nice to know there’s an extra 50W or so, just in case. 50 Watts won’t do much but, as they say, “It’s better than a sharp stick in the eye.”
Conclusion
The Pro Cycle 250W stator is fairly easy to install and, despite its horrid looks, it apparently works as advertised.
It’s expensive though, and too bad it didn’t pump out another 100W or so, which would make it that much more useful.
Just for comparison, an Omega 450W alternator conversion kit for the BMW R65 Airhead costs $575.00.
The original BMW alternator puts out about 240W, so the Omega conversion yields a big upgrade and, more importantly, it allows the battery to get a charge below 2,000 RPM.
Owner Comments and Feedback
See details on submitting comments.
From “T.G.” (September 2011): “A bigger stator is not a “free” upgrade as in just drop it in and wonder why they did not give you this bigger stator to begin with.
Making more Watts = making more heat. Upgrading the Voltage regulator is also a good idea when doing this kind of upgrade.
When I upgraded my FJR’s stator to a high output, I also retrofitted one of Yamaha’s larger Voltage regulators onto the bike as well.
Now the heat sink is much larger and can handle more than the stator puts out.
Side effect, my stator wires coming from the stator to the Voltage Regulator get a lot warmer than when running stock, my extra 60 Watts seems to be generating more than the wires can handle without getting warm.
This is something that needs to be watched whenever you re-design the electrical system on the bike.
If I had known this I would have ordered a custom wound stator that had leads that were the next gauge larger in wire to keep cooler.”