Adventures in Motorcycle Wheel Re-Spoking With a Suzuki DRZ400S
This is not intended as a complete “how to” article on re-spoking a motorcycle wheel.
Instead, the intention is to relate the problems I encountered along the way when I recently re-spoked a set of wheels for a Suzuki DRZ400S.
Perhaps some webBikeWorld readers will benefit by my mistakes or troubles.
This is only the first time I have ever “tangled” with spokes on a motorcycle wheel.
There are some excellent videos and articles out there with instructions, and also the webBikeWorld article on Re-Building and Lacing Spoked Wheels by Texas Joe.
UPDATE: See Part 2, Motorcycle Wheel Spoke Adventuress (this time on a Suzuki TU250).
Introduction
When I bought a used Suzuki DRZ400S, I had hoped to spend as little money as possible to get it ready for my attack on the remainder of the TAT (Trans America Trail) this coming summer with my friend Glen (see my article “Sena SMH10 on the Trans-America Trail“).
Our plan was to buy smaller bikes than we rode the first time.
We would fix them up as needed, complete the ride and then sell them afterwards.
I already have two bikes, a 2002 BMW R1150GS (report) and a 2000 BMW K1200LTC, so my spouse was not all that excited about a third. But here’s a tip: I was able to sell her on the “ride it then sell it” plan.
A hint of what was to come with the Suzuki can be found in my article on repairing the clock on the DRZ400S, which was only one of what has become many little repairs I have had to deal with on my newly acquired (and quite used) 2003 version.
Where to Buy Motorcycle Spoke
Check Reviews & Prices on AmazonSee More: Motorcycle Accessories, Motorcycle Tire, Motorcycle Helmets
Tires and Wheels
One of those repair items for the DRZ400S that I noted right off was that it was going to need a set of tires for Maryland Inspection.
Not only was the rear tire down to the wear bars, but I noticed the tire build date was a few years older than I felt comfortable with.
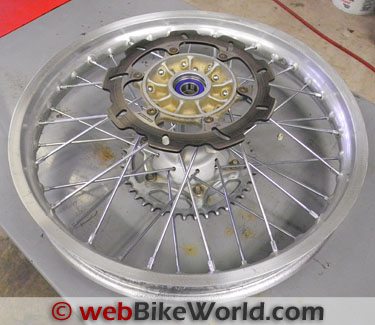
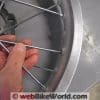
The first wheel to be removed was the rear and after fiddling with the rim lock (my first time dealing with one of THOSE beasts), the tire was off, thanks to the help of my Stubby Tire Tool (review).
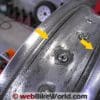
The wheel was pretty beat up, so I thought I’d check the runout on the rim just for the fun of it with the Tachyon Tire Balancer (review).
Good thing I checked; it was far from being true with a noticeable “hump” in one spot as it rotated, so I figured hey, now’s the perfect time to correct it, right?
I had watched a video on lacing a new rim so I figured I should be able to at least true this one up a little bit.
Well, maybe 5 minutes into the job and…DINK!, a spoke breaks. I had noticed that a few of the spokes had already been replaced, so maybe one of the previous owners had tried to do the same?
Now what I do?
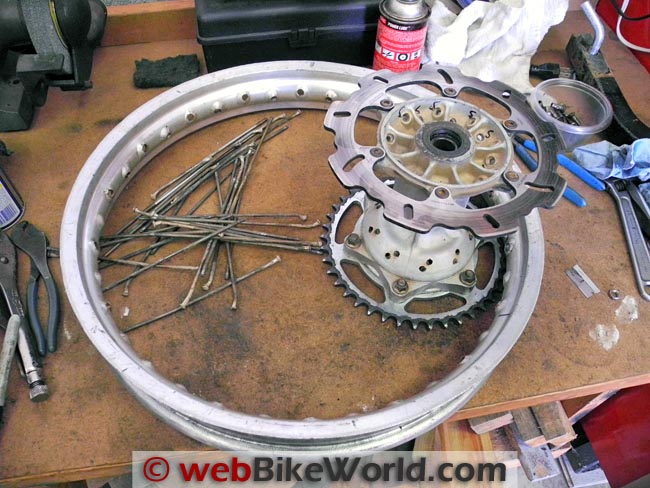
After searching for single spokes, a new rim or a used wheel, I opted to “simply” replace all of the spokes.
I have to admit I was a little wary of this undertaking, but I figured I should be able to get it to a point where it kind of resembled a round wheel; i.e., as it was before I started!
Before diving in, I took several photos, made some notes about the spoke pattern and marked the hub and rim in hopes of getting the two synchronized later.
Cleaning the Wheel
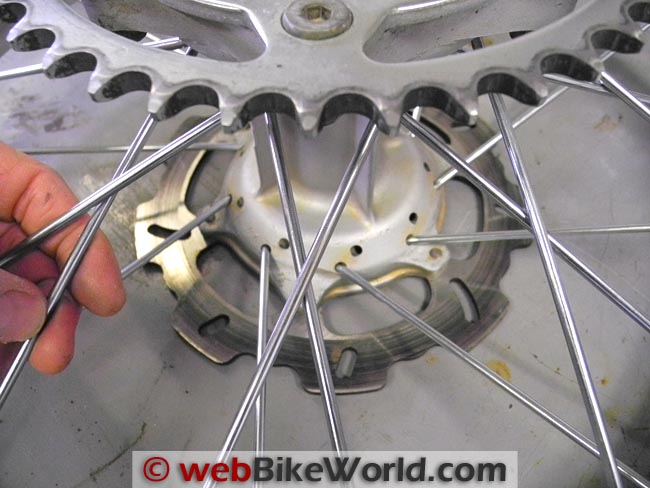
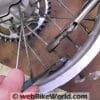
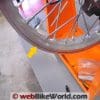
With a little bit of trepidation, I began removing all of the old spokes from the wheel.
Alas, despite some penetrating oil, several more spokes broke and many needed the assistance of a Vice Grip to free the spoke and un-thread the nipples.
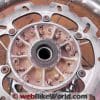
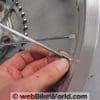
As the unbroken spokes came out, each of the lengths were measured and their mounting location was noted. In the end there were only two sizes, however, with all of the longer spokes located on the chain side of the wheel.
I had noticed beforehand that the rim wasn’t dead center on the hub, but offset towards the brake rotor side.
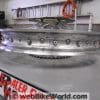
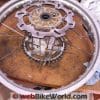
With all of the spokes out and the rim separated, I took time to smooth out some of the many scratches and gouges that were in the edge and sides of the rim.
For this I used my air-powered die grinder and an abrasive pad used for cleaning off old gaskets.
When finished, the rim looked much better and it no longer had any sharp edges or deep gouges. I also used a wire brush attachment to buff the recesses in the rim for the nipples.
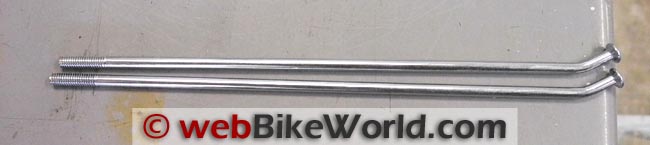 Short and long spoke sizes.
Where to Buy Motorcycle Spoke
Check Reviews & Prices on AmazonSee More: Motorcycle Accessories, Motorcycle Tire, Motorcycle Helmets
Buying New Spokes
Prior to the decision to replace all of the spokes, I experimented with removing one at a time to see which spokes would come out without interference from the others, as had been mentioned in a video.
Sure enough, it was not possible to remove an outer spoke if an inner was still in place. This would be important to remember when it came time to re-lace the rim.
My first attempt to buy a set of spokes (non-OEM) met with disappointment, since all of the new spokes were the exact same size…but not the same as any of the ones that came out; more of an in-between or average of the old spokes.
A return phone call from the retailer brought to light that, despite their listing, the manufacturer reported they would NOT fit my bike.
So, in the end I had to order a set of stock, OEM spokes from the Suzuki dealer, which arrived in just a few days.

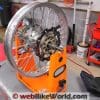
 Starting the Re-Spoking
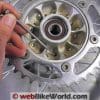
While I had the rear hub off and since I had no real history on the bike, I decided to go ahead and replace the rear wheel bearings.
Not a difficult job at all — if you have a shop manual — since the bearings on one side have to go in first and are driven home after the hub has been heated.
What really threw me for a loop was that the grease seals are installed opposite to what you might think, with the tension springs visible from the outside.
So, it’s seems that someone had been in there before me, because the seals I took out were in backwards.
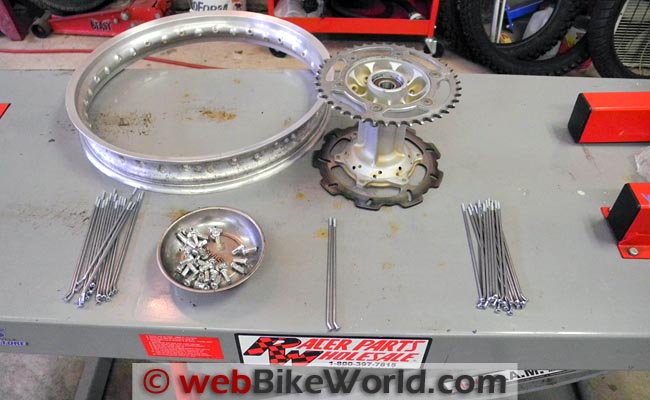
With everything cleaned and ready to go, I laid all of the parts out on a clean work area, separating the short from the long spokes so I wouldn’t mix then up.
A drop or two of WD-40 on the threads of the spokes and the nipples and I started inserting the spokes on one side — remembering to put the outer spokes in first.
The nipples were only screwed on a turn or two so, of course, everything was loose and moving around. With one side done, I carefully turned the wheel over and started on the opposite.
As more spokes went in, movement of the rim relative to the hub lessened, so I had to wiggle it around to get in the last few spokes.
With all of the spokes in place, they were tightened only a couple turns at a time, in steps, until each spoke was beginning to get snug.

Where to Buy Motorcycle Spoke
Check Reviews & Prices on AmazonSee More: Motorcycle Accessories, Motorcycle Tire, Motorcycle Helmets
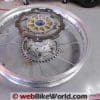
Truing the Wheel and Finishing the Project
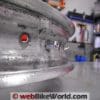
Next, it was onto the truing stand, where I had to really play around with the tightening sequence to get the wheel close to being true.
As I said, the rim was pretty beat up so I didn’t expect to get it perfect, but borrowing ideas seen on a few videos, like using a marker to show where the high spots were, I got it pretty darn close.
I didn’t have a spoke torque wrench at the time so I tightened each spoke by the sound made when struck with a small wrench.
I have to admit that I got kind of lost during the tightening sequence and probably could have done better, but considering the condition of what I had to work with in the first place, I’m content with the outcome.
I will be installing a new front rim on a Suzuki GZ-250 training bike in a few months, so this was a good trial run or warm-up before working with a brand new rim and spokes.
I intend to have a proper torque wrench by then and am shooting for a near perfectly true wheel on that one.
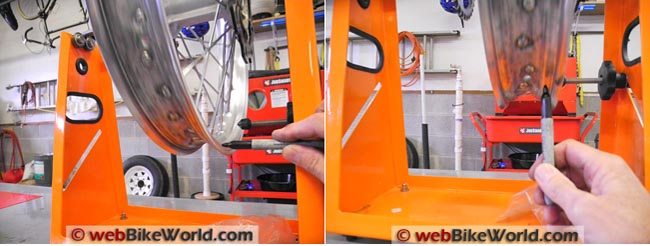 Marking the lateral high spots (L). Marking the high points on the outside diameter (R).
Conclusion
Re-spoking a motorcycle wheel is not a job for those without a lot of patience. You have to be willing to take the time to calmly sit down and systematically approach the project, especially during the truing stage.
I’m glad I was able to “practice” on an old rough rim of my own first, although having a properly true outer rim to work with in the first place might have made the job easier.
References
- Re-Building and Lacing Spoked Wheels
- Motorcycle Wheel Spokes (Part 2)
- wBW Motorcycle Tire Reviews
- wBW Motorcycle Wheels Page
- The Vintage Motorcyclists’ Workshop (Book).
- Buchanan’s Spokes & Rims — Stainless steel spoke specialists.
- Spoke Wrenches and Tools
More wBW: Suzuki DR-Z400S Blog
Owner Comments and Feedback
See details on submitting comments.
Where to Buy Motorcycle Spoke
Check Reviews & Prices on AmazonSee More: Motorcycle Accessories, Motorcycle Tire, Motorcycle Helmets
Other WebBikeWorld Articles Posts