
This is our second experience with the SW-Motech wide foot pegs.
This set is designed for the newest versions of the Kawasaki Versys 650 and 1000.
But there are very few differences, no matter the bike.
The foot peg is virtually the same, the only difference is the mounting points.
Wide foot pegs can make a big difference in comfort and these are dual-purpose.
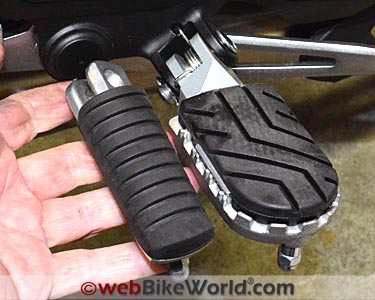
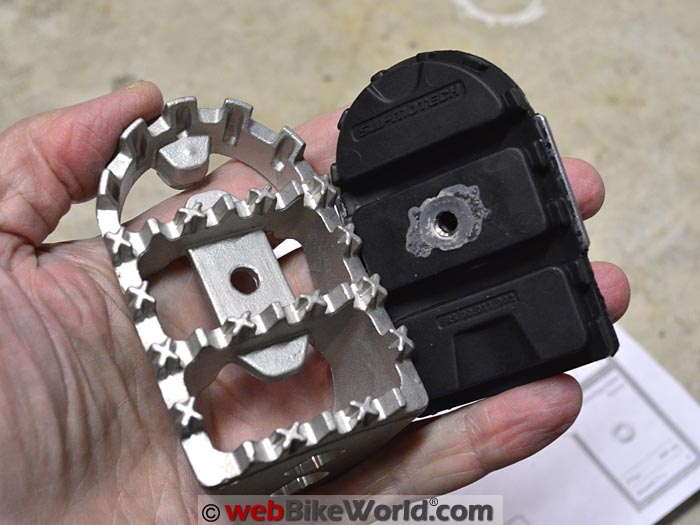
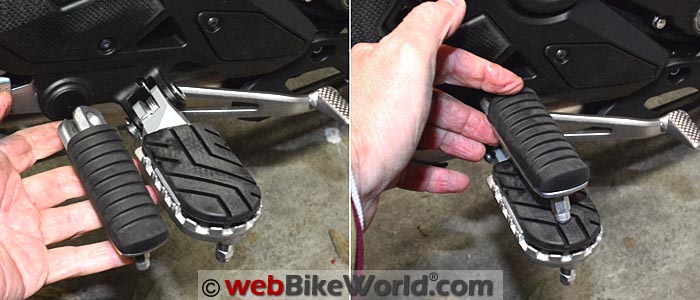
Use the rubber pads on top for the street or take them off to reveal the knobby metal prongs for off-roading.
But since the Versys is a pure street bike, we’ll go with the rubber side up…
We have pretty much covered everything you need to know about the SW-Motech wide foot pegs in this review.
Those were installed on the previous webBikeWorld Project Bike, the 2014 Suzuki V-Strom 1000 Adventure (Blog).
So this is just a quick update to describe how they work on the latest Project Bike, the 2015Kawasaki Versys 650 LT Blog.
The stock foot pegs on the V-Strom didn’t seem that bad although we don’t have the originals on hand, they seemed larger than the very tiny and narrow foot pegs that came on the Versys 650.
Rick noticed the small-feeling Versys foot pegs right away. They seemed to constrain the riding position for some reason and just felt out of place — like they were from a “toy” bike.
We originally wanted to try a different brand of wider foot pegs but we couldn’t really find anything. The good experience with the SW-Motech wide foot pegs on the V-Strom and the ready availability led us once more to SW-Motech.
The installation on the Versys is easier than the V-Strom for some reason…or maybe it’s just that we now have more experience.
Let’s take a Quick Look in photos:
Packaging Notes
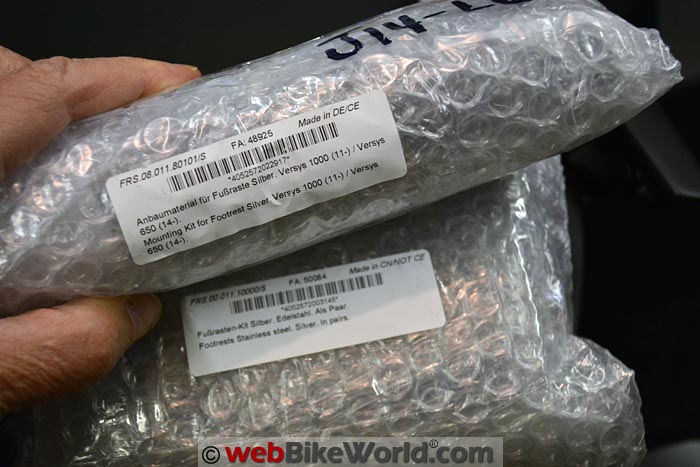
As shown in the photo above, the SW-Motech wide foot peg kit comes packed like an expensive piece of jewelry! The reality is that they could probably throw these in a plain box with no packing and they’d still be fine.
Note that there are two packages. One contains the standard foot peg castings and rubber pads, which are apparently standard for every bike. The only thing that’s different is the motorcycle-specific mounting kit in the second package.
This means that our experiences (and even the mounting) will be the same, no matter which motorcycle you own.
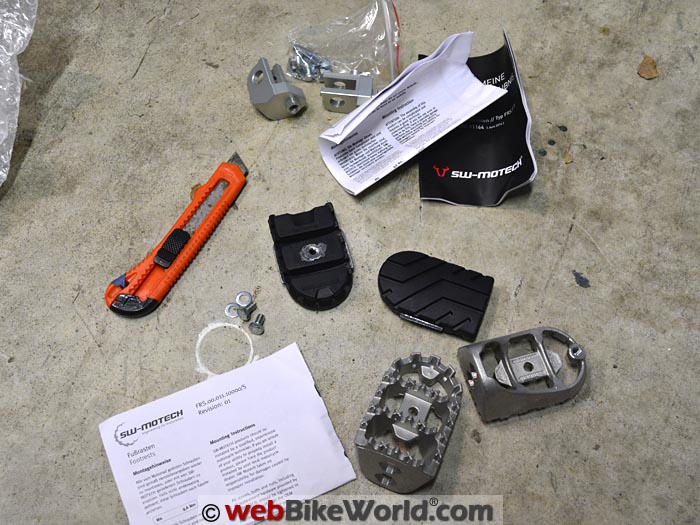
Here’s the kit, consisting of the two foot peg castings, the bike-specific mounts, the rubber pads, the feelers and assorted hardware. This time, we opted to install the road feeler or “hero tabs” on the outside of the foot peg casting, since the Versys is a pure street bike. Here’s the top of the foot peg casting without the rubber pads installed. Do you really want to stand on that all day?The SW-Motech Wide Foot Pegs
SW-Motech makes wide foot pegs for many different motorcycles. They’re very nicely made, as are all of the company’s products.
As with the set we installed on the V-Strom, the main foot peg casting (part number FRS.08.011.10101.S for the Versys) is made from stainless steel, cast in China.
The kit includes the rubber pads or cushions that can be bolted on top or removed if you want the pure off-road foot peg experience with the grippy nubs.
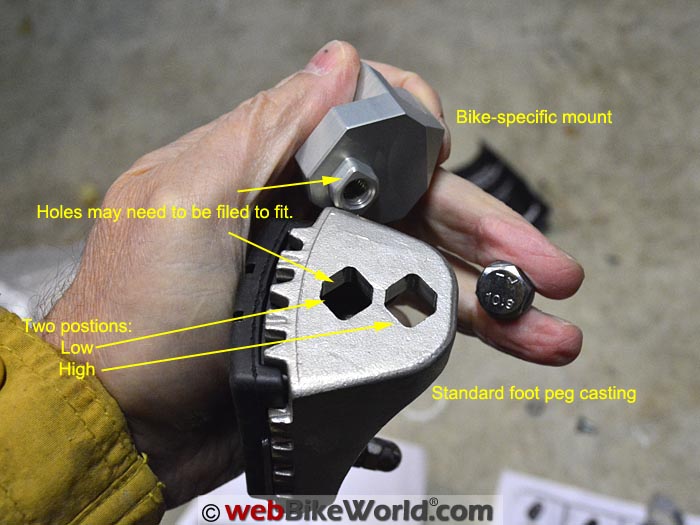
The foot pegs are also adjustable for height via a two-way attachment chosen at time of installation.
While the V-Strom kit fit a variety of other bikes, the Versys kit shown here fits only the Kawasaki Versys 1000 (2012 to 2015), the Versys 650 (2014 and 2015) and the new Versys 650 LT and ABS for 2015 and 2016.
There are also many other wide foot pegs for other brands of motorcycles through Twisted Throttle, the official SW-Motech U.S. importer, retailer and webBikeWorld affiliate.
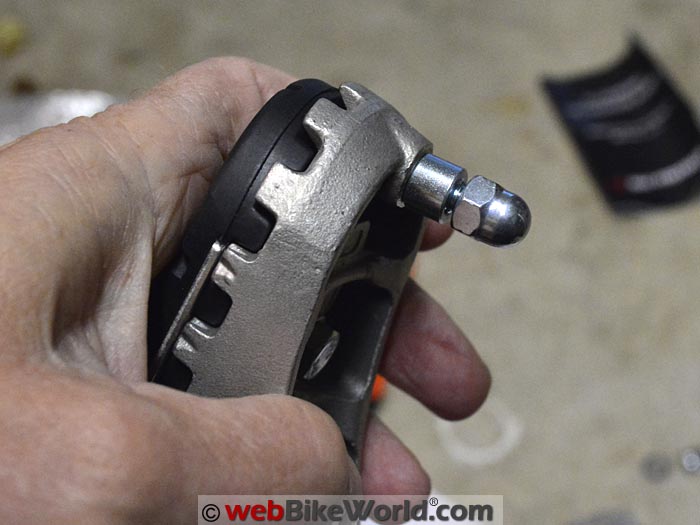
Close-up of the underside, showing the mounting bolt for the rubber pad and the location of the feeler tab on the right. The hardest part of the installation is squeezing the mounting bracket into the rough foot peg casting.Versys Mounting Notes
This is a very simple installation and we covered most of the information you’ll need in the V-Strom review. Here is a .pdf of the SW-Motech wide foot peg mounting instructions for the Versys 650 and 1000.
The foot pegs have two adjustment levels, depending on where you mount the saddle or U-shaped clevis that attaches to the bike. This isn’t something you can adjust on the fly though, it takes some wrenching to re-adjust the position.
Bolt the rubber pads to the foot pegs (unless you want to use the foot pegs with the metal cleats only) and then bolt the fork or “saddle” to the foot peg and they’re ready to install (see the photos below).
The rubber pads are available separately if yours wear out (doubtful).
Here’s a problem with the foot peg casting we had with both the Versys and V-Strom sets. The casting is a bit rough, so the triangular-shaped hole in the casting doesn’t match the machined boss on the mounting clevis that attaches to the bike.
You’ll probably have to use a fine file to chamfer the edges of the casting, then use a vice to squeeze the mounting clevis into the casting. It’s an extremely tight fit.
Otherwise, this is a pretty simple swap and SW-Motech recommends the use of medium-strength thread locker on both bolts.
SW-Motech also provides torque values in the instructions but it’s impossible to get an accurate torque reading on the recessed saddle bolt, so you’ll have to guess (and use thread locker).
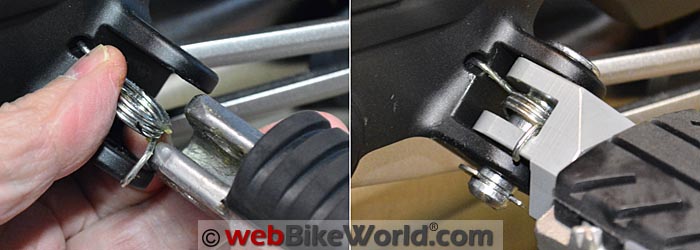
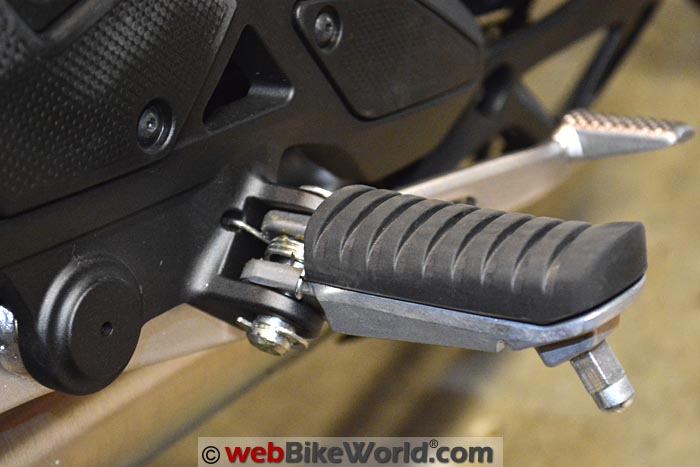
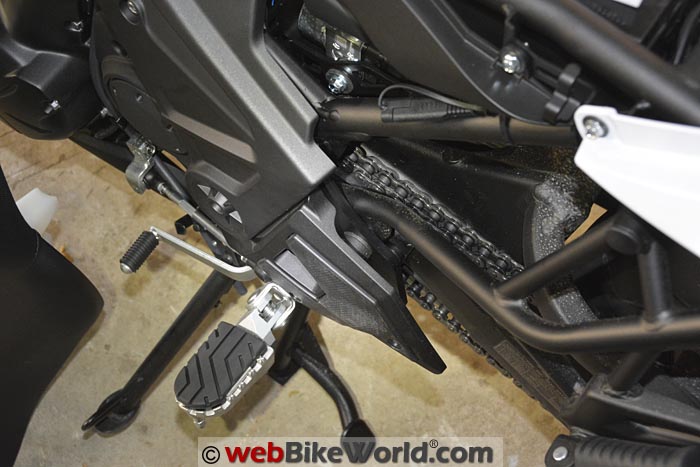
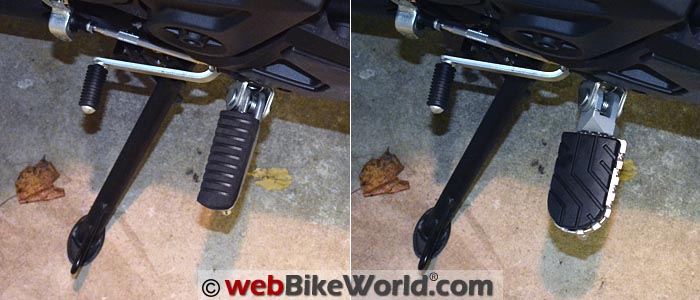
TIP: Hold the spring in place when you slide out the pin from the OE foot pegs, then simply slide in the new pivot pin (R). This is the OE foot peg that came with the Versys 650. Here’s the narrow stock Kawasaki Versys foot peg compared to the wide SW-Motech foot peg. View looking down on the SW-Motech wide foot peg.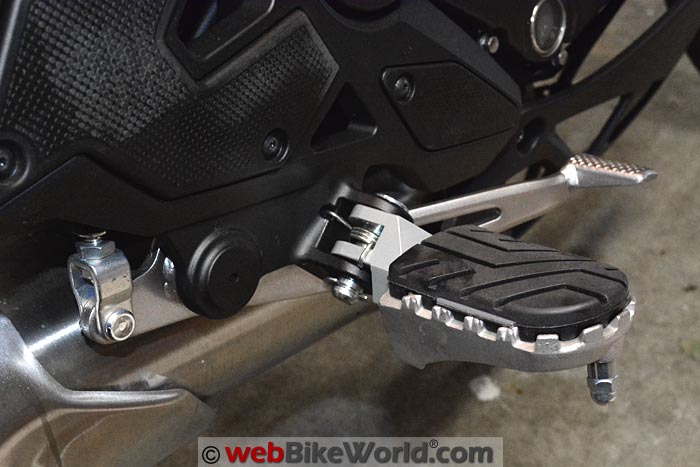 Another view of the SW-Motech wide foot peg. Here’s a comparison of the stock foot peg on the Versys (left) and the SW-Motech wide foot peg on the Versys.
Riding Impressions
The stock foot pegs on the V-Strom weren’t half bad, so the difference after installing the wide foot pegs wasn’t as dramatic as it is on the Versys.
The stock Versys foot pegs just seem like little wire stalks that are not very comfortable and somehow make the bike seem like a 250 rather than a 650.
The wide SW-Motech foot pegs on the Versys give a noticeable amount of extra width and room to move the foot around. Moving from the toe to the center of the foot is much easier and more comfortable.
So bottom line, the addition of the wide foot pegs makes a big difference on the Versys and it’s a dramatic improvement in riding comfort. It makes the bike feel “bigger” — or at least it no longer feels like a 125 or 250.
Conclusion
The SW-Motech wide foot pegs are easy to install on the Versys. Make sure you keep all the old parts just in case you want to return the bike to stock.
We put all of the original parts in a large plastic “zip” bag with a slip of paper inside that describes the contents for posterity.
Like most of the SW-Motech equipment, the wide foot pegs for the Versys are pretty expensive at $159.90 for the pair. They’re also very popular and often go out of stock, so if you want them and you see them in stock, buy now!
Unlike the V-Strom, which didn’t really improve much with the addition of the SW-Motech wide foot pegs, the Versys is a very noticeable difference and we recommend this upgrade.
More wBW: Kawasaki Versys 650 LT Blog
| wBW Review: SW-Motech Wide Foot Pegs | |
|---|---|
| Manufacturer: SW-Motech | List Price (2016): $159.90 |
| Colors: N/A | Made In: China |
| Review Date: April 2016 | |
Owner Comments and Feedback
See details on submitting comments.
From “D.H.” (March 2017): “Just to follow-up, the pegs arrived a few days ago; the order was correct. Installed the pegs yesterday afternoon but haven’t ridden on them yet.
I didn’t have to do any filing on the foot peg casting like you and some others had to, so perhaps QC has gotten better.
It was a tight fight but I was able to do it using only my hands to press the foot peg casting and the clevis together, and I’m not very strong.
Note: there isn’t enough clearance to start the bolt when installing in the lower of the two settings; you need to insert the clevis “pin” maybe half way into the foot peg casting, which then gives sufficient room to get the bolt started.
After which it can be tightened down to pull the two pieces together, making it easier then pressing the parts all the way together by hand anyway.
There’s no such interference when using the higher of the two settings.”
From “H.S.” (April 2016): “I have the SW-Motech footpegs on my KTM 1190 Adventure and could not be happier.
They are bigger than the stock pegs and provide tons of extra traction plus a little extra legroom (I run them without the rubber insert in the lowest position).
The peg does fit tightly on the adapter, but if you know you won’t be changing the height of the peg you can just line it up, insert the bolt, then tighten. Keep up the good reviews.”