Part 3: Where To?
Selecting this icon brings a number of follow-on choices:
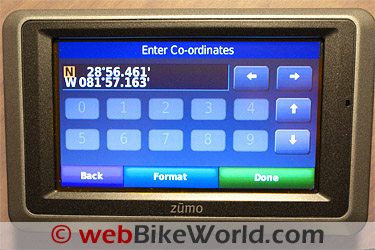
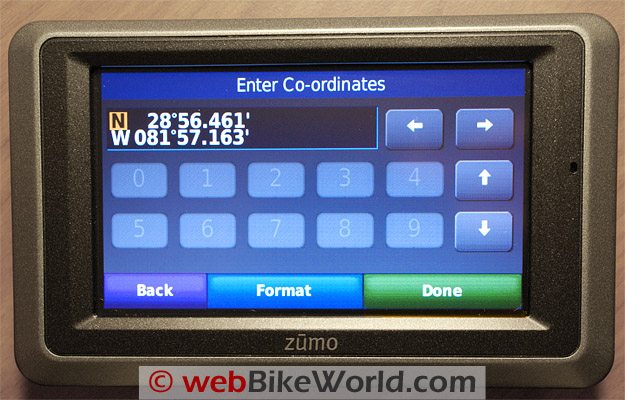
Address, Go Home, Points of Interest, Recently Found, Favourites, Junction, Extras, Cities, Custom Routes, Browse Map and, Coordinates.
To select an address, select a City in the appropriate state or country, using the icon on the bottom strip.
Alternatively, you can “Spell City” or “Search All” for a more global query.
From here the address, i.e., house or street number, if known, is typed in.
Now select “Done”. The next screen will prompt for a Street Name, and if there are a number of matches in the database, the auto-fill feature will bring up a short list.
Simply select the correct match and the system will present the closest address/addresses.
If the correct address is found, press the “GO” icon, which takes you to the map while the system calculates the route depending on the setup parameters in use.
The bottom icons can be used for “Back”: Return to the “Where To” screen; “Map” (provides a view without calculating a route) and “Save” (lets you turn the address in to a “Favourite” and save it off for future use).
GPS Simulator
This is a great tool for GPS 101 purposes, simulating a route or doing a dry-run rehearsal.
Activated by going to “Tools – Settings – System” and turning the GPS Simulator option on, the the simulator works in real time, using average driving speeds, posted speed limits, etc, to provide a realistic environment.
With a location selected from the favourites or typed in, the route is presented on the display.
If you now want to change your destination or add an intermediary point, just select “Menu” from the map screen. Go in and modify the route. For this exercise, a Point of Interest (POI) is selected.
Once a POI is selected, you have the option of making it a “Via Point” or a new destination.
If a “Via Point” is selected, the original route is recalculated and adjusted to accommodate this intermediary point.
Other changes can be made by returning to the “Menu” option.
From here you can select “Stop” the route, or alternatively use the “Detour” function to have the system identify alternate (colored) routings that will still get you to the original destination.
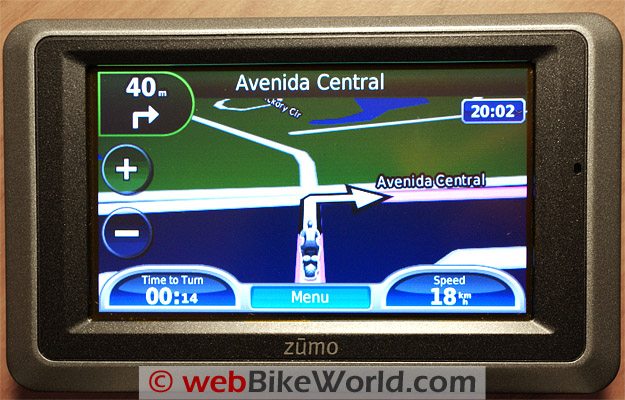
View Map
Pressing this icon will bring up the map showing your current location, as long as the device is within view of the required number of satellites.
If not, the system will show a flashing question mark over the user icon and the top bar will show “Acquiring Satellites”.
If this situation persists, you may need to move closer to a window or go outside or, exit the underground parking garage. Eventually the system will come up with the “Trouble Finding Satellites – Continue Searching” display.
From here you can select “Yes” or “No”. If “No” is selected, the GPS Simulator will be turned on for use indoors.
Tip: Pressing the upper left signal strength icon on the main screen brings up another screen that provides your location in latitude and longitude, the location and ID of the satellites being used, along with their respective signal strength and, your speed and elevation data.
3-D Glasses Not Required
To switch between 2-D and 3-D view, simply touch the “North” indicator arrow icon. Once in 3-D mode, the “Rotate” icon appears on the right hand side of the screen.
This provides an interactive means to change the viewing angle dynamically and allows a close-up or street-level view of things.
Information Display Tailoring
Customization of the View Map information is provided for via the Trip Computer page.
This allows tailoring of the information fields displayed to the Left and Right of the Menu button on the map page.
Touch either of the Left or Right information fields brings up the Trip Computer screens.
On the first screen the trip gauge appears in the upper left, with the 360 degree compass display ring immediately below it.
When “Off-Road mode is selected, a Red Arrow indicates the direction of your destination…just as an advisory of course.
The data fields on the right side of the screens provide information about the actual trip.
These fields can be customized through the “Settings” so that desired information is presented on the main screen in the Left and Right information fields.
When the device is connected to the motorcycle mount, the fuel gauge, if configured, will show the distance remaining.
The trip data, fuel and maximum speed fields can be re-set.
Some 660 Navigation Specifics
From the “Settings” menu, select the “Navigation” sub-menu.
This screen shows the previously selected Route Preference, Avoidances and Recalculation Mode.
Selecting “Avoidances”, which is currently shown as “Enabled” brings up an options check-box list: U-Turns, Motorways, Toll Roads, Traffic and Ferries, Car Share Lanes, Unpaved Roads and Seasonal Closure.
At the bottom of the screen, a “Custom” icon is displayed.
Activating this brings up two choices: Add New Avoidance Area or Add New Avoidance Road. If a route is being planned or if obstacles are encountered, the avoidance area or obstacle can be defined and added to the route display options.
This is dynamic and much appreciated new feature.

The Recalculation Mode menu provides some enhancements as well and the user now has three choices: Auto, Off or Prompted options.
For those who like to wander, with or without guidance, this is a handy feature…and the prompts are timely.
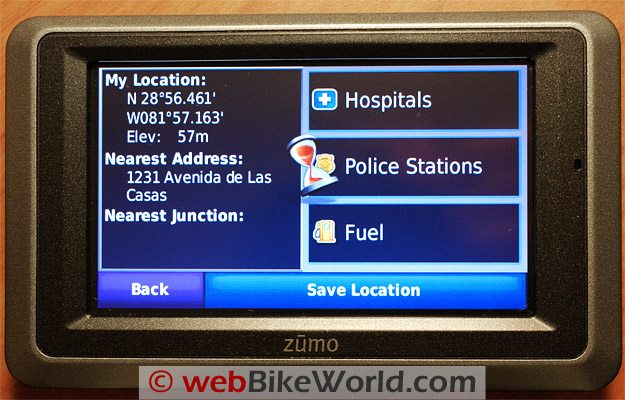
The “Where Am I?” screen.Where Am I?
One of the most useful tools available is the “Where Am I?” selection.
Activating this icon brings up an information screen that provides “My Location”, showing coordinates, elevation, the nearest address and the nearest junction point, all on the left side of the display.
On the right side of the screen are icons for accessing Hospital, Police Stations and Fuel location information relevant to your indicated location.
Touching “Save Location” saves the current location for ongoing or future use.
All in all a one stop snapshot that can be extremely useful in emergency situations.
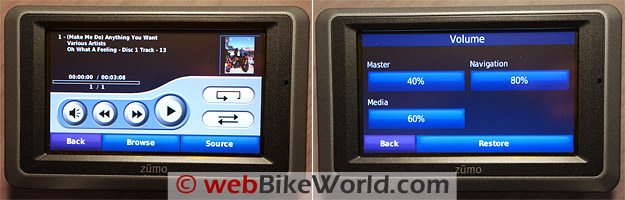
Garmin zumo 660 MP3 screen (L) and volume.Garmin zūmo 660 Media Player and A2DP
The zūmo 660 Media Player appears to be the same as that used for the zūmo 660 but there are some subtle changes.
The music player still only handles MP3 files (other options would be great), but on the other hand, it now allows Playlists to be Created, Edited and Saved on the device or externally on a PC.
For true portability and flexibility, the 660 has four audio output sources:
- Speaker (active if no other port or Bluetooth is in use);
- Integral 3.5mm connection on the unit itself;
- Harness 3.5mm connection lead; and
- WWireless option (Bluetooth wireless with A2DP compatibility providing a stereo stream).
zūmo 660 Help!
The zūmo 660 “Help” tool is pretty impressive and very useful. It won’t get you home by itself, but it will allow you to select or search for the necessary steps needed to get you on the right (guided) path.
Selecting the Help icon brings up an options list: Settings, Where To?, Favourites, Map, Navigation, Tools, General Information, Troubleshooting and finally, Hands-Free Calling.
A “Search” icon is also availab
| Garmin zūmo 660 Review: | |
| ▪ 1: Introduction to the the zūmo 660 | |
| ▪ 2: Physical Tour | |
| ▪ 3: Where To? | |
| ▪ 4: Using the zūmo 660 | |
| ▪ 5: zūmo 660 Specifications | |
| ▪ 6: zūmo 550 vs. 660 Comparison | |
| ▪ 7: Installation | |
| ▪ Owner Comments (On Page 1) | |