It took me just about one year to get this hugger installed on my Multistrada 620. Hopefully you can do it in about 1/52 of that time.
The story starts on March 15 of 2008, when I ordered the “official” Ducati carbon fiber hugger for the Multistrada 620 from the local dealer. They charged my credit card for the $272.00 at that time.
I figured it would take maybe a month or so to get it shipped over from Italy. But a month turned into two, then three, then four… I could have cancelled the order, but it started to get, well, interesting, ridiculous and silly.
So I figured I’d hang in there to see how long it really would take and then report back to you, our webBikeWorld readers.
Back and forth it went — and don’t forget they still had my $272.00. After much email traffic between me and the dealer, from the dealer to Ducati North America and from Ducati North America to Italy, we finally got notice that the part would arrive. It was now December of 2008, 9 months since the order was placed.
I got the call on New Year’s Eve, and went down today to pick it up. The parts guy brought the box out from the back and I knew right away that this wasn’t going to be pretty — the box was badly beat up and one side had been crushed.
He opened it up and there it was, a carbon fiber hugger with no packing around it, no protective wrap — nothing. Just a piece of carbon fiber, rattling around in a big box.
It had about a 3″ crack down the middle and it was pretty ragged and it looked like hell. This was probably the worst piece of carbon fiber I’ve ever seen — like it was made in somebody’s garage, a first try at making carbon fiber.
It had loose fibers all over, a terrible finish with no clearcoat, stress fractures all over, sharp edges, bits of the mold and mold release sticking out… Ducati should be ashamed of themselves. This should have never gotten out of the shop of whomever made it, much less shipped to a paying customer.
So at this point, I threw in the towel and got my money back. Apparently, I am the only guy in the world who actually ordered the official Ducati Performance Parts carbon fiber hugger for the rare and getting rarer Multistrada 620, and they must have fabricated this hugger in Uncle Louie’s carbon fiber works and shoe-shine shop.
Based on this experience, my advice is to forget Ducati for these type of parts — they really let me down on this one. It reminded me very much of the Ducati of old and not something you’d expect from a “world class” company in 2009.
Monster 620 mud guard, Ducati part number 56510301A.
What next? I still wanted a hugger. The Multistrada 620 (and, I assume, other flavors of the Multistrada) needs one badly. The bare rear tire throws up all sorts of dirt, mud, yuck and debris over the monoshock and everywhere else under the bike.
So I did a bit of research and learned that some Multistrada 620 owners had adapted a plastic hugger that was originally designed for the Monster for use on the Multistrada. Why didn’t I know about this earlier? I guess I had become enamored with the idea of having a real carbon fiber part, made by Ducati specifically for the bike.
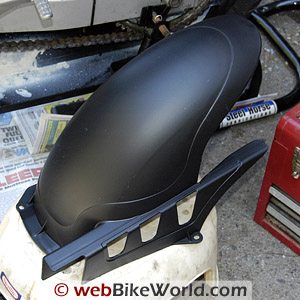
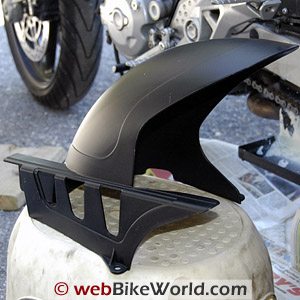
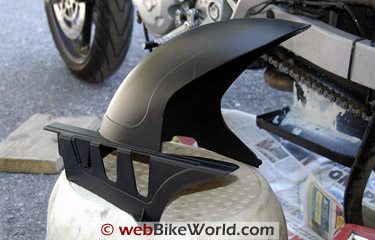
The Monster hugger is for the 620 Monster and it’s called a rear mudguard, Ducati part number 56510301A. The price I was quoted at the dealer was a very reasonable $43.80!
The part arrived only a few days later in good shape. It’s made from some type of plastic or ABS and although it probably could be painted, as I did with the hugger on the GT1000, the Monster mudguard has a built-in chain guard (which some owners do not like).
This gives it a more complex shape than the GT1000 hugger, so I figured I’d leave it in the unpainted black state rather than try to mess with all those complex corners.
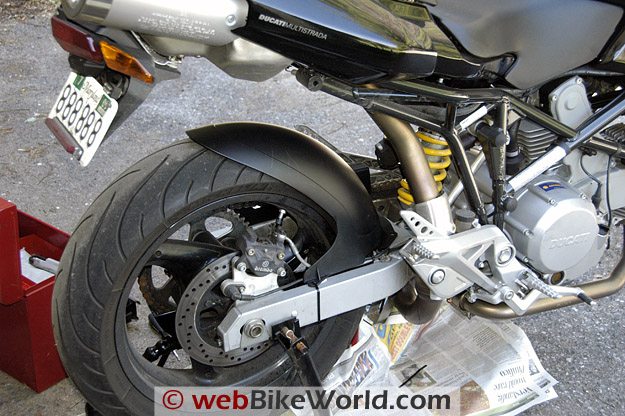
Dirt and crud in front of the tire without the mud guard (L). Front right bolt hole (R) doesn’t need to be secured.
The Monster mud guard fits almost perfectly to the bolt holes on the left side front and rear of the Multistrada 620 swingarm, but the Monster hugger also has a hole in the right front and right rear that have no matching bolts on the Multistrada 620.
Some owners have drilled the extra two holes in the swingarm on their MTS620, but I didn’t really want to do that. Or at least I wanted to see if I could make it work first as a sort of trial and to make sure I knew exactly where the holes should be drilled if I wanted to go that route.
So I bolted the left-hand side front and rear and found that the hugger fits pretty tight without the extra bolts. It fits so tightly that drilling for the extra bolt on the right-hand side at the front didn’t seem necessary at all, but to line the hugger up correctly over the tire, I’d have to do something about the right-hand side in the rear to pull the plastic over a bit and get the top of the hugger to line up correctly over the tire.
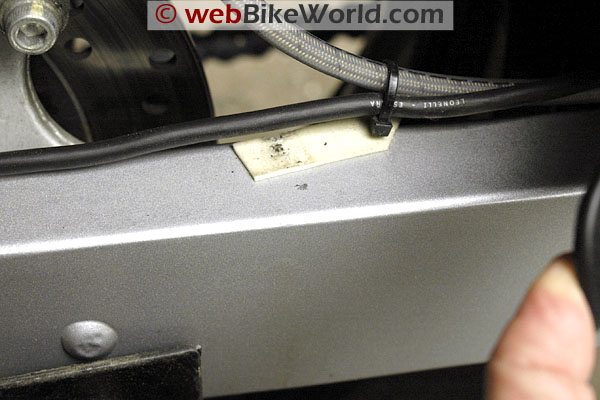
Again, I didn’t want to drill the swingarm, more out of laziness than anything else. So I cleaned off the bottom of the tab on the hugger with some rubbing alcohol, then put a piece of double-sided tape on it. I pulled the hugger back until everything looked even (looking at the tire and hugger from the rear of the bike to make sure they were lined up) and then I stuck the tab with the tape down on to the swingarm. I then used a heavy cable tie around the swingarm to hold the hugger in place.
So far, it’s been working fine. The only issue might be one of style — the cable tie certainly isn’t as clean or professional-looking as a properly done bolt hole. But it works for me, no one has noticed and the entire installation took only a few minutes.
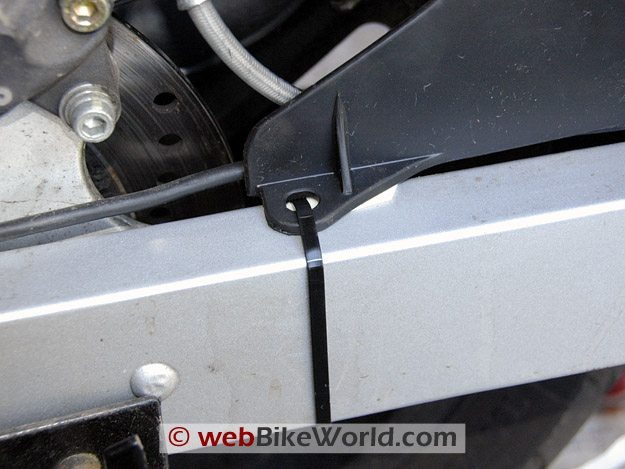
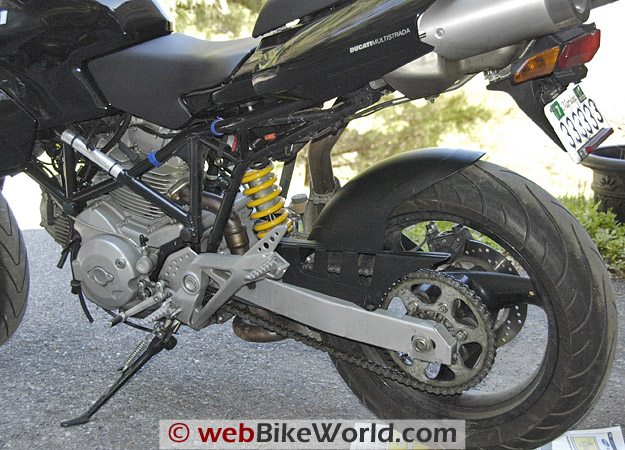
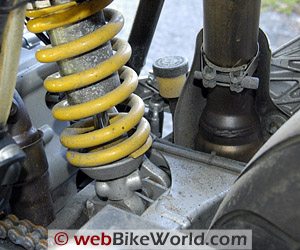
Here’s how it looks:
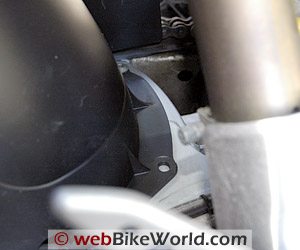
Monster 620 mud guard installed on the Multistrada 620, left side. Close-up of cable tie holding the hugger. The double-sided tape can be seen under the bolt hole tab.

Conclusion
Adapting the Monster 620 hugger for the Multistrada 620 can be a quick and easy project. Fussy types can drill the correct holes in the swingarm, but just make sure everything likes up first, and I assume the holes would also have to be tapped.
We’re interested in hearing from Multistrada 620 owners who have installed the Monster 620 hugger the “right” way — perhaps you can let us know how you fit the bolts into the Multistrada’s swingarm (see update below in comments)?
Owner Comments and Feedback
Not all comments will be published (details). Comments may be edited for clarity prior to publication.
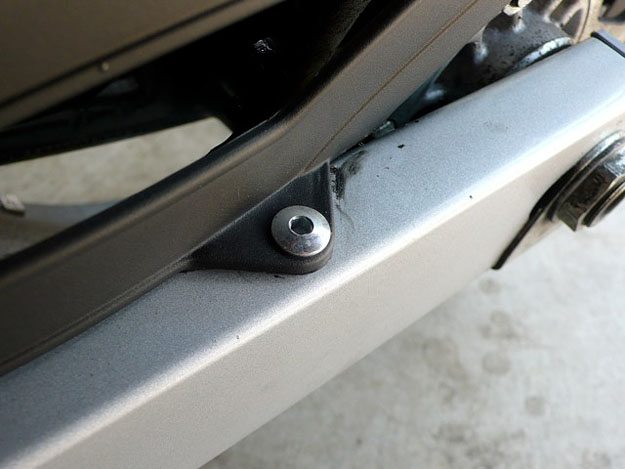
UPDATE (From Author): The cable tie broke the first time I lifted the Multistrada on the rear stand. So I decided to drill the swingarm and add a self-tapping screw. Here’s how I did it:
 I carefully lined up the hugger to make sure it was even on both sides, then I used a pencil through the hole in the hugger to make an index mark on the swingarm.
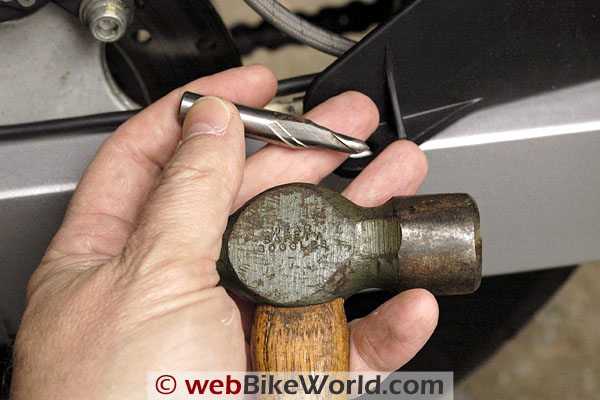 Next, I used a center punch to mark the hole. This will give something for the drill bit to grab.
 Here’s the drilled hole.
 And here’s the final result. I used a hex-head self-tapping screw, probably about 2 sizes larger than need be, but it was the only one I had on hand.
From “M.R.” (5/09): “Easy attachment…drilled small holes and used self tapping screws (in this case self tapping Allen screws):