Introduction
So, you’ve made the decision to build your own DIY electric skateboard; good on you! Firstly, there are a number of aspects to consider before starting your eBoard project. From design components to picking the right battery, we aim to cover the essential aspects of building your own eBoard from scratch in this guide.
A good quality electric skateboard costs between $400 to $800+, so it’s no wonder that people build their own. If you still feel like a pre-built eBoard is for you, feel free to check out our electric skateboard reviews now. Otherwise, let’s jump straight into our guide to building your own DIY eBoard, starting with the fundamentals of how and why they work:
How Does an Electric Skateboard Function?
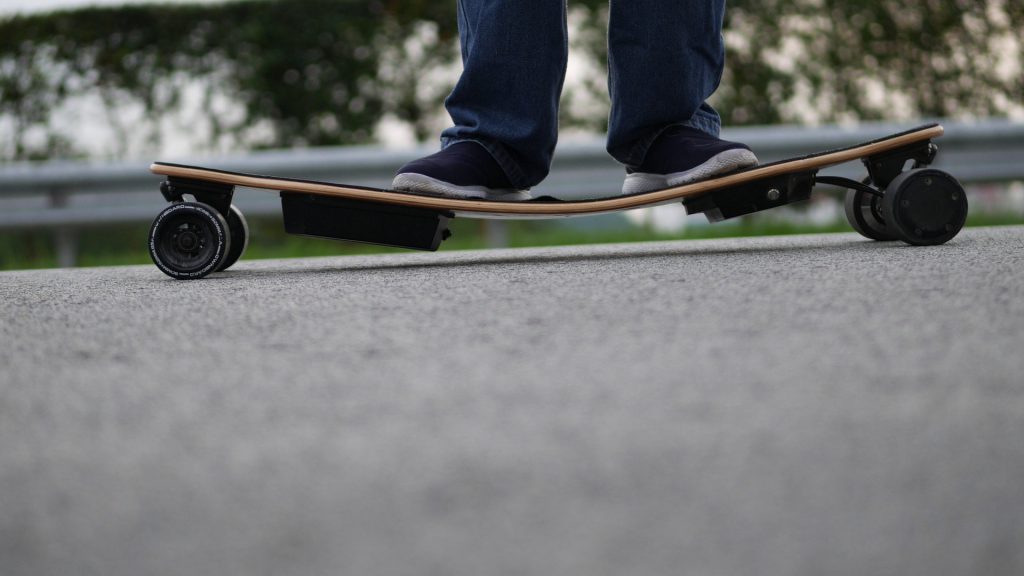
Understanding how something works is integral when building, repairing or upgrading almost anything. An electric skateboard is no different, although it is mostly a regular skateboard with a few helpful components added.
For example, all eBoards require either a belt or hub motor (similar to ebikes), a controller, and a battery suitable for the motor output. Steering remains the same as traditional skateboards, with the rider required to lean left or right to turn.

The main benefit to building your own eBoard is the bespoke experience each one provides. They’re easily customized to suit your requirements and go as fast or as far as you want them to—within technological limits of course. Pre-built eBoard buyers do not have this liberty, instead paying the full price for a board built to their specifications.
Although most brands offer warranties and products of good quality, riders could be left with components or performance not fit for purpose. Therefore, we believe building your own electric skateboard is a great project for even half-serious riders with a technical mind. Continue reading and uncover everything you’ll need to make your dream DIY e-Board a reality.
What You’ll Need (Design & Components)
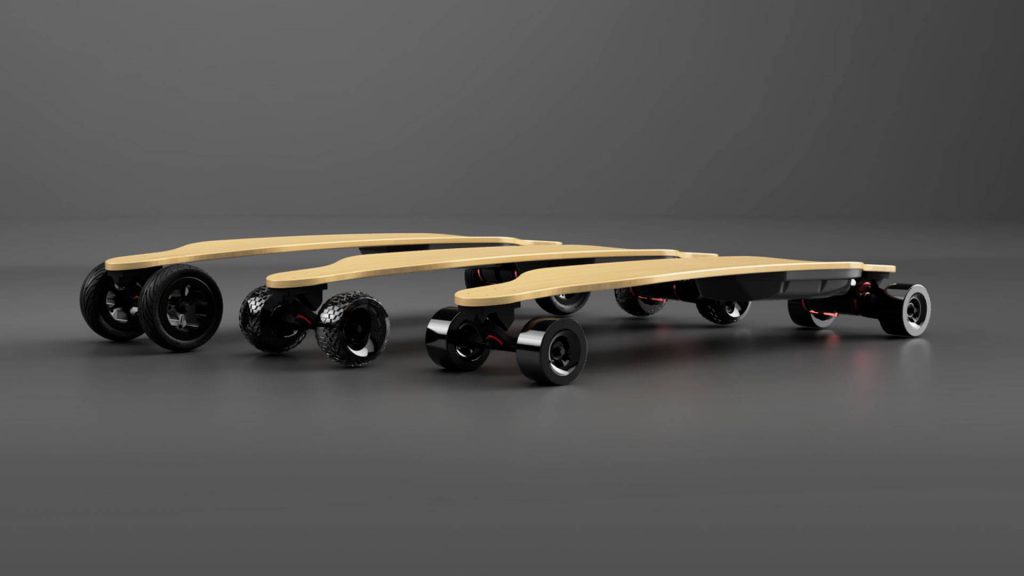
Choosing the Right Deck
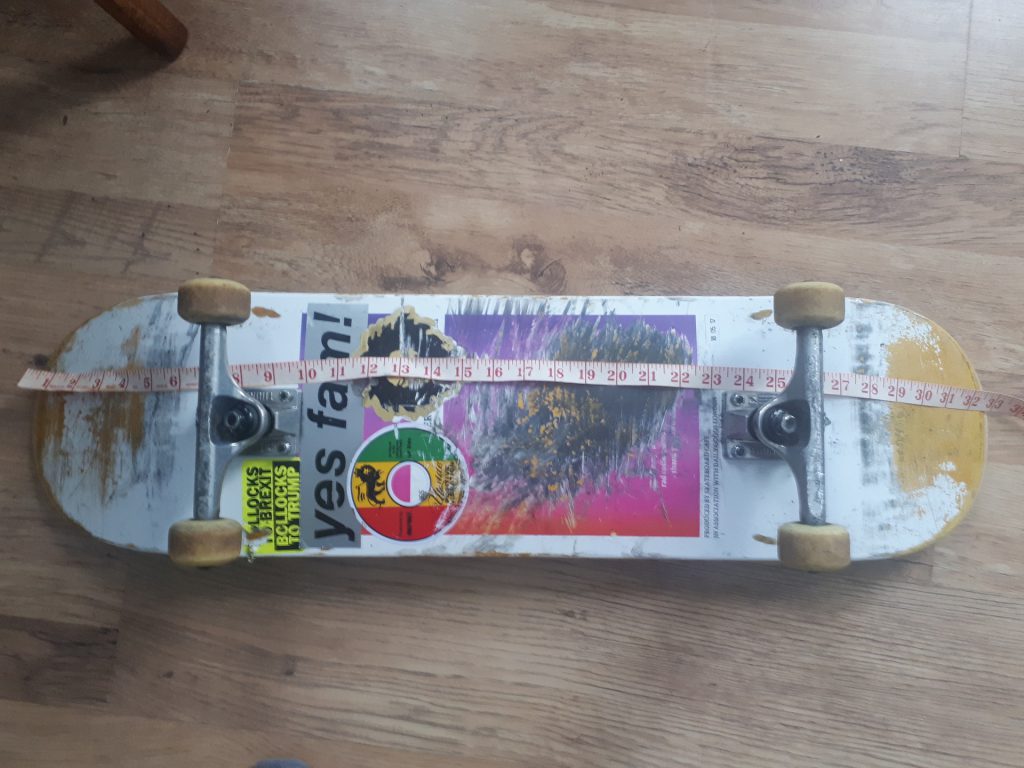
One of the main components of any skateboard, a good deck is large enough to comfortably ride safely. Unless you’re converting an old skateboard, you’ll probably be buying a new deck.
Before buying any old deck, riders must first account for the wheelbase, deck flex and shape. These three prove the most important factors any deck and should be planned for beforehand, briefly explained below:
- Wheelbase: The overall distance between (typically the baseplate) of each truck, limits where electronics can be mounted. Make sure to plan to have enough space for your battery, motor, controllers and other such components.
This reason is partly why we recommend opting for a longboard design, typically of 100cm or longer. Lastly, make sure that you have at least 120mm of ground clearance for the (average) motor and any other component under the deck. Learn more about wheelbases here.
-

Deck Flex: How much does the deck flex or bend when you stand on it; will this cause an issue with certain components, such as a long battery? As a rule, flexible boards mostly suit low-speed riding and offer great shock absorption from the deck alone. However, most electrical components are not designed to bend, which can cause issues for DIY eBoards.
As such, we recommend avoiding flexible parts of the deck, such as the middle. Instead, place solid components such as batteries behind the front or rear truck, with the connecting wires bridging the gap. You can also carry connected/cabled components loose in a bag, although we really do not recommend this. Read about deck flex in greater detail here.
-

Deck Shape: The shape of your chosen deck will dictate the curvature between both sides of the board, alongside which components remain suitable for use. These deck shapes come in the following: Concave, camber, rocker, “W” concave and drop deck. Things might get a little complicated here.
Whilst each deck shape comes with its own pros and cons, we personally favour the drop deck for its stability and comfort; although they definitely do require more technical knowledge to build on. Read this post from MellowBoards for more information on deck shape.

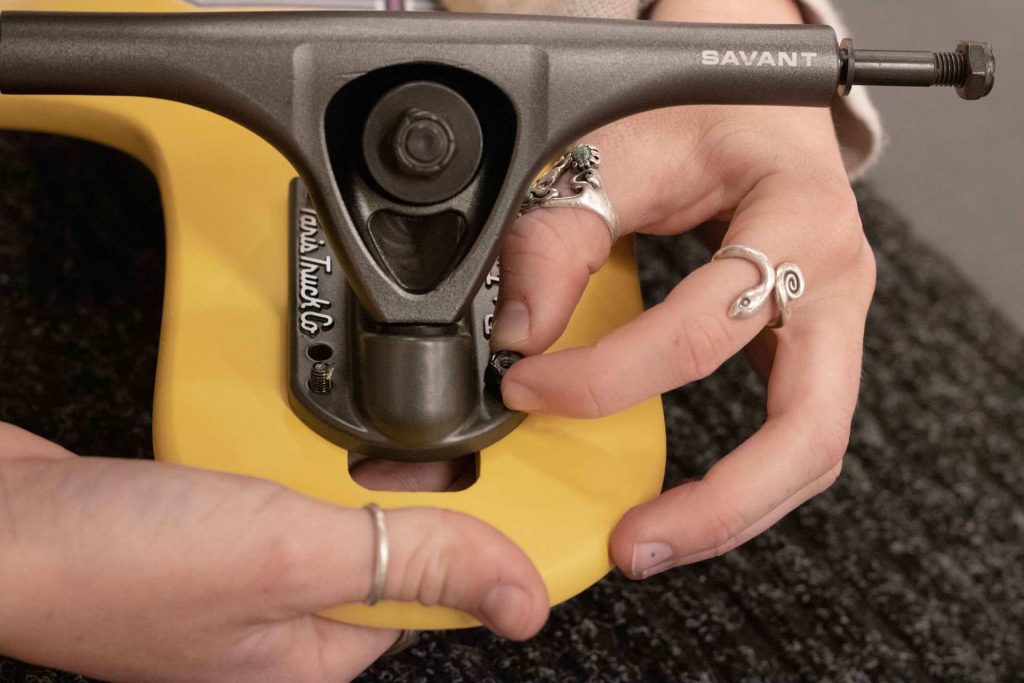
Wheels/Trucks
Firstly, the necessity for separate wheels and trucks relies on your motor choice. For example, hub motors are incorporated within the wheel already, so riders with this option need not worry about this. However, belt drive motors require wheels compatible with your chosen model.
Clearance also remains one of the most important aspects in choosing a set of wheels, requiring space from the ground to accommodate for the motor, battery and other components.
If you decide to use a belt motor, there are two main types of electric skateboard wheels to consider; ‘urethane’ and ‘pneumatic’, each with its own pros and cons.
Urethane wheels are completely solid and extremely hard to break, whereas pneumatic tires offer great shock absorption and grip at the cost of durability. For this reason, we heavily recommend choosing urethane wheels, although this still depends on your intended use and route.
The Best Motor for a DIY eBoard
As discussed under “wheels & trucks”, hub and drive motors are the two choices all DIY projects face. Belt drives used to be the only choice for home-built e-Boards, operating as a pulley system with a motor gear pulling the belt, thus turning the wheel.
Although a bit more expensive, hub drive motors have quickly taken over as a top alternative to belt driven models. This is mostly because the motor is attached straight to the wheel, essentially removing the need to purchase wheels when building your board.
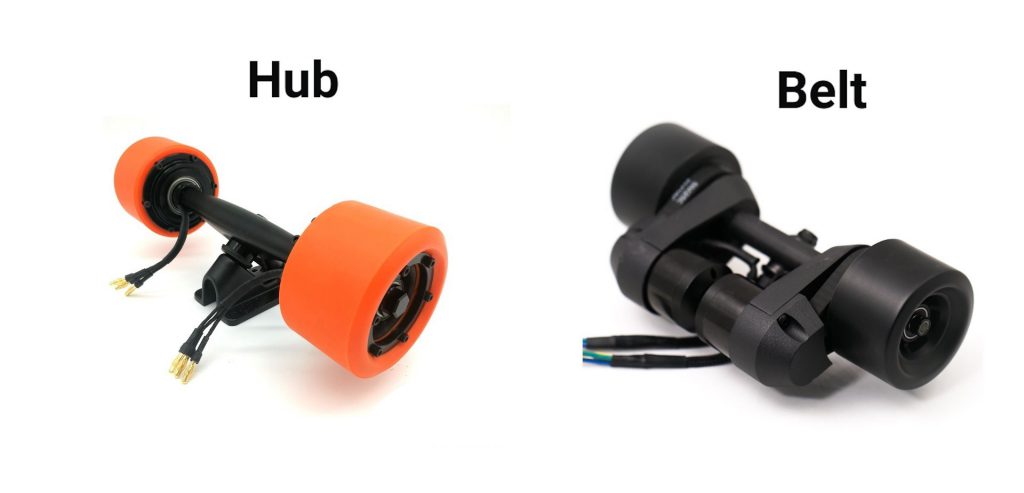
Belt Drive vs Hub Motors
Without power, hub driven eBoards operate much better as traditional foot-powered skateboards, whereas belt driven boards prove much more difficult to push. Some builders also believe that belt driven models are less reliable, containing more components that may potentially break.
However, hub drive motors are much more difficult to repair, due to a more complex mechanism and smaller parts. Despite this, we firmly believe hub motors remain the top choice for almost everyone building their own electric skateboard. They prove more reliable and offer better performance.
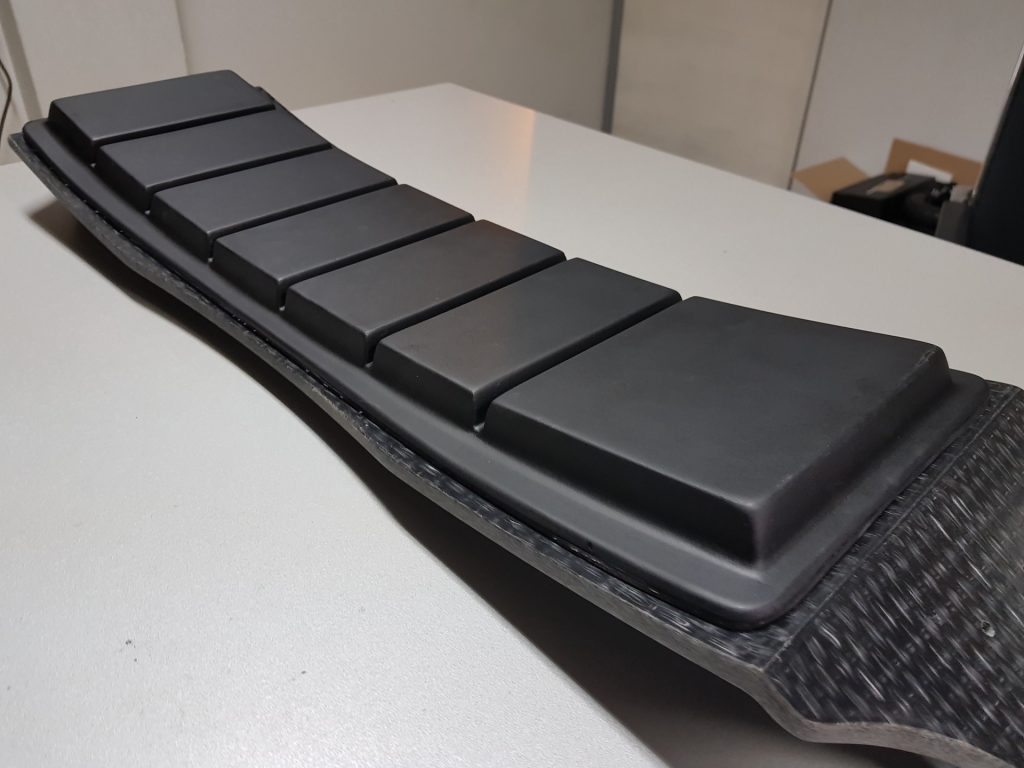
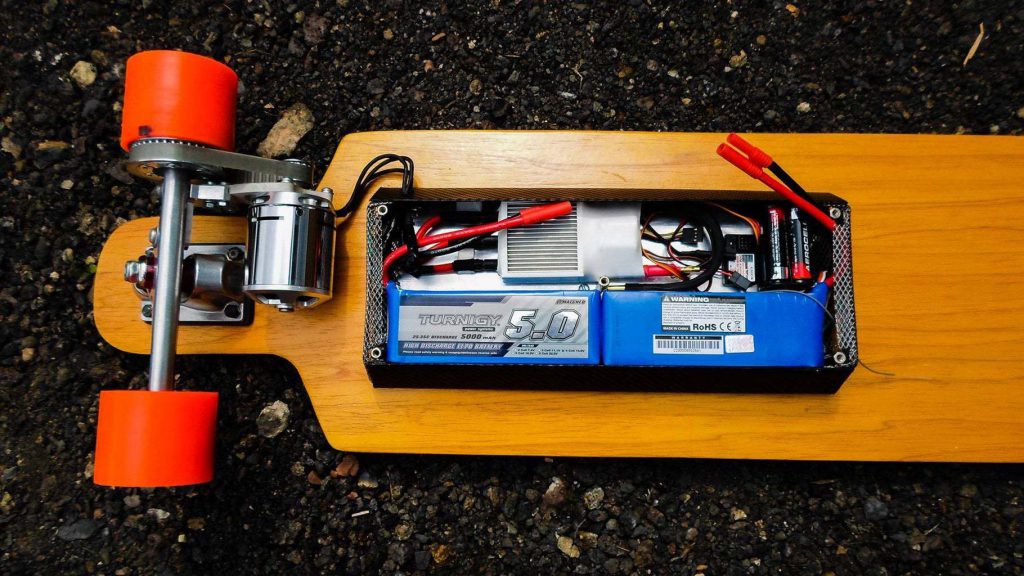
Cases & Protection
Cases remain the primary method of protecting the components of your eBoard. We recommend choosing a good quality case capable of withstanding harsh hits and bumps; along with exposure to the elements. Worth noting, most of these cases do not come pre-drilled, requiring riders to drill their own for charging ports, cabling and any power switches.
What Battery Should I Use for My DIY Electric Skateboard?
A crucial component for every build, the battery pack is responsible for powering everything else on your electric skateboard. We cannot emphasize enough the need to choose a high-quality battery pack for your build and avoid cheap options. Even if you have an incredible motor output, a bad battery will result in poor performance for everything.
Alongside this, some low-quality batteries experience ‘voltage sag‘ under periods of pressure, which could lead to a complete stop when under stress. Choosing a good battery for a higher price often saves money over time, thanks to a longer lifespan on average.There are a few battery types to choose from, although the main ones are lithium-polymer and lithium-ion packs.
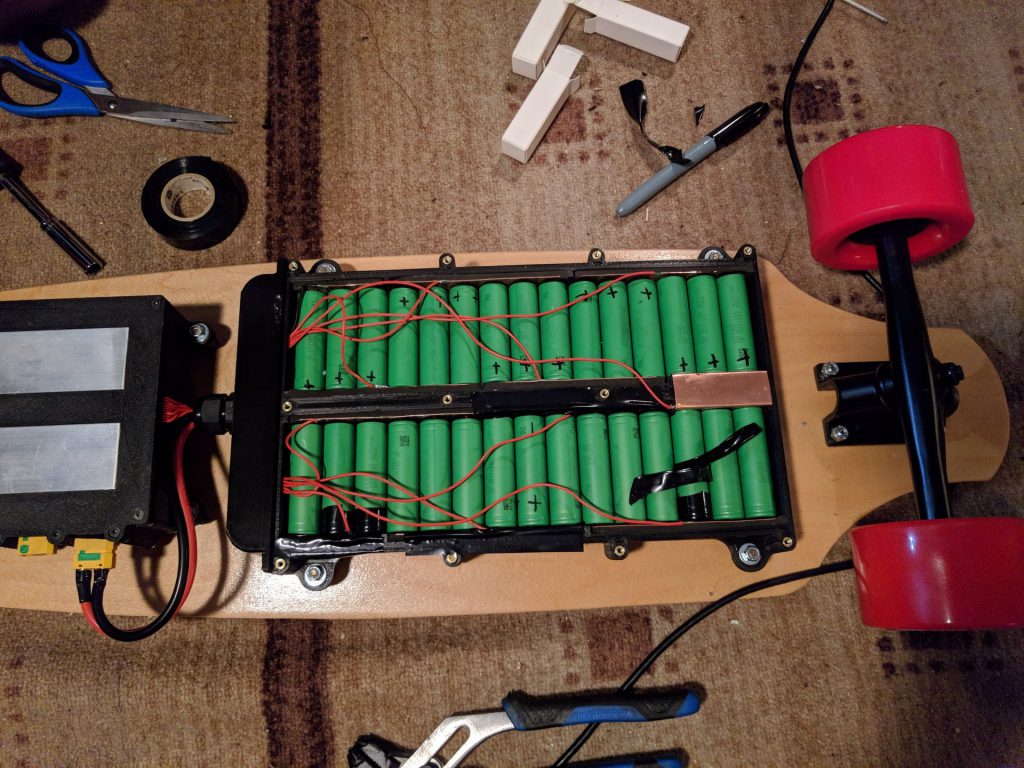
We recommend picking a lithium-ion battery pack, as they prove cheaper and more efficient than their polymer counterparts. Lithium-ion packs boast a higher energy density and a longer life span, whilst remaining more suitable for sustained heavy usage. However, lithium-polymer batteries show great flexibility and are molded into various shapes and sizes.
This could be important or irrelevant, depending on your build, so the choice is up to you. Here’s a quick list of other aspects to consider when choosing an eBoard battery:
- Voltage: Please ensure that your battery voltage is in-line with the motor requirements. Some parts are designed for set voltages, so higher outputs can short-circuit or damage these components. The industry standard voltage remains at 36V/30A (Ampere).
- Ampere: The unit of measurement to determine how much current a battery continuously discharges, with 30A remaining the most common. Learn all about amperes here.
- Ampere Hours (aH): The amount of energy a battery would lose if all power were discharged in one hour. This is an important figure to look out for, as it’s a reliable indicator of the range offered from a full charge.
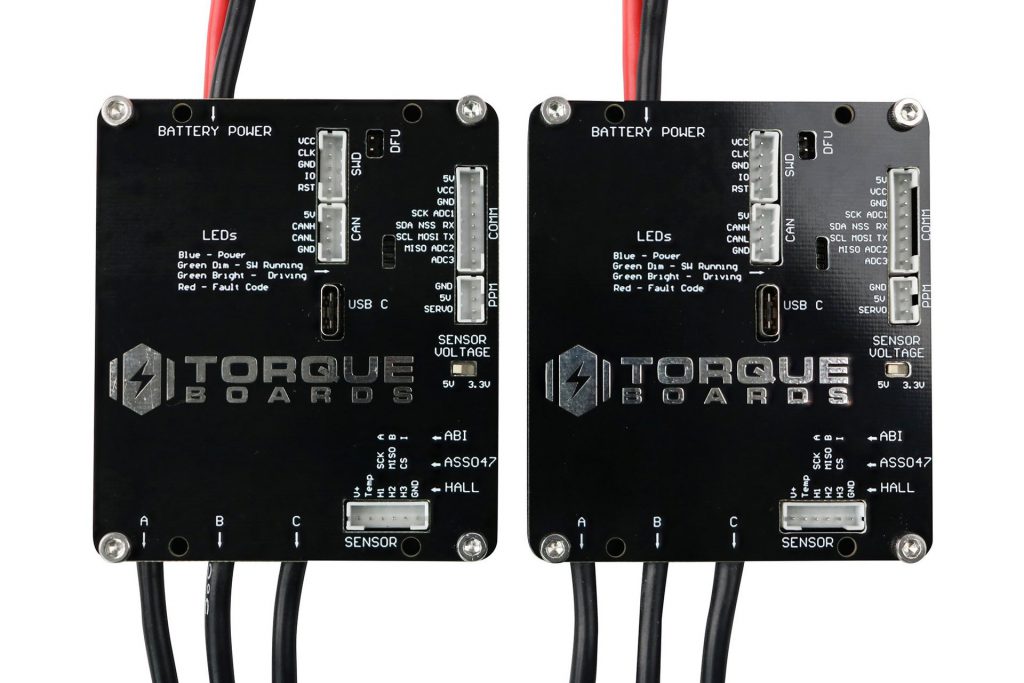
Choosing the Right ESC (Electronic Speed Control)
As the name suggests, the Electronic Speed Control (ESC) sets the speed of your board. It acts as a receiver connected to the motor, dictating power output through a remote-controlled by the rider.
If the battery is the heart of an eBoard, the controller is certainly its mind. For your own safety, we do not recommend cheap ESCs. These types are usually designed for toys such as RC cars and cannot handle high currents or heat generated from the motor.
As such, a cheap ESC proves a threat to rider safety and the health of their board. Double-check and ensure that the ESC you buy is designed for electric skateboards. These are commonly found in DIY stores that accommodate or specialize in skateboarding. Interestingly, one of the most popular options is a free open-source ‘VESC’ from Ben Vedder.
In his own words, Ben aims to make the “best ESC available”, whilst keeping all of the hardware and software open to the public. Alternatively, the ‘VESC Project’ is another great free option for DIY skateboarders.
However, VESCs are mostly for the technically minded, as there is some programming required to operate one. It all boils down to your ambitions and reasons for building your own board.
If you’re doing it for a challenge, this could add a new level of difficulty to overcome or save you some money on a physical controller. Uncover everything there is to know about ESCs here. Alternatively, here are our top 3 ESC package choices:
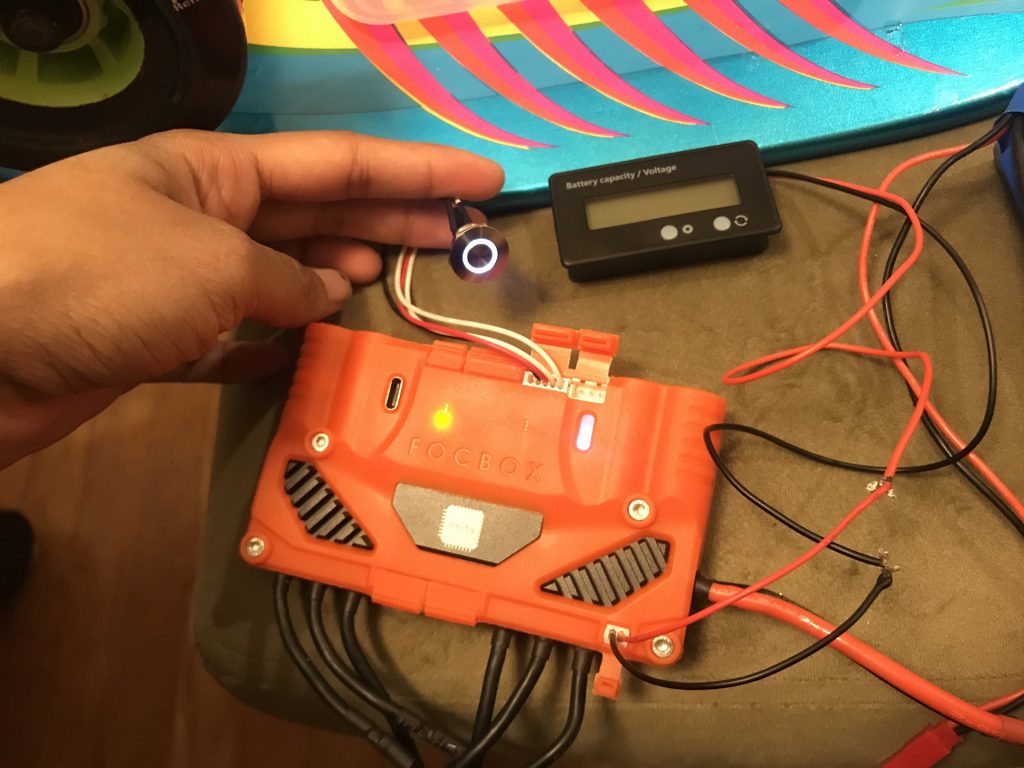
FOCBOX Unity: One of the best DIY ESCs available, which includes regenerative braking support, Bluetooth connectivity, great versatility and solid build quality. The case is also very convenient, protecting against exposure and other potential damaging factors.
-
Dual FSESC6.6 6.7 Plus: This ESC functions great and has a continuous 100A single / 200A total current, perfect for all manner of motors. It has slightly fewer features than the Unity but is more cost-effective and functions nicely.
-

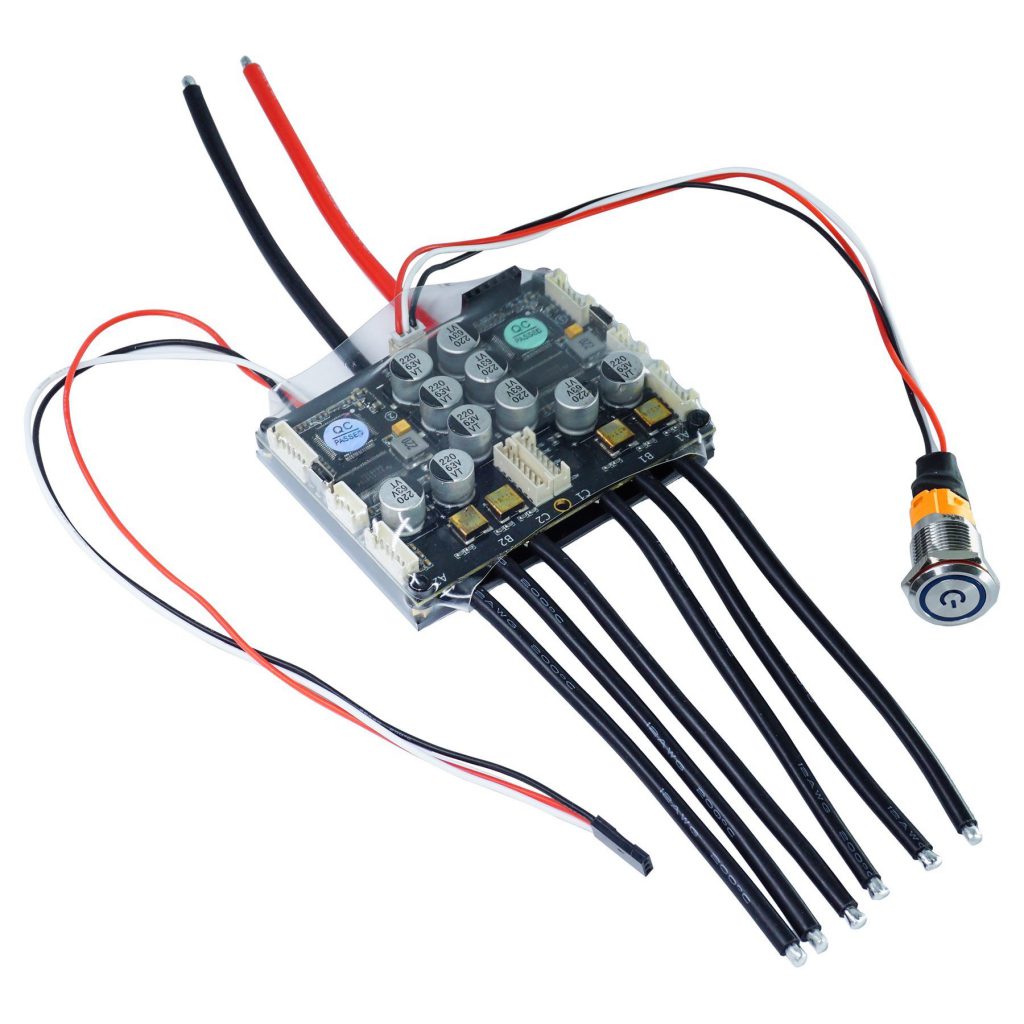
Dual FSESC4.20 Plus: This model is a more cost-effective and upgraded variant of its predecessor. It includes an integrated anti-spark switch function alongside a thinner base. It also includes support for regenerative braking and reversing, with everything a DIY eBoard rider needs to get their ride rolling.
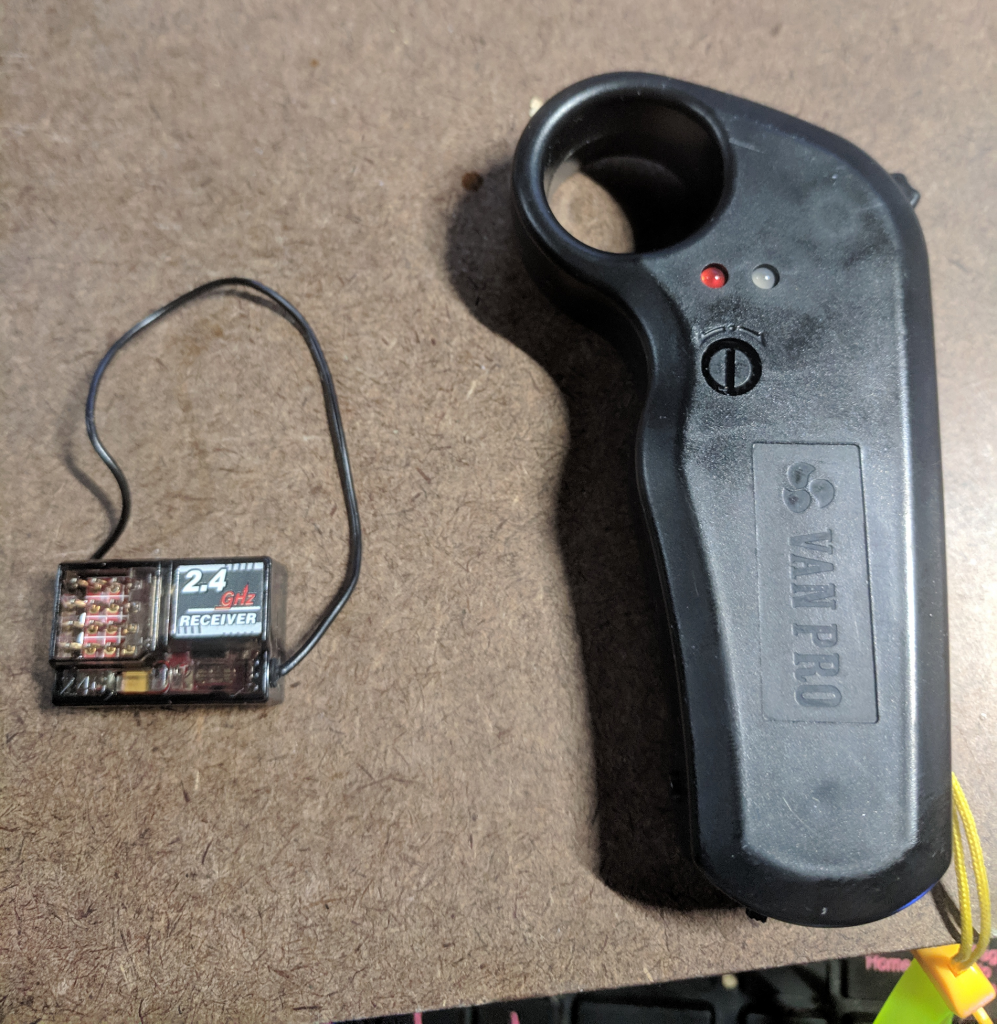
Transmitters & Receivers
Many first-time DIY eBoard builders may assume that an ESC consists of a transmitter/receiver, but in reality, it is just the chip. Despite this, most ESCs come with a transmitter and receiver included. It’s not a major deal if they don’t, as almost any RC controller is suitable for this.
There are also a number of highly affordable options online, including those on our list above. The main thing to consider when choosing a transmitter/receiver is battery life, although you should also make sure it comes with installation instructions.
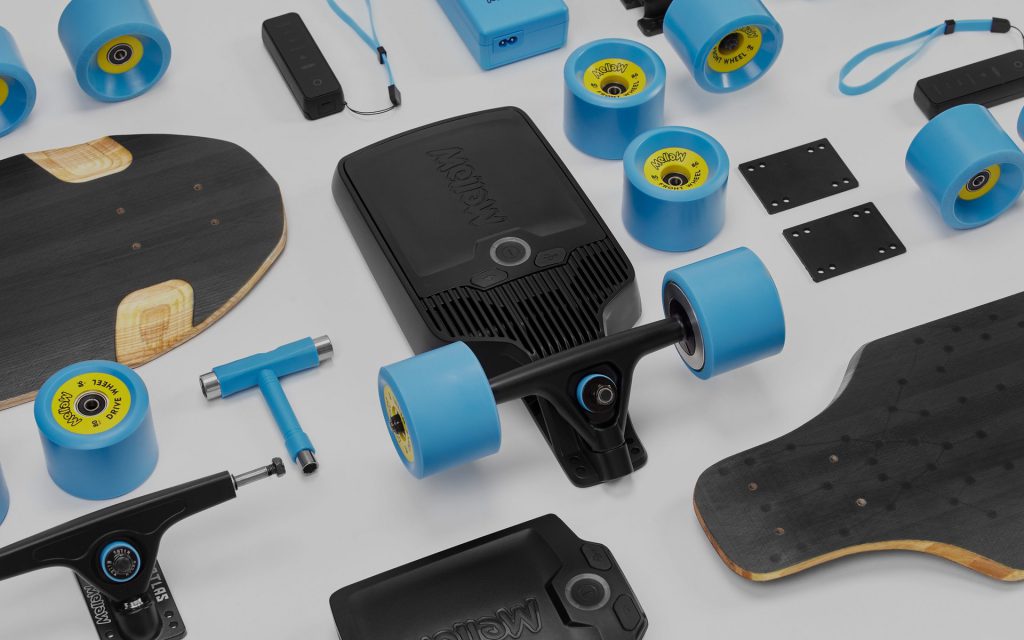
eBoard DIY Kits
If you want to save the stress of picking out each part of your DIY eBoard, skateboard kits come with everything you need except the deck. They make a great option for no-nonsense first-timers who want to ensure they do it right with compatible parts. They also often come with a detailed installation guide, removing the guesswork and making it that much easier.
We recommend double-checking to make sure the kit doesn’t cost more than buying individual components separately. Here are our top 3 eBoard DIY kit choices to help get you started:
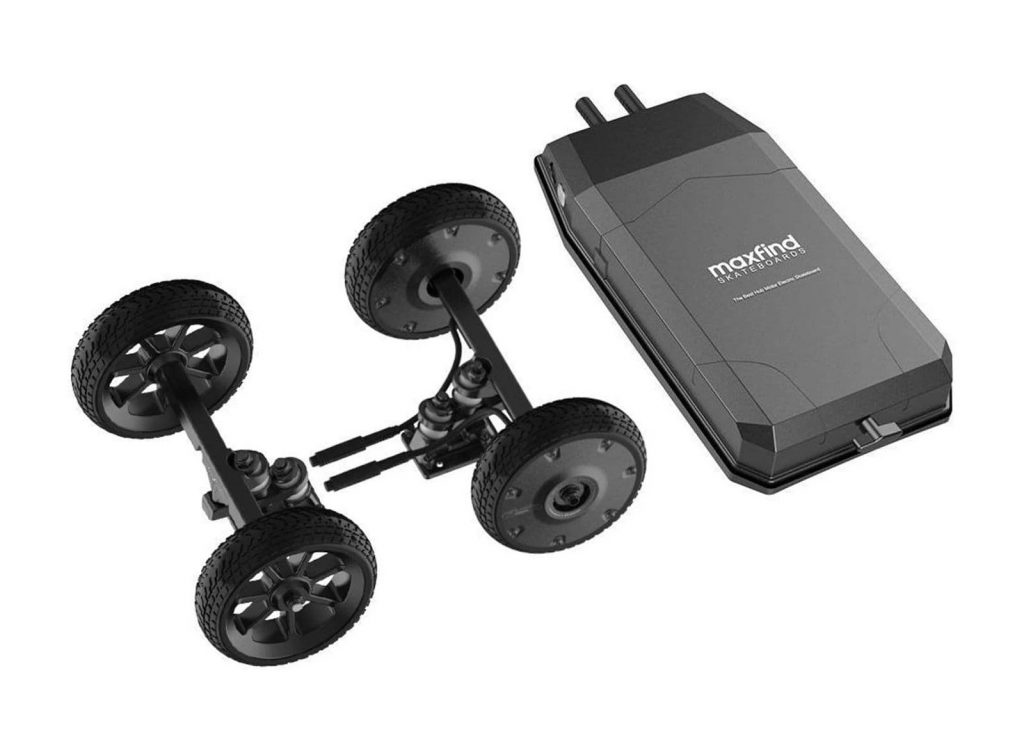
Maxfind M6: The M6 Drive Kit is a top choice for those aiming to build a mid-level eBoard out of the box. It includes a charger, remote, manual, hub-motor wheels, battery, tools and more. Riders can reach speeds of up to 24 mp/h on their DIY Maxfind D6 and tackle inclines of up to 35%!

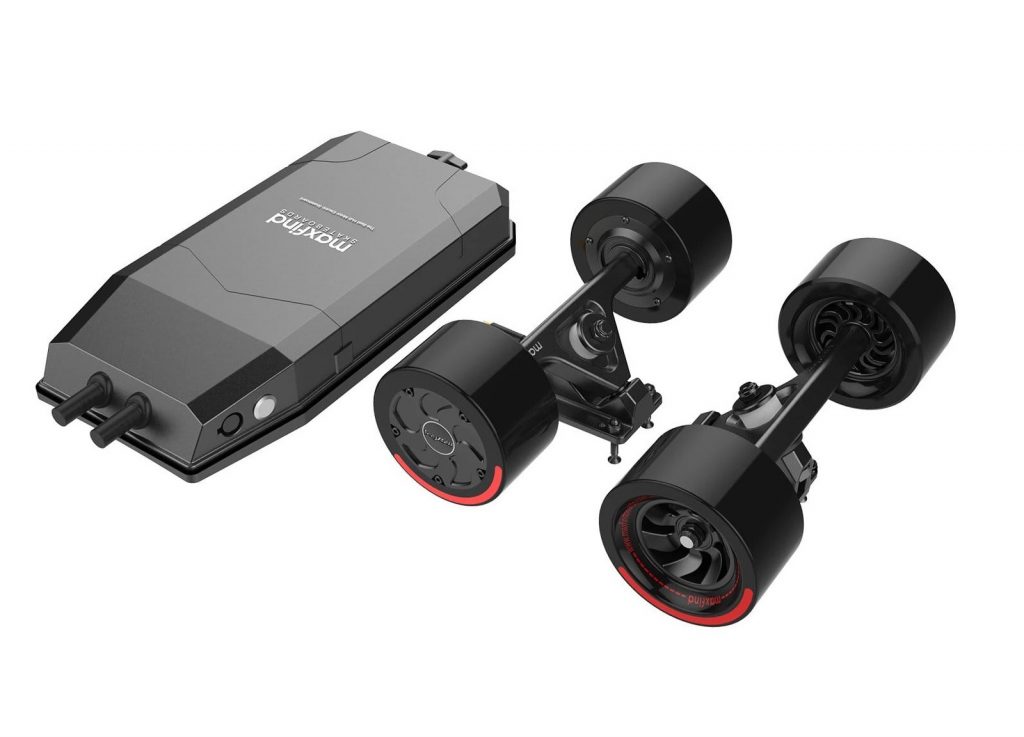
 Maxfind M5: The Maxfind M5 is a more cost-effective, albeit downgraded variant of the M6. Despite this, the performance is quite similar, offering a top speed of 25 mp/h and a range of 12-36 miles. It includes 2 hub motor wheelsets, a 4.4Ah 10S2P Samsung battery, charger, tools and more. Truly another great choice!
-

BKB Duo: The BKB Duo DIY eBoard kit is a top choice for those seeking convenience. Including the “first remote designed to be comfortable” and boasting a 12-hour battery life, the specifications and performance offered by this kit are great. Depending on the wheels, the belt-fed motors propel eBoards to speeds of up to 35 mph, for a range of 10-20 miles (up to 60 miles with Type R).
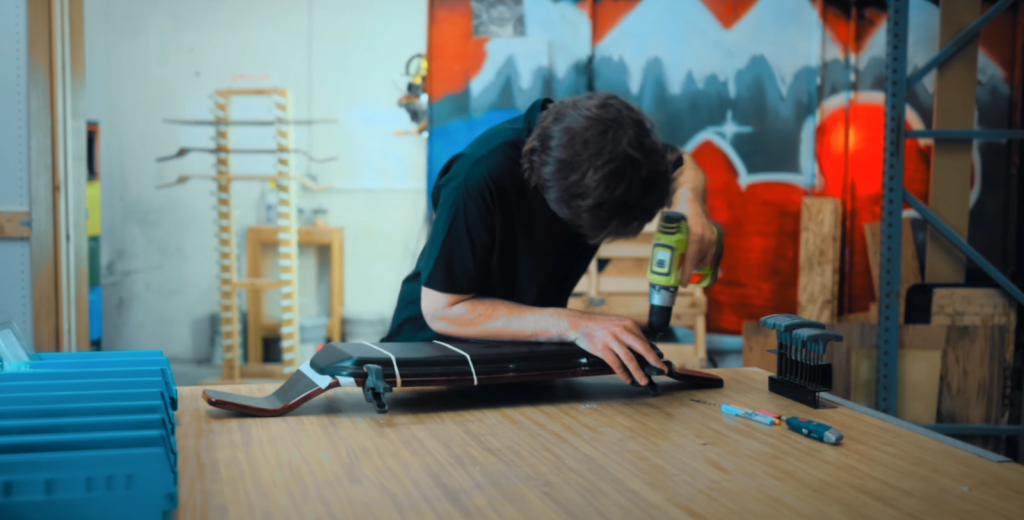
Building Your eBoard
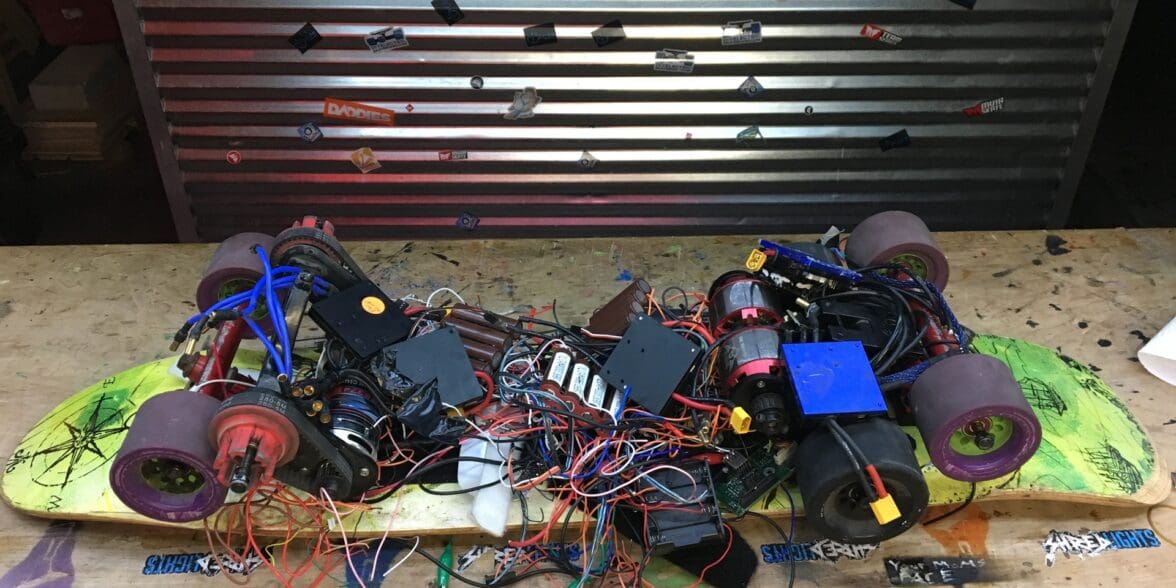
Now you have all of the required parts, it’s time to assemble your custom DIY electric skateboard. It’s incredibly important to make sure all of your components will fit within the desired layout beforehand.
The process alternates depending on whether you use a drive or hub motor, although both will likely come with an installation guide. We still recommend following a visual guide or tutorial video as you go to best ensure you make no mistakes:
Step 1: Mount the trucks and motor to your deck with appropriate spacing. We recommend first prepping your motors by adding them to your rear truck, inserting them into the appropriate mounts and installing the motor drive pulley. Test both motors and make sure they spin freely with no unwanted drag from the drive pulley.
Add the wheel bearings securely and press them in, repeating for all wheels. Most motor sets come with an instruction/installation manual, so follow it closely. Hub motors are very straightforward to install, with belt drive motors proving more technical. Watch the belt drive installation process here.
Note: ensure that all components are securely screwed in to avoid failure or injury when riding.
Step 2: If necessary, drill holes in the case for cabling, switches, etc. We recommend starting off small, before gradually widening with larger drill bits. Going straight in with the biggest drillbit runs the risk of cracking plastic, which could compromise waterproofing and the overall protection of your components. Make sure to clamp your deck/case down before drilling to keep it in place.
Note: this task varies depending on deck size, battery placement and other factors.
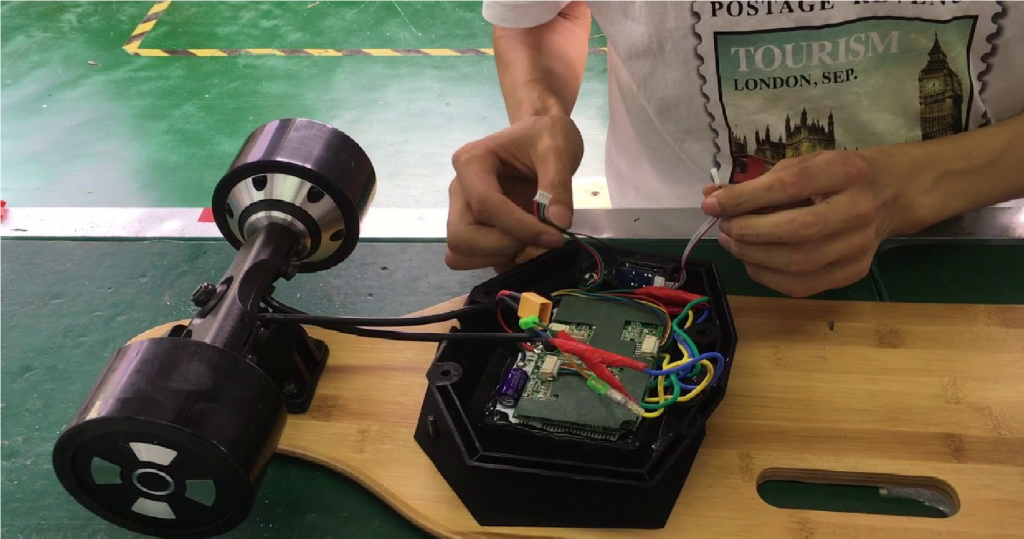
Step 3: First, test the fit of both the battery and ESC within the enclosure. Install the battery and ESC into your case. Connect the charging port to the battery and power switch to the ESC, before finally connecting the battery and ESC.
Note: avoid connecting the battery until all other electronics are either test fitted or in place already.
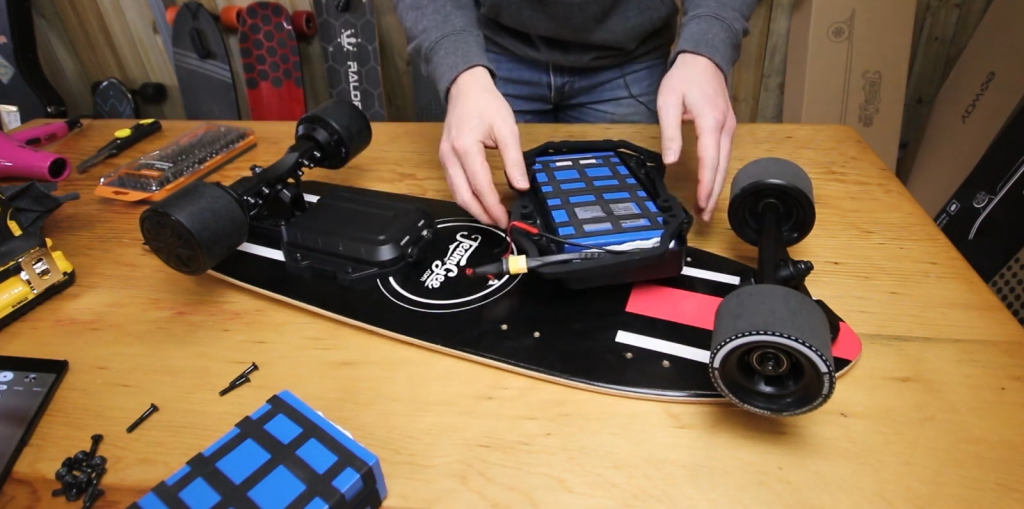
Step 4: Feed the motor wires through the case and connect them to the ESC. Test everything with the controller beforehand. Once both the battery and ESC are secure, add the receiver for your remote control/transmitter. Most ESCs come with instructions, which we recommend following closely.
Test everything out by turning on the power switch. At this stage, the ESC should turn on and show a green light, meaning that everything is correctly connected. Those who opted for a virtual ESC must now program their controller using a VESC tool. We recommend watching this tutorial for all the fine details on programming a VESC.
Note: make sure your electrical components are off when testing to eliminate the risk of electrocution.
 Step 5: Seal the case securely and enjoy your new eBoard. This is done through screws or adhesive, although we recommend both for maximum safety. Ensure there are no pinched wires or poorly secured components. If you bought a kit, please follow the kit instructions closely!
Note: ensure that there are no loose/rattling electrical components before sealing.

Final Thoughts on DIY eBoard Building
There you have it, our brief guide to building your own DIY eBoard. Follow these instructions carefully and make sure to pick the right parts for your needs; you’ll be skating to school or work before you know it. Remember though, your board will only be as good as your budget!
We hope we were able to answer all of your questions and help you build your dream electric skateboard. If you’re still seeking a pre-built board, take a look at the top 10 electric skateboard brands of 2021.
Spotted something we’ve missed or have a question? Leave us a comment and we’ll get back to you. Alternatively, read through our PLEV news section here, or keep scrolling for some FAQs.
FAQs
What deck is best for building my own eBoard?
Whilst this heavily depends on your intended use, we personally prefer longboard decks, as they offer the most room for electrical components and rider maneuverability. They’re also easier to convert for first time builds. Please carefully consider the size of your components and your requirements before choosing a certain deck.
Are DIY eBoards cheaper than pre-built models?
Yes and no. Depending on the components you use, a DIY electric skateboard may prove cheaper than a pre-built model straight out of the box. However, these are usually done on a budget, which significantly sacrifices performance for price.
We don’t recommend building a board using the cheapest components. A DIY eBoard is much more reliable and performs better than a standard store-bought model, but it has to be built properly!
What is the best battery to use for my DIY electric skateboard?
Possibly one of the most important components, the size of your battery depends on the motor size and intended use. If you want to ride 30+ miles a day, a bigger battery will prove essential. However, check the ‘C rating’ of your chosen battery first. For example, a rating of 30C (recommended) means that the battery has a peak output of 40 times its capacity.
What road laws do I have to follow?
This varies depending on your country, region or city. We recommend reading through our PLEV law in the USA, alongside Europe and Canada articles. In many cases, electric skateboards remain unregulated or restricted.