Heavy-Duty Engine Protection
Just for the record, the SW-Motech skid plate, as we call it in the States, is officially known as the SW-Motech Engine Guard.
This type of engine guard is also referred to as a “bash plate” and probably a few other colloquialisms as well.
“Engine guard” seems correct to me, but many people use that term for the “crash bars” that protect the sides of the engine if the bike falls over.
Any Adventure Touring bike worth its mud flaps surely has to have a skid plate, which is a device used to protect the underside of the engine from damage.
I’ll probably never need one, but hey — it sure looks cool and I guess it shows that I’m serious about off-roading, right?
The SW-Motech Engine Guard
I looked around for a good, solid, high-quality skid plate for the DR650 and there are several available.
I ended up going with the more expensive ($124.95 vs. $79.95 for the Pro Cycle version) SW-Motech Engine Guard for a couple of reasons.
First and most important, my experience has been that products made in Germany are usually precisely engineered with high quality parts and hardware.
I got burned on the installation of the hand guards for the DR650, as you’ll learn when I get around to posting that review, and I didn’t feel like going through another routine like that again with the engine guard.
The SW-Motech skid plate looks really nice also, with precision laser or water-jet cut holes and what seems like better coverage than other plates.
It also looks like it will allow a fairly easy oil and filter change, and I’ll see about that the next time the bike comes due for one. And finally, it will work with the SW-Motech center stand I also have, waiting for installation.
As it turns out, installing the SW-Motech skid plate was fairly easy, with one quirk. Also, there are no installation instructions, other than an exploded diagram.
Installation
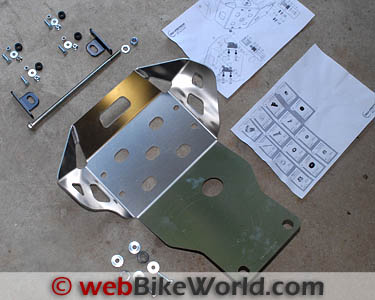
The first thing I’d suggest is to lay out all of your hardware and check it against both the parts list and the assembly diagram to make sure you have everything need.
A parts list is included in the package that illustrates and lists each piece, so take some time to arrange the hardware and familiarize yourself with it, because the instructions aren’t specific about what goes where.
Also, you’ll need a torque wrench because all of the parts have a specific torque requirement, especially the important main engine mounting bolt (see below).
Also not detailed in the non-existent instructions is the assembly order:
- First confirm that you have all the parts and hardware (and tools and torque wrench and Loctite) necessary to do the job and you know where everything goes.
- Next, mount the front brackets as illustrated below. These are a bit difficult to torque, so I mounted the skid plate in a bench vise to hold it while I torqued the nuts.
- Next, remove the long engine bolt from the bike and replace it with the SW-Motech bolt while you mount the front of the skid plate.
- Before you tighten the front, loosely install the two rear mounting bolts with their rubber grommets and spacers.
- Once everything looks like it will fit, snug up the bolts, then torque down the long front bolt and then the rear bolts.
Here is a full-sized version of the assembly diagram and a full-sized version of the parts list. I’ve arranged the photos to illustrate the process with the narrative below each photo:
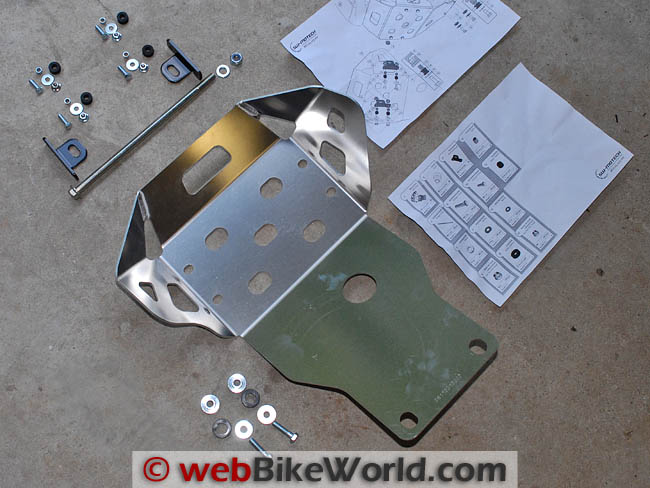
(Photo Above) First, lay out all the parts and check them against the parts list. Familiarize yourself with the assembly diagram and how all of the parts will be assembled.
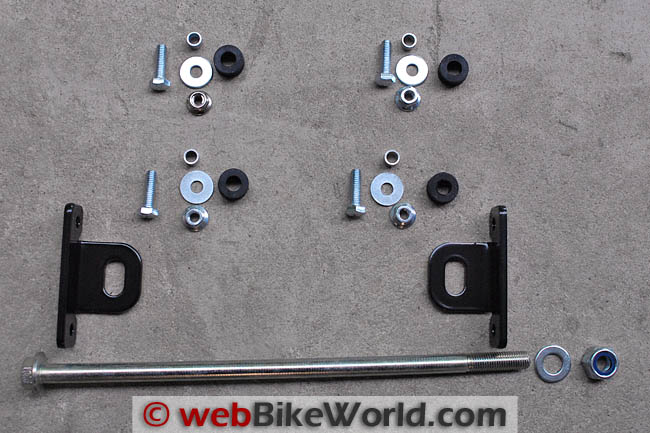
(Above) Here’s a close-up of the mounting hardware for the SW-Motech Engine Guard.
Make sure you have the same hardware (for the DR650; other motorcycles may differ). The long bolt replaces the original equipment main bolt that secures the DR650 engine to the frame. More on this below.
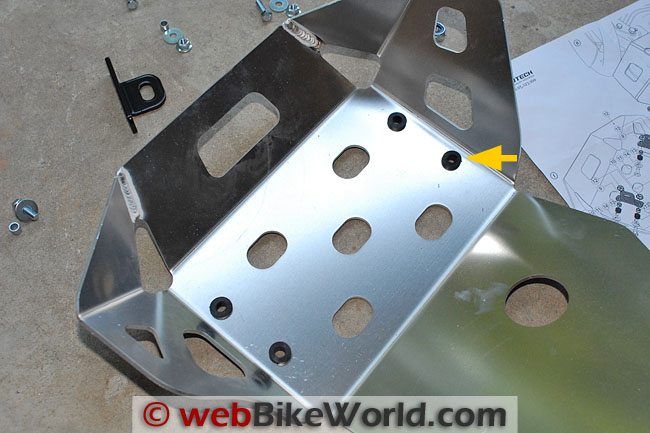
(Above) It isn’t explained in the instructions (because there are no instructions), but you’ll need to first mount the brackets on the inside of the skid plate.
The small rubber grommets fit into the mounting holes on either side of the skid plate. These cushion the internal mounting brackets from vibration.
The holes in the skid plate are slightly oval shaped to allow for any lateral adjustment that might be necessary due to tolerance variations, but the grommets should fit right in.
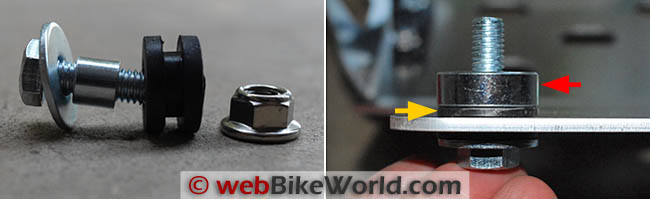
(Above) On the left is a close-up of one of the four front mounting bolts. The parts are shown in the order of assembly. Note the spacer just to the right of the washer; it fits inside the rubber grommet.
On the right is a close-up of one of the rear mounting bolts that fits into the skid plate mounts that are installed on the DR650 at the factory. It’s difficult to see in this photo, but the yellow arrow indicates the larger rubber grommet just below the large spacer.
The spacer is indicated by the red arrow. This assembly bolts to the rear skid plate mounting brackets that are installed on the DR650 at the factory.
See the note below; I had to use extra washers because the bolts that came with the SW-Motech skid plate were too long and interfered with the bottom of the engine.
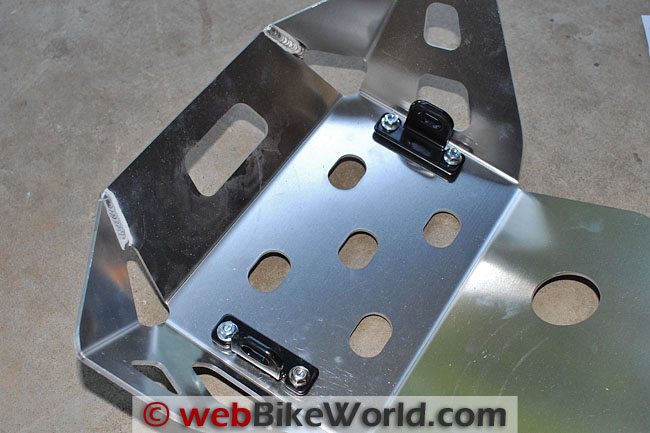
(Above) The internal mounting brackets installed in the skid plate.
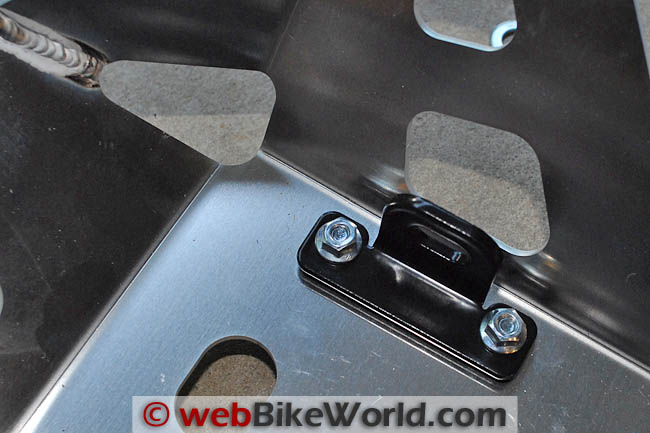
The photo above is a close-up of the internal mounting bracket.

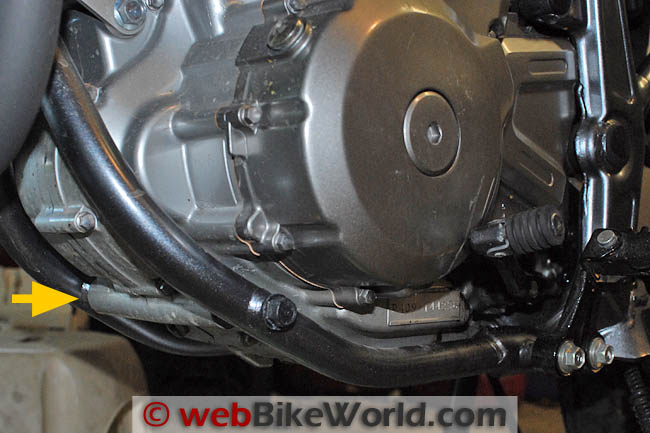
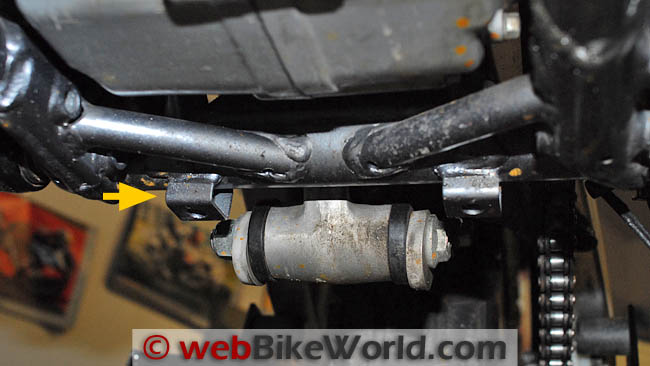
(Above) The arrow indicates the main mounting bolt (the long bolt) that must be removed and replaced with the new bolt included in the SW-Motech skid plate hardware package.
It wasn’t difficult to remove the bolt, although you may need someone to hold the wrench on the left side of the bike while you loosen the nut on the right side.
SW-Motech recommends using Loctite on all of the fasteners and I used the blue Loctite medium grip.
I also put a very thin coating of anti-seize on the main engine bolt just in case, to help prevent any corrosion in the future.
According to the Suzuki DR650 shop manual, the long engine bolt requires 65 Nm (47 ft. lbs.) of torque.
This photo above shows the rear skid plate mounting bolts. These are installed at the factory on the DR650.
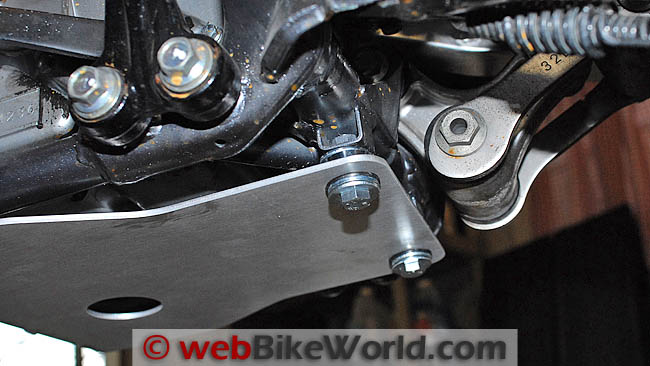
The photo above shows the rear mounting bolts installed.
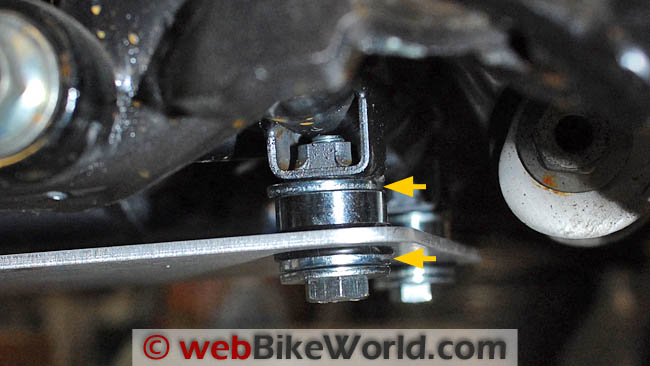
(Above) Close-up of the rear mounting bolts. The bolts were too long, so it was either cut them down or add a couple of washers.
I took the easy route and added the washers as spacers, indicated by the arrows.
You can see where the end of the bolt scratched the bottom of the engine, just where the threads are sticking out from the nut.
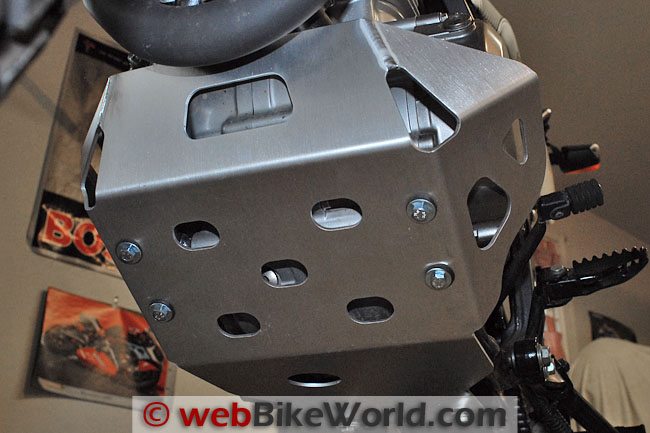
Photo above is from underneath showing the mounted skid plate. Note the four bolts holding the front inner brackets.

(Above) The SW-Motech Engine Guard skid plate mounted on the Suzuki DR650.
Publication Date: May 2011
Suzuki DR650SE Blog Home
Master Listing of All wBW Motorcycle Product Reviews
Owner Comments and Feedback
See details on submitting comments.
Other WebBikeWorld Accessories Posts