

A possible cheap quick handlebar mount for GPS units that employ a ball and socket mounting system.
Editor’s Note: Arthur V., who wrote this article, kindly donated his honorarium to a webBikeWorld charity.
The Problem
I would crawl through 50 feet of half-inch garden hose full of crushed glass to get my hands on one of Andy Pridmore’s bead-blasted custom machined stainless steel Garmin i-Series mounts for my StreetPilot.
But alas; it appears not to be as they are no longer available. What to do…?
The Sloution
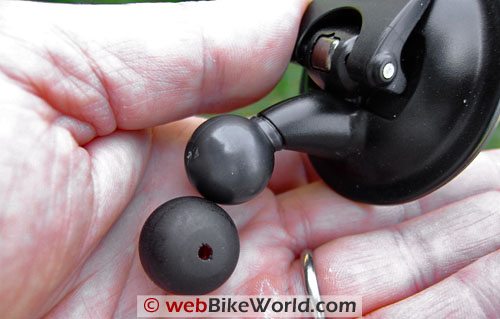
After staring at my Garmin i3’s socket-and-suction-cup mount for a couple of minutes, the answer turned out to be almost as easy as raiding the kid’s toy box.
It looked like all that was needed was a proper sized bead, a handlebar mount and a machine screw to join the two (Figs 1, 2, 3).
So a look in the Yellow Pages revealed a local business whose sole existence was based on the selling of beads, and this was in a town of only 16, 000 people.
It looked like Beads-R-Us when I walked through the door.
The woman who ran the place had heard it all before, so when I asked for a 17 mm diameter bead she didn’t even blink. And did the nice man want it in clay, glass, wood, ceramic or resin?
How about colours and maybe place of origin?
She advised against wood because humidity can cause it to swell and make removal a risky job; glass and ceramics preclude any fine-tuning such as shaping and drilling.
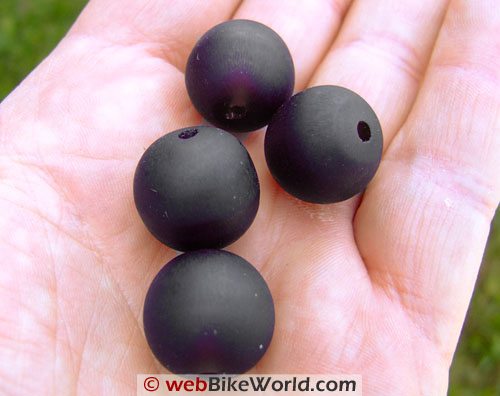
I settled on a bike-matching burgundy resin bead of 17 mm in diameter (in one axis it was), all from the exotic location of Indonesia. So for $1.00 plus tax I was on my way. Grrrr, they came 5 to a bag.
(Photo Above) Fig 1. Confirming the ball size (Photo Above) Fig 2. The bead really was 17 mm on one axis. (Photo Above) Fig 3. A lifetime supply of leftover beadsHardware
The local fastener store recommended that I use a stainless machine cap screw, as it would look classy when the GPS was not mounted and at a cost of $1.23 that fine by me.
Grrrr. They have a $10.00 minimum. Oh well, one can never have enough Super Lube grease at list price can one?
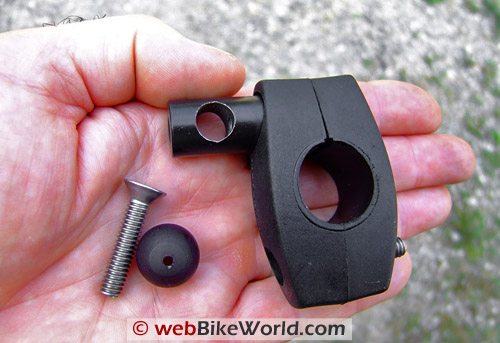
The handlebar mount was the only easy part. Along with my CB900C came a windscreen with two handlebar mounts and I was certain I would have no use for any of it. One mount had been volunteered into service to hold my 12-volt power tap and that left one for this project.
I have seen many similar mounts at swap meets and being a boater, I have found “rail mounts” at the local chandlery (a.k.a. West Marine), under the heading of “rail mount”.
Fig 4. The bits required to solve the problem.Drilling
The only touchy parts were the drilling of the bead to match the diameter of the screw and the countersinking of the hole to match the screw head. NOTE: Wear eye protection, a dust mask as well as skin protection.
This task is not unlike sanding fibreglass!
I have not included screw and drill bit sizes, as they may be unique to my situation.
The advantage to using a bead is that they already come with a pilot hole. The goal was to make the hole large enough that the threads would lightly touch the side so that any temperature expansion or contraction with dissimilar materials would not cause the bead to crack.
I started with a smaller bit and worked up, which is an important point if your bits and drill have a built in wobble factor like mine. Care was taken to use slow speed so as to not heat up and melt the material.
The only heartache could be the countersinking of the bead to match the angle under the head of the screw, as the angle can be country specific.
An Internet search found that in the U.S., the common countersink angle is 82 degrees, where as in England it is 90 degrees and I am sure there are many more angles lying in wait.
I solved the problem by using a wood screw countersink at 82 degrees and then fine-tuned it with a Dremel.
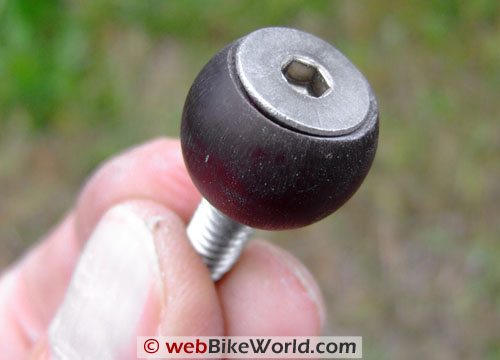
Once the bead was mounted on the screw, kinda like a Tootsie Pop, then the final shaping began (Fig 5). I wound a nut up snug against the bead base and put the screw in the chuck of a drill.
(Photo Above) Fig 5. The “Tootsie Pop” ready for shaping after the screw was fitted.Installing
I must caution against over tightening the screw because the countersunk head will act like a wedge and split the bead before you can say über poopie.
180-grit sandpaper was used to smooth the top down to about half way while spinning the bead at a slow speed. I made repeated attempts to fit the bead into the GPS’s socket.
When it looked like the socket was starting to slip on I started to extend the shaping downward toward the bottom half of the bead.
Hint: It is quicker to be slower with the sanding than it is to start over because you went too far.
At one point the socket snapped on with a click but the GPS would not tilt without binding which indicated that the bead was still a bit fat at the bottom restricting motion.
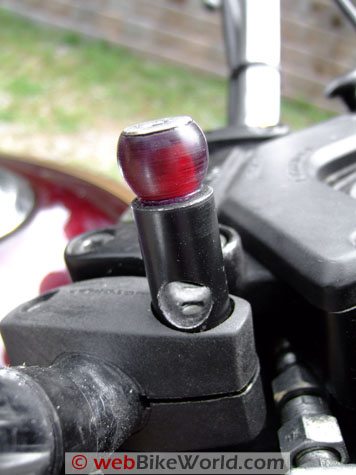
An exaggerated example of the proper shape would be an inverted pear (Fig 6).
(Photo Above) Fig 6. A close look reveals two main tasks completed: 1. The shaping required on the under side of the bead necessary for the GPS to tilt.
2. The flattening of the base where it mates with the handlebar mount.
The bottom of the bead where it mates with the handle bar mount was flattened with a couple of swipes of sand paper in order to give a larger contact surface.
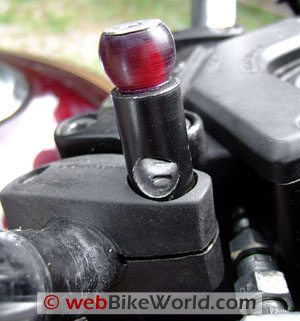
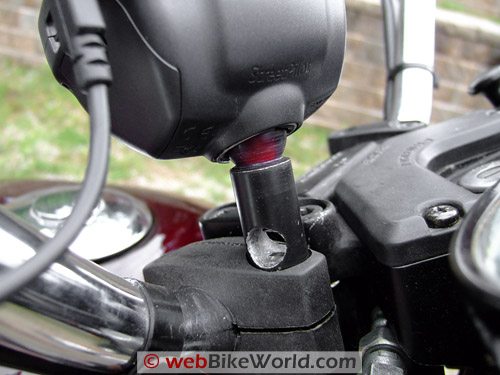
I bedded the screw in the bead with silicon to cushion against vibration and then used Loctite 242 on the screw threads when I screwed it into the mount, as no one wants their GPS waggling around their knees in the twisties (Figs 7,8,9).
(Photo Above) Fig 7. All parts assembled and operational. (Photo Above) Fig 8. This shows overall placement and my need for a shorter usb/power cord.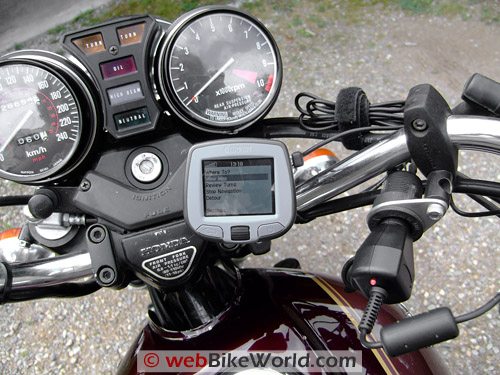 (Photo Above) Fig 9. Ready to ride
Conclusion
I was robbed! Something that should have cost me about $3.00 plus tax in anybody’s dollars ended up in costing $15.00 plus tax.
If you are lucky enough to live/work in an area of higher population, there is a much better chance you can assemble the parts at a much more competitive price point.
The fiddly bit of putting it all together was a fun exercise that cost a couple of hours and was tax-free.
Now when I hop off the bike at the end of a ride, my StreetPilot pops off and goes in my pocket. Just make sure you take yours with you, or it could just as easily pop off into someone else’s pocket.
Owner Comments and Feedback
See details on submitting comments.
From “J.B.” (6/09): “I was looking into putting a Garmin 550 waterproof GPS as a far less expensive motorcycle solution vs. the Zumo products.
I found mounts and thought they would be relevant to your review as the cost is generally quite low.”
From “B.D.”: “Thanks for having such a great website, lots of good reading here!
I saw your Garmin GPS mount article. I had the same thoughts when I was looking at all the brackety mounts made and their cost.
I found a 17mm ball bearing at “Metric and Multi standard” (Irving TX) and welded it to a mirror stem. Since I am using bar end mirrors, the stem hole was free and I could position it there. Simplicity!
One thing I have noticed, with the cradle for my (Garmin) NUVI 200, eventually popping it on and off has caused 2 cradles to fail, breaking off one or more of the plastic friction parts in the cradle’s socket.
I run a piece of safety wire through the cradle to the bar in case it gives. For now I plan to keep a cradle on the ball.
Another thing I found was that my Battery Tender terminals were a correct fit for a power adapter socket I found at Wal-Mart. The adapter is made to give you a 12v accessory (cig lighter size) socket from a trailer light connector.
It has a weather cap as well and was only a few bucks. Quick and easy way to get a power outlet from a plug I already had installed.”
From “R.T.”: “The scratch made holder … looks like it could do serious damage in the event of an involuntary dismount. I hope I’m wrong- just sayin’… Love your website.”
Editor’s Reply: Good point, perhaps tightening the handlebar mount only as much as necessary to hold the GPS is a good idea so that the assembly will move forward in case the rider’s body hits it during a crash.
From “T.”: “I own a Navman GPS and found that the ball/socket mount was 5/8″ diameter.
So I made my own handlebar mount by welding a 5/8″ dia. ball bearing to a short length of 3/8″ diameter steel rod which I drilled and tapped on the other end to take a set screw.
All that was then needed was a flat strip type of clamp to suit the handlebar and it was done. Sorry I have no pictures to send you and I hope you can grasp the gist of what I did.”