One of the more common problems encountered with seasonal equipment is the prevention of rust and corrosion activity during the off-season.
Here in the Northeast U.S., we routinely store our lawnmowers, boats and motorcycles for extended months during the winter.
While we would all prefer to have the use of a heated and humidity-controlled storage facility, the more common scenario for most of us is an unheated garage or outbuilding.
Unfortunately, even a properly prepped bike will be susceptible to some corrosion and rust under these conditions, and my Triumph Legend apparently developed some rust in the fuel tank while under the care of a previous owner.
Rust and corrosion on the body of a bike is usually noticed quickly, and can be addressed before it gets too far out of hand. Rust inside the fuel tank, however, may go undetected until it reaches an advanced state.
Fortunately (?), the Triumph Classic Triples are very sensitive to dirty fuel, and upon disassembling my Keihin carburetors to investigate a bit of rough running, I discovered a generous dose of rusty sediment in my float bowls. Time for a sealer kit!
Since I had no previous experience sealing a fuel tank, I did what any self-respecting novice would do and turned to the internet for some basic research.
I discovered several fuel tank sealing kits on the market but I selected the Caswell product because it is made here in New York and I found no negative reviews about it. Ordering directly from the manufacturer, I had the kit in my hands in just a few days.
About the Caswell Fuel Tank Sealer Product
The Caswell product is a “phenol novolac epoxy”, according to the company. It’s claimed to be chemically resistant and “able to withstand permanent immersion of many harsh solvents, fuels and oils”.
Caswell also says that the epoxy used in the kit “has much better bond strength than single component products, with strengths of up to 3000 PSI, and this higher strength reduces the need for a clinically clean surface, as the epoxy actually prefers to bond to a rough rusty surface”.
Caswell also lists many other uses for the epoxy; it can be used as a battery component coating; a high-strength adhesive; a potting compound to encase electronics; for repairing leaks in concrete; as a general bonding solution and to make molds or repairs.
The Caswell Fuel Tank Sealer Kit
Upon opening the box, I found two steel cans which were tightly sealed with clips and a sheet of instructions. These were divided into 3 categories: Preparation, Mixing and Application. Each category has several steps, and the instructions are clear and easy to understand.
Here is a quick summary of what is actually involved in sealing a tank:
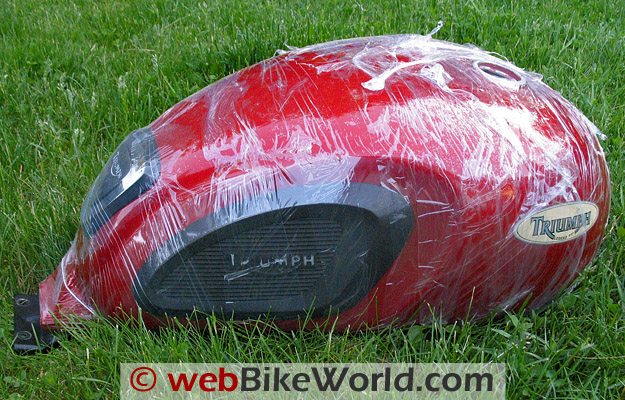
Step 1: Remove the tank, and wrap it with a protective cover. The instructions suggested plastic shrink wrap (Amazon.com)![]()
followed by aluminum foil and then one additional layer of shrink wrap.
I improved on this a bit, and used a roll of shrink wrap plastic similar to what shippers use to wrap large pallets. This is available at most discount stores, and it adheres very tightly. I used the “mummy” wrapping technique, without using aluminum foil.
Step 2: Flush with acetone or lacquer thinner. I used a funnel and carefully poured in a quart of acetone, and then plugged the filler hole with a big rubber stopper wrapped with more shrink wrap plastic.
This was then taped down tight with Gorilla Tape (Amazon.com)![]()
. The printed directions call for sealing the filler hole with more Glad Wrap and a rubber band, but my Triumph tank has a sunken filler tube, so there was nothing to hold the rubber band).
To plug the petcock hole, I simply used a piece of rubber underneath the petcock spacer block, and a couple of oversize nuts to run the bolts through to take up their extra length without the petcock included. The directions suggest Silly Putty (Amazon.com)![]()
for this role, but since I had to use the petcock as the drain because of the sunken filler neck, my method was faster and cleaner.
The directions also called for adding some sheetrock screws to be agitated with the solvent, but my filler design would have made their removal questionable, so I skipped this step.
Step 3: After dumping out the acetone, add dish detergent and hot water (Dawn brand is recommended) and then flush once again so no residue is left to interfere with the adhesion of the epoxy.
Then let the tank dry thoroughly. I left mine in the hot sun all day, although if you are on a tighter schedule, you can set up an air hose to circulate air through the tank, and thus reduce the time needed to achieve a dry tank.
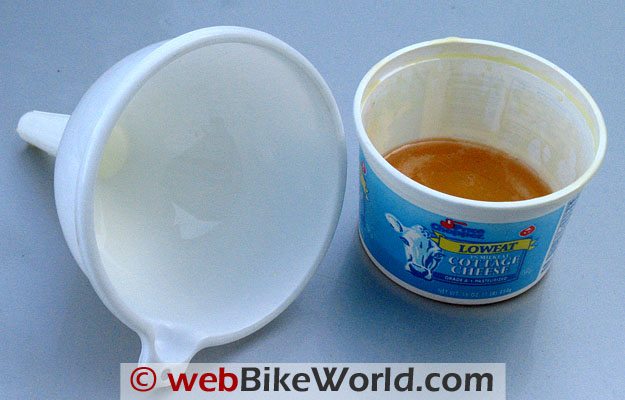
Step 4: Now it’s time to mix up the epoxy and pour it in. A cheap funnel and an empty plastic container can be used for this; I used a cottage cheese container and a plastic spoon to stir the mix.
Applying the Caswell Fuel Tank Sealer
While the directions state that a five-gallon tank will only require half of the kit, I found that I wasn’t getting enough coverage even after turning the tank for 15 minutes, so I mixed up the other half and poured it in.
After another 15 minutes of turning the tank every which way to spread the honey-like product inside (I recommend a chair for this, as you can rest it on your lap), I removed the petcock plug and let the excess drain into the plastic container. Then I left the tank in a warm garage overnight and finally back into the hot sun the following day to finish.
Once it dried, it became a smooth, glass-like coating, completely encasing the surface rust underneath. The shape of my tank caused the sealer to pool up in thicker amounts along the outside seam areas, but I don’t anticipate that this extra thickness will cause any problems, as this product is also used to “pot” or contain electronic circuits, where the components are placed in a receptacle and then filled over.
Conclusion
While slightly time-consuming due to the drying times required at the end of the rinse stage and again once the epoxy is applied, overall this was a very easy procedure.
Due to my local climate, I would not hesitate to use this product even on a brand new steel tank as a preventative measure, and I would certainly use it again for a rusted tank. Kudos to Caswell for developing such an easy-to-use kit!
|
wBW Product Review: Caswell Fuel Tank Sealer |
|
| Available From: Caswell, Inc. | Suggested Retail Price: $39.99 per pint (claimed to seal motorcycle fuel tanks up to 10 Gal.) |
| Colors: N/A | Made In: U.S.A. |
| Review Date: May 2010 | |
Note: For informational use only. All material and photographs are Copyright © webWorld International, LLC – 2000-2013. All rights reserved. See the webBikeWorld® Site Info page. NOTE: Product specifications, features and details may change or differ from our descriptions. Always check before purchasing. Read the Terms and Conditions!
Owner Comments and Feedback
See details on submitting comments.
From “S.C.” (6/10): “I used this product last winter on my 77 Guzzi LeMans tank; in the past I have used Por and Kream Coat with good results.
I like the fact that you don’t have to get rid of the rust with the Caswell, so no acid cleaning which is a nice step not to do.
I used the sheet rock screws, to get them out I used a shop magnet on a flexible neck to remove them. Also, before cleaning used a length of chain to loosen up the rust then stuck a shop vac to suck it out. I was able to use half a can and from what I can tell I got good coverage.
I am going to use the rest on a 74 Kawasaki F7 175 I just picked up. I’m happy with the Caswell tank sealer and would use it again.”