It wasn’t all that long ago when owning a car was a real hands-on experience.
Carburetors, points and condensers, spark plugs that only lasted a few thousand miles, single-weight oil and take-it-or-leave-it quality meant that like it or not, you were involved with your machine.
Cars have evolved (some would say devolved) to the point where many owners never even open the hood and have no idea what an engine looks like. Motorcycles are somewhere in between.
Motorcycle ownership requires a certain amount of commitment to understanding when and how everything is working correctly. It’s more than a curiosity — it’s a matter of life and death, because ignoring a mechanical problem on a motorcycle can be, at a minimum, very dangerous. If you don’t understand why, then you probably shouldn’t be riding in the first place!
Nevertheless, many owners have a very limited knowledge of their bike and depend on their local dealer to do everything from an oil change to a saddlebag installation. I can certainly understand this if it’s a matter of time and scheduling, although surely it would take way longer to make an appointment, bring the bike in, get a ride home and back and then pick the bike up than it would for the owner to spend the half-hour or so it takes to change his or her own oil.
I can also understand how some owners just aren’t as fascinated by combustion engines and the mechanics of riding a motorcycle as I am. But motorcycle ownership is all about an intimate experience of rider and machine, which means that it’s important to know what’s happening with every nut and bolt on the bike. Owner-performed regular maintenance tasks like an oil change are a very good way to get down-and-dirty with the machine to keep tabs on its condition.
You’d be surprised at how much you can learn about a motorcycle when you’re up to your elbows in its dirty details. I’ve found everything from critical bits and pieces that needed replacement to important nuts and bolts that have vibrated loose. Obviously, it’s much better to find out about this in the garage than when you’re leaned over in a 60MPH sweeper.
Which brings us to the topic of removing a plastic motorcycle gas tank. Lurking on several motorcycle user group email lists has indicated to me that too many owners, for one reason or another, have never attempted to remove the gas tank on their bike to inspect or change the spark plugs, air filter, inspect the wiring or to perform other important maintenance or repair tasks.
The prevalence of fairings and plastic on many bikes means that removing a gas tank is sometimes more complex than it should be, and perhaps this puts some owners off. Removing all that stuff can sometimes add a half-hour or more to even the most basic maintenance task, which is maybe why some owners have given up on doing it themselves. But with perseverance and patience, it can be done.
I recently had to remove the plastic gas tank on our 1998 Triumph Tiger to take a look at the carburetors (another interesting project that I’ll be reporting on soon), so I figured I may as well take some photos and write it up. Now you experienced mechanical types might think that this is a too-basic maintenance task for a feature article, but my feeling is that you just never know who might benefit by this information.
Maybe some motorcycle owners would like to do some of their own work and they only need a little bit of guidance to give them the confidence and show them that it can be done.
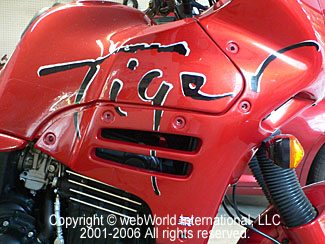
So what’s so special about removing a plastic motorcycle gas tank? In the case of the Tiger, the fairing side panels are fastened to the bike via some threaded inserts that are embedded flush into the walls of the plastic tank itself.
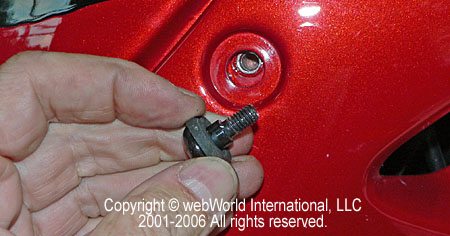
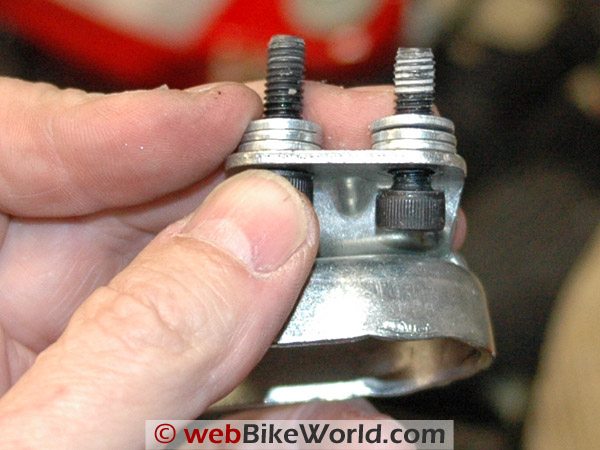
I’m not sure how common this is but there are some extra cautions that must be taken when removing and replacing the panels if they’re attached to a plastic gas tank. The Tiger uses specially designed Allen head cap screws (photo below) to attach the side panels to the gas tank and the rest of the bike.
This special cap screw is commonly used to attach motorcycle fairing panels. It has a machined shoulder that acts as a stop so it can’t be screwed in too far. The shoulder is deep enough to allow room for the thickness of the panel (seen in the photo below) and also to prevent over-tightening, which might pull the threaded insert right out of the plastic tank.
The rubber washer keeps the head of the cap screw from damaging the plastic side panel but also provides a bit of resistance to the screw after it’s inserted, similar to the action of a split lock washer. The outward pressure of the washer helps to keep the threads tight and prevents the screw from backing out of the threaded insert.
What this all means is that it’s important to make sure the cap screws aren’t over tightened and that the panel and holes are lined up as close as possible to ensure that everything fits with the least amount of stress and strain. Read your owner’s manual and/or shop manual for the correct torque settings for these screws and don’t guess!
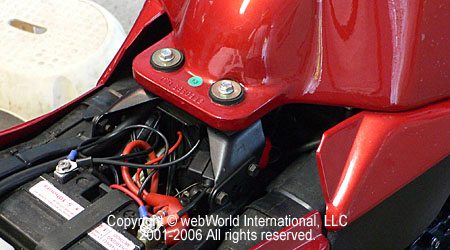
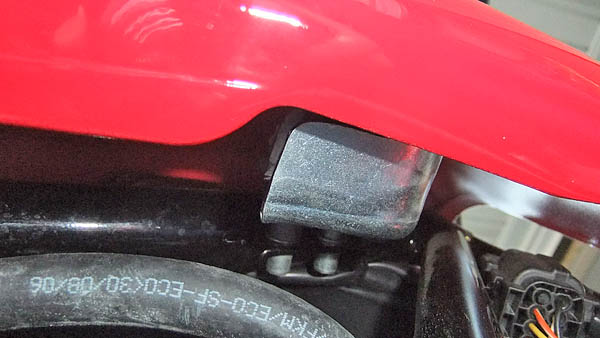
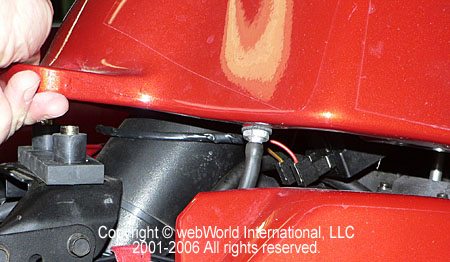
Once all the side panel cap screws are removed, the front and rear gas tank bolts must also be removed. These are typically found on most motorcycle gas tanks, which usually have either one or two bolts in the rear of the tank that hold it on to the motorcycle frame and one or two in the front of the tank. On the Tiger, the rear bolts have steel and rubber washers, as seen in this photo:
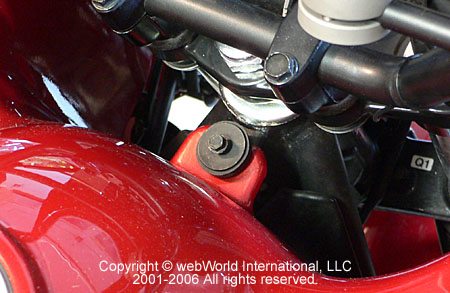
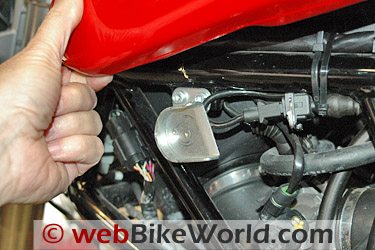
The front of the Tiger’s gas tank is secured with a single 9mm bolt with a wide steel and rubber washer. This bolt really doesn’t hold the tank down on to the frame per se; it simply locates the red plastic tab while the rear bolts do most of the work of securing the gas tank.
Once the bolts are removed, lift the tank and gently pull off the fuel tank overflow hose from the underneath the right rear. Notice the bushings on the left under my hand; these locate the bolts that hold the back of the gas tank.

The ’98 Tiger has a petcock on the left-hand side. Remove the hose clamp with a pair of pliers and gently pull off the fuel line. It’s a good idea to have a paper towel underneath because a few drops of fuel will probably leak out of the hose after it’s removed.
Which also reminds me — it’s a good idea to turn off the petcock and run the bike until it stalls (i.e., the fuel in the line is used up) to minimize the amount of fuel that might spill when this line is removed.
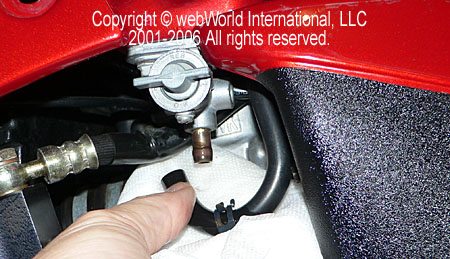
Slowly and carefully lift the fuel tank off the bike, but be careful that the petcock doesn’t catch on the side panels — it could open up and spill fuel! Use extreme caution whenever working on a fuel tank or around gasoline.
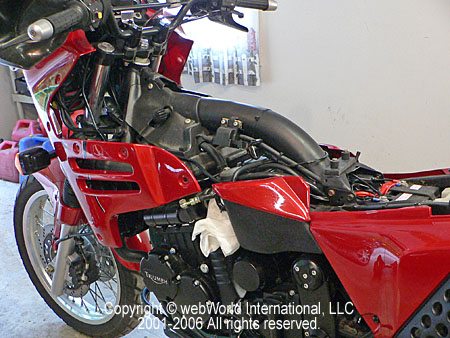
Here’s what the bike will look like after the plastic gas tank is removed:
Note: For informational use only. All material and photographs are Copyright © webWorld International, LLC – 2000-2011. All rights reserved. See the webBikeWorld® Site Info page. NOTE: Product specifications, features and details may change or differ from our descriptions. Always check before purchasing. Read the Terms and Conditions!