***My Pick of the Year So Far***
Interested in picking one up? Use coupon code ‘webbikeworld’ at checkout (no ‘) to save an additional 8%!
Video Review
The Rationale
When I discuss which products to review with our content manager I push for:
- Ones I hear other people recommend strongly in forums or in person.
- Products I personally believe will be useful or have a clear, positive impact.
- The more expensive ones. I want us to take the financial risk so you don’t have to.
The MCCruise system fits this criterion exactly. To this point, I haven’t reviewed a product that I like or will appreciate having on my bike more than this one. It’s not even close.
I’ll cut to the chase and reveal that the only reasons MCCruise didn’t get 5 stars out of 5 come down to the cost of buying the system being fairly substantial ($550 which is a lot of cheddar) and the fact it does take moderate mechanical skill to install it.
Some people might also point out that the control switch assembly is too big and will ruin the look of their bike as well. I’m on the fence about that one.
FYI: ***The kit only took about a week to arrive here from Australia and I had to pay $25 of duty as well.
Not a Throttle Lock
Practically everyone has at one time or another spent $20 to $100 on some variety of throttle lock in an attempt to save their wrist and hand from cramping up on long trips. I’ve tried more than a few myself and they’ve always left me wanting and unsatisfied.
The MCCruise is a sophisticated electronic add-on that works the same way the one in your car does… only smoother and better.
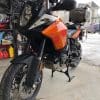
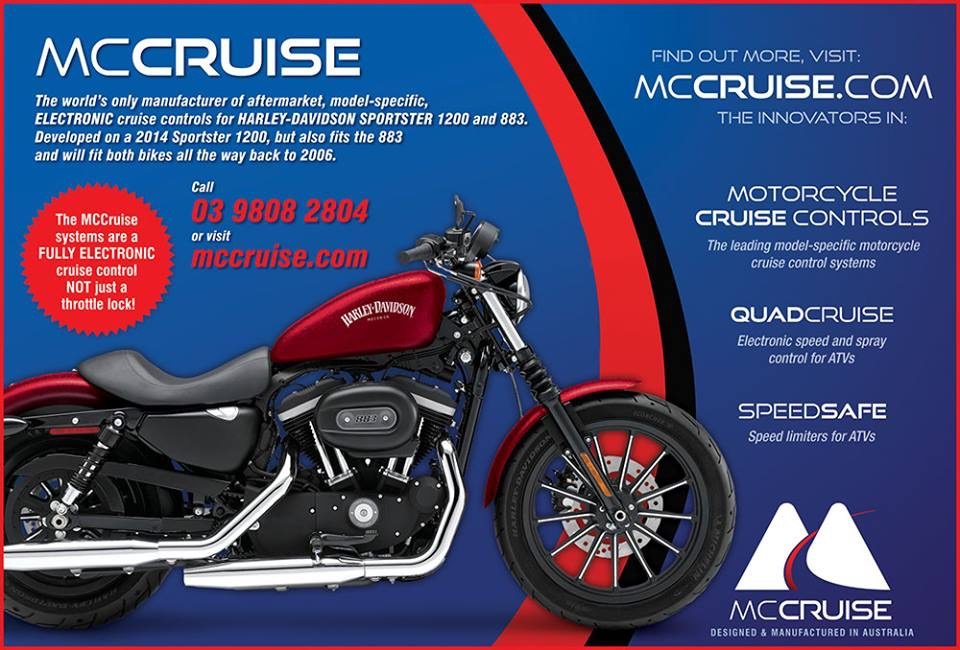
This review is for the Throttle By Wire compatible MCCruise system made for KTM 1190 Adventure bikes, but there are also numerous kits available for bikes that have cable operated throttle assemblies instead. They’re quite different with the cable systems costing more to buy and being more complicated to install because of the need for an actuator servo to be installed correctly in order to work safely.
This means that there’s an MCCruise available for pretty much every bike on the market.
The Overall Experience
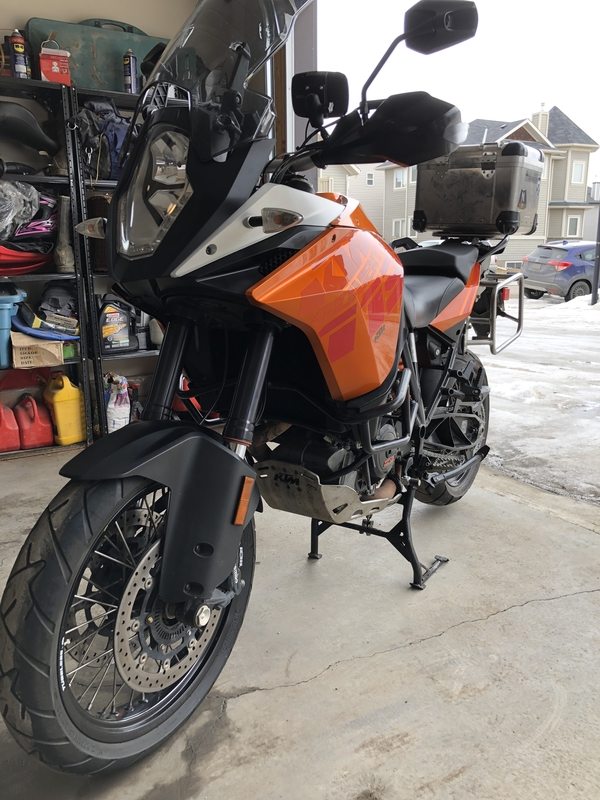
I installed the throttle by wire system in my 2014 KTM 1190 Adventure S in about three sessions lasting 2 hours each. I think that’s roughly how long it took but I’m not totally sure. I was battling illness and sub-zero temperatures in my garage which made me have to take breaks for a couple of days before coming back to it. Add to that my OCD tendencies forcing me to wait for parts I had ordered, needed to finish other repairs/maintenance while I had the gas tank removed like:
- Cleaning the engine air filter
- Removing the emissions canister
- Replacing both fuel filters
- Installing a kickstand relocation kit
- New chain and sprockets
- New mounting bolts for the bash plate under the engine
What can I say? I wanted to make sure my bike was totally ready to go for riding season. My point in telling you this is that the kit wasn’t difficult to install, just a little time-consuming. I’ll go into greater detail about the installation later. First, let’s talk about the performance of the MCCruise.
A “Quick” 160 Mile Test Drive
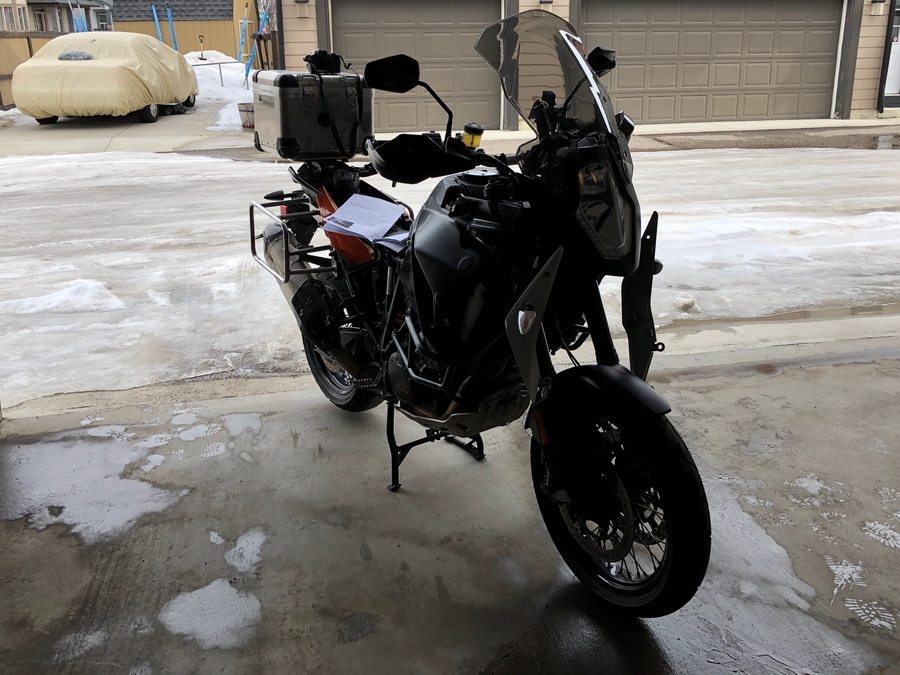
When the weather finally warmed up enough in this unusually cold month of April for me to contemplate road testing the MCCruise, there was still plenty of melting snow and ice on the ground outside my garage.
I steadied my nerves and bulldozed my way through the 4-inch deep pile of snow and ice built up in front of my garage and made it to dry pavement. It was an uneasy slip and slide lasting about 35 feet to the road, but then I was free of winter’s grasp! I’m now looking at replacing my Continental Attack 2 tires with something that would have an easier time to get traction in snow as a result.
During winter here in Alberta, city snow removal crews throw down copious amounts of pea-sized gravel to give better traction to cars traveling on the snow and ice covered roads. That gravel is still very much thereafter everything melts and it creates deadly mayhem for motorcycles every spring. I was very much aware of this danger and tried to ride accordingly once I reached the clear asphalt. That’s tough to do on a bike as powerful as my KTM and I wisely took it out of my preferred SPORT mode in favor of STREET.
My plan was just to ride a big lap around the outskirts of the city I live in, lasting about 25 minutes and allowing me to adequately test the MCCruise at a variety of speeds, and on differing terrain.
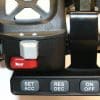
Red Light?
As I got out of town and onto roads where I could safely engage the system to try it out I was caught by surprise when a red indicator light appeared beside the ON button after pushing it. For whatever reason, the red color made me think something was wrong or not working because I didn’t remember reading anything about it in the instructions to indicate that was normal.
I decided to throw caution to the wind and risked pushing the SET button.
Scenes from the old Stephen King movie Maximum Overdrive began flashing through my mind. I briefly imagined the KTM taking me on a terrifying and unstoppable ride right up to my bike’s insane top speed. Would I perish in a fiery crash brought on by my own incompetent installation of the MCCruise system? A glitch in the programming maybe?
Oh well, at least I would die doing something everyone would remember and talk about for years after. Remember that crazy motorcycle writer guy crashing at 200 mph into that field full of cows outside town?
What an idiot he was thinking he should have cruise control on a 1190.
The Red Light Means MCCruise Is On, But Not Engaged… Phew!
My irrational thoughts disappeared after the red light turned yellow and the bike very smoothly locked at the desired speed and stayed there until I squeezed the brake lever or pulled in the clutch just as advertised.
You know how most cruise systems jerk when you hit the SET button and let off the gas abruptly? MCCruise doesn’t do that. It’s super smooth when activating, but immediately drops off when you cancel it. Full credit for making this a truly motorcycle friendly system. No herky-jerky on a motorcycle, please and thank you. Well done!
Solid and Accurate
I was so pleased with the initial test that I HAD to ride longer than just a lap around Airdrie, so I headed west towards a huge hill that slopes upwards at a 45-degree angle for at least a couple of miles to see how well the speed would hold. I set the cruise at 75 mph at the bottom of the hill and it didn’t waver even 1 mph in the ascent!
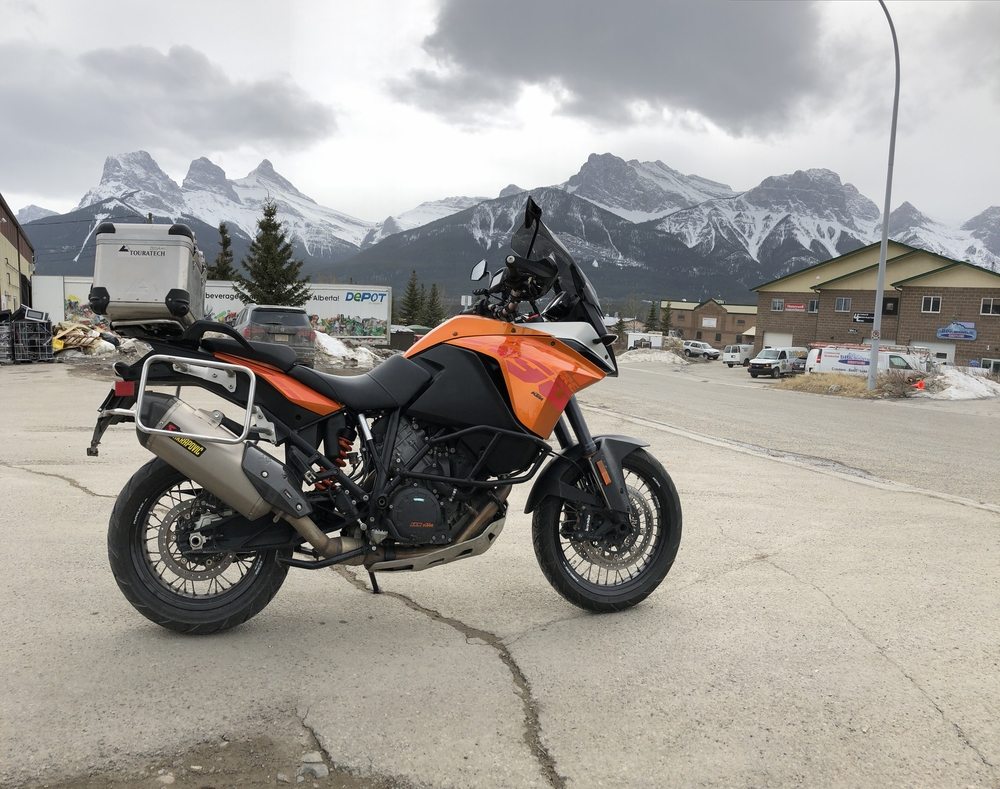
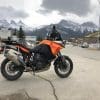
I ended up riding further west into the still snow-capped Canadian Rockies that I love riding in so much. I logged a total of 160 miles to make up for some of the long winters I had to endure without any riding time. The MCCruise was flawless and completely earned my trust and confidence over that time and distance.
How Low Will It Go?
Most cruise control systems won’t activate until you’re going faster than about 25 mph and I was curious if that applied to MCCruise. After some experimentation, I found that I was able to activate the MCCruise at a surprising 18 mph as it turns out. That’s going to come in handy riding through construction zones this summer.
A Happy New Owner
Up until then, I was seriously considering selling my 1190 and buying a different bike equipped with factory cruise control. No more! That’s going to save me a pile of money and let me keep a bike that I’ll now really enjoy a lot more on long rides.
The MCCruise Brothers
The minds behind MCCruise are two Australian brothers named Tony and Frank Guymer. The testing data they provided me with showed that at 60 mph there’s almost zero variation in speed even when riding up big hills. My testing confirmed those numbers. It’s really well thought out and engineered.
Tony and Frank were easy to reach and prompt to answer questions via email or phone. Impressive considering they’re half a world away “Down Under”. I found them to be very passionate about ensuring their product is safe and reliable.
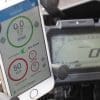
Firmware and BlueTooth
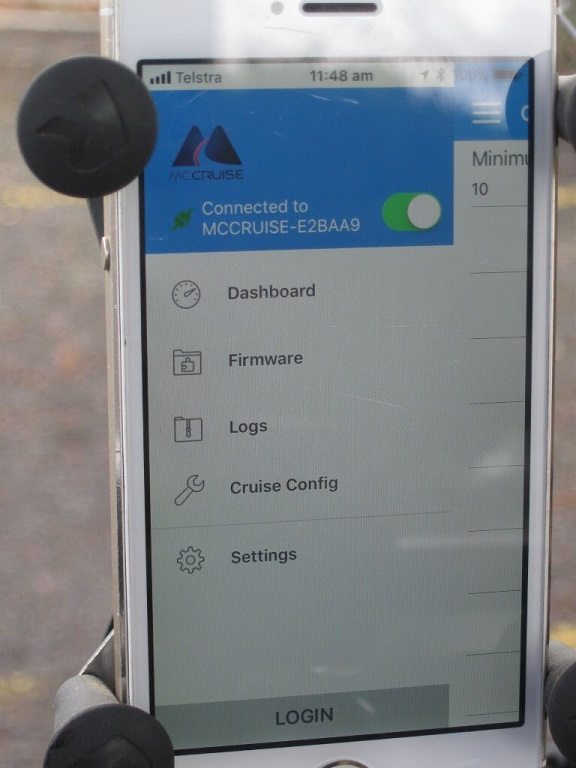
Tony informed me that coming in the next month or so you’ll be able to buy a Bluetooth connector to add to your MCCruise system to further enhance it This connector combined with an MCCruise app on your phone will allow pairing of the two devices.
When improvements to the firmware are developed by the Guymers you’ll be able to update the system this way.
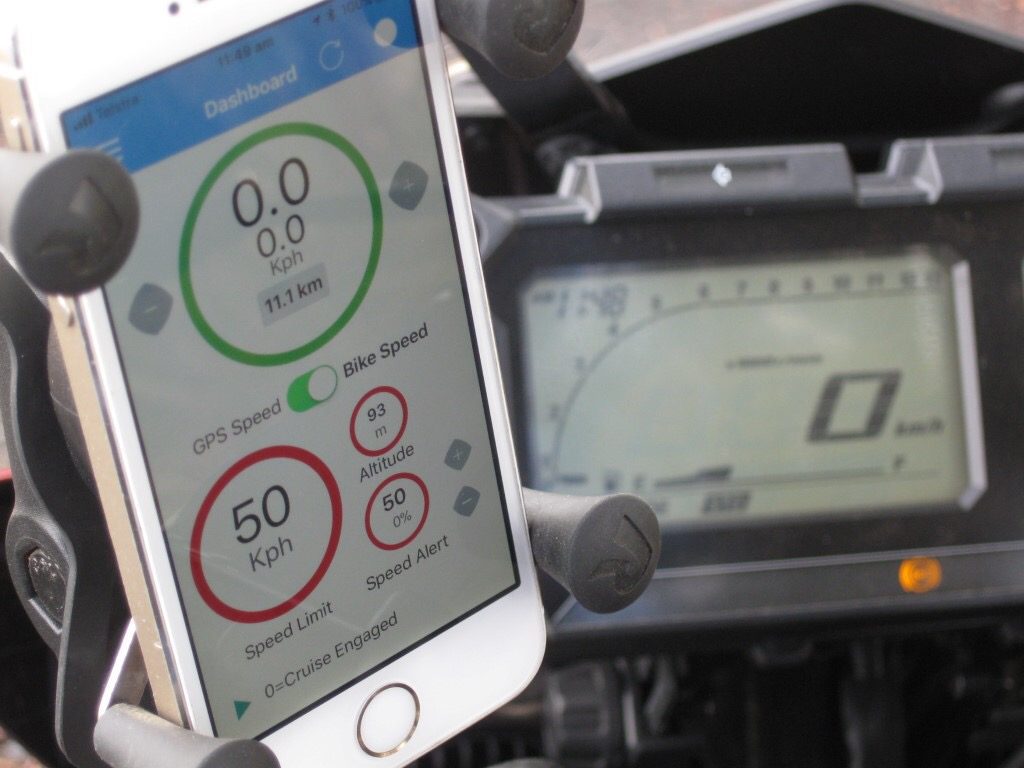
Even better, the app will display your TRUE speed instead of just what your speedometer reads if you pair it with your cellphone and GPS app. The MCCruise app can be set up to warn you if you go over the speed limit for the road you’re traveling on. That could help save you money on speeding tickets and justify buying the system.
Intelligent Cruise Control
Tony Guymer told me that he and Frank had successfully programmed the cruise control system to automatically adjust the bike’s speed on its own to match the GPS road data. They chose not to release this feature to the public because the road speed limit data isn’t always accurate. All the same that is pretty cool to think this kind of potentially “intelligent” cruise control is possible with MCCruise.
The Installation
Now we get down to the nitty-gritty: getting the kit on your bike.
Instruction Manual
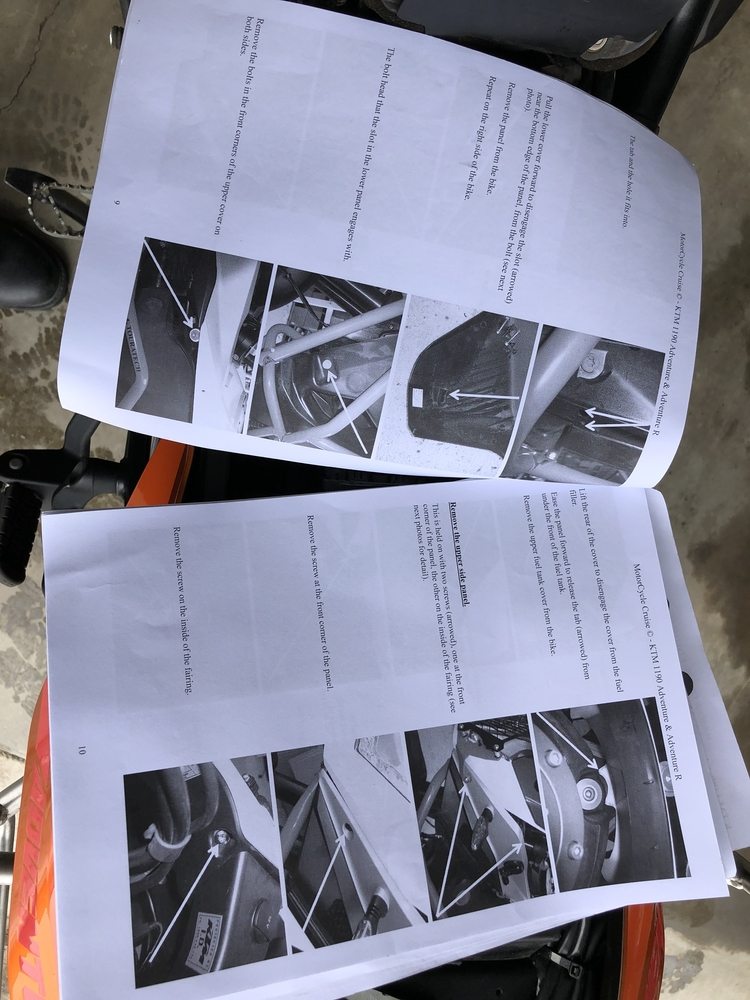
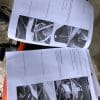
The instruction manual is written in a clear step-by-step style and has useful black and white photos in it for reference. It covers:
- Removal of all parts necessary for MCCruise installation
- Routing of the two wiring harnesses and where to attach tie straps
- How to disassemble wiring connectors on the bike and in the MCCruise harness
- Wiring color diagrams and what sensors and switches they correspond to. This also functions as a basic wiring schematic for the system and can be used for troubleshooting needs down the road
- Calibration of the system when the install is completed
- How to safely bench test the system in your garage before taking it out on the road
It Turns Out I Read “Aussie” Fluently
I impressed myself with my complete comprehension of the Australian dialect the manual was written in and how much it resembles our English language.
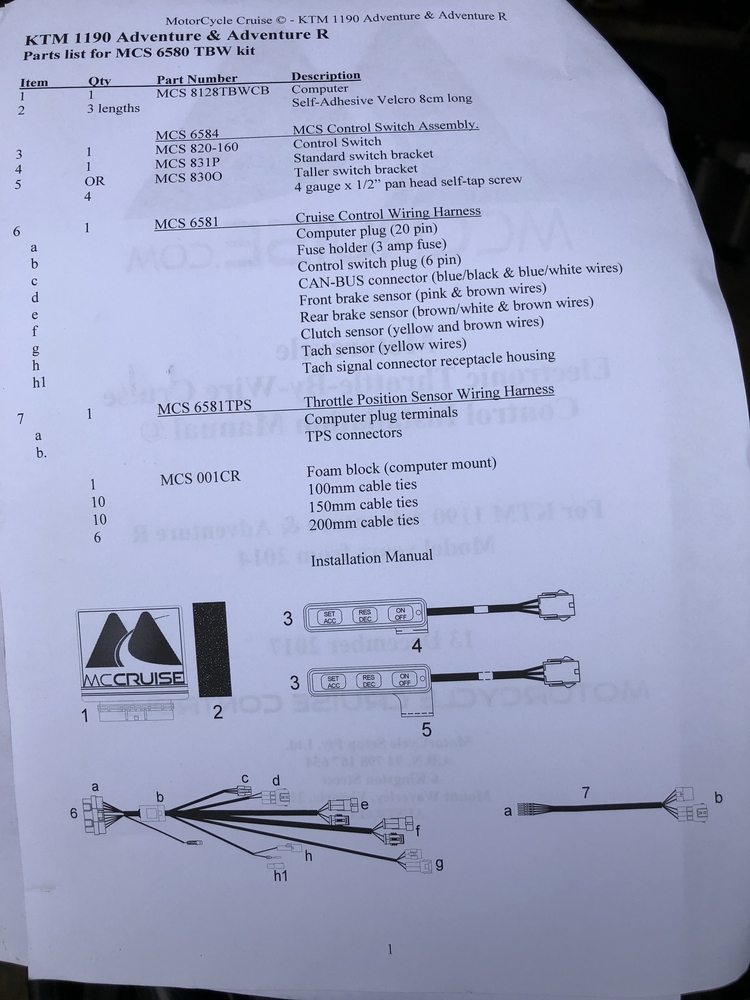
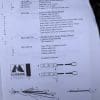
This page in the manual lists everything that comes in the kit and provides part numbers in case anything is missing. Everything in the kit gets used in the installation, including the packing foam. I found that out the hard way when out of habit I threw it away after opening the box weeks before I installed the kit. I didn’t realize that chunk of foam is used underneath the MCCruise electronic control module for support when installing on the bike. Oops. Good thing I had some extra foam kicking around.
TPS Harness and Main Harness Installation
There are two harnesses to be installed that run from just underneath the handlebar riser mounting clamps along the right side of the frame under the gas tank, all the way back to underneath the passenger seat area.
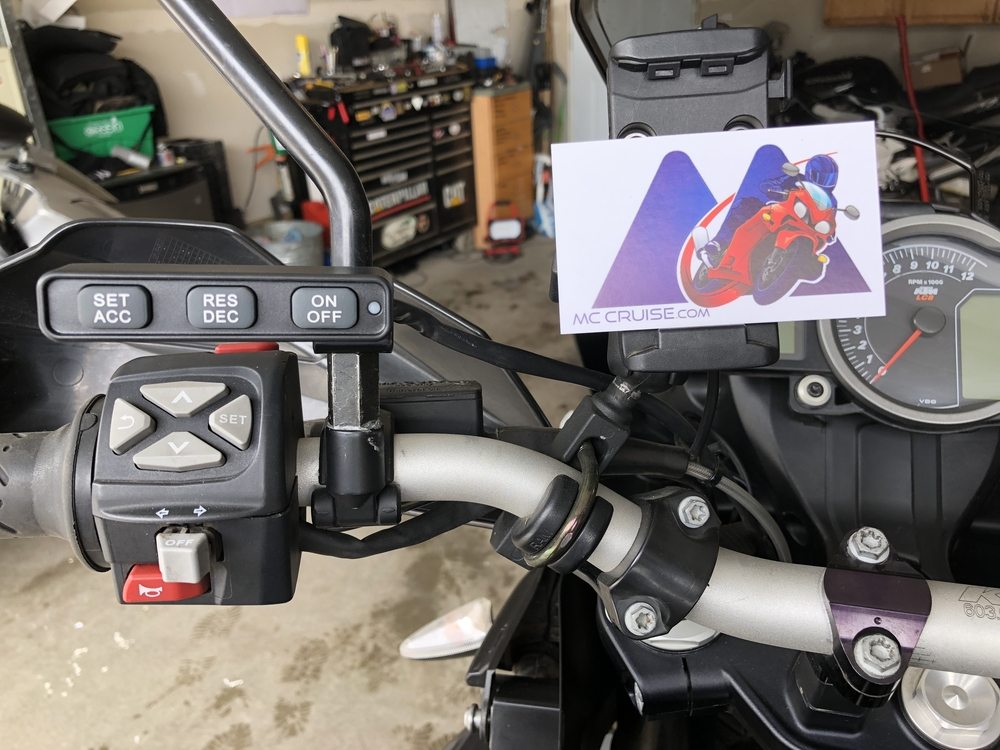
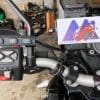
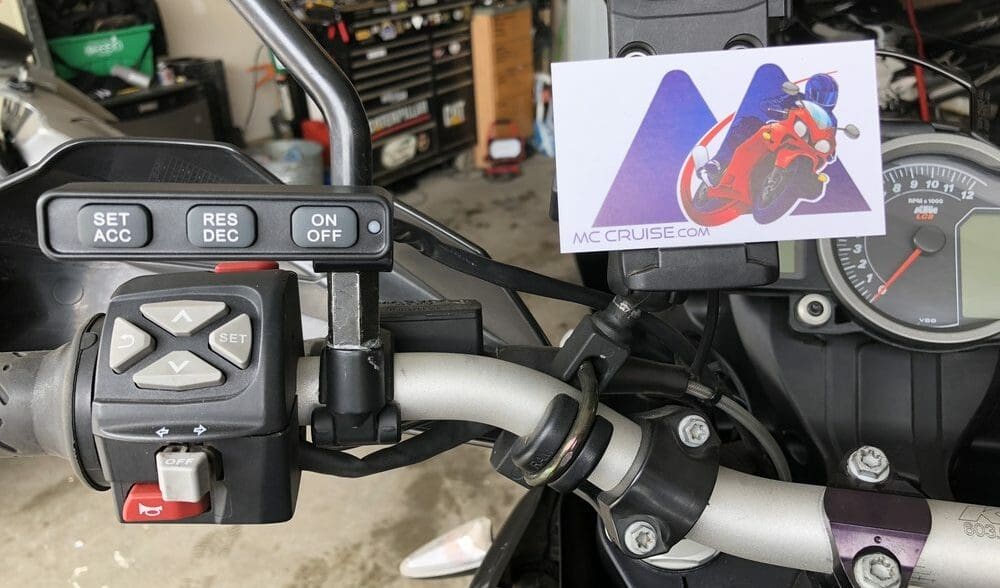
The TPS (Throttle Position Sensor) harness installation begins with removing the left side mirror and sandwiching the control switch housing mounting bracket in between it and the mirror perch (photo above). You have the option of a normal or high mount depending on what configuration you have to work around on your bike’s left handlebar.
I installed the standard height bracket as pictured above. There’s still plenty of room to use the buttons on the left handlebar.
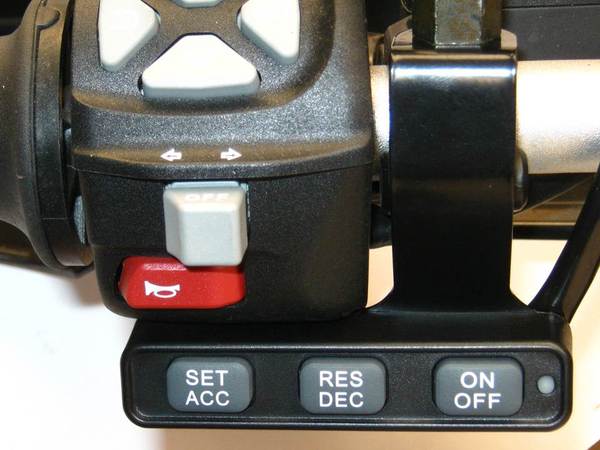
You can alternately mount it underneath the left handlebar if you prefer as shown in this photo below. Looking back now that may have been a more discreet location for it.
The MCCruise TPS harness has two connectors on it that match the TPS connectors on the bike’s harness. You need to connect them in between the two halves of the bike’s connector.
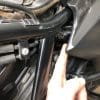
In order to get access to the bike’s TPS connector, you need to remove the gas tank and the left side intake tube. Even after that, it’s a challenge to be able to cram your hands into the small opening in the frame available to access it. The instructions say to remove both intake or snorkel tubes, but I managed it with only the left side removed.
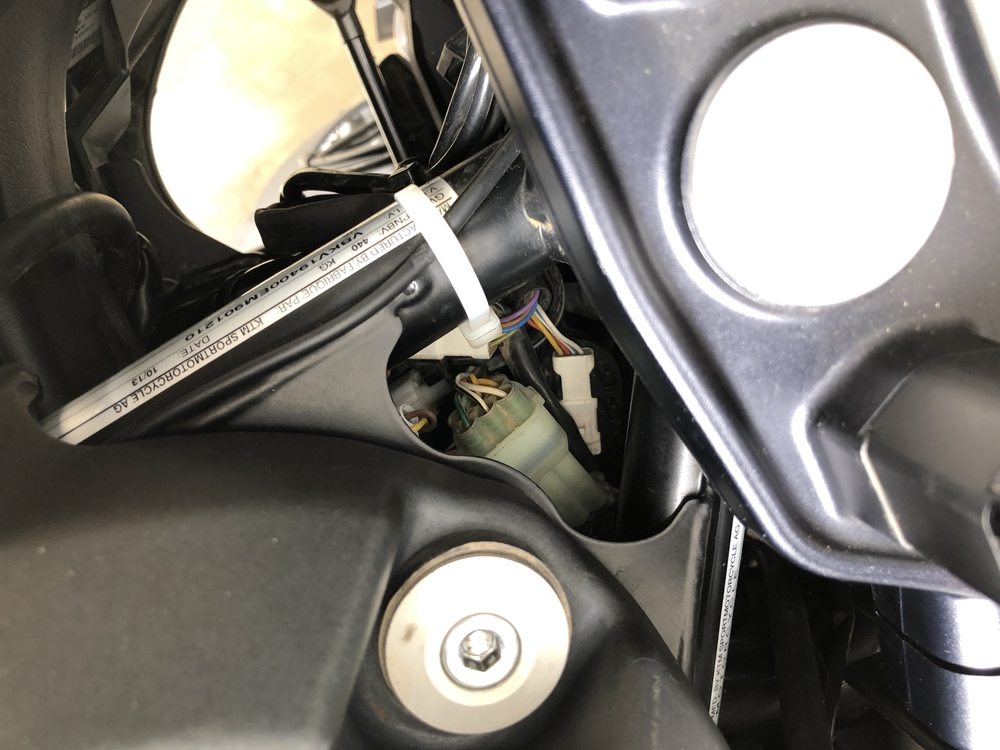
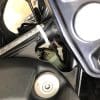
Photo Above: This shows the view looking from above at the small opening in the frame to access the TPS connector.
The bike connectors are all fairly difficult to pull apart using only one and a half hands while working through only a small opening, but it can be done if you’re persistent and use a very small screwdriver to help by pushing down on the locking tab.
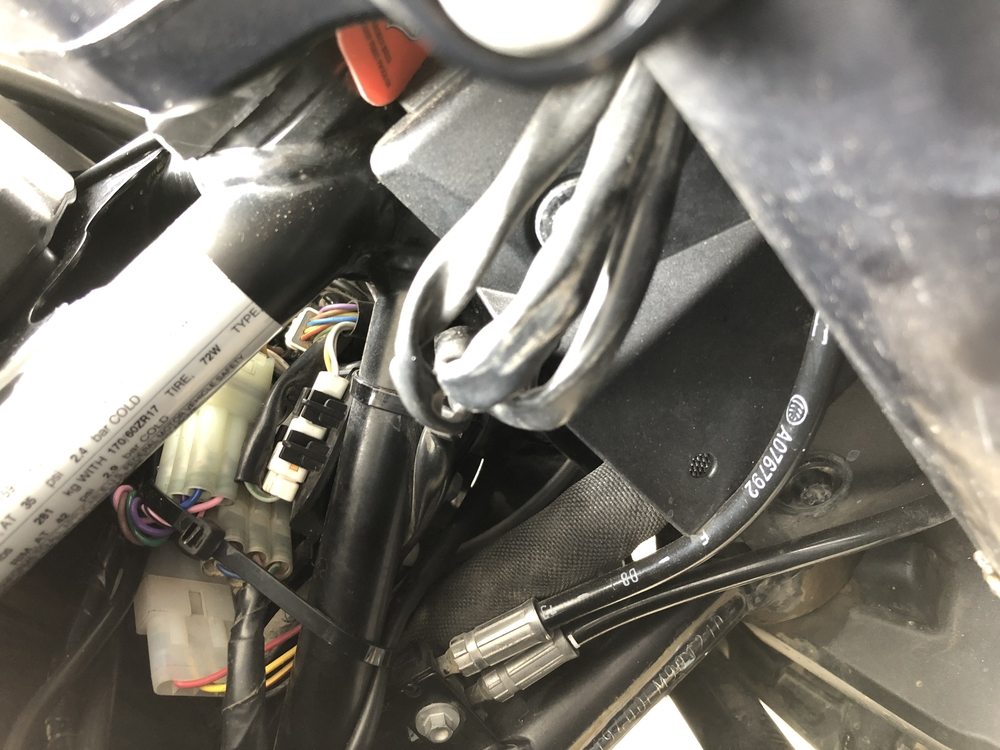
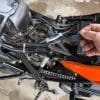
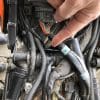
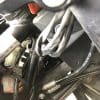
Photo Above: The mess that is the TPS and Main MCCruise harnesses that are installed in the jumble of connectors located behind the triple tree clamp area.
In addition to the TPS connector, you’ll also have to pull apart the ones for the front brake and clutch switches located in the same small area and plug in MCCruise harness connectors. After doing up everything in this small area you’ll have twice as many connectors jammed in the space just flopping around. I wrapped tie wraps around the whole collection and secured them in an ugly looking ball to the frame. As you can see in the photo above it’s not pretty, but should hold together.
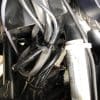
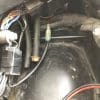
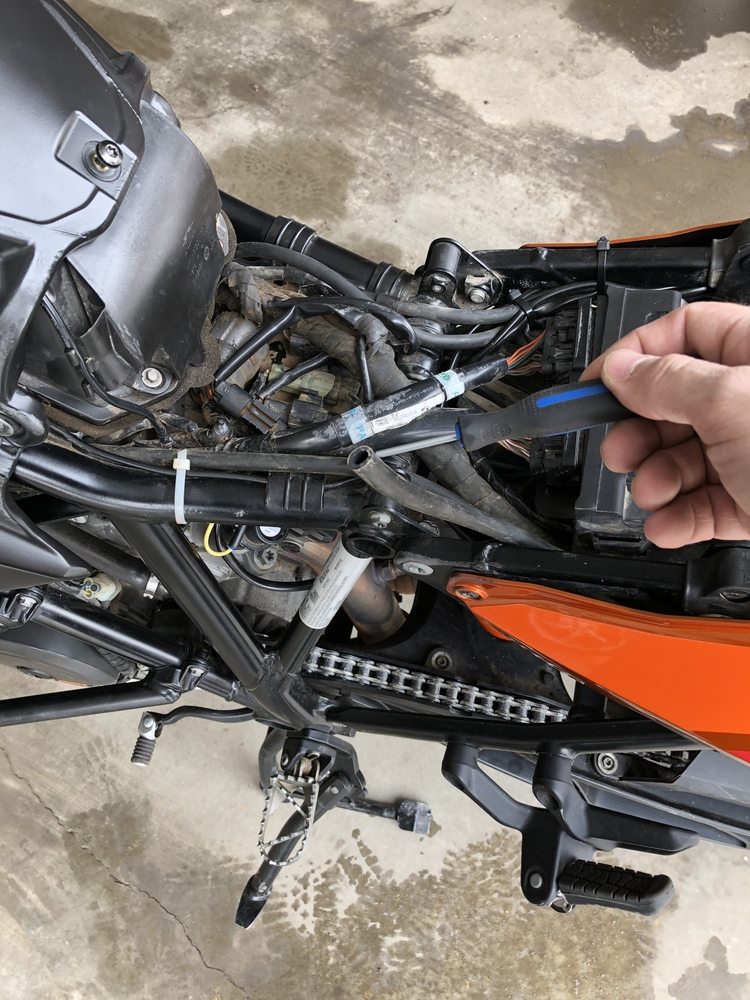
Now it’s time to route both harnesses towards the back of the bike along the inside of the frame between it and the airbox.
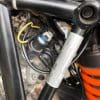
This photo shows the gap between the frame and airbox where the two harnesses have to be routed from the front of the bike to the back. The two steel tubes on the left of the photo make a good anchoring point and guide for the harnesses to follow as you route them.
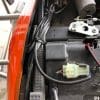
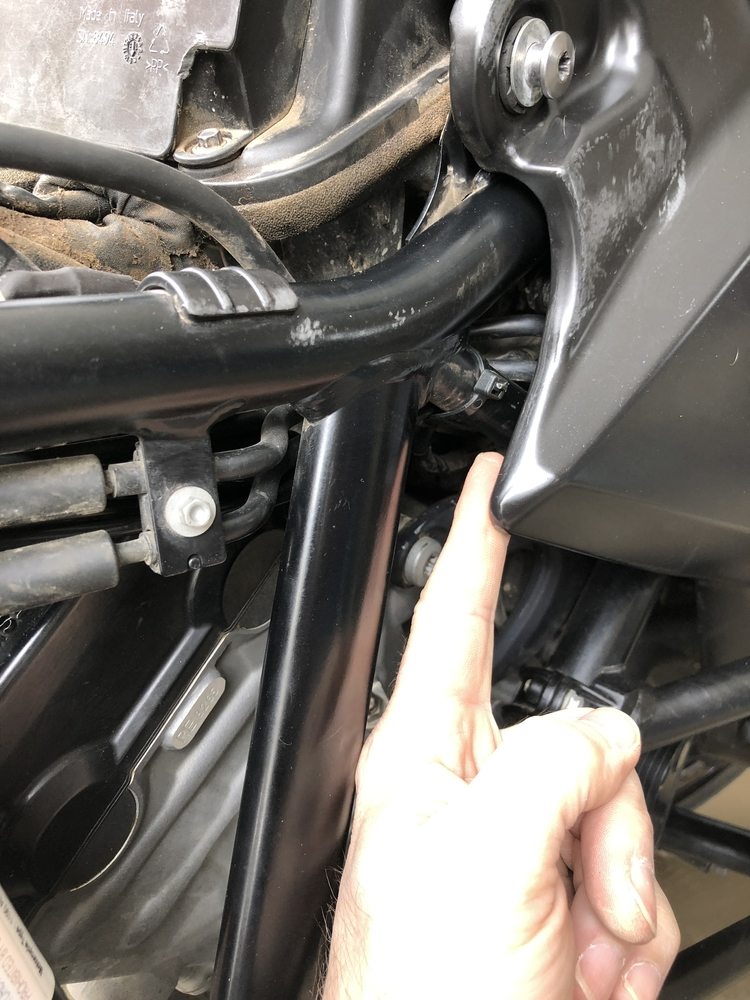
That bundle of shiny wires is the TPS and main harnesses coming from the front and running along the right side frame all the way to the back of the bike where the MCCruise control module will be housed underneath and behind the passenger seat. You have to loosen off the orange body panel screws on the lower part of the photo in order to route the harnesses under the frame and then up and over it to the control module. Do all this while bearing in mind where the seat will land on the frame so that it won’t pinch the harnesses.
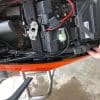
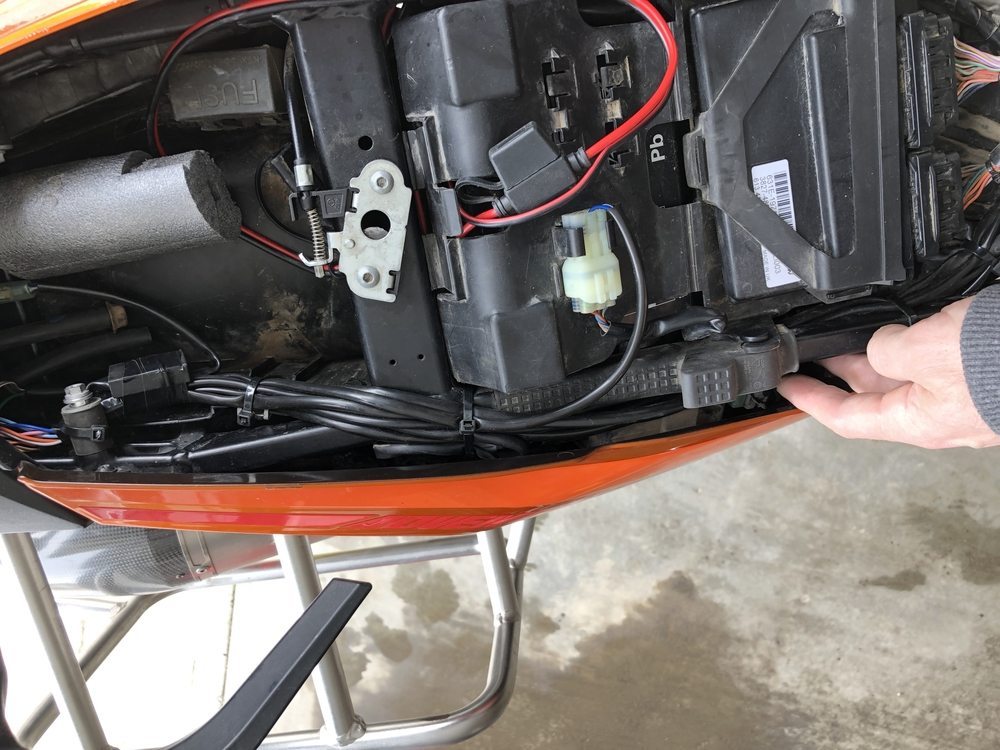
There’s also a wire with a clear plastic connector coming off the main harness that plugs into the diagnostic plug you see sitting on top of the battery in the photo above and another that you route to the rear brake switch located under the bike’s electronic control module.
Note: ***MCCruise offers a pass-through patch harness to support other accessories or “dongles” already plugged into the diagnostic port. Other add-ons can live downstream of the MCCruise connection with this patch harness installed allowing the MCCruise and another performance-enhancing system to operate simultaneously. No worries, Mate!
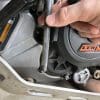
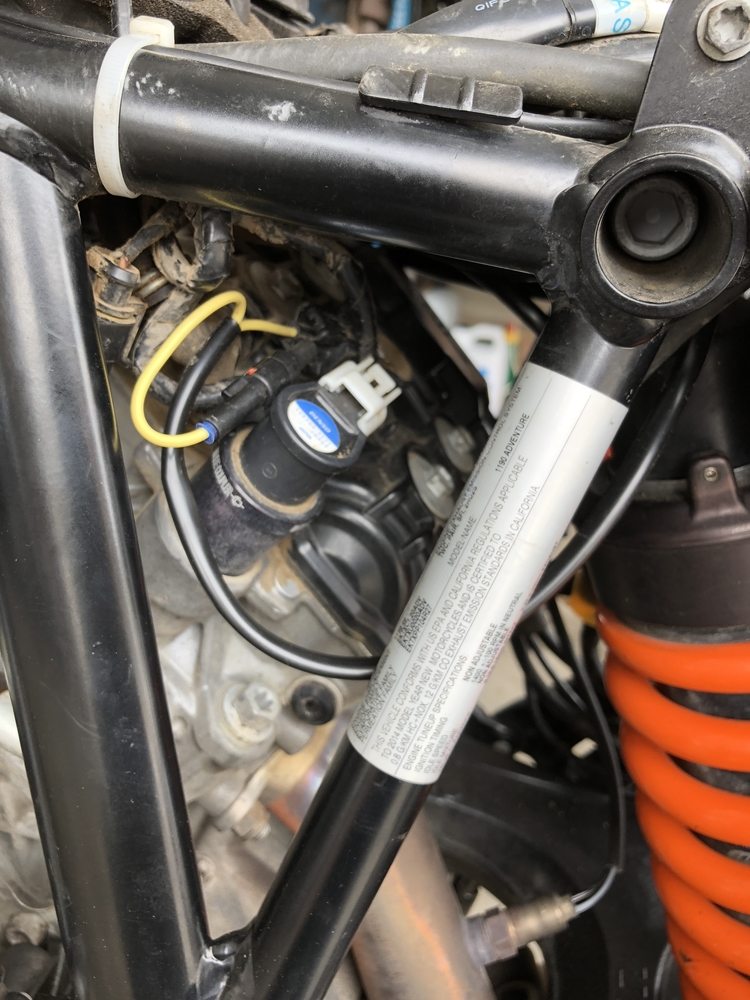
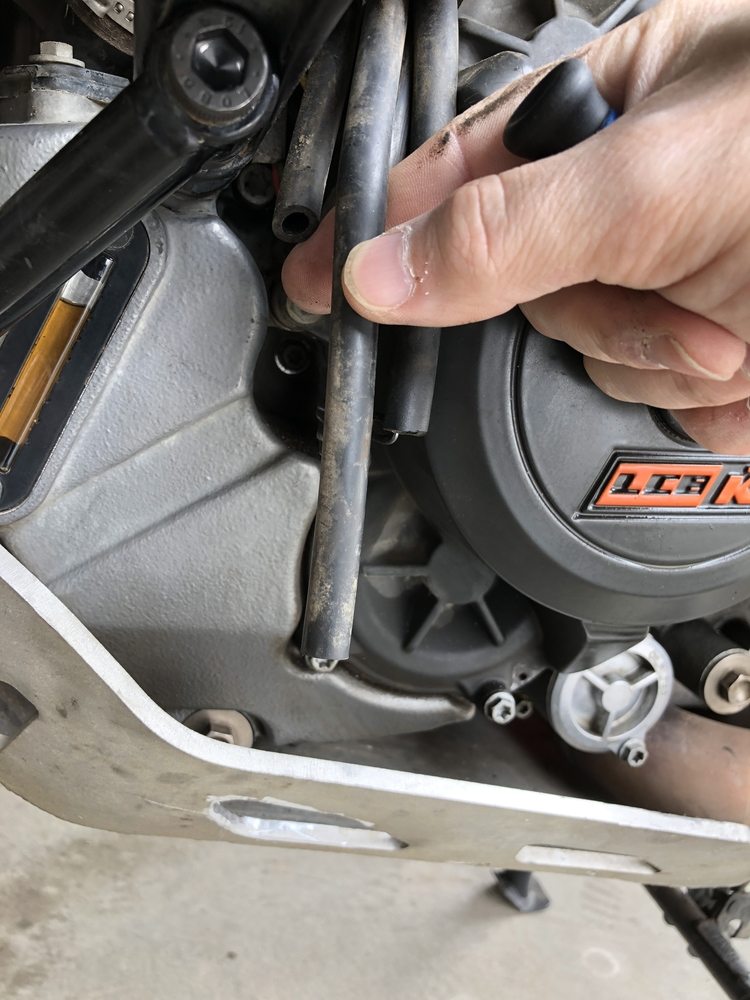
The final yellow wire off the main harness runs across the frame of the bike above the rear shock to end up connected to one of the spark plug coil connectors as seen in the photo below. Again, the way to do this is clearly explained in the installation instructions.
Install The MCCruise Brain
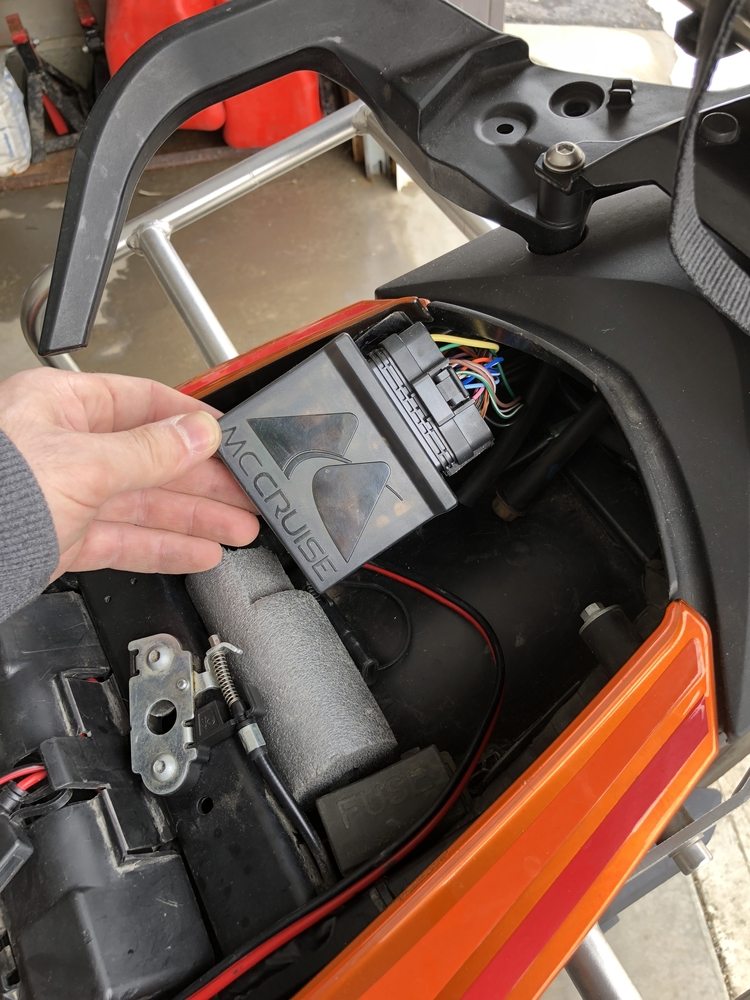
This is the “brainbox” for the MCCruise system that makes the magic happen. You’ll have to unlock the large, rectangular connector that plugs into it and insert several wires in the correct pin holes before you connect it to the brainbox (electronic control module if you want to use proper nomenclature). The instructions show and explain clearly how to do this, thankfully.
Once that’s done you can stick the brainbox to the roof of the pocket in the black plastic body panel at the rear of the bike. The instructions call it a “duckbill” if I recall correctly. Velcro tape is included to hold it there and then you stuff the packing foam from the kit (that you wisely didn’t throw away) under it to keep it in place. A perfect hiding place for this important computer module to stay safe.
That shiny black wire in the photo above with the clear plastic spade connector on it also needs to be plugged in to supply power to the system from the bike. You’ll find two wires with these spade connectors just hanging out in the back of that body panel waiting to put power into whatever you decide to connect to them.
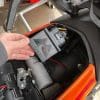
Removing the Emissions Canister: Optional
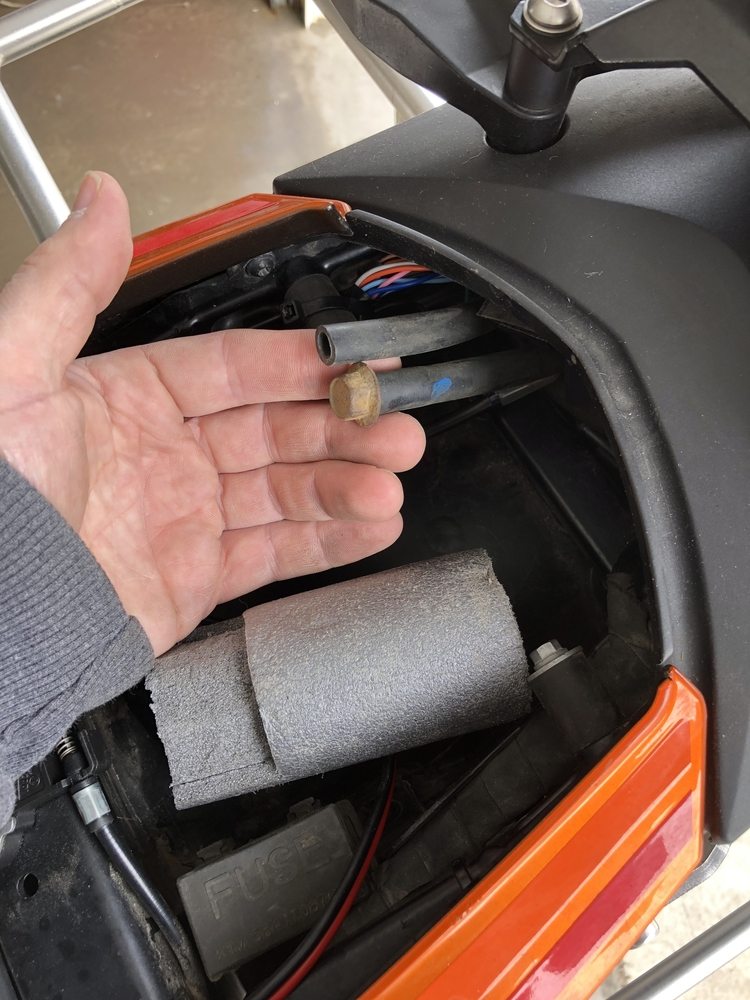
In the last photo, you’ll notice two hoses on the left of the power wire, one of them has a blue dot on it and a bolt stuck at the end of it to plug it off.
Those hoses came off the emissions canister which I chose to remove from the bike in order to make room for the MCCruise control module and free up the area where the bike toolkit is supposed to be kept too. I don’t need the canister in the area I live to comply with emissions regulations. You, on the other hand, may need to keep it in there depending on where you live. Check and see what your local laws regarding fuel tank emissions are before removing this canister.
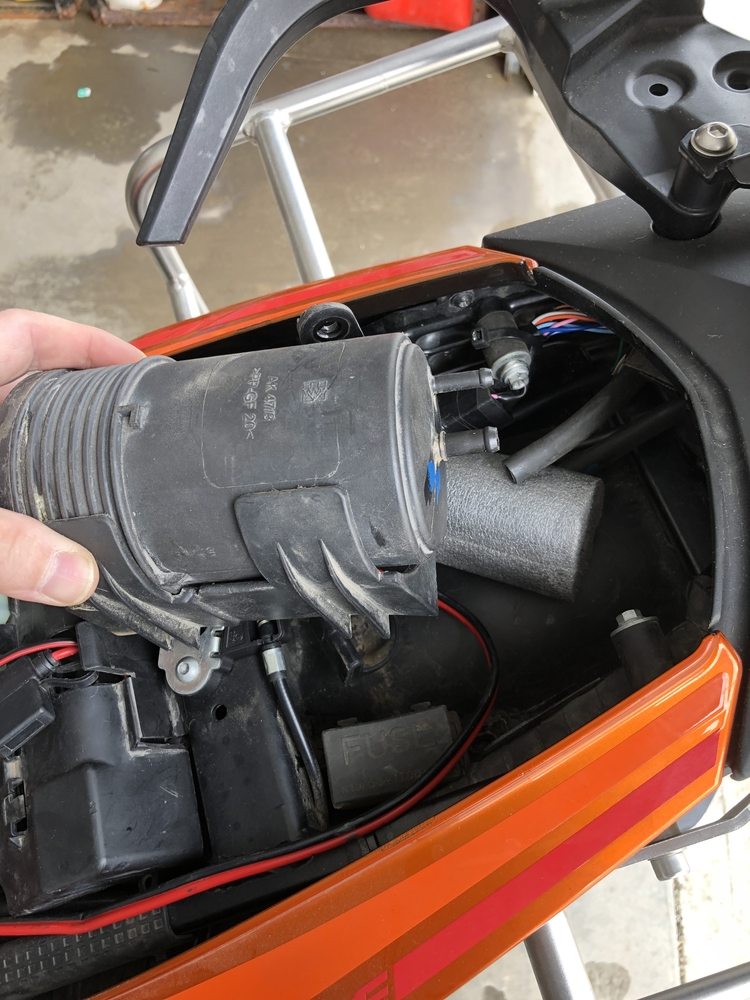
This photo above shows the canister in its mounting bracket and how it would take up all the space in the duckbill area.
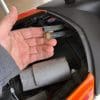
The hose with the blue paint on it in the photo before the last one came off the nipple in the center of the canister. That’s the one you plug with a bolt. It leads to the PCV on the left side of the engine. You can verify this by trying to blow air into the hose. You shouldn’t be able to flow any air into it if it’s the PCV line.
The other hose leads to the right side of the gas tank cap area and is a breather. If you blow in it air will flow out the end of the hose at the front of the bike if your gas tank is removed or into the tank if it’s still installed at that moment.
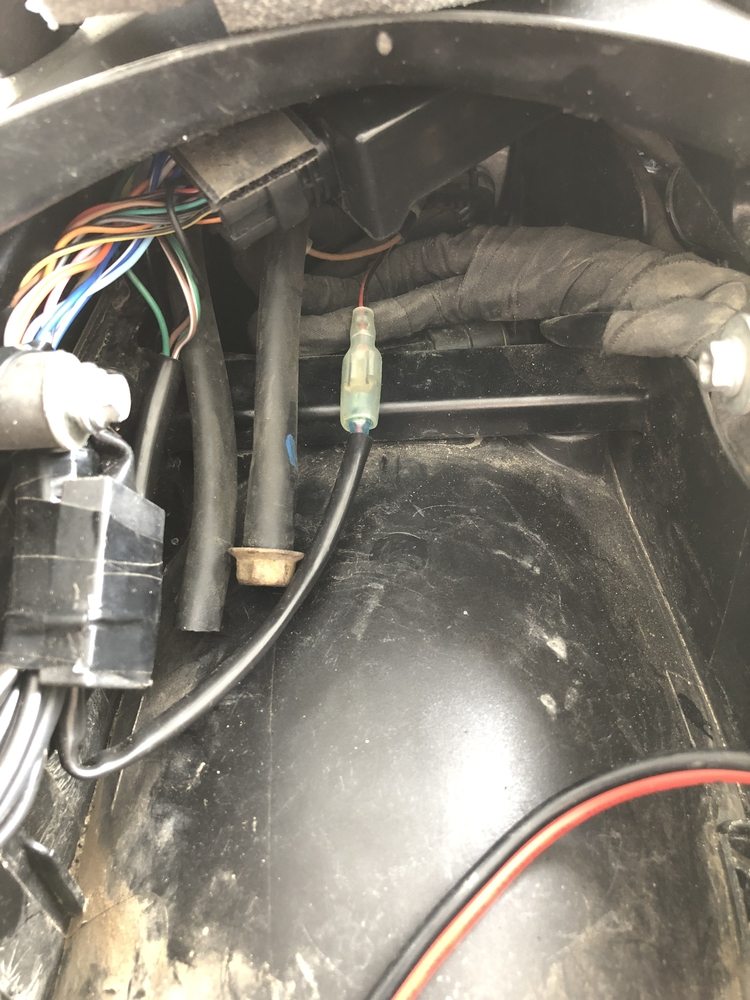
Trace the breather hose back to the area just in front of the bike’s battery/computer area and cut it there as seen in the photo above. Tuck the rear portion of the hose down out of the way. Feed the front portion of the hose back towards where it connects to the gas tank cap and then re-route it so that it runs straight down along the frame somewhere so that it can drain anything that comes out of the gas tank breather without pouring it onto the hot exhaust anywhere.
Doing it this way leaves the option open of putting everything back the way it was using a barbed fitting between the two cut sections of the breather hose if in the future you need or want to put the canister back in the bike. Don’t worry, removing the canister and plugging the PCV hose won’t damage anything or throw any error codes on the bike.
Final Checks
You should have the control switch box in place, all the wiring run now and the computer installed. Use the supplied tie straps to anchor the harnesses down tightly and so that they won’t get pinched by any moving parts of the seat when installed.
Now it’s time to check your work for errors and calibrate the MCCruise to your bike’s throttle position sensor. This is a way of making sure the cruise control will work without having to risk a failure while flying down the highway on the bike.
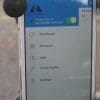
Self Diagnostic Mode and Calibration
The process is explained in the instruction manual of how to put the system in test mode using buttons on the control switch while watching the little LED light beside the ON/OFF button.
This video goes through the installation process and the way to test and calibrate the system.
Conclusion
I Wholeheartedly Endorse it
This Throttle By Wire MCCruise system is a super smart add-on for bikes like the KTM 1190 Adventure S or R, Honda VFR1200X or even the new 2018 Honda Africa Twin.
These bikes and many others have TBW technology on them but still no cruise control option from the factory.
How manufacturers can seriously say these are touring/adventure bikes and not provide cruise control is a riddle I’ll never solve. Some are coming around now and we’re seeing cruise control on newer KTM bikes for example, but this isn’t the case with many others. The legendary sport touring Kawasaki Concours has never come with cruise control for example.
Luckily MCCruise is a viable option that can make you as happy as I am now that it’s on my machine.
There have been issues reported with some of the earlier MCCruise systems for cable actuated throttles. Those systems used engine vacuum to control the movement of the throttle and from what I’m told Ethanol gasoline was leaving gummy deposits in the system causing problems with them. Those issues have since been resolved by Tony and Frank with some preventative measures and improved new designs like the mini electric servo systems.
The new TBW systems have no worries mate because they have no moving parts to gum up. If you have a TBW setup on your bike and no cruise control, the MCCruise is a no-brainer.
Pros
- Cutting-edge technology
- More accurate and smoother than OEM cruise control systems
- Upgradable firmware and BlueTooth connectivity coming soon
- Compact and reasonably easy to install
- Self-diagnostic mode for troubleshooting
- Customized cruise control kits are available to fit nearly any motorcycle
Cons
- Expensive to buy
- People with no mechanical skill will need to pay to install the system
- Large control switch may clash with the looks of some motorcycles
Specs
- Manufacturer: Motorcycle Cruise Controls (MCCruise)
- Price (When Tested): Approx $550 (tax, duty, shipping incl.)
- Made In: Australia
- Alternative model: Mini Electric Servo Controlled Systems
- Review Date: April 14, 2018
McCruise TBW Aftermarket Cruise Control Image Gallery