
Introduction
How time flies; it seems like it was only yesterday since we published our first look at the INNOVV Power Hub 1 product – I’ll blame it on cabin fever generated largely due to our lousy and continuing winter…
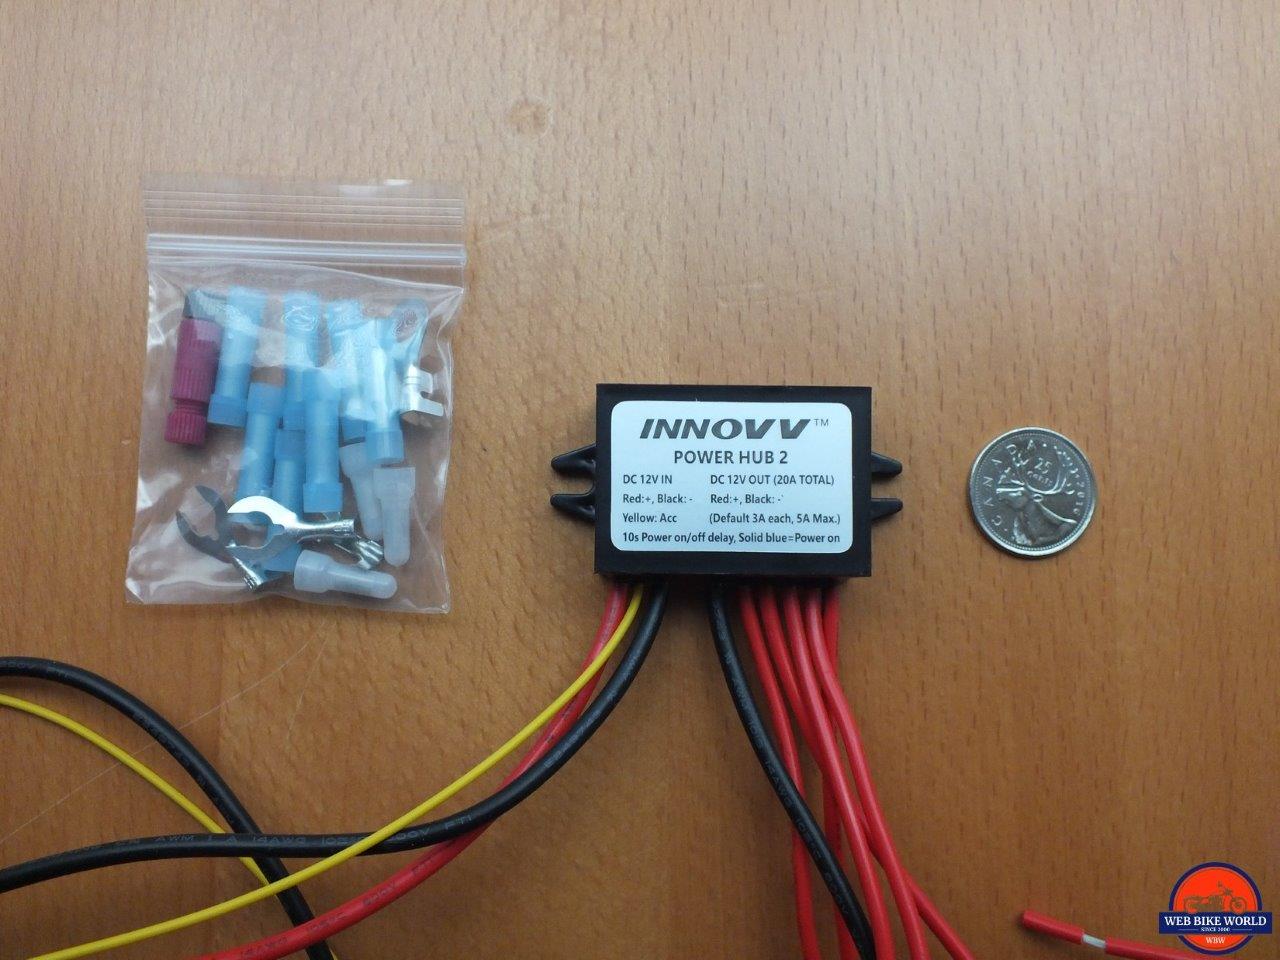
But like the original Power Hub 1 reviewed in December 2016 to be exact, the newest iteration, now called the Power Hub 2 still provides five switched in-line fused outputs, but in a much smaller form factor – taking up about half the space needed for the original Power Hub 1.
And it is this ‘downsizing’ that is, at least for me, the biggest change to what is one of the most versatile and economical power output products on the market.
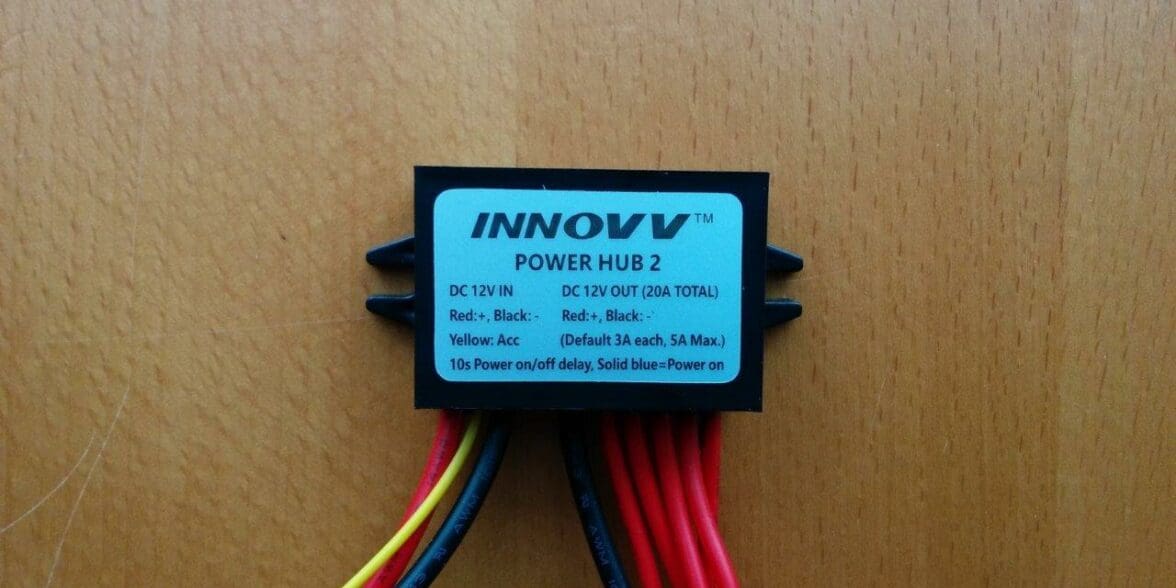
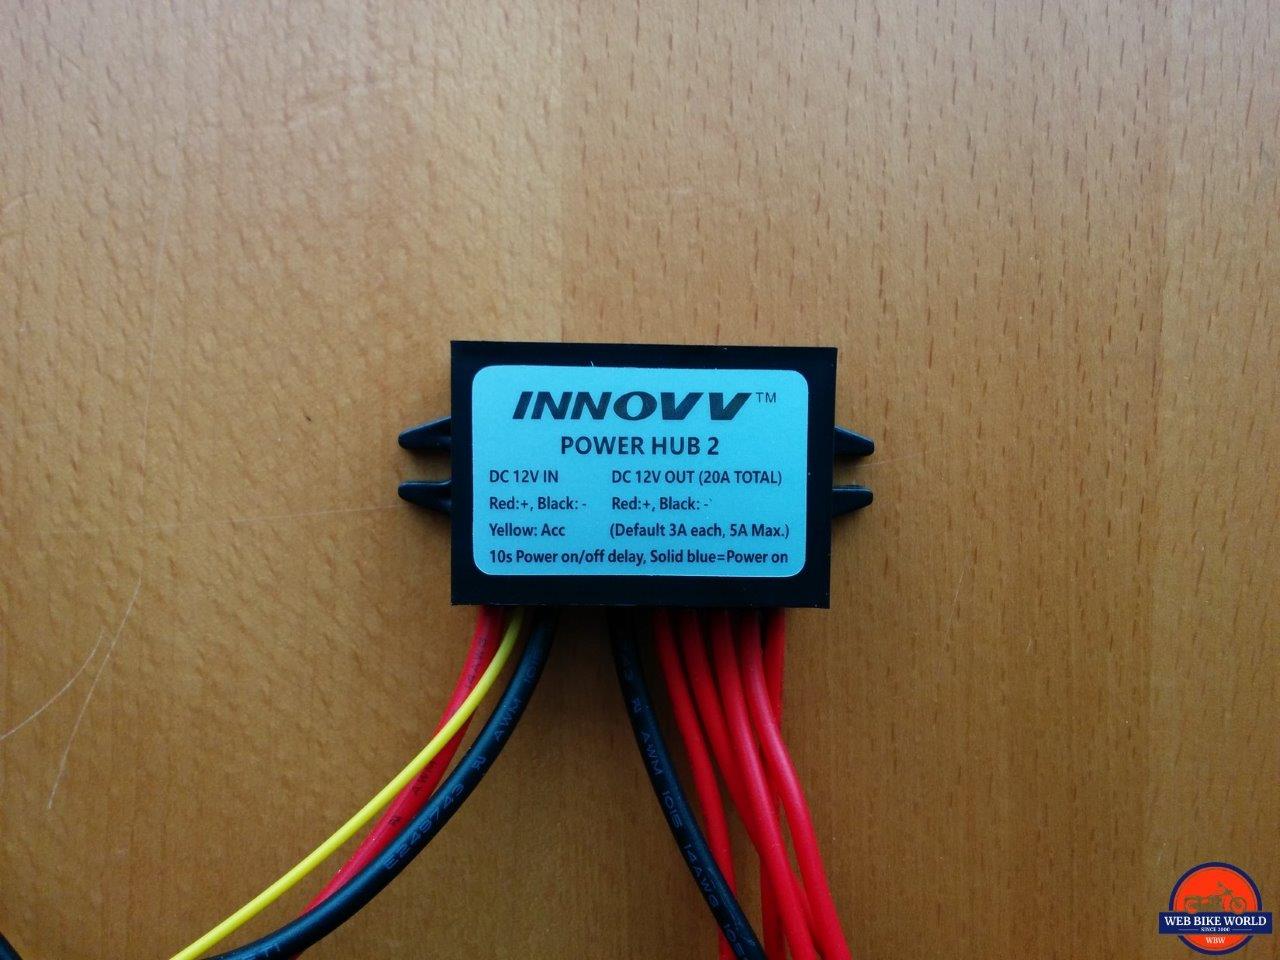
The INNOVV Power Hub 2
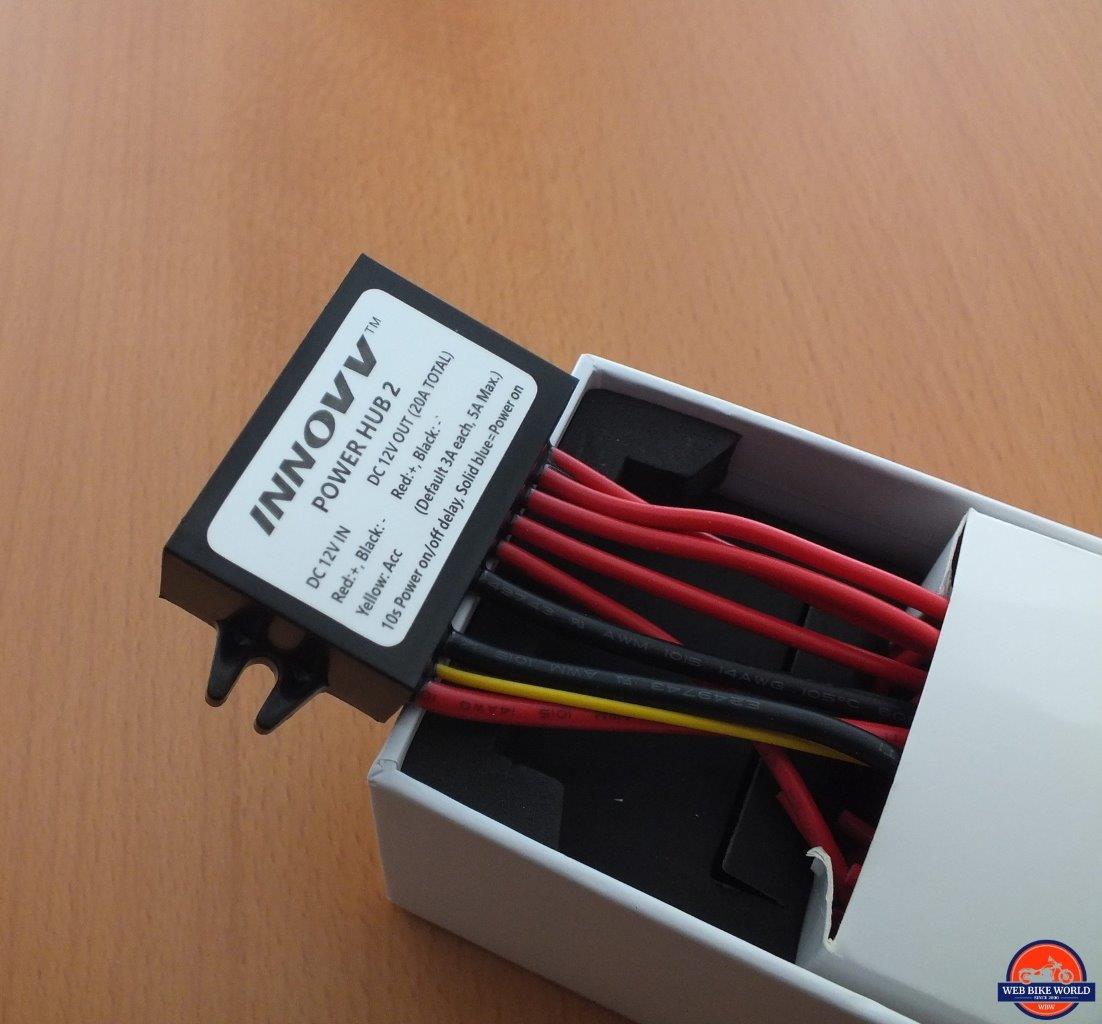
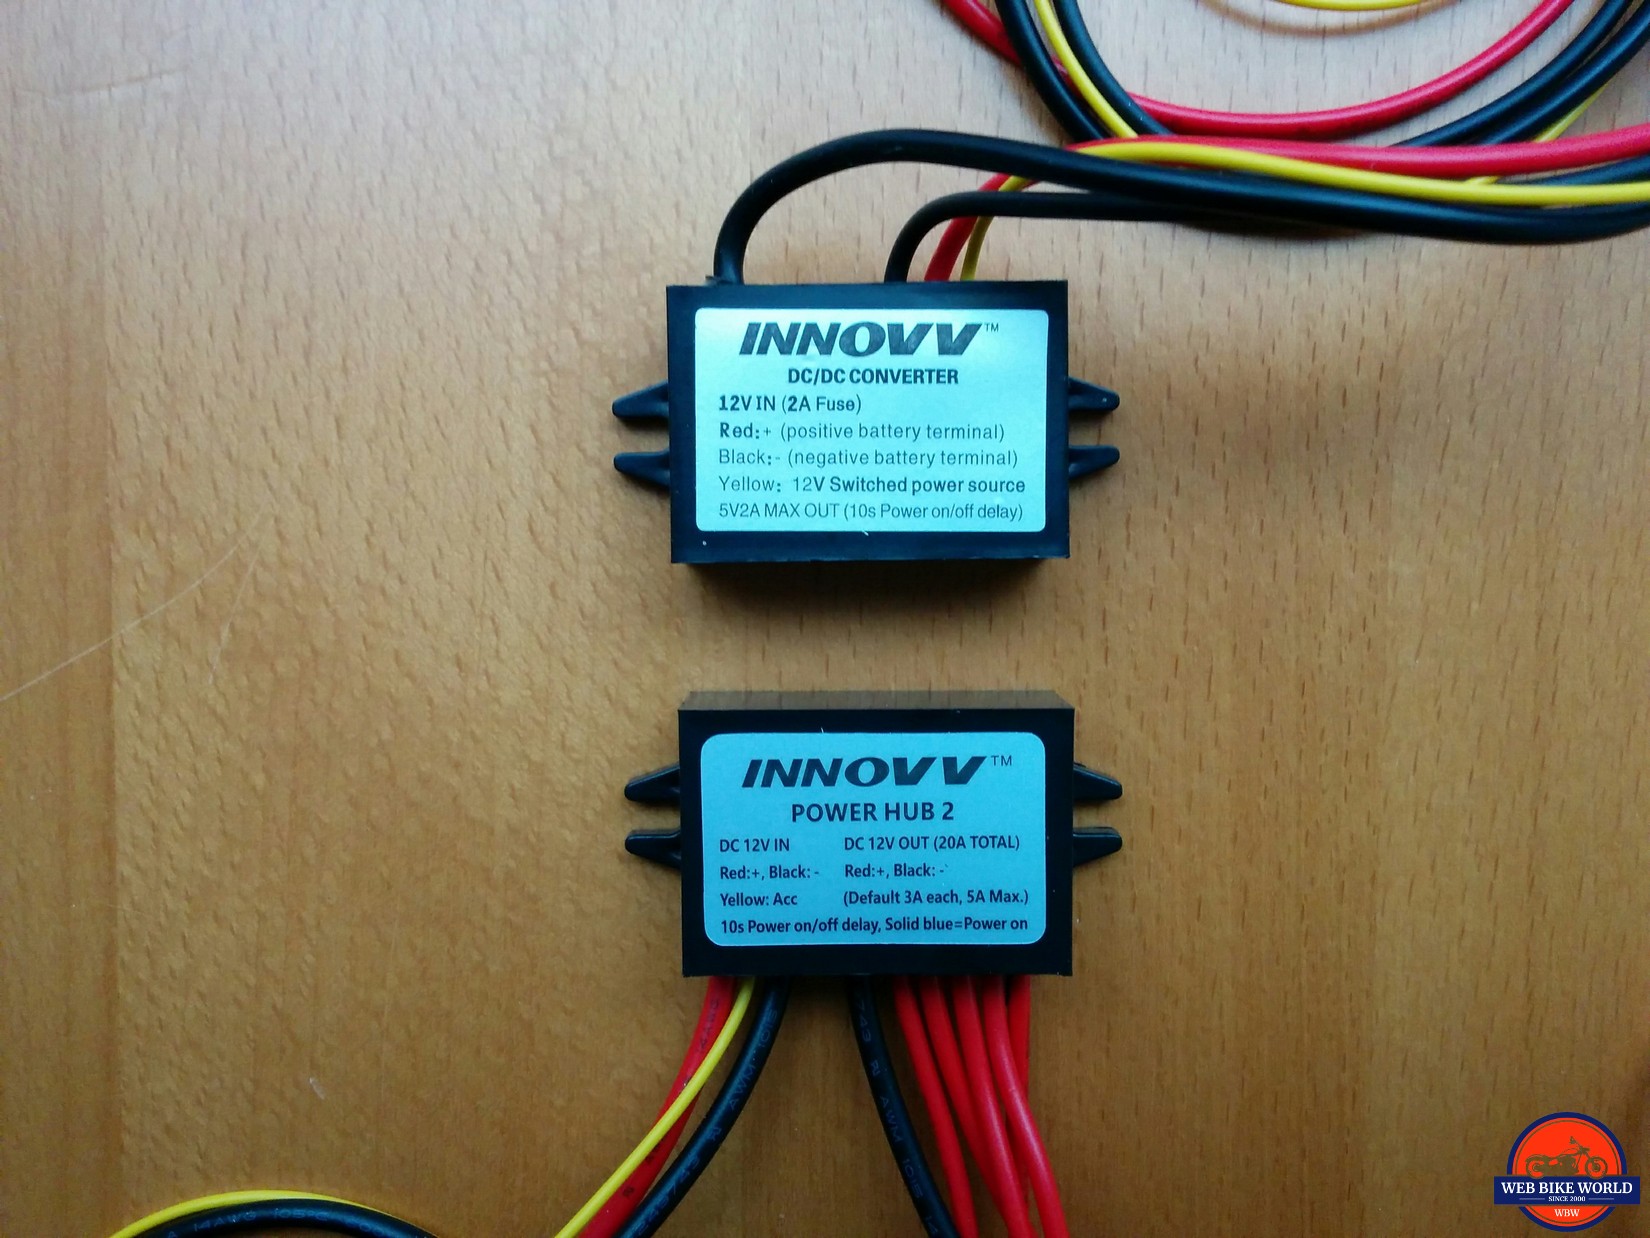
Welcome to 2019 and the INNOVV Power Hub 2. Unlike the Power Hub 1 that is a more 3-dimensional shape (think The Borg Cube), the Power Hub 2 is packaged in a smaller ‘brick’ form factor with identical dimensions to that of the INNOVV smart power supply module supplied with the C5 single and K2 dual channel camera systems.
Comparatively, both Hub variants are totally sealed, including the flying lead cables used for input and outputs – features allowing the modules to be mounted and used externally or in a more protected or hidden unused spot on the host platform.
But the newer smaller Power Hub 2 is far more likely to fit into a wider variety of spaces, especially when footprint and clearance are paramount; the five output leads with ATM fuse modules occupy more space than the module itself…
wBW has tested, installed and used virtually everything power distribution and management system on the market over the years, be they large, small, switched or unswitched, wired or wireless managed; and, the INNOVV Power Hub products remain great representatives for their genre.
We truly are well served regarding power distribution products for motorcycles. However, in comparing many competitive products, the INNOVV pieces still stand out, not only for their simplicity and flexibility but also pricing.
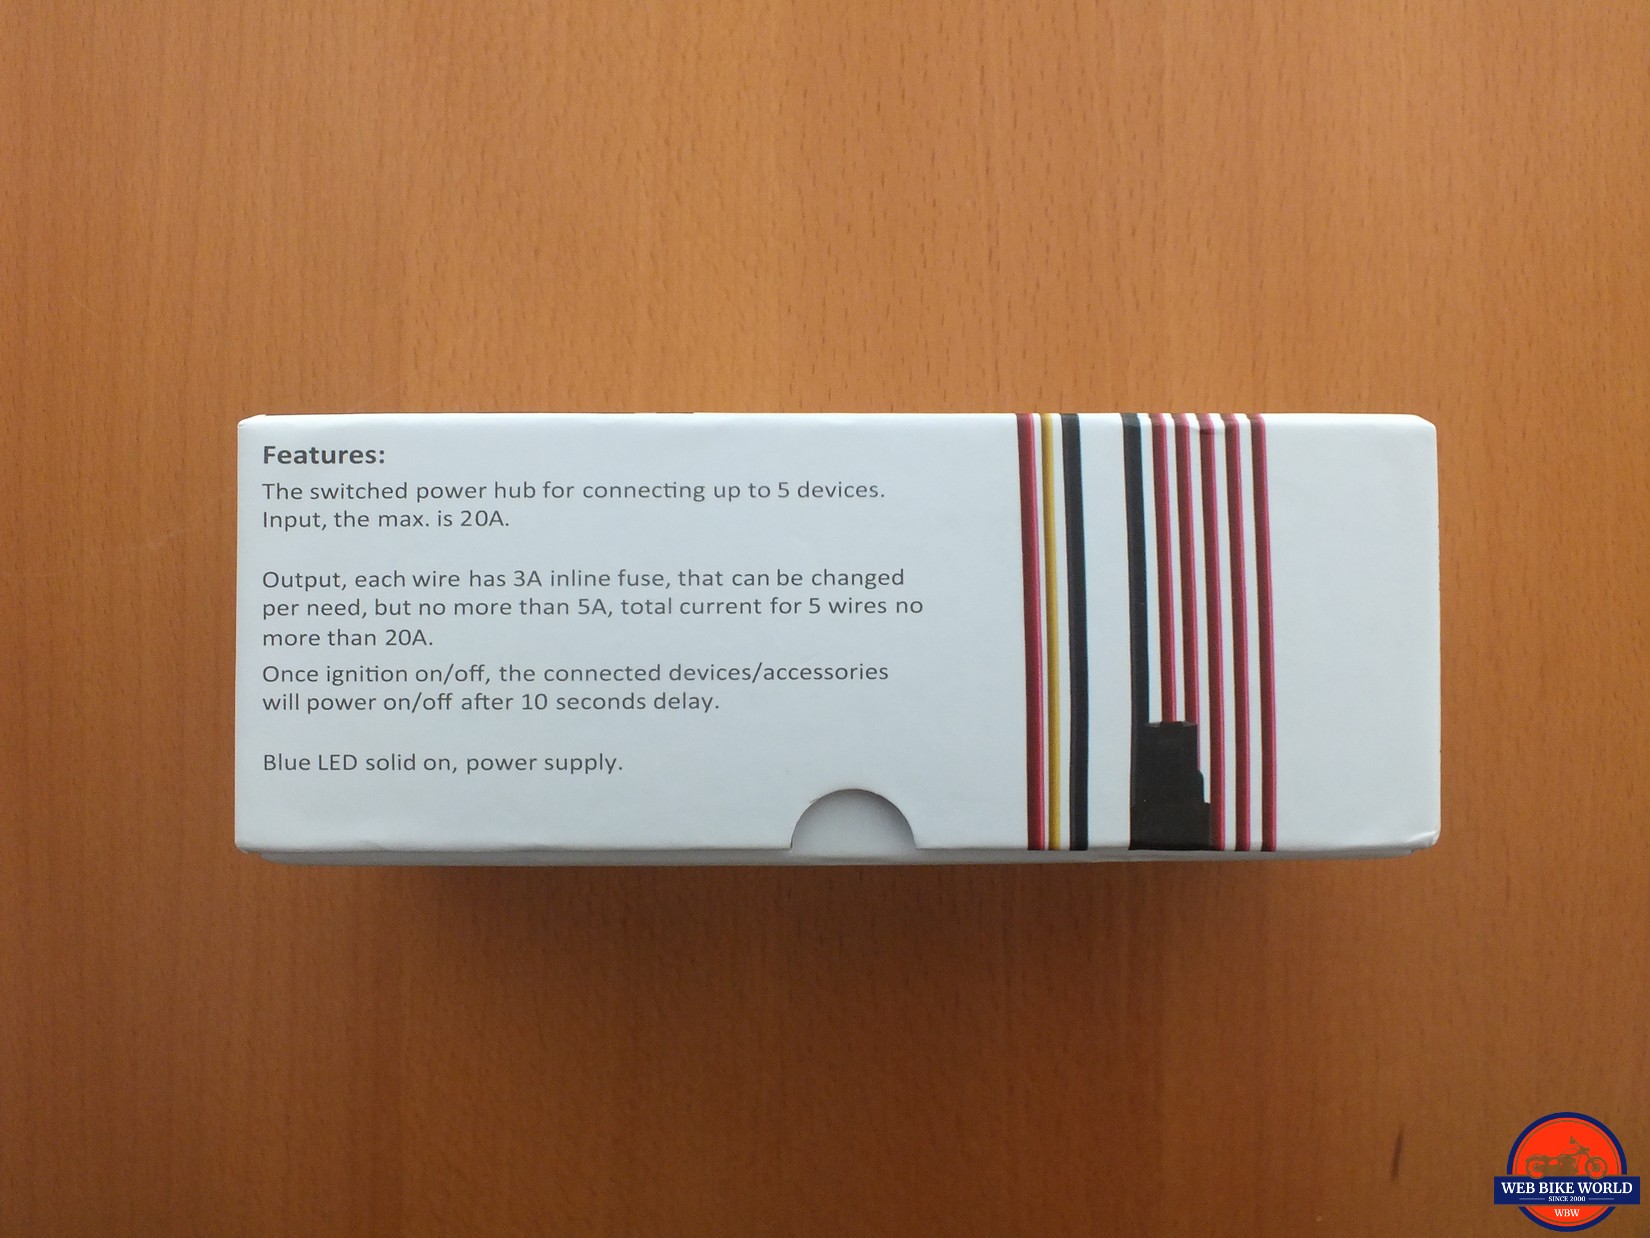
Power Hub 2 Features
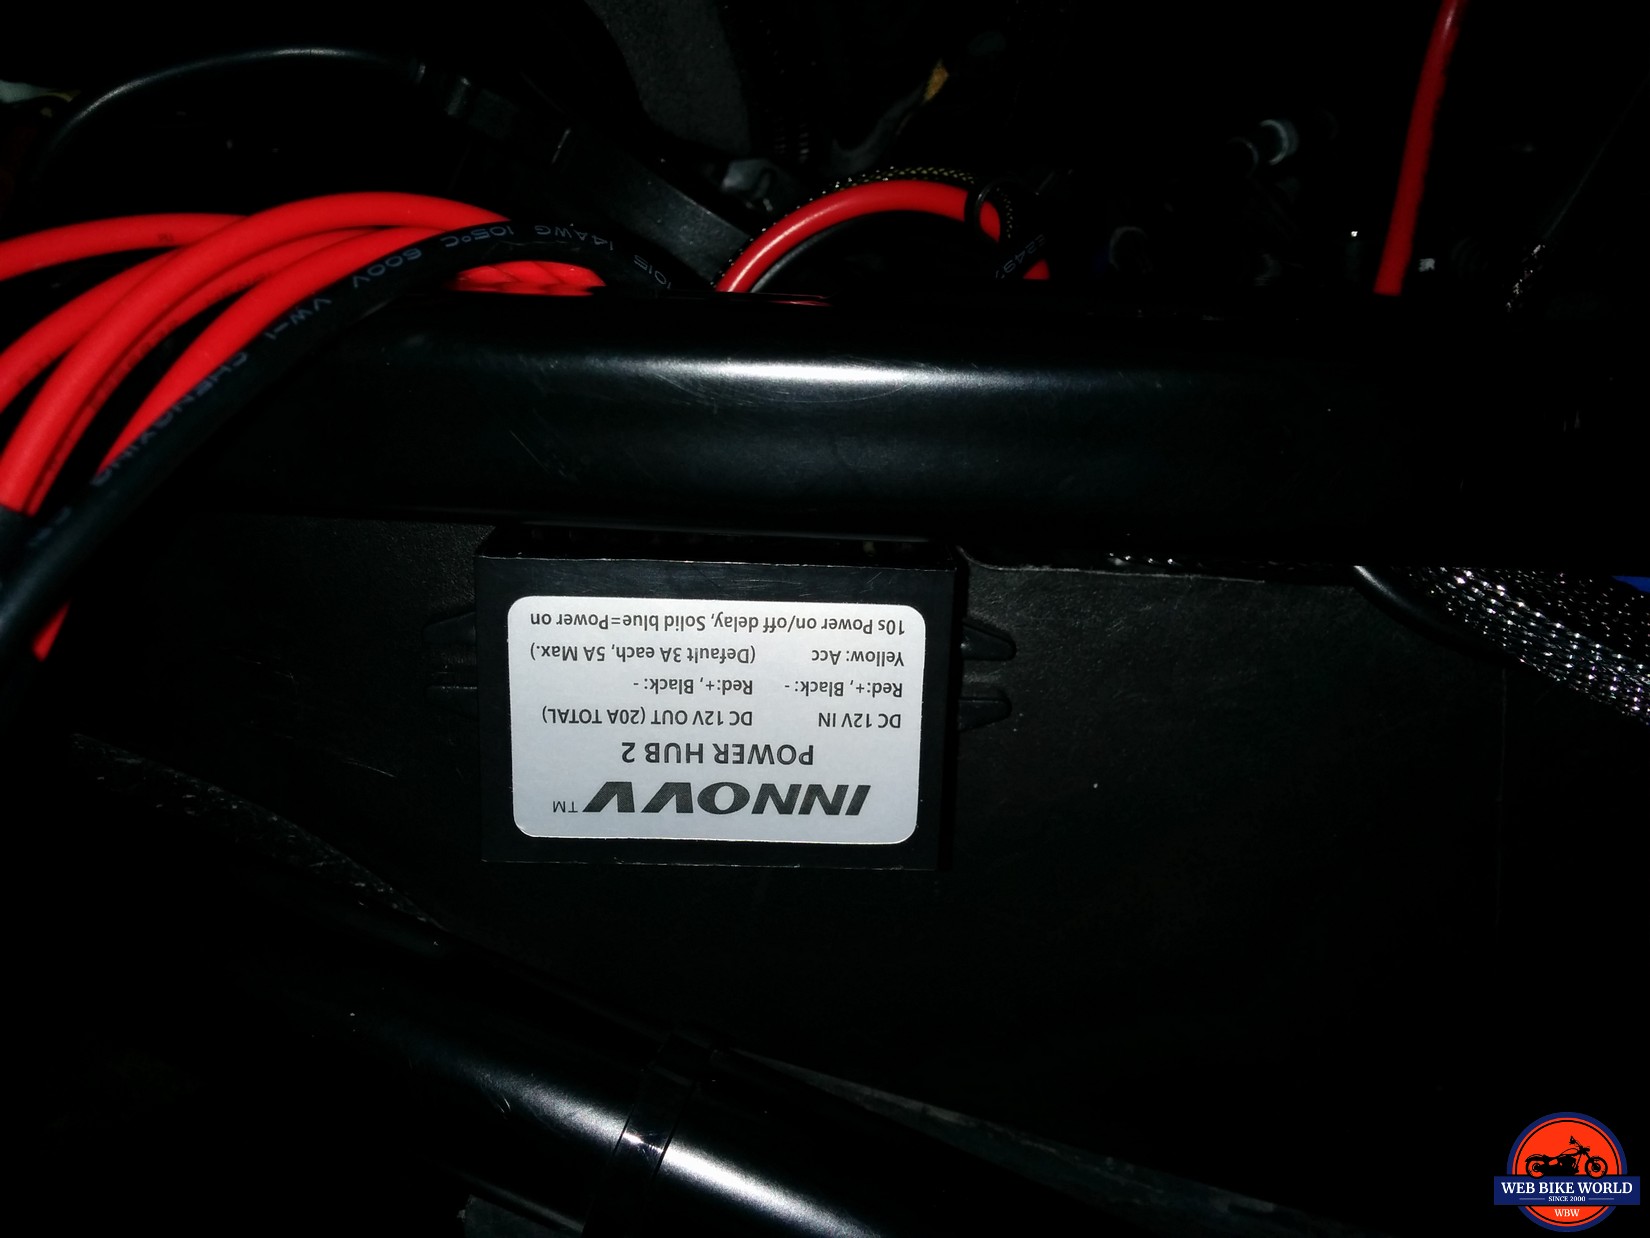
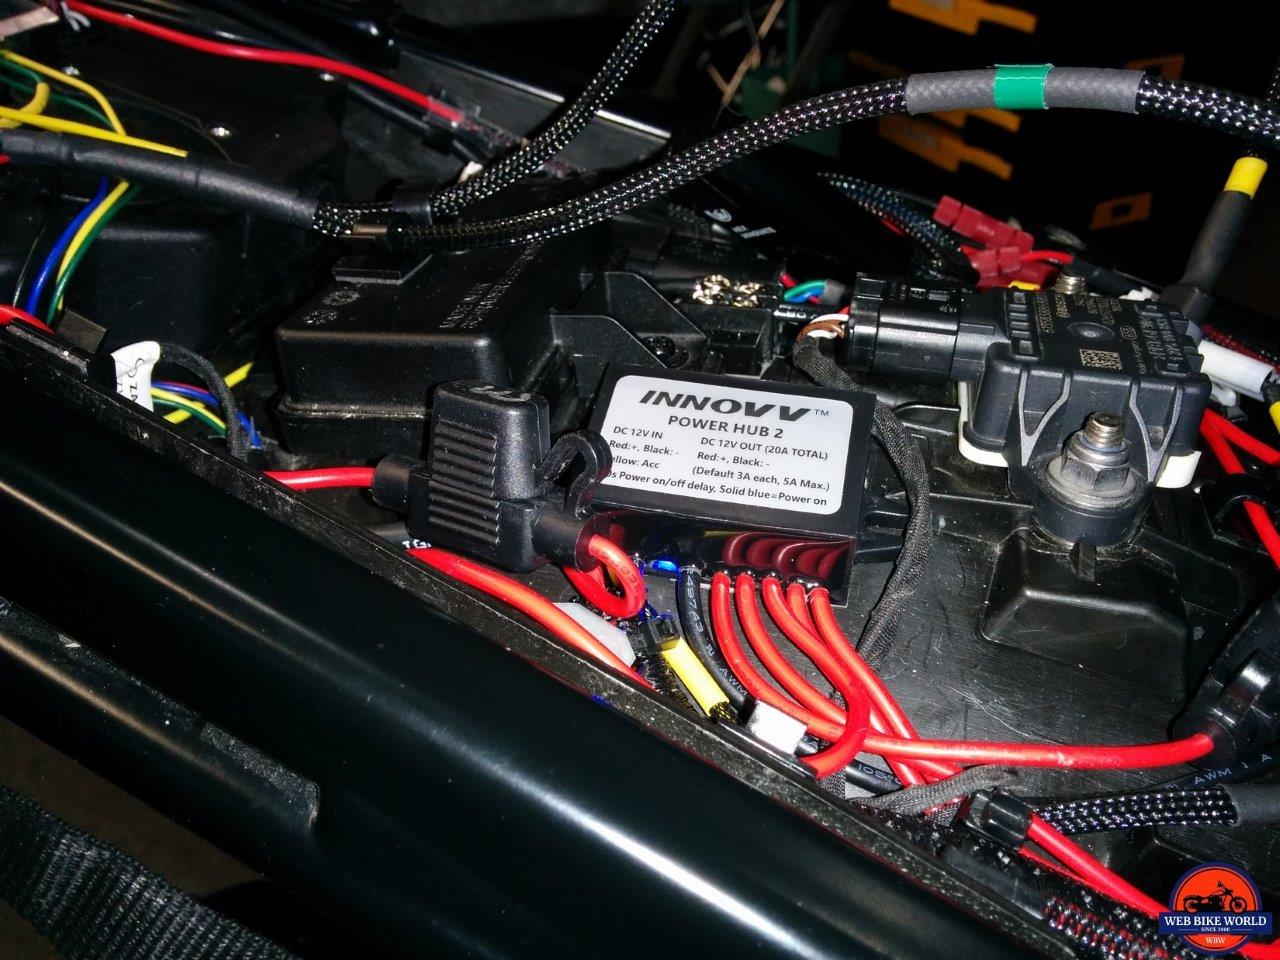
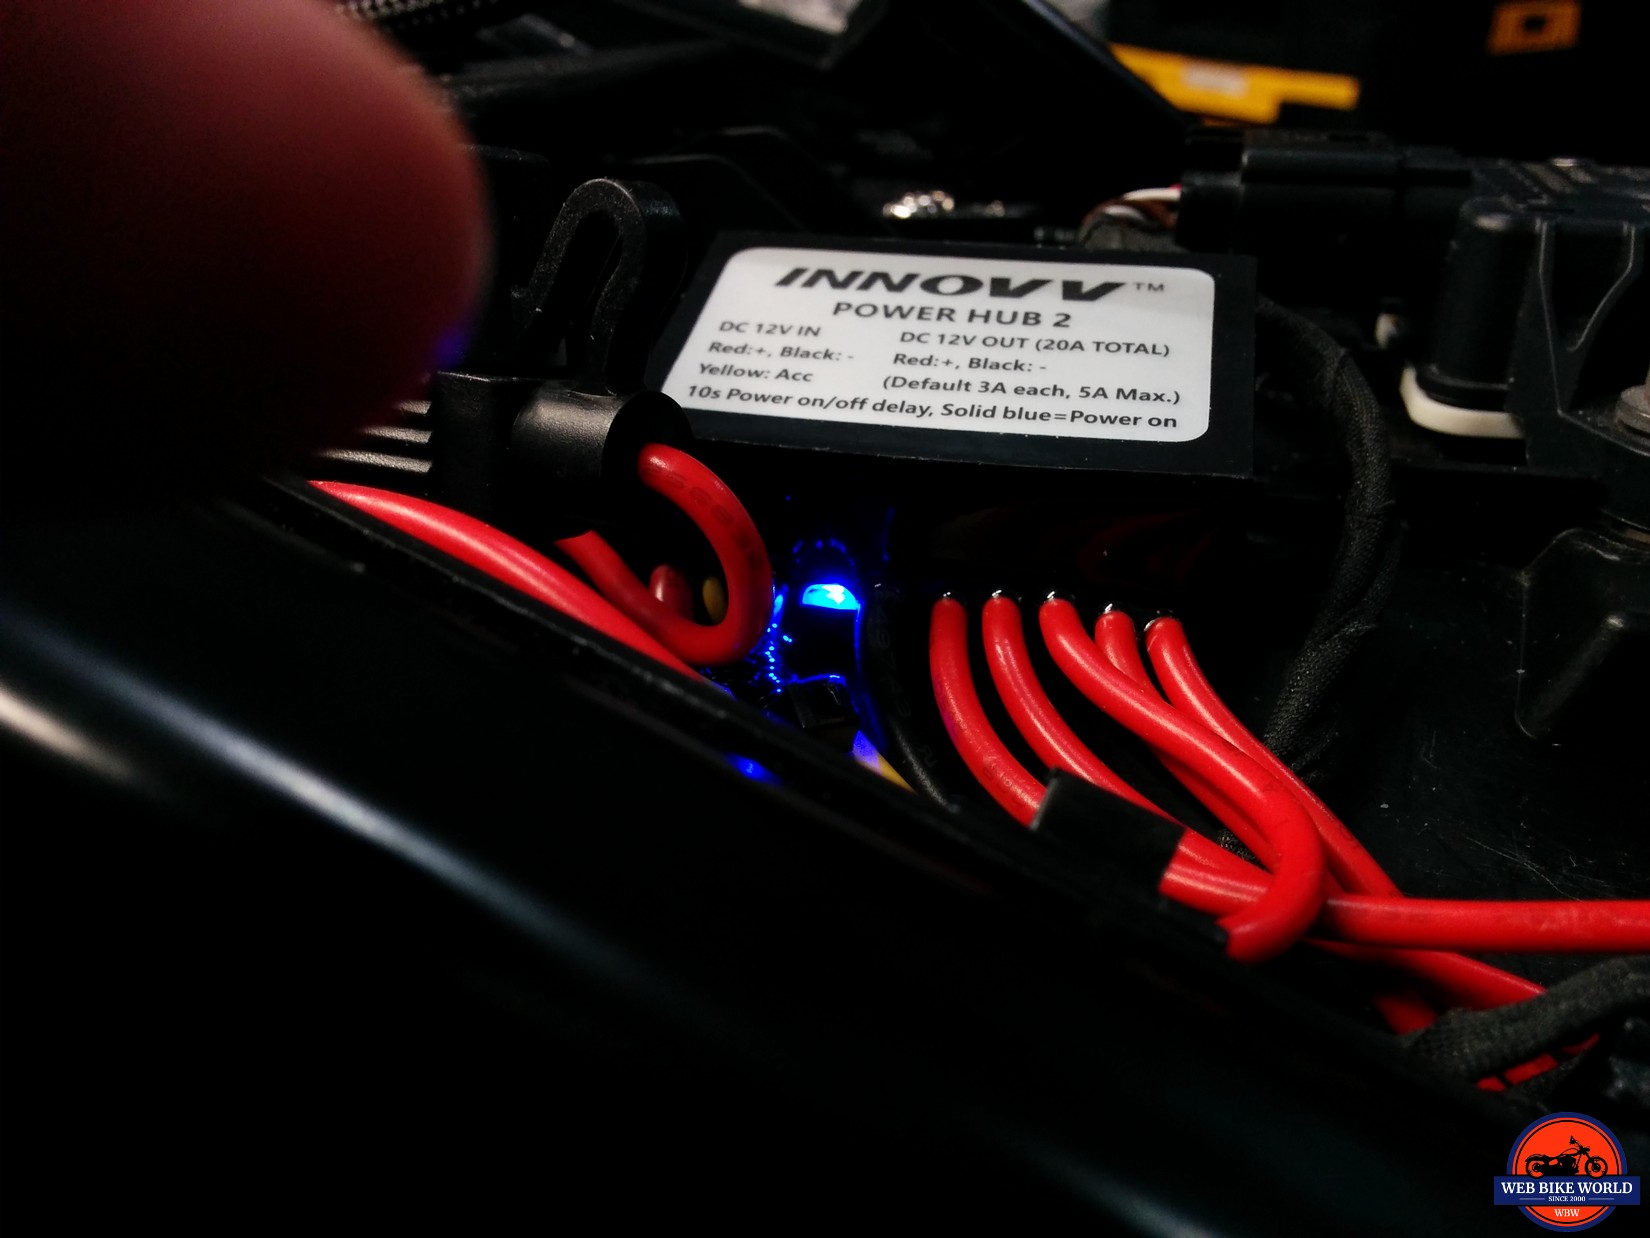
At almost half the size of the original, the down-sized Power Hub 2 still features three input leads and five output leads – all with individual in-line ATM fuse modules. The two LED display found on the Power Hub 1 is now represented by a single small Blue status LED on the Power Hub 2.
Power Hub Comparison Table
| Feature | Power Hub 1 | Power Hub 2 |
| Dimensions | 64.2 x 39 x 40mm (2.5 x 1.5 x 1.6in) | 46.2 x 31 x 18mm (1.8 x 1.2 x 0.7in) |
| Input Leads | Pos (fused), Neg, Ignition trigger | Pos (fused), Neg, Ignition trigger |
| Rated | 40A maximum | 20A maximum |
| Output Leads | 5 x 5A fused flying leads (15A max) | 5 x 3A fused flying leads (5A max) |
| Boot Delay | 10 second On and Off | 10 second On and Off |
| LEDs | Red = Fault, Blue = Flashing on/off and Steady for power good | Blue = Flashing on/off, Steady for power good |
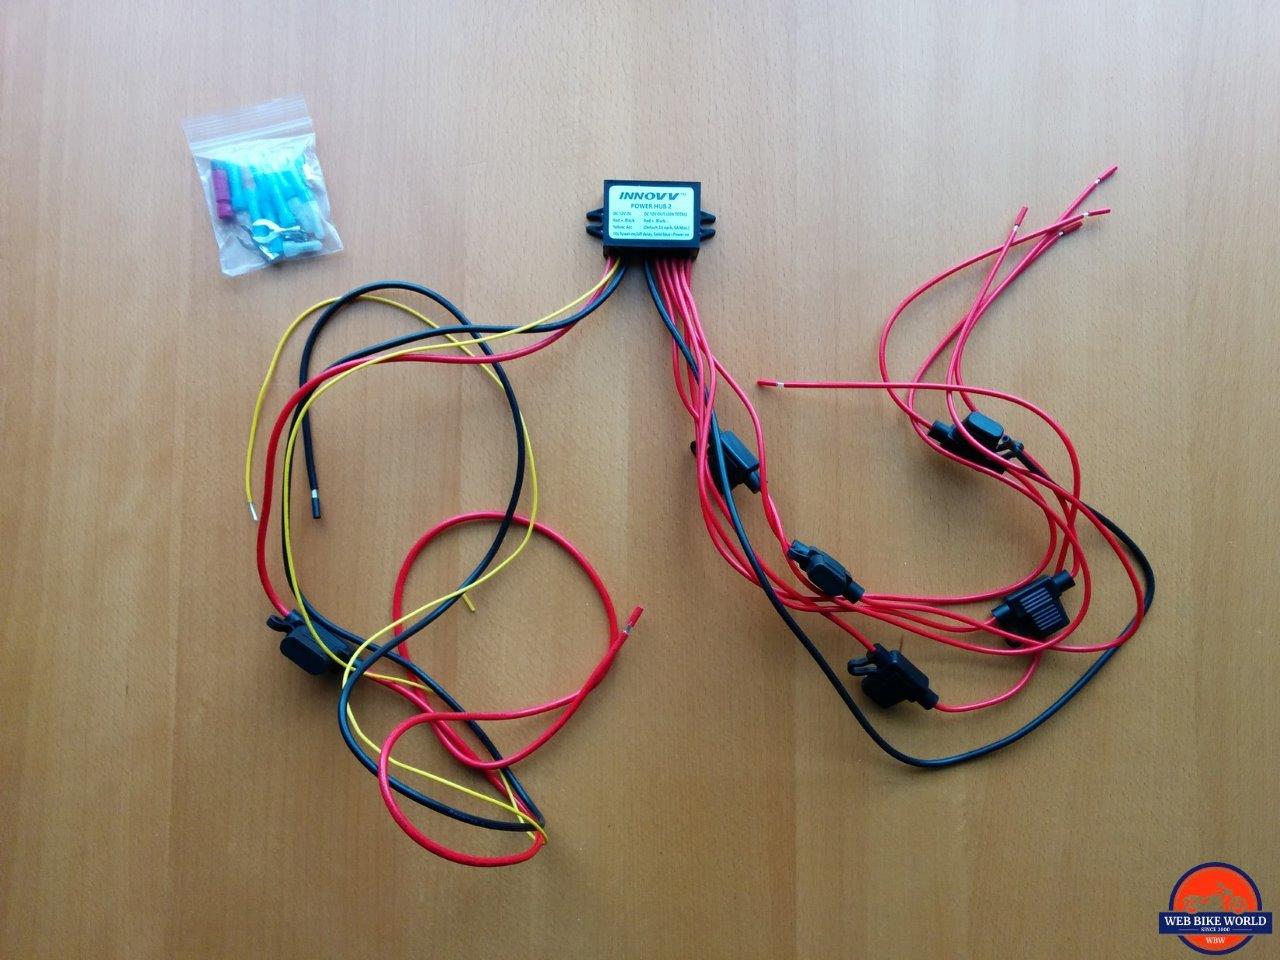
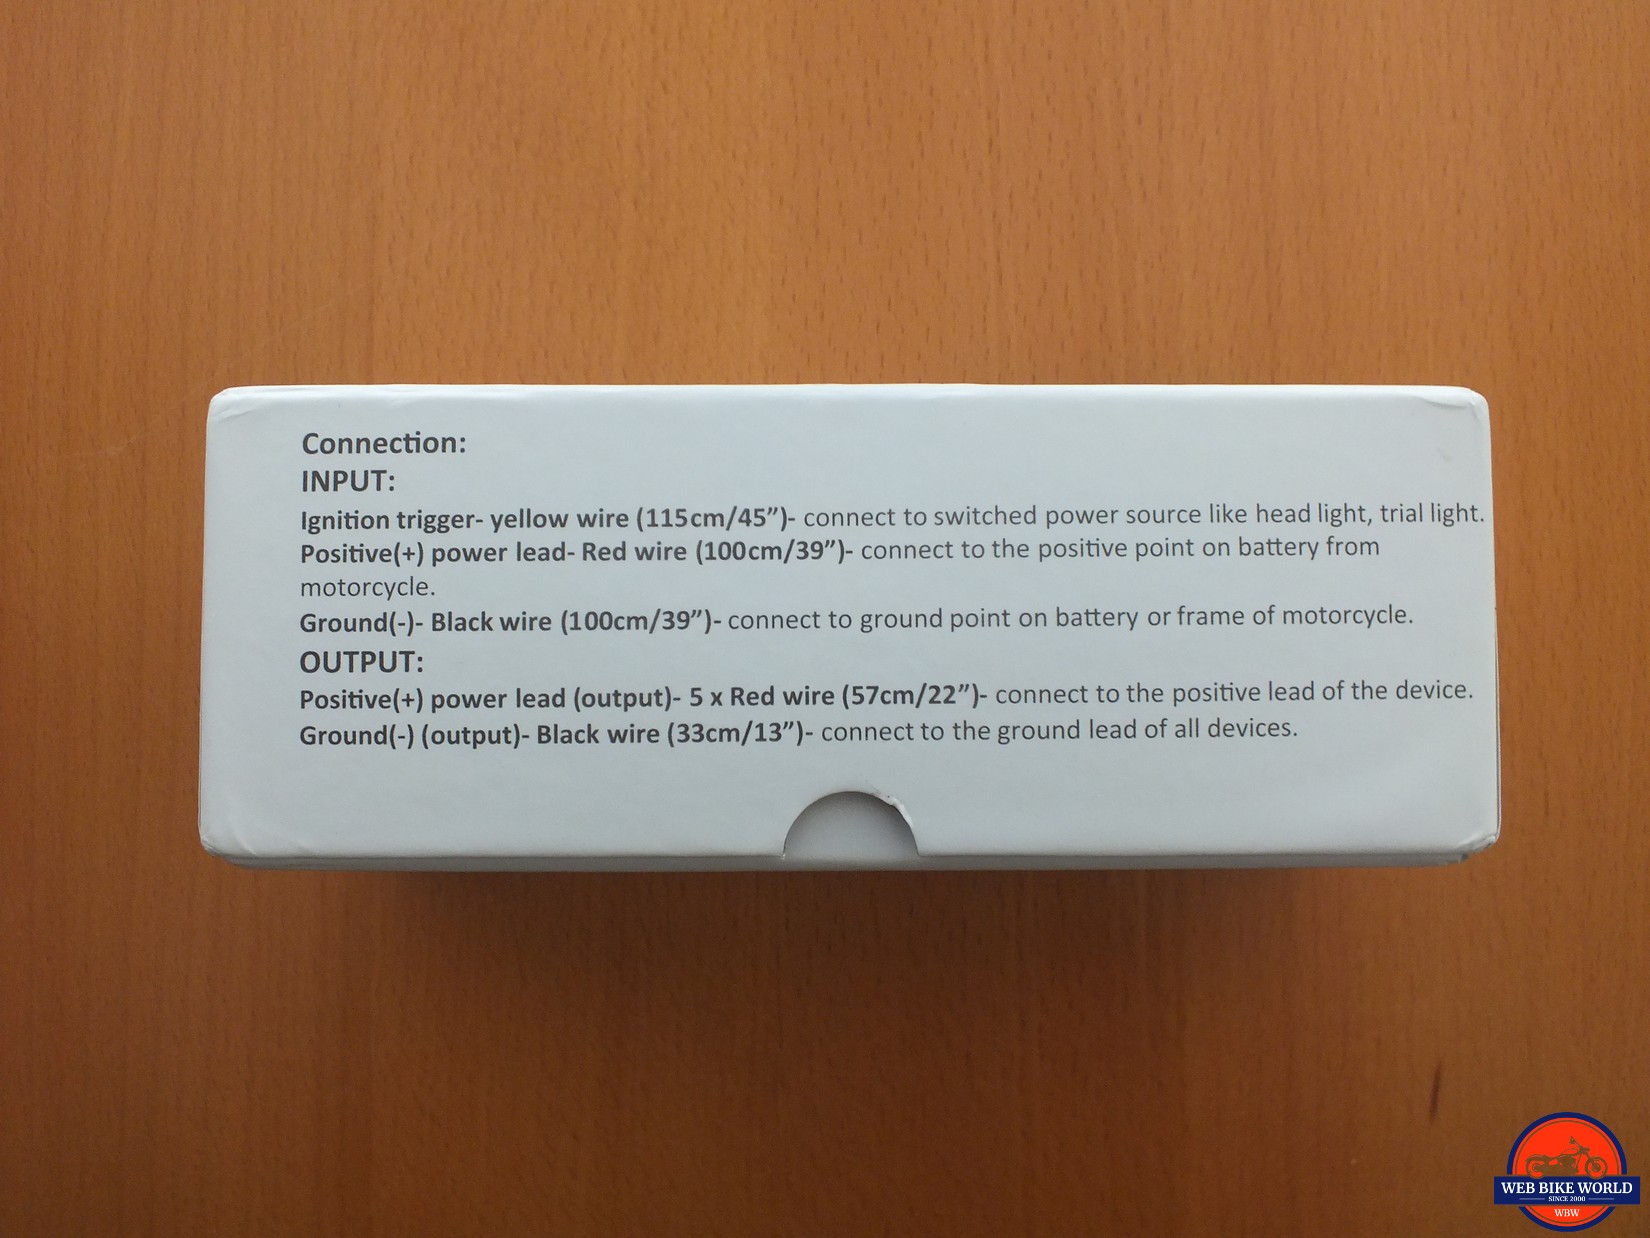
Power Hub 2 Leads & Lengths
- Yellow = ignition (trigger) – connected to ignition switched power source, sends electrical signal to trigger the Power Hub to turn on and activate the five output circuits (115cm/45in)
- Red = positive power lead input connected to positive terminal of battery, ATM fused (100cm/39in)
- Black = ground lead input connected to negative terminal of battery (100cm/39in)
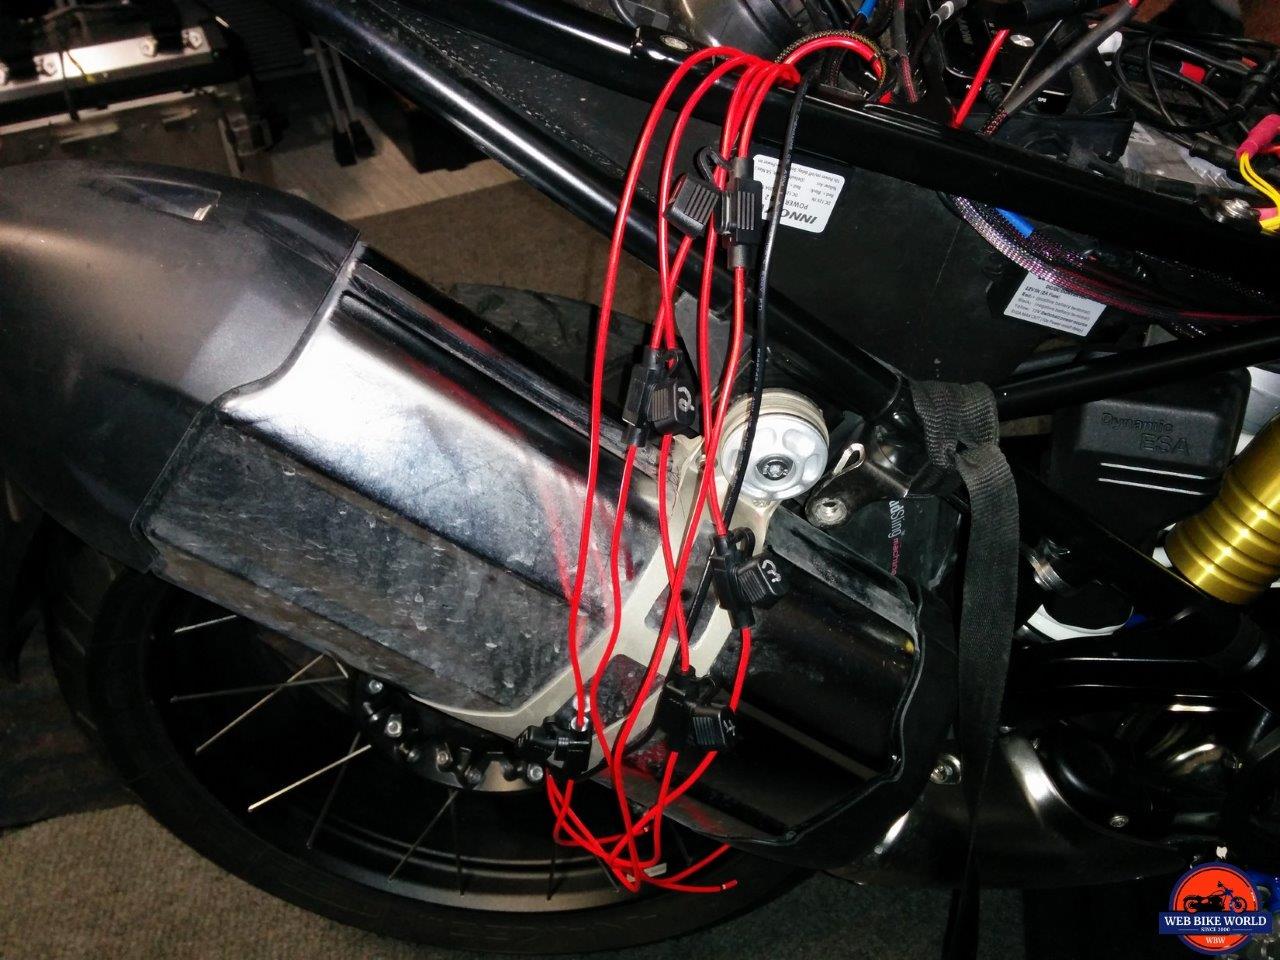
- 5 x Red power output leads, with ATM in-line fuses (57cm/22in)
- 1 x Black common ground for connected accessories (33cm/13in)
Installation
As the Power Hub 2 is so small and totally sealed with input and output connections done using the flying leads the module is mountable almost anywhere, making it such a simple solution for virtually any powersports platform, especially motorcycles.
Since its release, I have installed many Power Hub 1 modules in a variety of motorcycles (sports, touring, adventure and scooters) with a suitable spot always found, although sometimes it took a bit of scoping and creative mounting to get it installed in the best location.
Not so for the Power Hub 2 – it is proving to be much easier to find a good spot or spots on the exterior or interior in which to mount it and with its long input and output leads routed, there aren’t a lot of limits to just where and how the system can be installed.
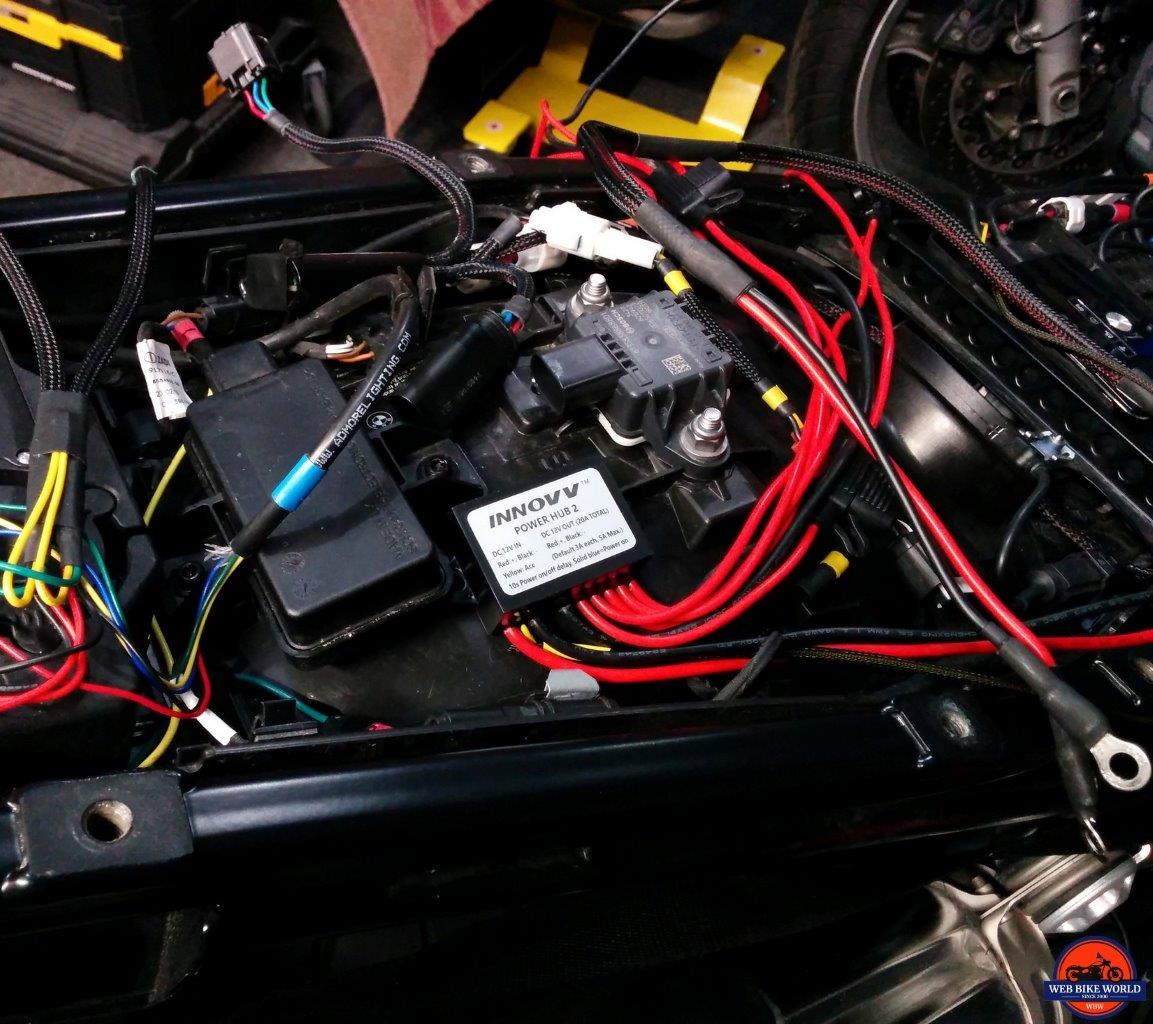
Being in the middle of cabin fever mitigation activities – otherwise known as winter period accessorizing, the arrival of the Power Hub 2 was timely as some additional unswitched power was needed for some additional USB outlets, handguard LEDs and rear-facing auxiliary lighting.
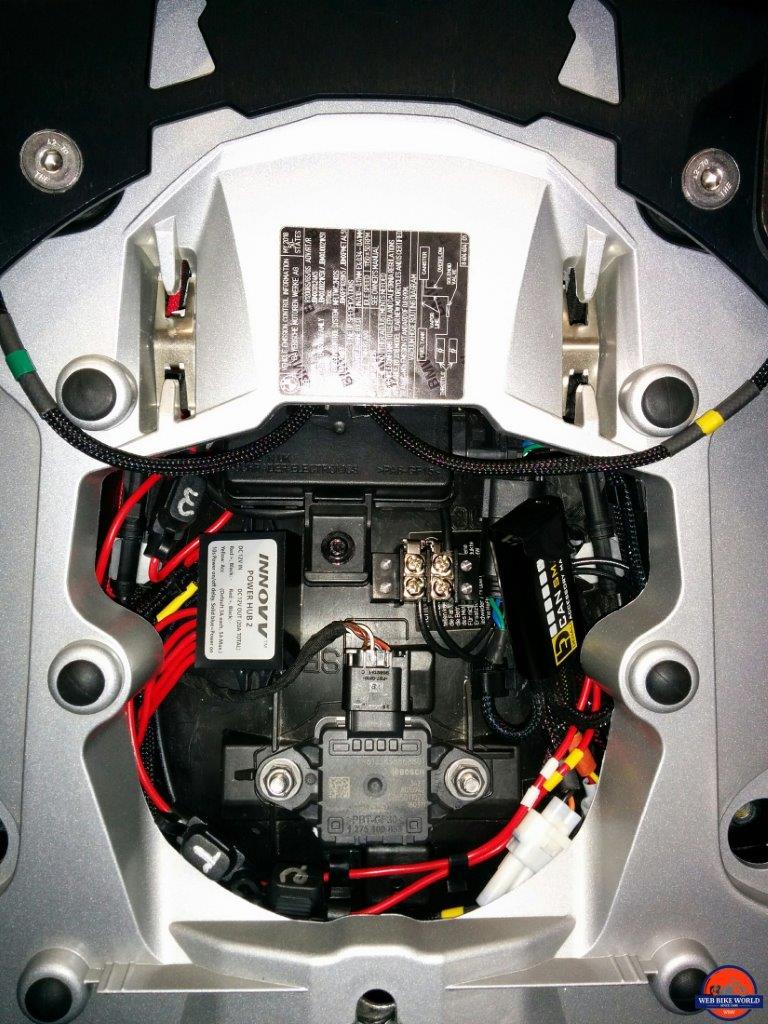
An initial outer side wall installation of the module was done on the 2019 F850GSAdv for assessment but was then moved over to the 2018 R1200GS Rallye where it had a temporary home and now a (permanent) location.
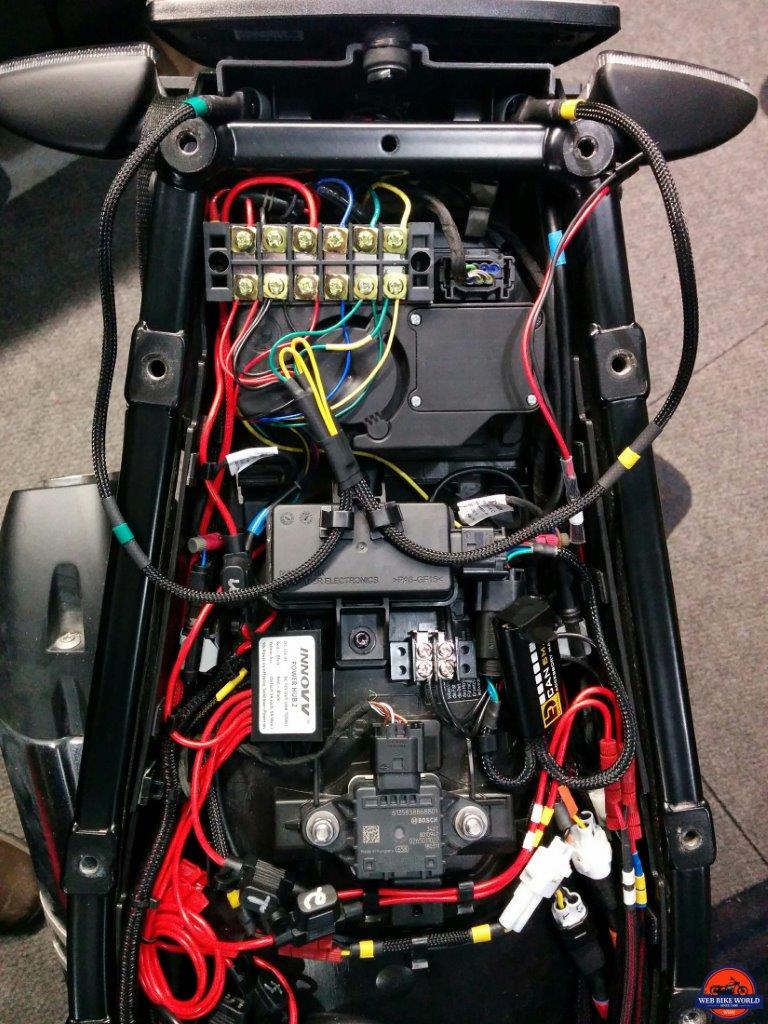
On both the F850GSA and the R1200GS, the module was initially mounted on the right outer sidewall of the under-seat housing before being moved to its permanent home under the back deck and just to the right of OE DWA (Alarm) module.
All the locations work fine, although with different fastener material used for fixing the lightweight module in place. The external mountings use 3M VHB adhesive strips while the under-deck placement is more than adequate using low profile 3M Dual-Lock pieces, so the module can be lifted out of the way easily – the deck area is crowded…
While the Red and Black power leads, housed in a length of Flexo F6, run up to or forward (depending on the motorcycle) to the battery box, the Yellow trigger wire has a couple of connection options.
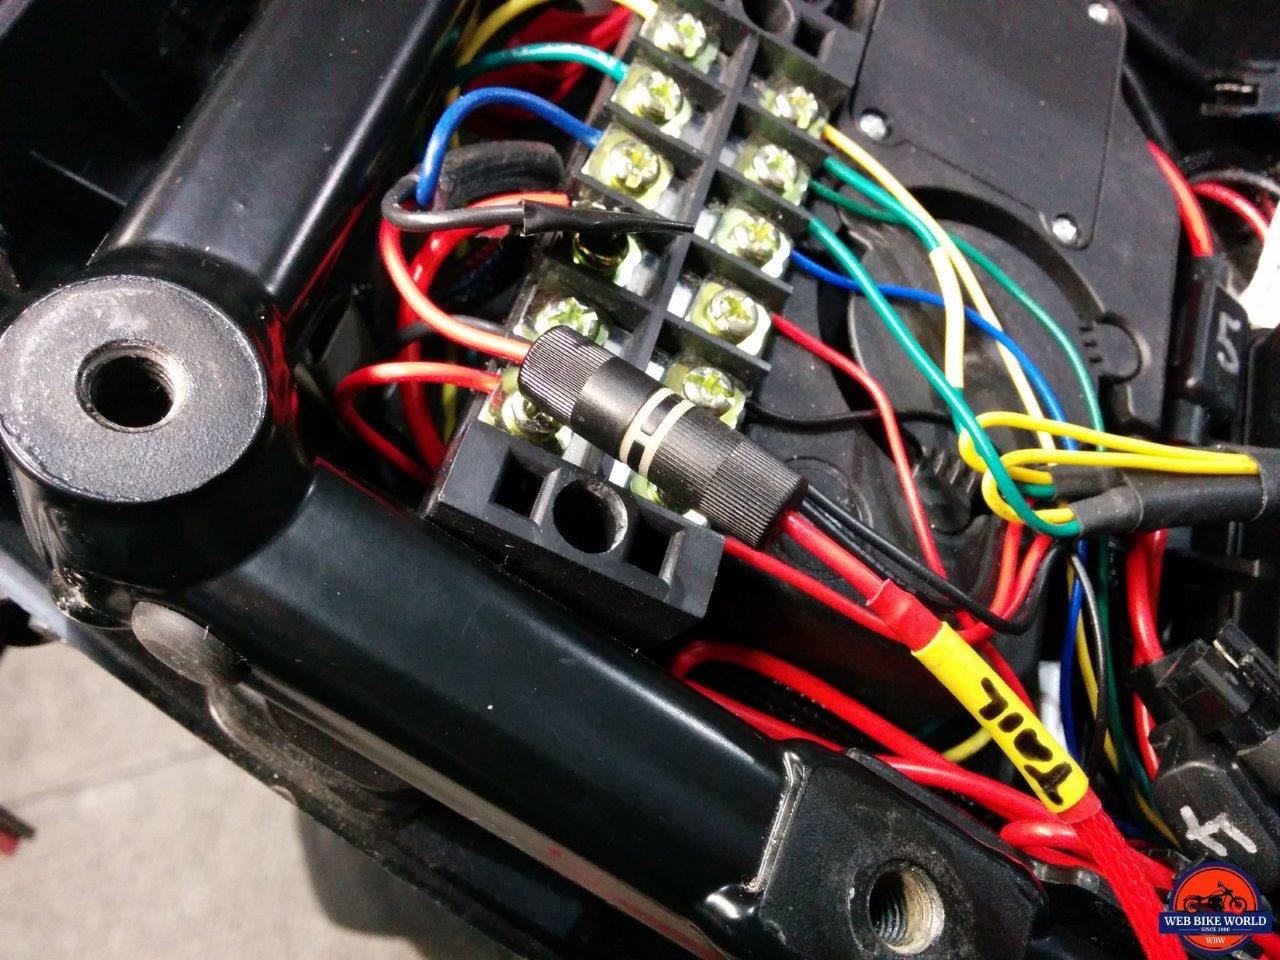
All the home fleet motorcycles see a lot of accessory ‘test mule’ activity, so extension leads via Posi-Tap pieces from the Brake, Left and Right Turn Signal and License Plate Light leads are installed and run to a six terminal common connection (barrier) strip to facilitate ongoing access and eliminate repeated access to the thin OE wiring.
The remaining two terminals are used for 12V switched power sources with a separately dedicated ground block mounted under the deck as well.
So, the ignition switched yellow trigger wire can go to the nearby Posi-Tap on the 7.5A 12V switched lead of the 10A/7.5A dual accessory circuit module located to the right under the rider’s seat section or to the terminal block hosting the license plate extension lead.
With the ‘input’ side of things taken care of, the one, it is time to utilize the five output leads with their ATM in-line fuse pieces to get things wired up. I typically mark the circuits one through five for documented use identification.
Two of the output leads run forward along the right wall, joining up to their respective accessory leads using waterproof Posi-Locks. A third output, also with a waterproof connector, routes behind the OE alarm module as 12V switched power to the Admore Lighting ADMSB Smart-Brake light bar (these are among the first accessories installed on all home fleet motorcycles).
The remaining two output circuits, with fuses removed (bagged, with spares and secured in an accessible spot) are sealed off, wrapped up and tucked away between the DWA and RDC modules – but fishable from the deck cutout.
Function & Performance
Turn on the ignition and wait 10 seconds – when the (visible or not) Blue LED lights up the Power Hub 2 is up and running along with connected accessories. Turning the ignition off sees another 10-second delay (along with any onboard system delay), then the PH2 shuts down.
Performance, including reliability, is easy to assess…none of the (many) original Power Hub 1 units I have installed nor either of the two newer Power Hub 2 systems has ever shown any sign of weakness or failure.
Conclusion
INNOVV has stayed the course regarding general features of both the original Power Hub 1 and now the new Power Hub 2; the biggest visual takeaway regards the difference in overall size between the two.
Capacity and output are downsized – from 40A to 20A, with the expected reduction in recommended individual circuit maximums, from 15A to 5A (Hub 1 and Hub 2 respectively).
This could raise concerns over limitations, but as (most) of the accessories in use between four different motorcycles typically draw 0.5A to 4A tops (another benefit of using LED lighting) this reduction isn’t a major concern, although it needs to be considered.
And multiple circuits could be ‘ganged’ together for heavier duty demands, like the previously mentioned heated gear.
A small nit – there is (still) no choice between switched and unswitched output as many other products offer; once the 10-second bootup step is completed, all the circuits, properly fused, are available for use.
An observation made in the Power Hub 1 review over the 10-second boot and shut down delay is possibly still applicable here, although it doesn’t seem to have arisen as a major issue for users.
But it would still be great to see a time-delay shutdown provided if the motor is not actually started within a specific time…
Our bottom line from the original Power Hub 1 review bears reuse, although updated to reflect the new product; “the INNOVV Power Hub 2 is cost-effective with a list price of $69.00 and is a near perfect small form factor solution for adding multiple accessories where a rugged hands-off operating environment is key.”
Pros
- Very small simple module
- Simple battery and trigger lead connections
- Five fused switched output circuits (3A nominal, 5A maximum)
- Totally sealed module and leads
- Long leads facilitate installation
- Installable almost anywhere desired
- Price
Cons
- Hard plastic ATM fuse modules are (very) hard to open
- No switched/unswitched output option
Specs
- Manufacturer: INNOVV
- Price: $69.00 USD
- Made In: China
- Alternative Models: The original Power Hub 1
- Sizes: Small, ~50% smaller than the Power Hub 1
- Review Date: February 2019