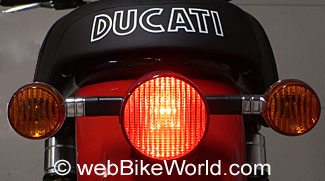

I like the GT1000’s simple round brake light. It adds to the bike’s retro looks and its balanced proportions bring a touch of class to the rear of the bike. Too bad the entire housing is made from plastic though…
I’ll bet that a Ducati designer studied a variety of 1960’s style motorcycle tail lights, because even the reflector has the classic “grid” look when the bulb is lighted. The standard bulb is the typical 1157 dual filament, which can be found at any local auto parts store and is also available in a heavy-duty version. One filament of an 1157 is lighted when the bike is started and the other filament comes on when the brakes are engaged.
An alternative bulb is the 2397, which is very slightly brighter than the 1157 under some circumstances, but has a lower expected life. We compared a variety of brake and tail light bulbs some time ago in this article.
But, tinkerer that I am, I figured that I might be able to improve on the Ducati design by replacing the 1157 with an LED light. I’ve had very good success with the Custom Dynamics “Clusters” LED brake/tail light, which we’ve used on various motorcycles that have passed through the garage, from the Triumph Thunderbird Sport to the Triumph Tiger and others, so I thought I might add one to the GT1000.
I’ll cut right to the chase here — the bottom line is that the 1.85″ LED light will not fit into GT1000’s brake light reflector housing, but I learned something interesting tips that also apply when replacing the brake light bulb on this motorcycle.
First of all, because the entire GT1000 brake/tail light assembly is made entirely (well, almost) from plastic, extreme care must be taken to avoid breaking or stripping any of the parts. I envisioned having to order a new brake light assembly from Ducati while the bike sat there for 6 months, which would be a disaster.
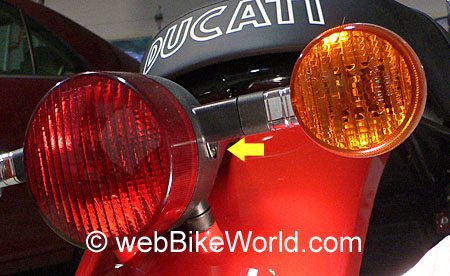
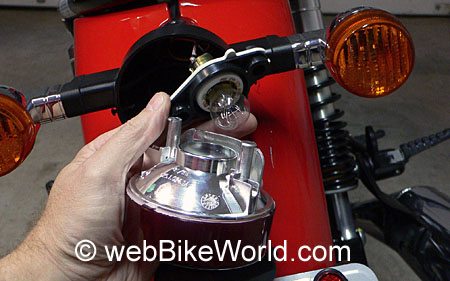
The owner’s manual actually does include a section on replacing the GT1000’s brake light bulb. Following the instructions, I fond that the reflector can be removed by unscrewing the #1 Phillips head screws on either side of the main reflector housing, as shown in this photo (below), with a yellow arrow pointing to the screw on the right-hand side.
It’s not very easy to access these screws because of interference with the turn signal housing. And, at least on my bike, the screws were inserted very tightly at the factory, which made them hard to remove the first time. Also, the screws are not made from the best quality metal and the heads are very easy to strip.
An extra-long, high-quality #1 Phillips head screwdriver is necessary to get past the turn signals and to obtain the correct angle of attack to remove the screws while putting enough pressure on them with the tip of the screwdriver so that the heads of the screws will not strip.
A high-quality #1 Phillips head screwdriver will have a special tip that is not chrome plated but has a special coating or surface to give it as much grip as possible. Don’t try to unscrew these with an el Cheapo $1.99 screwdriver!
The problem is that it is very hard to find a high-quality, long (8″ or so) #1 Phillips head screwdriver. I went to Sears and a couple of other stores to find one but couldn’t. I ended up ordering one from Snap-on along with a 30mm, 6 point socket that I’ll use on the rear axle nut to adjust the chain (article coming soon).
But in the meantime, I realized I had something that would work. One of my favorite tools is the Wiha bit driver, which is long enough for this job when used with a set of Wiha bits. The Wiha tools are, in my experience, all very high quality and I just happened to have a #1 Phillips bit in my set, which worked fine. If you recall, the Wiha bit driver was also the perfect tool for removing the GT1000 evaporative emissions canister.
The bottom line here is that you’ll need to have patience and be very careful when removing these screws because it’s way too easy to strip the heads if you aren’t careful.
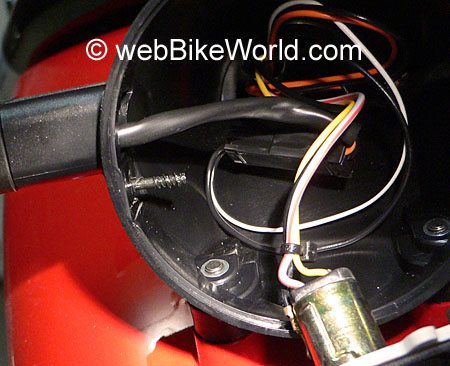
The screws have a strange body design, with a wide and sharp thread at the tip that I think is a self-threading mechanism when the screw is inserted into the black plastic tail light housing. The screws can only be backed out so far and they hold the actual brake light reflector housing by friction. This photo (below) is a close-up of the left-hand screw.
The next photo (below) has a yellow arrow indicating the “ears” on either side of the brake light housing. The screws reach into these ears and hold the brake light housing in by friction.
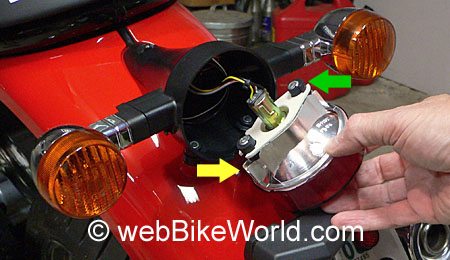
The actual bulb assembly fits into the chrome/red plastic reflector, also with a friction fit. The green arrow in the photo above points to the rubber bumpers that hold the white colored bulb holder in place. The bulb holder can be removed by very carefully pulling it from the reflector with alternating pressure.
It feels like it would be very easy to break something here, so use extreme care and have patience! It will eventually come loose, but it’s not easy.

Unfortunately, after all this effort, I discovered that the red lens is glued to the chrome reflector. The chrome reflector only has a big enough hole in the back for the 1157 bulb to fit through; thus, the larger LED light will not fit. There’s probably a small LED light that will fit through this hole, but my guess is that the LED would be so small that it would greatly decrease the visibility of the brake light.
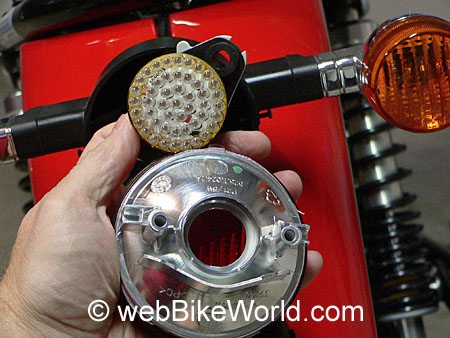
Also, LED lights are much more directional than incandescent bulbs, so the chrome reflector would not redirect the bulk of the light if an LED was used, further decreasing the amount of light coming out the back.
I don’t recommend using one of the halogen 1157 replacement bulbs (see article) either; we tested these a long time ago and they get extremely hot and my guess is that they would quickly melt the GT1000’s reflector housing.
So, it’s back to the drawing board. I like the retro look of the GT1000’s brake light when the bulb is lighted, and I don’t really want to add any external LEDs to the bike because I think it would ruin the period look of the rear end.
I may order an extra brake light reflector (if that’s possible; I wouldn’t be surprised if the entire rear brake/tail light assembly comes as one piece) and cut it apart and send it out to get the entire lens filled with LED lights. This works very well, as we detailed in this article a while back when we filled the brake light of a BMW R100RS with LEDs.
If you have comments, further information, tips or guidance on this project, please send it to me at![]()
![]()
Owner Comments
Note: For informational use only. All material and photographs are Copyright © webWorld International, LLC – 2000-2011. All rights reserved. See the webBikeWorld® Site Info page. NOTE: Product specifications, features and details may change or differ from our descriptions. Always check before purchasing. Read the Terms and Conditions!