
The Cameleon oiler is relatively easy to install and it has some advantages over other automatic chain lube systems.
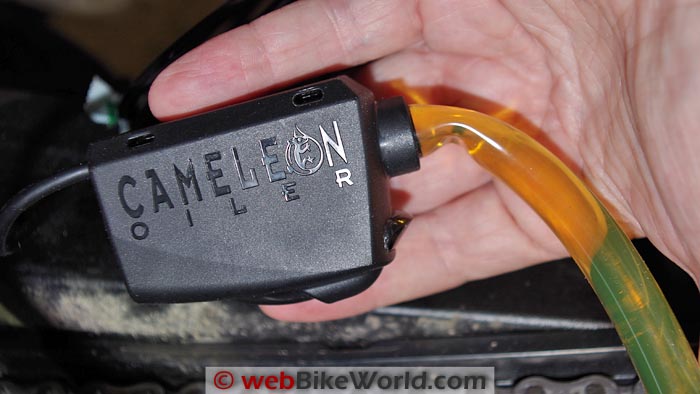
All of the chain lubricating oil is stored in a clear vinyl hose and the hose is attached to a control unit that meters the oil.
The system works via gravity, so the end of the reservoir hose must be located higher than the controller.
The Cameleon controller needs a switched electrical connection.
A valve in the controller opens once every 3 minutes and 45 seconds and the owner programs the unit to release the oil for the specified amount of time, then the valve closes again.
Programming it for about 3-5 seconds should be sufficient to lubricate a motorcycle chain.
There are a few challenges to resolve in mounting any chain oiler.
For the Cameleon system, those challenges include finding a suitable location for the length of reservoir hose (which can be cut to make it shorter); locating and securing the controller to the bike; and finding a good location to attach the semi-rigid drip tube on the swingarm.
And finally, the Cameleon has a ground and power wire that must be spliced to a switched power source on the bike that engages only when the motorcycle is running.
Once all of those issues have been resolved, you should have a fairly worry-free chain lubrication system that is “set and forget”.
Keep an eye on the oil level (a full hose should last eons) and you’re all set.
One more thing to remember: less is more when it comes to chain oiling.
A drop or two will do. If you can see oil on the chain, you’re probably using too much.
Cameleon chain oiler kit.We installed it on a 2014 Suzuki V-Strom 1000 ABS (Blog) for purposes of this review.
Introduction
The Cameleon Chain Oiler was reviewed in 2008 on webBikeWorld and it was installed on a Ducati Multistrada 620 (Blog).
That bike has a welded tube frame and that, as we discovered, made locating and securing the Cameleon controller and oil reservoir hose relatively easy.
Since the new 2014 V-Strom 1000 ABS has a rear sub-frame made from welded tubing, I thought it might also be a good idea to try the latest version of the Cameleon oiler once more.
Truth be told, modern motorcycle O/X/W/Z-ring type chains require much less maintenance than older-style chains.
Keep ’em relatively clean, squirt a bit of lube on ’em once and a while, keep ’em adjusted properly and you should get many worry-free miles.
Chain drives may seem troublesome (chain lubes and occasional sprocket changes) but don’t forget, shaft drives aren’t without their own unique “challenges” — and a belt drive system isn’t completely issue-free either.
Besides the added weight and occasional handling effects of a shaft drive (when’s the last time you saw a MotoGP bike with a shaft?), the final drive usually requires an occasional lube change.
And there’s the dreaded BMW Airhead spline lube (How-to) issue of older BMWs. And while I’m at it, don’t forget the problems some owners are reporting with modern BMW shaft drive bearings.
Anyway, I’m as lazy as it gets when it comes to chain maintenance, so a “set and forget” chain lube system like the Cameleon is right up my alley.
Cameleon chain oiler controller.Scottoiler vs. Cameleon
Surely the most recognized name brand when it comes to automated chain oilers is Scottoiler, and we’ve reviewed all of those on webBikeWorld.
The Scottoiler is a good system, no doubt about it. And one of their advantages is that — other than the overkill Scottoiler eSystem (review) — no electrical connections are necessary.
However, depending on the motorcycle, it can be difficult to find a suitable or optimal location to mount the oil reservoir canister.
The Cameleon chain oiler uses a 1/2″ flexible clear vinyl hose as the oil reservoir and as long as the hose doesn’t become kinked and it’s mounted with the end higher in the bike than the rest, it’s easy to stow and hide.
That’s because the Cameleon chain oiler is a gravity-fed system, but it uses a powered controller that must be connected to a switched (turns on when the ignition is on) power supply on the bike.
The controller isn’t much larger than the hose, but it can be a little difficult sometimes to find a location on the bike to fit everything.
The oil reservoir hose must be located above (i.e., higher) than the controller, but the drip feed tube that comes out the other side of the controller must be located lower than the controller for gravity to do its job.
The idea is that gravity “pulls” the oil down from the reservoir hose, through the controller and then continues down through the drip feed tube and on to the chain.
So it’s difficult to say whether the Scottoiler or the Cameleon would make for an easier or more tidy installation on any given motorcycle, but my feeling is that the Cameleon is probably easier to locate.
The tradeoff is the extra effort required to make the electrical connection. Remember, however, that the Scottoiler has a bigger cylindrical reservoir that must also be located higher than the drip tube also.
One of the most frustrating issues with mounting any automatic chain oiler is routing and securing the drip tube on the swingarm.
Since every motorcycle is different, there’s no standard hardware for mounting the tube and neither the Scottoiler nor the Cameleon installation kits have what I’d call very good, usable hardware that might make this part of the job easier and “cleaner”.
The Cameleon Chain Oiler
The Cameleon oiler is a simple and efficient device. The oil is stored in the clear vinyl 1/2″ hose that must be attached to the frame or bodywork of the motorcycle.
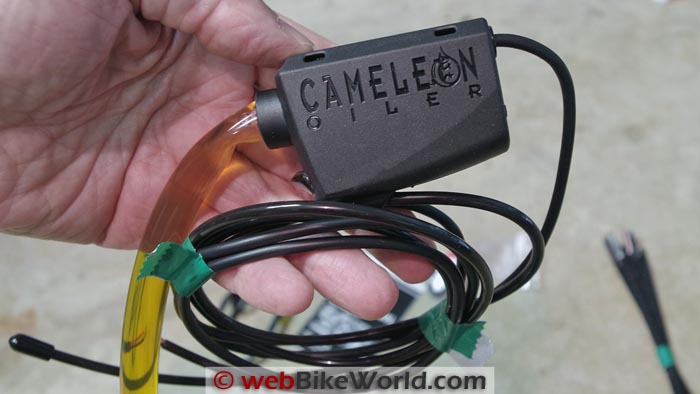
As mentioned in the previous section, the Cameleon control unit isn’t much thicker than the hose itself. It has slots molded in along the top for cable ties that make it easier to attach the controller to a frame part.
On our controller, those cable tie mounting slots were block, apparently at the factory that manufactured it.
I had to use a small screwdriver to clean out the flashing or glue that was used to hold the two halves of the controller housing together so that I could fit the cable ties through the slots.
I do wish that the top of the Cameleon controller was molded with a curve to more closely fit the tubes on the V-Strom’s frame.
And while they’re at it, how about some rubber or soft vinyl cushions to both protect the paint on the frame and help keep the control module from sliding around on the tube itself?
On both the Multistrada installation in 2008 and for the V-Strom, I had to improvise with an old cut-up inner tube as a cushion.
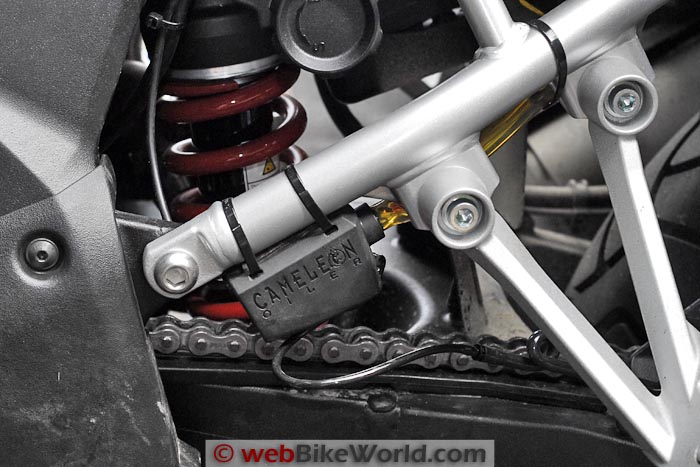
Location of the Cameleon controller on the frame tube of the rear sub-frame on the V-Strom. Note oil reservoir tube (and semi-straightened kink) leading up and the small hose feeding the semi-rigid drip feed tubing leading from the bottom of the controller.Mounting the Cameleon Chain Oiler System
The Cameleon controller can be mounted just about anywhere but the oil reservoir hose must be higher up in the bodywork than the controller and the controller must be located higher than the drip tube.
One of the things I found difficult with the V-Strom installation is that the oil reservoir hose doesn’t have a reinforcement where it enters the Cameleon controller and the hose was kinked when it was put into the brand-new Cameleon kit blister pack at the factory.
Obviously, you don’t want a kink in the hose that might limit the flow of oil.
To help prevent this and to make sure no kinks enter the hose during installation, Cameleon should put a spring-type or other type of reinforcement on the outside of the hose.
It could start where the hose enters the controller and continuing back for about 50 mm or so to prevent kinking at this crucial location.
Worries about the hose becoming crimped or kinked limited the mounting options on the V-Strom; if the controller was located with the reservoir hose towards the front of the bike, it would need to have a big curvy bend.
Otherwise, the controller had to be located with the hose end pointing up, which is the orientation I used.
In addition, although the reservoir hose can be cut or trimmed to desired length to fit inside the bike, I wanted to keep as much of the hose length intact as possible to maximize the amount of oil capacity and decrease the amount of time between chain oil refills.
After noodling over this for some time, I settled on locating the controller towards the front of the sub-frame on the left-hand side of the V-Strom, just above the foot peg, as you can see in the photo above.
IMPORTANT: Check several times to make sure the oil reservoir hose will not overheat (don’t located it near any exhaust parts or other hot parts), become chafed or will interfere with normal motorcycle operation.
Make sure you securely fasten it by using cable ties or other methods to the bike frame or other location.
Swingarm Mounting
Cameleon includes two “J” shaped hose clamps in the box for mounting the semi-rigid drip tube, along with some self-tapping screws and cable ties. They suggest drilling into the swingarm to mount the clamps that hold the oil drip hose.
I used an existing bolt holding the front of the chain guard on the V-Strom to hold one of the hose clamps.
The semi-rigid oil drip tube is very stiff and it must be straightened and then located so it runs along the bottom or top of the swingarm. I ran it down along the back of the swingarm to partially hide it.
I’ll probably drill a hole and use the other hose clamp but I really don’t like drilling into the swingarm.
So I used two cable ties instead to hold the drip tube, but have since discovered that the tube moves slightly as the swingarm bounces up and down when riding, so I’ll have to work on it to make sure it stays secure.
The problem is that the cable ties don’t have enough holding power after they’re wrapped around the wide and thick swingarm.
UPDATE: I ended up using a section of an old motorcycle tire inner tube to wrap the drip tube. Placing the drip tube on the inside of the swingarm, I used three cable ties to secure it in place.
The rubber from the inner tube gives a nice cushion for the drip tube and also has enough friction against the swingarm to hold the drip tube securely in place.
This firmer mounting system allowed me to precisely locate the tip of the drip tube about 10 mm above the chain for a nice, even coating of oil. Problem solved the el Cheapo way!
Locating the Oil Drip Tube
Cameleon suggests placing the tip of the drip hose about 1″ above the chain, in front of the rear sprocket, but I think this seems to far away from the chain and the drips could end up flying away as the bike is moving, so I located the tip about 15 mm above the center of the top part of the lower chain run.
Getting the oil drip tube securely mounted and oriented so that it stays put above the chain is the most difficult part of any automatic chain oiler installation project.
Not much has changed from the original 2008 version of the Cameleon and the 2014 version. I ran into the same issue that we had with the Multistrada; that is, getting the tip of the semi-rigid drip tube to stay aligned out over the top of the chain.
This part of the Cameleon is a bit crude; it would be nicer if there was some sort of floating design for the drip tube tip that kept it centered over the chain.
A shroud around it would be good also, to ensure that the oil coming out does actually end up on the chain.
The semi-rigid drip tube appears to be the same as it was in 2008. It has a stiff casing with a thick length of steel wire running inside that’s maybe about 8 or 10 gauge or so.
The drip tube can be bent to fit and it will remain in the chosen shape, but also like the 2008 version, it’s pretty difficult to cut — it takes a hefty pair of wire snips to do it.

If the tip of the tube is unsupported over a length of about 2-3″ or so as it’s mounted on the swingarm, it’s difficult to make it stay in place in position over the chain, so it’s important to find a way to support the tube as close as possible to the tip and this may mean quite a bit of fettling.
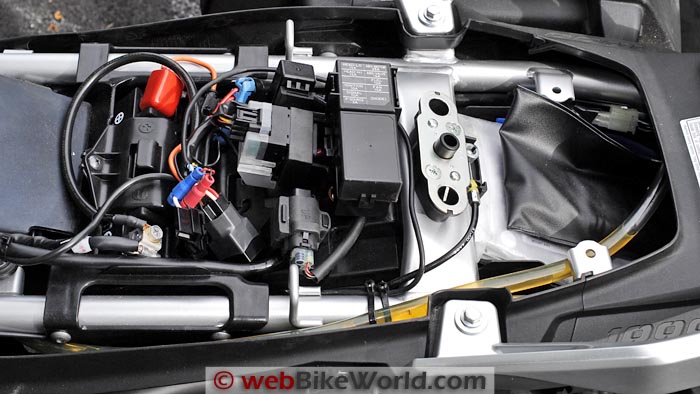
Cameleon oil reservoir hose mounted under the seat of the V-Strom.The Cameleon Controller
The controller is basically an on/off valve, powered by an electrical connection. The power and ground wires running from the controller must be spliced into a switched electrical connection on the motorcycle.
Cameleon suggests using the rear tail light but those wires were too difficult to access on the V-Strom (I tried and gave up), so I spliced into a temporary powered (via relay) accessory wiring harness I have attached to the bike.
The connection must become powered on and off with the ignition to activate the controller when the bike’s ignition is engaged.
The controller opens a valve to allow oil to flow for a set amount of time programmed by the owner.
That is, the valve opens once every 3 minutes and 45 seconds and then it will stay open for the time that you set — usually 3-5 seconds is sufficient to just let a drip or two exit the end of the drip tube.
Programming the Cameleon Controller
Programming the Cameleon controller is very easy and still kind of fun, in a nerdy way.
The program can also be changed or modified within seconds whenever necessary to change the amount of time the valve is allowed to open.
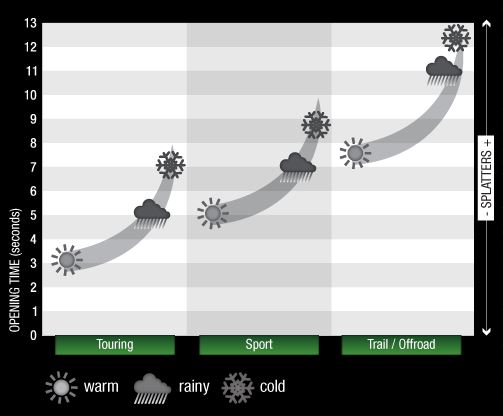
Cameleon provides a chart (below) that gives some starting points for suggested amounts of oil. The chart shows the time in seconds on the Y axis and the type of motorcycle on the X axis.
They no longer use colors for various oil weights, which makes it easier to use the chart and to program the oiler.
In 2014, the reservoir hose comes filled with the special oil. Cameleon suggests using their special synthetic PolyAlphaOlifin chain oil, “specially developed to go on the chain to have less spray drops”.
They claim a rate of 8 ounces of Cameleon Chain Oiler CCo-190 for around 12,000 miles when the controller is set for a road setting.
They also say this provides about 5,000 lubricating intervals in the 12,500 miles for a chain wear rate of 0.54%, compared to 42 lubes if you’re good at the manual spraying intervals and do them once every 300 miles (who does?).
They also say that the Cameleon oil penetrates all parts of the chain and helps reduce dirt and wax buildup, decreasing heat generation.
To choose a starting point for programming the controller, first pick the motorcycle type.
Then look up from the motorcycle type to the typical riding conditions (sunny, rainy or winter). Next, look to the left on the Y axis to find the time, and you have the recommended starting point.
Let’s try it for the V-Strom. First, here’s a scan of the chart provided by Cameleon (this chart is also on their website):
I use the V-Strom on the street, so let’s call it “Sport”. Look up from the center column to, say, somewhere between sunny and rainy and you have about 5-6 seconds.
Now you’re ready to program the Cameleon controller (of course, you’ve now installed everything and tapped into the power source).
Turn on the ignition and then press the button on the bottom of the controller within 3 seconds. The light on the back of the controller will then start to cycle through about 10 different colors.
Back in 2008, the color corresponded to an oil weight but apparently that is no longer required, so it doesn’t matter which color shows on the light.
When you’re ready, push and hold the button for the amount of time suggested by the chart and release it. You have now programmed the Cameleon controller to open for, say, 5 seconds once every 3 minutes 45 seconds.
Now the lights will start to cycle through the color choices again and when you see a color you like, press the button once more.
That will be your color choice that will glow on the back of the Cameleon controller just for show as the bike is running; it also acts as an indicator to let you know that the system is working.
That’s what I did, but after the first few rides, there seemed to be too much oil on the chain, so I re-programmed it using the same procedure for 3 seconds and now it’s working fine.
Note that it will take a while for the oil to work its way through the system, so you may need to ride the bike for a few hours before the oil flows to the programmed rate.
Conclusion
I said it in 2008 and I’ll say it again:
The Cameleon chain oiler is relatively easy to install and it has some advantages because it’s simple, has very few moving parts and the oil is stored in the hose, which can be easily concealed.
The most difficult part of installing any automated chain oiling system is getting the drip tube correctly located. With the Cameleon, you also have the added issue of tapping into a switched electrical power source.
It takes some thinking and prototyping for any bike to figure out the best place to mount the controller and where to stow the oil reservoir hose, but once you get it figured out, it’s fairly easy to get it all set.
Once you do, you should have trouble-free, worry-free chain lubrication for quite some time and the Cameleon system is also reasonably priced; in fact, the price has been lowered by $20.00 since 2008. Now that’s progress anyone can get behind!
Review Date: July 2014
Owner Comments and Feedback
See details on submitting comments.
We first reviewed the Cameleon Chain Oilerback in 2008.