


I get to try a fair number of wired, wireless and hybrid motorcycle communications systems, most of which have some Bluetooth components in a direct or supporting role.
I also seem to discover something new or ‘different’ with every system: sometimes intended, sometimes not.
It is these differences, subtle or otherwise, that distinguish one system from another.
As with any of the systems evaluated, each one is put through a number of standard and ad-hoc tests — the Biker Com being no exception. Much like an earlier system evaluated, the BluVirtu BAT-01 (June 2008), the Biker Com is a hybrid of sorts and as such a bit different in some ways.
Newer systems coming to market or being updated provide the ability to connect with peripheral devices either via a primary Bluetooth connection or an auxiliary or secondary wired connection like version two of the Midland BT2 (review) and the Chatterbox XBi2 (review). But Biker Com takes it to another level.
This part includes helmet and motorcycle installation, system use, summary and compatibility tables and all available technical information. It also includes information on helmet and motorcycle installation and the device compatibility table with results using the optional noise filter. Common radio use testing is covered in Part 3: Using the BikerCom System.
Headset Installations
So far the Biker Com headsets are mounted in two helmets; my highly valued well worn and well-used Arai XD3 (review) and the Nolan N-102 (review). Next up will be the N-103 and the (new) BMW System Six, a superb lightweight flip helmet that cannot be imported or sold within the US, but they are available here in Canada.
BikerCom microphone mounting.Arai XD3 Full Face
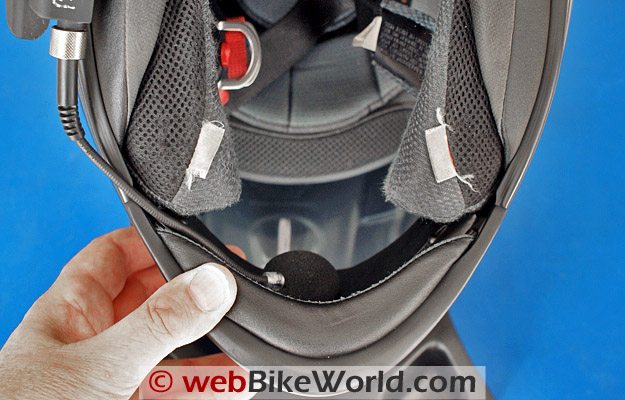
The XD3 installation is utter simplicity. To make sure the boom microphone assembly is correctly positioned, slip the mounting bracket up inside the outer shell and slide it forward or backwards slightly until the microphone is centered where the mouth will be.
Once this is done, the bracket is tightened up using the supplied Allen key wrench and the microphone is oriented to put the silver strip next to the mouth. The left and right speakers are on short and long leads respectively and at only 33 mm (1.25″) in diameter, are easily fitted into the individual liner inserts.
I used two of the foam spacers from the fitting kit for each earpiece, moving the speakers closer to my ears and providing more effective audio (better listening environment with less volume).
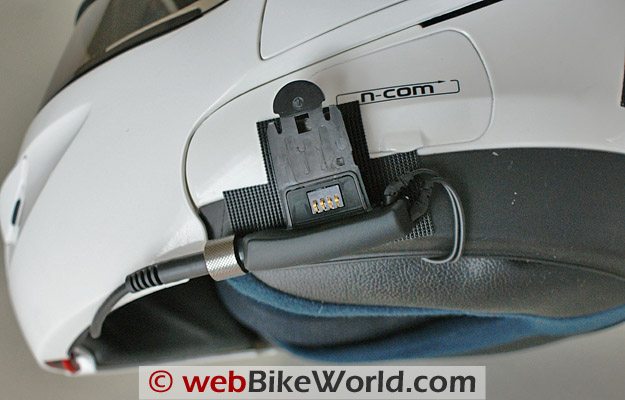
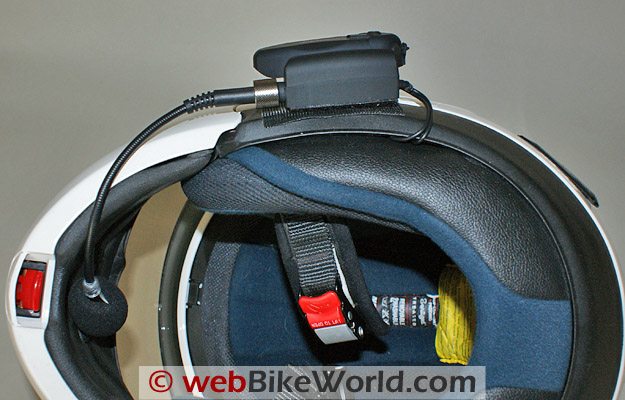
BikerCom intercom headset mounting bracket. Bottom view of mounted BikerCom intercom headset.Nolan N-102 Flip-up
The Nolan can be a bit problematic due to the unique curvature and flexibility of the lower shell edge – typically an adhesive mount is the most expedient option. The two square pads from the kit will work, but they are not large or strong enough by themselves to provide a solid mount. Additionally, they push the whole assembly well out into the air stream.
I used my usual solution — industrial strength hook and loop material to fashion a larger mounting pad for the helmet and a smaller shaped counterpart piece for the back of the mounting bracket. The backing plate that normally clips up inside the helmet shell is removed; this alone reduces the mounted profile of the assembly by half an inch.
One of the thick mounting pads from the kit, cut in half, fits perfectly in the spot vacated by the backing plate. So with this, along with the industrial fastener, there is more than enough surface area to solidly ‘latch’ the whole assembly to the pad on the helmet. The larger pad on the helmet lets me adjust the headset position as needed…and use it for other systems.
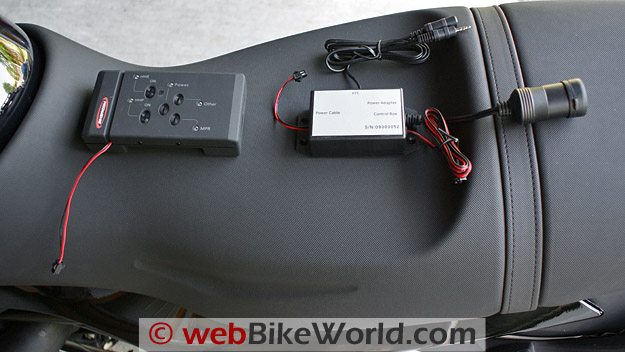
BikerCom control box and noise filter.Typical Motorcycle Installation: BMW R1200R
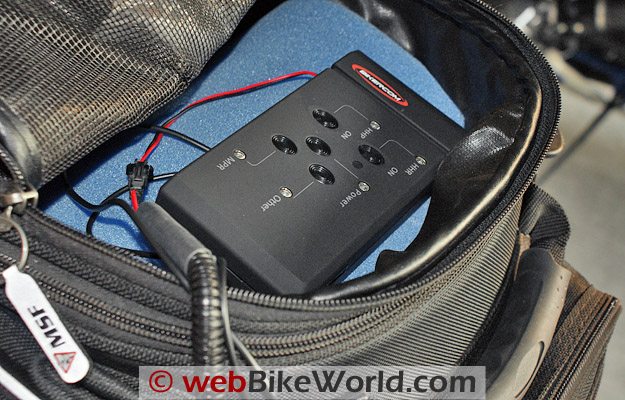
At this point in time both the BMW R1200R and the F800GS (review) have been wired up with the Biker Com harness including the noise filters. I have not yet mounted the Control Box under the seat or wherever, preferring to stash it in a side pocket or main compartment of the respective tank bag.
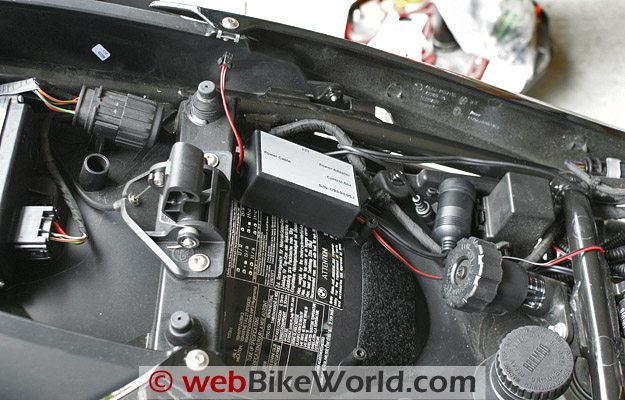
Installing the harness and filter on the 2009 BMW R1200R was straightforward. There is lots of available real estate under the seat for everything if desired. Remove the seat and take off the left side cover, then put the seat back on – lots of room with clearance.
Wired directly to the battery, the power harness gets encased in standard 7/16″ (10 mm) wire sheathing for protection and esthetics. Without the noise filter in the loop the harness comes directly up in the space between the tank and the seat and connects directly to the Control Box positioned in the tank bag.
The PTT (Push To Talk) assembly mounts to the left handlebar control module, readily and safely accessed by the thumb or inside finger. The connecting wire runs along the handlebar and across to the tank bag for connection to the PTT port on the back of the Control Box.
The tucked-away system does not need to be accessed – holding the main PTT pressure button down for a few seconds will power the system up. A smaller button on the leading edge of the module turns the system off. Power is indicated by a small but quite bright light on the side of the PTT module.
BikerCom noise filter mounted under seat. Push-to-talk button mounting.All the audio connections are straightforward; just plug the device into the appropriate port. The PTT, Radio and Audio ports are dedicated per se, but Auxiliary 1 and 2 can be used as desired for alert (Radar) and navigation (GPS) devices, etc.
While the noise filter could be mounted almost anywhere under the seat, to address wire length and accessibility issues I literally stuck the noise filter module to the flat inside edge of the left side panel, close to the battery. A rectangular piece of hook and loop was custom cut to fit the shape of the filter.
With the noise filter mounted up and ready, system connectivity changes somewhat. The noise filter module has a short connector that plugs into the main vehicle power harness and another longer connection that then goes to the Control Box power connector.
The noise filter also has a PTT Y-harness. The handlebar lead plugs into the 3.5 mm receptacle of the Y-harness and the other connector runs up to the Control Box and connects to the PTT port. These cables are also going to be encased in wire wrap.
As noted earlier, depending on where the system components and radios are mounted, cable length might be an issue. If so the two 3.5mm four-element extension cables included in the kit will come in handy. On the R1200R the stock harness lengths were fine.
BikerCom Control Box in tank bag.The last connector on the filter unit is a 12V DC accessory lead with a North American plug. This provides a filtered power connection for a common (FRS/GMRS or CB) radio, with or without an external antenna.
The FRS/GMRS radios run off internal battery and a full day of use is possible from one charge. However the Radio Shack Citizen Band (CB) radios are much smaller without their bulky battery packs, so they are powered directly from the vehicle using a custom power cable with a Powerlet style plug.
To accommodate the North American electrical receptacle used on the Noise Filter, a cigarette lighter to Powerlet socket cable adapter (Powerlet PN AAC-003) is used. While this solves the interface issue, it also adds another connection into the system, which by themselves can contribute to electrical noise levels.
Biker Com BMW F800GS Installation
The little GS is another issue; real estate under the dummy panel and the seat is limited as other accessories claim rights by virtue of previous occupancy. Although not permanently mounted yet, I suspect the noise filter will end up installed in the back under-seat area where the OEM alarm system goes if installed.
The alternative is to look at the whole real estate issue and make further accommodation changes, something that will get captured for the next F800GS chronicles submission.
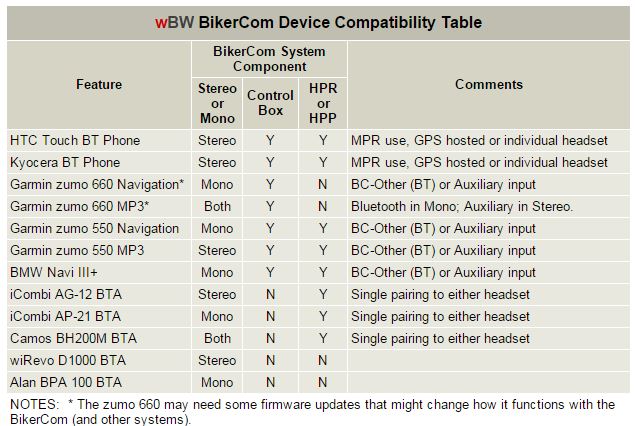
Device Compatibility Table
The information contained in the following table is based on devices used during testing and actual system use. It is not nor intended to be comprehensive and is provided for informational purposes only.
The Little Box That Could…Can
Back to reality. With the motorcycles off, the Biker Com powered up and the XM/MP player drawing juice from one of the accessory plugs everything is quiet. Only some very faint white noise on the Bluetooth RF link, detectable only when there is no active audio stream, can be heard.
But when either motorcycle is turned on and then started, the noise threshold erupts. First a very noticeable ignition click is heard, followed by extreme electrical interference from the accessory plug connection, making use of that device and the system impossible.
Removing the accessory plug connection removes one source of the noise, but the remaining noise levels are still high and would severely intrude on system use.
With the noise filter connected up and the XM/MP3 player powered from the filter’s accessory plug, only a very faint click is heard when the ignition is turned on and with the motorcycles running, the difference is amazing. Noise levels are extremely low — just slightly above the omnipresent RF white noise detected when the machines are turned off.
The fine tuning continues but with proper orientation of the Control Box so that the top edge is clear of obstructions, such as metal components or other electrical components, the wireless connection is very quiet. Noise levels only increase when range limitations are approached or the headset power supply is low.
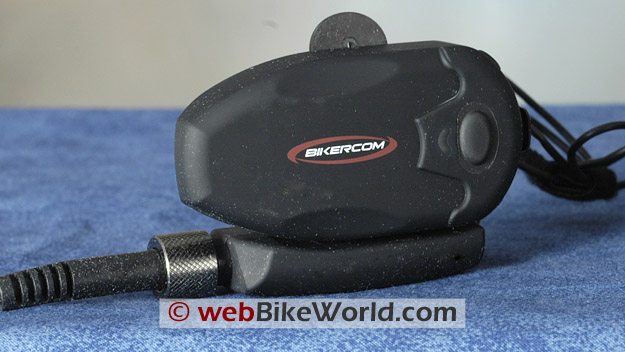 Close-up of BikerCom intercom module.
See Also
▪ Part 1: BikerCom Review
▪ Part 3: Using the BikerCom System