
The SuperBrace Fork Brace is relatively easy to install on the DR650.
The manufacturer claims it can reduce low- and high-speed wobbles, improve stability and reduce tire cupping.
It is also supposed to help reduce sensitivity to rain grooves in the pavement.
We haven’t noticed any of these improvements, but I suppose the fork brace doesn’t hurt, either.
The original concept for the webBikeWorld.com Budget Adventure Touring series was to basically demonstrate how much fun an owner could have without spending a fortune on an Adventure Touring motorcycle and accessories.
The budget was initially set at $7,500.00, including the motorcycle.
Not bad — and essentially a down payment on a new BMW R1200GS!
Believe it or not, we’ve been struggling to reach that $7,500.00 mark.
Not that we have to spend all the money in the budget, mind you, but it just shows that it definitely can be done.
It also demonstrates how expensive (and overly-complex) modern motorcycles have become.
And the best part is, you could definitely spend a lot less than we have and still end up with a darn good ride, no doubt about it.
The unspent money was put to good use (more or less) however; it allowed us to buy more accessories for evaluation and to report back to our faithful readers.
Which brings us to our latest (and probably unnecessary) item: the SuperBrace Fork Brace Stabilizer. Let’s take a look…
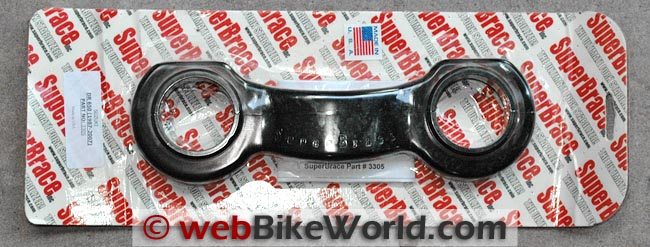
Be careful when removing the tightly-packed vacuum blister packaging!The SuperBrace Fork Brace Stabilizer
A fork brace or fork stabilizer is supposed to help prevent twisting or torque in the front forks of a motorcycle.
The theory is that adding a fork brace can help to reduce low- and high-speed wobbles, improve stability and reduce tire cupping, according to the manufacturer.
A fork brace is also claimed to help reduce sensitivity to rain grooves in the pavement.
Noble goals, for sure, but whether a fork brace does this or not may be open to debate and interpretation. I’d venture to guess that most owners don’t ride hard enough to notice.
And my other theory is that if a fork brace was a magic solution, the manufacturers would add it to the bike right from the factory.
The bottom line is that we haven’t noticed any difference with the SuperBrace Fork Brace installed on the DR650.
That’s not to say that it isn’t working; it’s probably more of a reflection on the rider(s) than the bike.
But, like many other accessories we’ve added to the DR650 — most of which look cool but aren’t absolutely necessary, when you get right down to it — the SuperBrace Fork Brace adds some style and panache to the bike.
And like I said, it can’t hurt…and maybe one of these days we’ll be abusing the bike enough to take advantage of the device.
SuperBrace isn’t the only fork brace or fork stabilizer manufacturer, but they’re probably the best known. The products are made in the U.S.A. and the quality on this one is fantastic, no question about it.
They claim a tolerance of ± 0.002 (inches) and the Fork Brace is made from 6061-T6 aluminum.
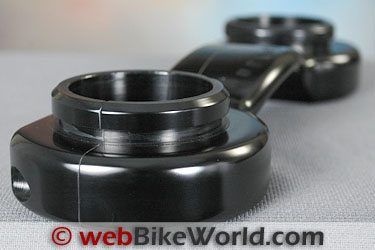
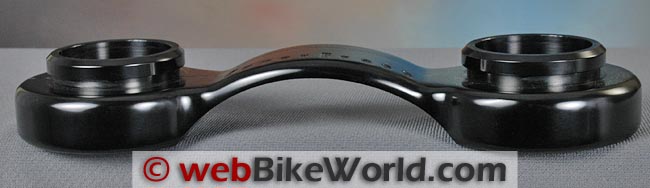
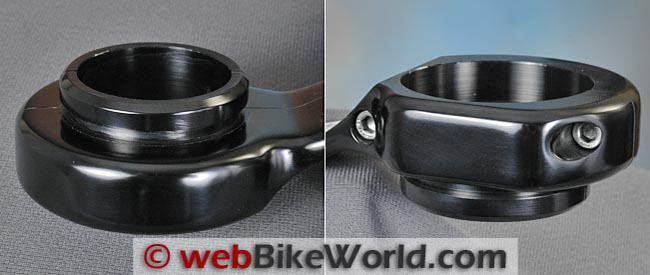
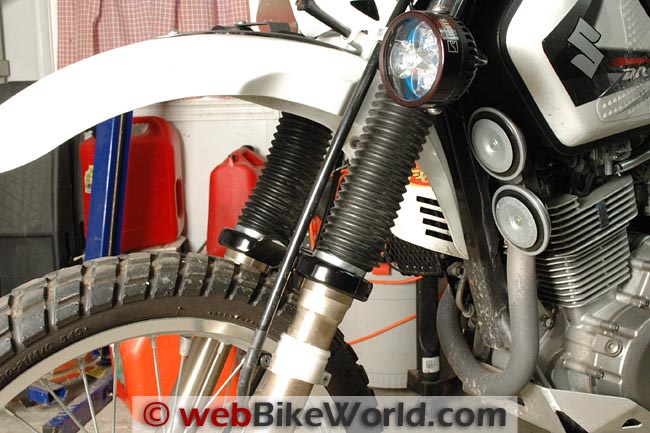
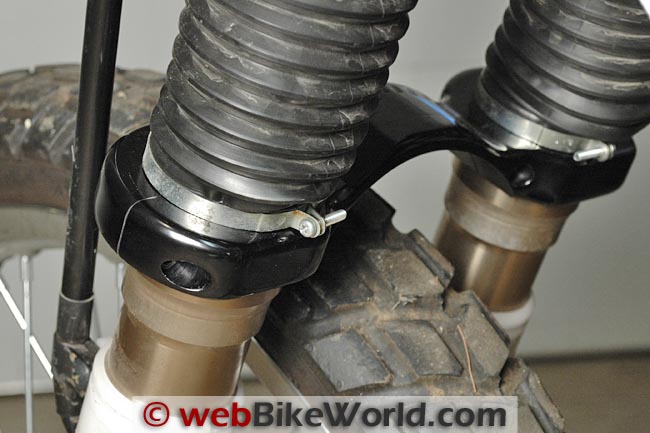
Side view of the SuperBrace Fork Brace profile for the DR650. Note “aerodynamic” profile. Split line is where the SuperBrace Fork Brace comes apart to slide over the fork seal tops. Close-up of the ends of the SuperBrace Fork Brace. Fork gaiter attaches to lip shown on the leftInstalling the SuperBrace Fork Brace Stabilizer
The SuperBrace Fork Brace is easy to install. The most difficult part is trimming the fork protectors on the DR650; street bikes don’t usually have this problem.
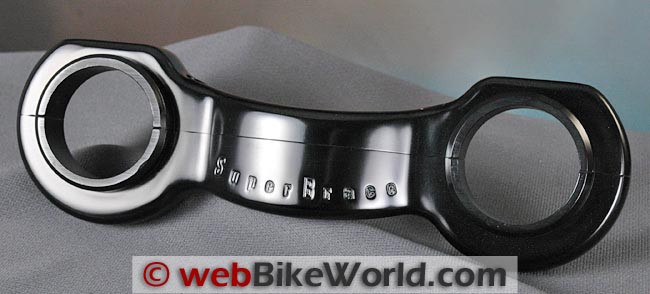
The Fork Brace is split in half, as you can see from the photos above. The halves are attached with stainless steel hex head cap screws.
The instructions call for first loosening the axle pinch bolts, which helps ensure that the forks won’t be forced into a slight twist when the stabilizer is installed.
On the DR650, we also had to loosen the hose clamp that holds the rubber fork gaiters or fork guards and release it from the top of the fork seal.
Each SuperBrace Fork Brace is designed specifically for a particular bike; this is their Part Number 3305 for the Suzuki DR650, build years 1987 to 2012.
Unscrew the two halves, slip the brace over the top of the fork seal and tighten to 10 ft. lbs. and you’re done.
As I said, the hardest part on this bike was fitting the fork gaiters over the top of the stabilizer. The OE fork protectors cover the entire top portion of the bottom half of the forks on the DR650.
They need to be trimmed to fit over the lip machined into the top of the SuperBrace Fork Brace.
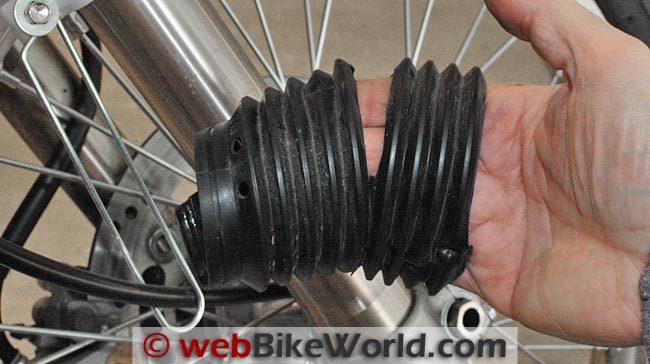
We ended up cutting 9 rings off the bottom of the gaiter to get it to fit correctly without too much slop. 7 rings would probably have worked better, but once you cut, there’s no going back!
(UPDATE: See the tip from C.D. in the Owner Comments section below!).
We used a very sharp pair of small surgical scissors with a sharp point. You can find these Made in India scissors in most any hardware store for a couple of bucks, and they come in very handy around the garage for precision slicing and dicing.
Don’t try to use a utility knife to cut the gaiter, as it will most likely not make a smooth, straight cut.
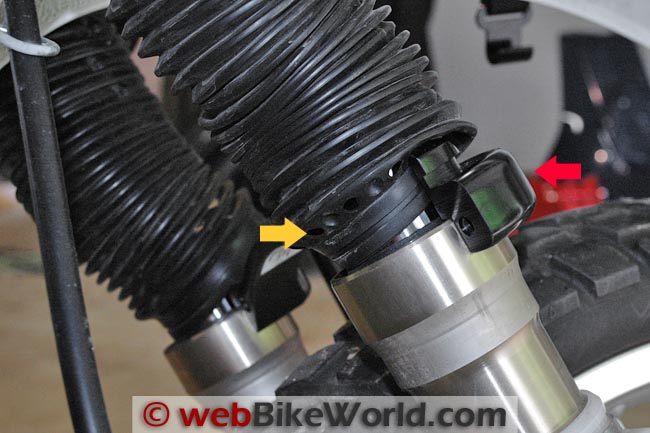
Note that the original equipment fork protectors have a series of air vent holes along the bottom, indicated by the yellow arrow in the photo below. These allow the air to enter and escape as the forks move up and down.
We left a small slit in the rear of the trimmed fork protector, which so far has served the same purpose without “blowing out” the bottom of the fork protector.
Tighten up the hose clamps or use cable ties and you’re all set. Be sure to re-tighten and re-torque those pinch bolts!
Here are a series of photos showing the installation:
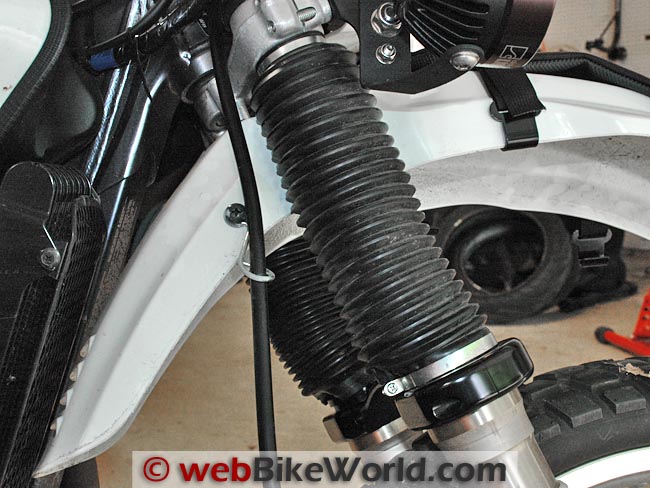
Orange arrow indicates air vent holes in original fork protector. Red arrow indicates SuperBrace Fork Brace. Initial fit of the rubber fork “gaiter” protective cover. 9 rings were cut from the bottom of the fork protector. 7 probably would have done the job. Fork protectors after cutting and reinstallation. Side view of forks with SuperBrace Fork Brace installed. Rear view close-up showing SuperBrace Fork Brace and cut-down fork protectors.Does It Work?
Two of us rode the DR650 on and off road, and neither of us noticed any obvious difference in the bike.
That’s not to say that the Fork Brace doesn’t work; just that for basic street riding and light off-road duty, there just didn’t seem to be any noticeable difference.
We don’t have any grooved pavement anywhere near here, so I can’t comment on that.
If you have installed a fork brace or fork stabilizer on your DR650 or street bike, feel free to send your comments to the address below.
Conclusion
The SuperBrace Fork Brace fork stabilizer is a beautiful piece of kit, precision made in the U.S.A.
It was sort of an expensive farkle in this case because we haven’t noticed any difference in the bike after the stabilizer was installed. But, it sure looks cool!
| wBW Review: SuperBrace Fork Brace | |
|---|---|
| Manufacturer: SuperBrace | List Price: $165.95 |
| Colors: Black. | Made In: U.S.A. |
| Sizes: For many different bikes. | Review Date: July 2012 |
Owner Comments and Feedback
See details on submitting comments.
From “S.Z.” (January 2014): “I read that you guys really didn’t notice any improvement or benefit of the fork brace on your DR650, other than it made the bike look snazzier.
My belief is this: They make stock forks for modern bikes a heck of a lot better than they used to. If you’re a normal to spirited rider you probably won’t notice anything. But if you’re a rider that wants to push the bike to test its limits, then that’s where it’s going to help.
I had several 1982 Yamaha Seca 650 Turbos, and a fork brace was probably the sturdiest piece in the fork assembly…lol!
On a bike like that, and my current 1986 Yamaha SRX-600, you can definitely appreciate the improvements to a weak fork design.
The forks on a DR650 are pretty stout to begin with, as are most of today’s street and dirt bike offerings. Most mods fr modern forks include progressive fork springs and heavier fork oil.
Or for the guy that has nothing better to do than spend money, there’s always an Öhlins replacement to be had.
Personally, I don’t go overboard on mods. I tend to sell or trade in my bikes every year or three and you don’t get out of it what you put into it.
I spend my money bringing old bikes like my 1986 Yamaha SRX-6 back to the land of the living. It’s hard enough when a lot of parts are no longer available, but even the ones that are available are pretty expensive.”
From “B.B.” (August 2012): “I didn’t really understand the fork brace need either because my 2012 DL650 (V-Strom) seemed fine the way it was. I located a used one and decided to find out what the big deal was.
My experience was much different than your testing indicated.
It took about 10 seconds to realize it was quite the improvement. It is hard to describe other than the front seems more precise and nimble at slow speeds and tracks better and is more grounded at higher speeds. Kind of like going from an SUV to a sports car.
I also feel safer and more in control. In time, it will just become normal but the moment I put it on it was noticeable. I am glad I did it.”
Editor’s Reply: I’m sure that the outcome will vary when installed on different bikes with different geometries, rider inputs, road types, etc.
From “C.D.” (August 2012): “No need to cut rings from the gaiters. Just slice the gaiter somewhere midway along its length. Then slide the bottom part under the top part. The two parts will stay locked together, due to the ribbing.
You can adjust the overlap to fine tune. The join is almost invisible.
The most noticeable improvement with the SuperBrace for me was in hard braking in corners (stupid, I know but sometimes necessary). The bike used to stand up due to the single disk, in other words understeer.
The SuperBrace cured that. It also cured a slightly flabby handling characteristic when my Safari tank was near full.”