
Part 5: Software Management
As lamented at the end of Part Two: Sena SR10 Features, a few issues and observations impacting SR10 functionality and performance remained outstanding, so I was really looking forward to the first firmware update.
Nevertheless, continued use of both SR10 systems, along with a growing list of Bluetooth helmet communications systems and personal headsets, kept reinforcing the portability and utility of the devices.
The SR10 with a paired Bluetooth headset is not the first to offer or provide a wireless two-way radio interface. Midland, AKE and StarCom1, for example, all offer options.
But considering the lacklustre results I have observed in getting other two way radio and headset combinations to work well, the SR10 with headset combination is easily the best I have used.
And in using the SR10 with a variety of Bluetooth headsets, as detailed in Part 6: Sena SR10 Compatibility, it seemed prudent to provide some information on the respective system pairings: presented later in this posting.
But first: software.
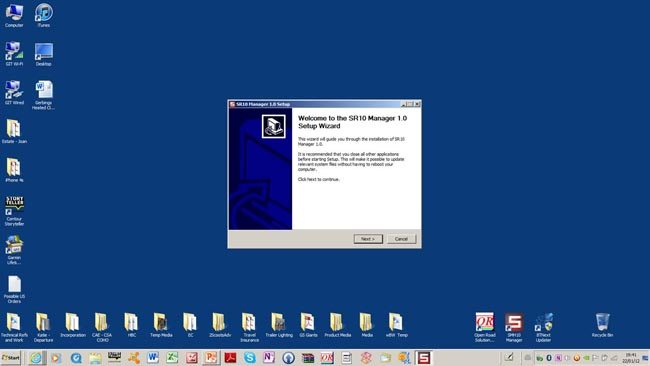
Welcome screen to begin installing the Sena SR10 Manager firmware updater.The Sena “SR10 Manager”: Installation and Features
The first release of the Sena “SR10 Manager”, version 1.0, is similar to the Sena SMH 10 Manager application in look and function and while overall not as slick as the Midland NEXT application (review in process), the Sena applications are easy to use in getting the devices updated.
As with the Sena SMH10 Manager, the SR10 application is compatible with MS Windows XP and Windows Vista or Windows 7, 32 or 64 bit versions from the Sena Bluetooth Support page (you have registered your Sena system, right?).
Don’t forget to also download and read, the Manual_SR10_Manager_v1.0.pdf (2 January 2012) as well.
With the appropriate file downloaded to the default or otherwise remembered location on the PC, installation of the application can take place, best done running administrator privileges.
As way of reminder, do not connect the SR10 until so instructed; this varies depending on which version of the application gets installed.
For Windows XP installations, launch the sr10manager-v1.0-setup.exe program and follow the steps detailed via the sequential windows. The final window allows you (by default) to launch the SR10 Manager once “Finish” is selected.
With Windows Vista and Windows 7, a 32-bit installation uses the file identified above, but for the 64-bit versions of Windows Vista or Windows 7 the SR10manager-V1.0-setup_x64.exe is the appropriate download.
The initial steps for installing the application are the same, but during the “Installing” process, a pop-up will offer you the chance to install the SR10 device driver, or not.
As stated in the manual, this step should not be skipped (“Cancel”) if this is the first time the application has been extracted and installed on the computer.
If driver installation is desired at this point in time (recommended), connect the SR10 to the PC and turn the SR10 on. A second pop-up will let you know if the SR10 is detected and if so, once the pop-up disappears and “Next” selected, the Device Driver Installation Wizard window will appear; this step may take a few minutes, depending on your computer.
If all goes well, the subsequent window will show a check-mark beside the device name.
Clicking “Finish” brings up the final screen. Selecting “Finish” here will close the screen and launch the SR10 Manager if the (default) checkmark is not de-selected.
On my initial attempt to install the SR10 Manager application on a MS Windows 7 (64-bit) system, Murphy’s Law (that which can go wrong, will) prevailed. Result: the device driver didn’t get installed. Thankfully Sena provided for this possibility by including workaround instructions in the manual.
I rebooted and followed these instructions to manually install the driver from the Start Menu >All Programs >Sena Technologies > SR10 Manager. Clicking on the “Install Driver” option will launch the Device Driver Installation Wizard again. Proceeding from this point resulted in the driver being installed.
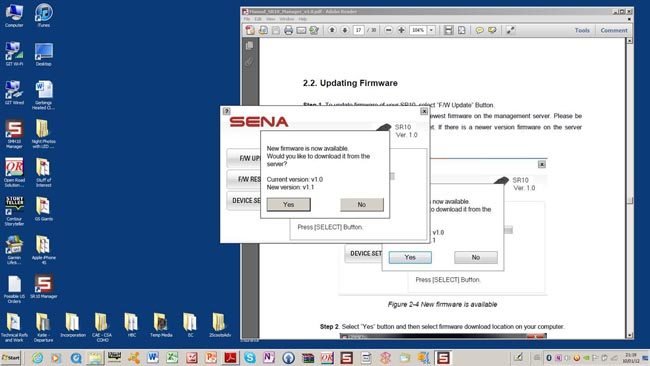
Connecting to the Sena Server for Firmware Updates.The SR10 Manager Application
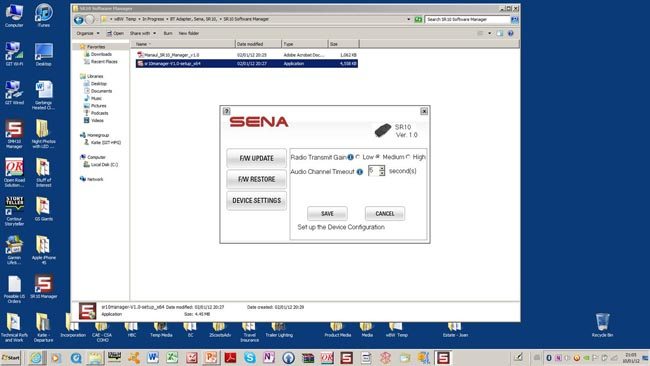
The SR10 Manager is straightforward in function, offering firmware update, firmware restore and device settings menu selection.
Selecting either “F/W Update” or “F/W Restore” will initiate the processes detailed below. Starting with firmware version 1.1, the third menu option, “Device Settings”, allows the user to view and change some of SR10 functional parameters.
Clicking on “Device Settings” will bring up two options in the main box. The top one is for the “Radio Transmit” (microphone) “Gain” (Low, Medium or High, with Medium the default). The second line is for “Audio Channel Timeout”, the value for which can be adjusted from 3 to 60 in one second increments (I use five, the default value).
Each setting has a small blue “i” icon and clicking on either invokes a pop-up text box that explains what the “Radio Transmit Gain” and “Audio Channel Timeout” options provide.
If changes are made, don’t forget to click the “Save” button to push the parameter changes to the connected device, although the changes to the system are only applied after the device is restarted.
Finally, the current version of the SR10 Manager you have installed can be displayed by clicking on the “?” button in the upper left corner of the program window.
SR10 Firmware Version 1.1 Release Notes
Firmware version 1.0 (23 September 2011) was the original baseline utilized with the SR10 devices. A much-awaited firmware update, version 1.1 was released 2 January 2012 and provided the following changes:
- Support Voice Command function of mobile phones.
- Support for multiple point Bluetooth headsets.
- (Fix) a temporary disconnection of Bluetooth audio channel.
SR10 Manager updates and options screen.Updating the SR10 Firmware
Launching the SR10 Manager will result in an initial screen along with pop-up instructions to connect and power up the SR10. At this point, if using XP, the needed driver installation process will or should have started automatically and once any task bar progression activity is completed for the driver, the actual update process can begin.
- The SR10 Manager displays the current firmware version for the connected SR10.
- Make sure an Internet connection exists on the PC.
- Select “F/W Update”. The Manager will check for the newest firmware from the Sena management server, if there is a newer version, a pop-up will identify it and provide the opportunity to download it.
- If “Yes” is selected, the file will be downloaded to the default location, or you can choose another before saving the file.
- A pop-up download progression bar will appear and disappear one done.
- Click on the “Update” button in the F/W Update box.
- A yellow-coloured pop-up with instructions to press and hold the “Pairing” button will appear, once the message disappears, the button can be released, initiating the update mode.
- The original firmware will be backed up to the source folder and then the new firmware written to the device, with text messages in the Update box identifying which process is ongoing.
- When “writing” reaches 99%, the process may halt for 5 to 10 seconds for verification purposes.
- Once the update is done, another yellow pop-up instructs the user to press “Pairing” and “PTT” simultaneously until the message disappears.
- A pop-up will appear stating that theSR10 is successfully updated and clicking on the ‘OK’ button completes the process. The (new) current firmware version will be displayed in the upper right box of the program window.
If there are problems in updating the firmware or a roll-back is desired, the “F/W Restore” button initiates this. Clicking it will initiate a set of instructions on how to complete the restoral.
Note: The user needs to use the same computer so that the default storage path for the backup file (backup.img) remains valid, although many users will know how to get around this point…
Owner Comments and Feedback
See details on submitting comments.