
Yet another precision-made, high quality motorcycle stand from Acebikes.
The new Acebikes Steadystand Cross is designed for motocross, off-road and adventure touring bikes.
It holds and secures the front wheel in place and it’s designed for trailer mounting.
It will fit wheels from 18″ to 21″ in diameter and from 90 mm to 120 mm wide.
The laser-cut parts fit together perfectly…once you know how.
Combine this with the Acebikes Tyre Fix hold-down strap (review) for an easy-to-use method of securing a motorcycle on a trailer.
We have now reviewed several Acebikes products and each one increases our admiration and enthusiasm for the company’s designs.
These are very well made products that are precisely engineered and manufactured.
It’s as different as night is to day when compared to the cheap junk found on those auction sites and overstock warehouse retailers.
No matter how many times we’ve done it, trailering a motorcycle is always a stressful and potentially dangerous experience, so it pays to have the best equipment for making sure the bike is secure.
If you don’t think so, just wait until the first time someone makes a claim against you for an accident caused by improper trailering methods…
The new Acebikes Steadystand Cross is the latest in the Steadystand series.
That includes the Acebikes Steadystand “Original” (review) and the Acebikes Steadystand “Multi” (review).
And don’t forget the Acebikes Tyre Fix Hold-Down Strap (review), which makes trailering a piece of pie!
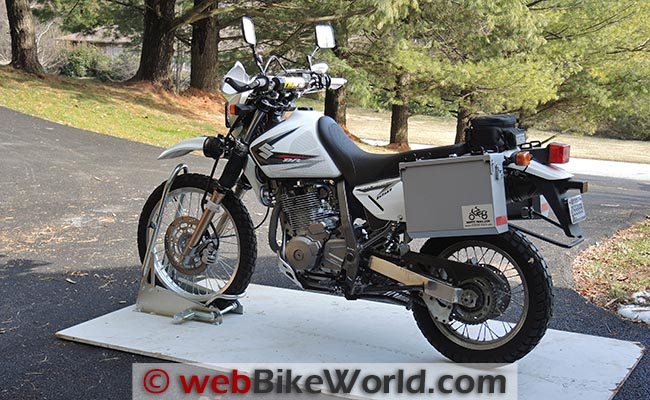
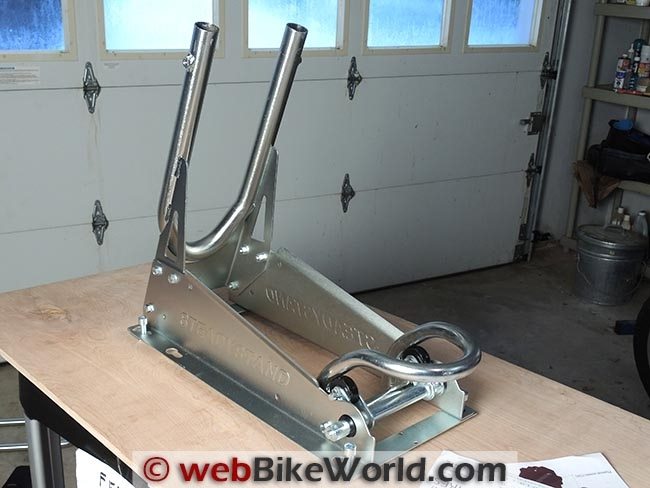
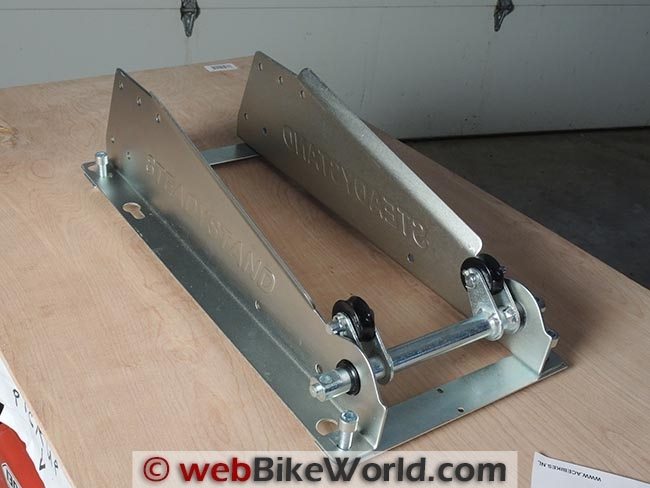
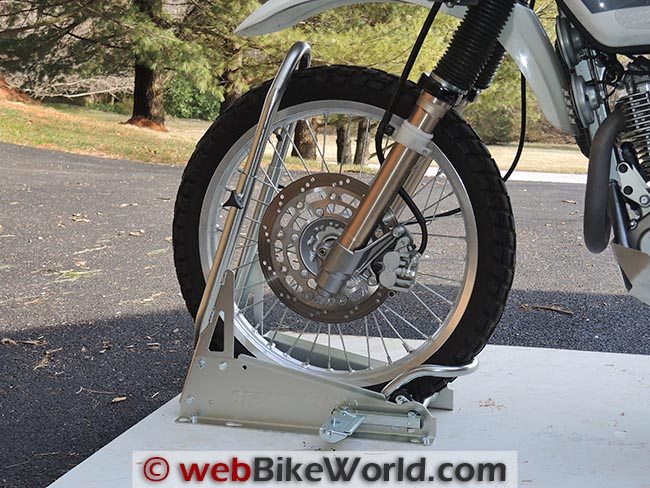
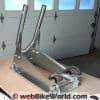
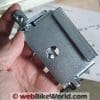
Acebikes Steadystand Cross mounted on plywood sheet for evaluation.The Acebikes Steadystand Cross: Details
All of the Acebikes products we reviewed are beautifully made and precision engineered.
The pieces all appear to be cut using a CNC laser or water jet and high-quality hardware is supplied.
We have never had a problem with any of the Acebikes stands; all of the parts are there and all the hardware you need is provided.
The Cross stand is designed for motocross, off-road or “dirt” bikes — and that includes adventure-tourers like the Suzuki DR650 (blog), Kawasaki KLR 650 and even the Big Boys like the KTM 990 Adventure and others.
The Cross stand is not a floor stand like the Acebikes Steadystand “Original”.
It’s designed to be mounted to a trailer and, as you will see, it has a clever design that allows it to be (relatively) easily removed from the trailer floor if desired.
The Cross stand is designed to fit the larger front tires found on dirt bikes; it’s rated to hold from 18″ to 21″ front tires that are between 90 mm and 120 mm wide.
As you know, most standard front wheel trailer chocks are not designed to hold narrow, tall tires like this, so a special product was developed and it’s quite unlike most or all other dirt bike wheel chocks that we’ve seen.
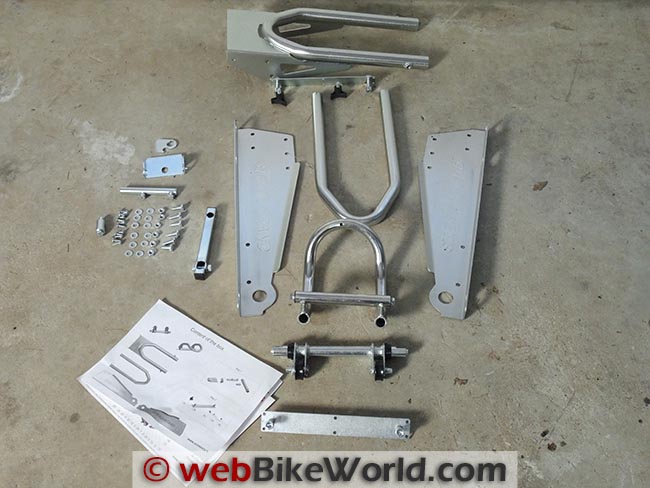
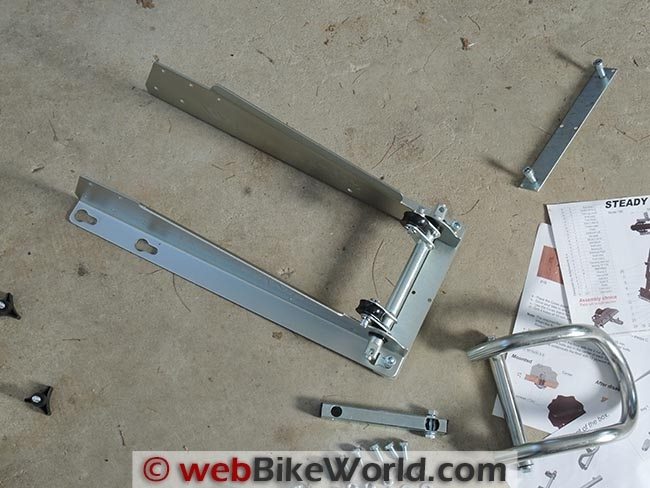
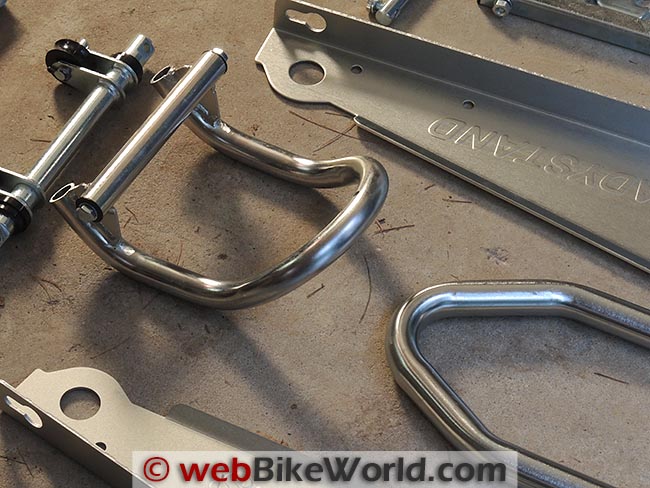
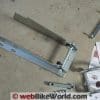
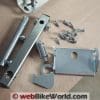
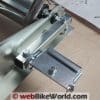
Steadystand Cross kit contents.In the Box: The Acebikes Steadystand Cross Kit
The assembled stand weighs roughly 12 kilograms (~27 lbs.), so it’s a pretty hefty piece.
It comes in a rectangular box broken down in its component pieces, as you can see in the photo above, where the parts are laid out roughly in their final assembly position.
A bag of high-quality hardware is provided, which includes 8 mm bolts and two straps with welded-on nuts for mounting the Cross stand on the trailer.
The instructions that come with the kit are visual only.
So there is no step-by-step instruction guide, we’re guessing due to the many countries in which the stand is shipped.
This is typical Acebikes procedure and for the other stands, it’s not a problem, but the Cross stand does have more parts and is a bit more complicated at first glance than the other stands.
However, once you lay out all the parts and start to piece everything together, it all makes sense and the more parts you use, the fewer parts you have left and it becomes even more obvious on how it all works.
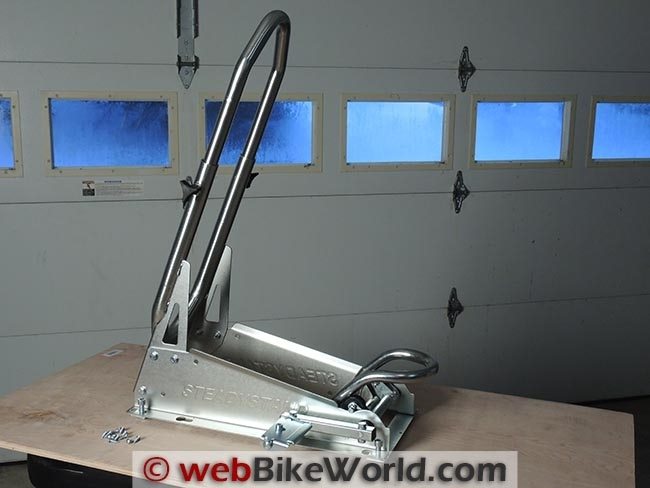
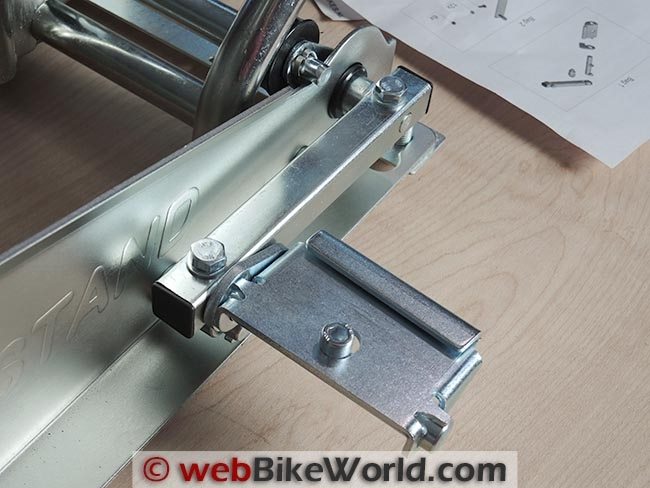
Assembling the Acebikes Steadystand Cross Wheel Chock
We put together a series of photos in the slide show above to illustrate how it works and, hopefully, to act as an adjunct to the Acebikes exploded diagram that comes with the kit.
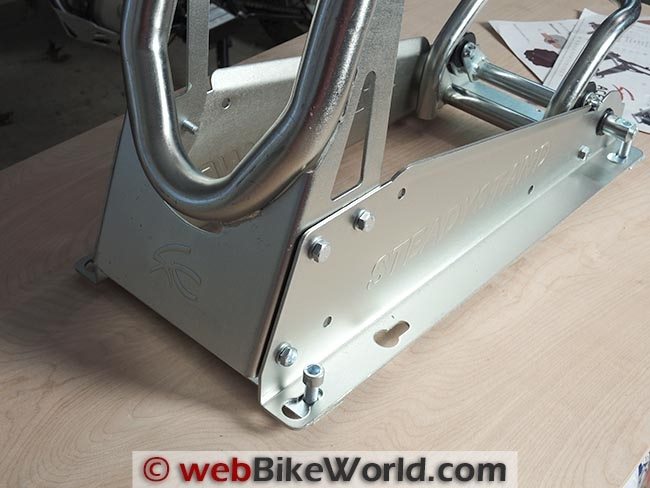
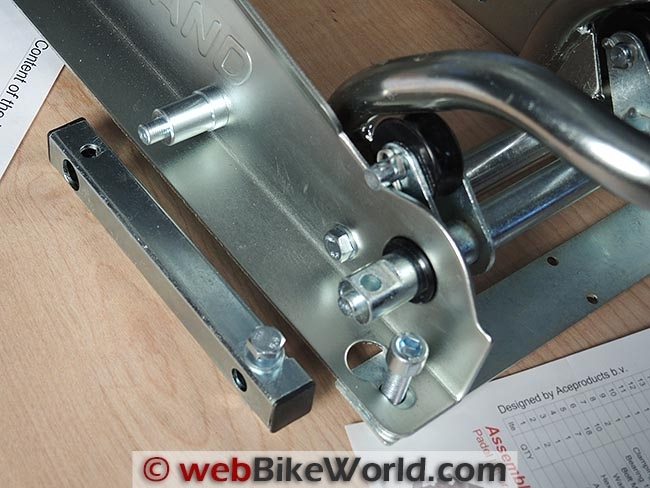
First, assemble the two sides of the Cross stand.
We installed the two horizontal bars to hold the sides upright, although the bars are designed to go under the floor of the trailer to hold the stand.
The rotating bar with the attached rollers goes in the front, along with the hoop lock that holds the rear of the tire.
Follow the Acebikes illustration in the exploded diagram and basically there are only four main parts that go together to form the chassis of the Cross stand.
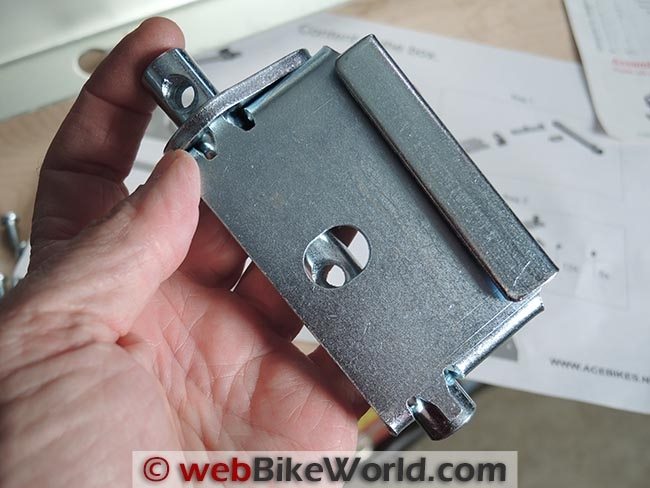
The separate assembly on the side is the foot pedal that can be fitted to either the left or right side.
This rotates the hoop in the rear of the stand down to roll the bike on to the stand, then up to lock the wheel into the stand when the bike is in place.
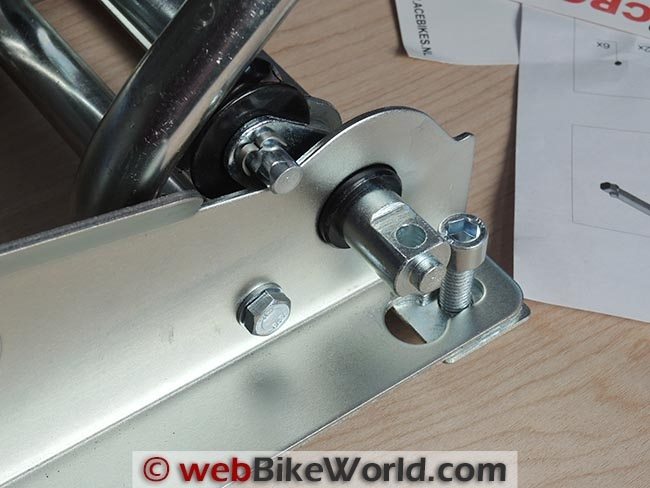
We took some close-up photos of the pedal assembly, which consists of several parts and took a bit of head-scratching to figure out because the exploded diagram provided with the kit is a bit lacking in this detail.
Once you see it — hopefully in the slide show photos — it’s easy to assemble.
In fact, the stand assembles with relatively few nuts and bolts actually.
You might want to keep a tube of blue Loctite handy also but make sure you assemble the parts loosely first until you get the idea, then tighten and lock it all down.
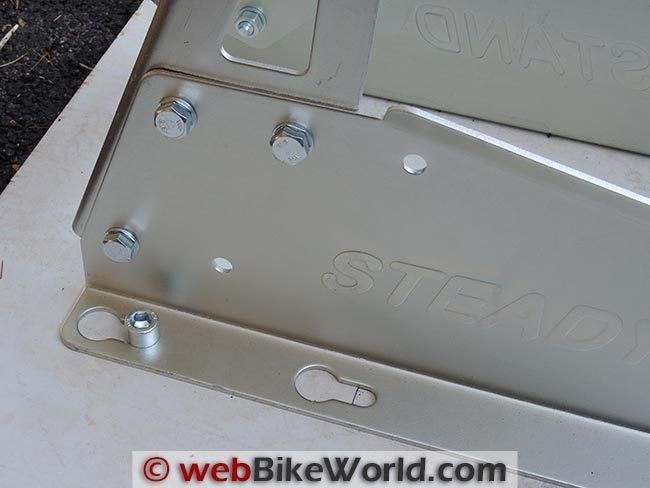
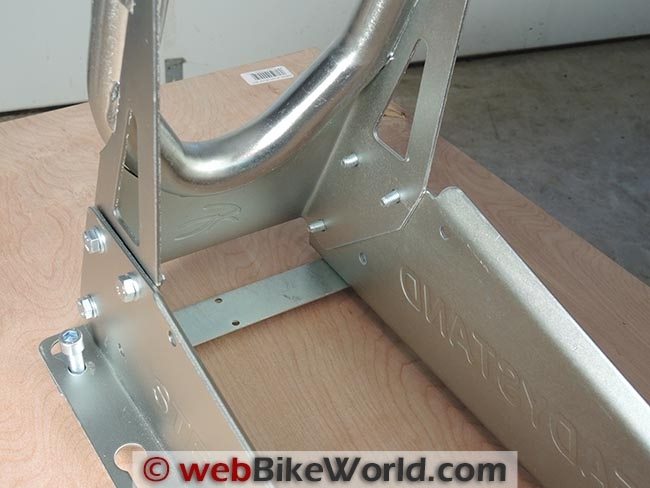
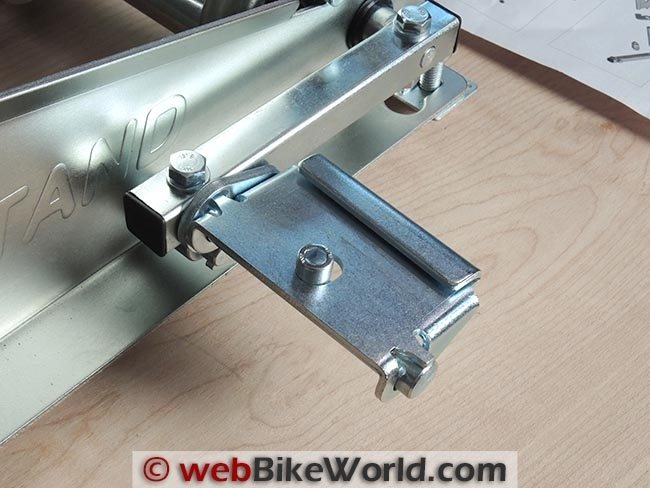
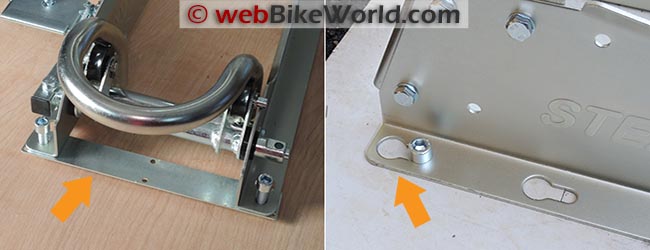
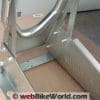
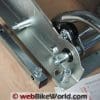
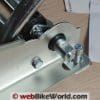
Mounting strap shown on the left. Keyhole-shaped mounting holes on the right.Notes on Mounting
You’ll notice three sets of keyhole-shaped holes on the bottom rail of each side of the Steadystand Cross chock. The two holes towards the front are shown in the photo on the right above.
These holes are used for bolting the stand to the trailer floor and 8 mm HHCS bolts (shown above) are provided in the kit for this purpose.
Also in the kit are two straps with attached nuts. These are placed horizontally at the front and rear of the stand.
This is illustrated in the photo on the left, but note that the strap here is shown above the mounting board.
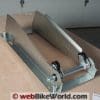
We first installed the straps on both side rails while assembling the stand because this holds the parts together while the rest of the pieces are installed.
But you would then drill 18 mm holes through the trailer floor, using the holes in the Steadystand Cross as a guide.
The straps are then placed under the floor of the trailer and the bolts are used to tighten the stand.
The clever design is the keyhole-shaped holes.
If you want to remove the Cross stand, simply loosen the bolts, slide the stand until the bolt head lines up with the larger hole and remove the stand.
The bolts can then be tightened and the straps remain under the trailer floor for next time.
Or, if you want to go one more step, you can countersink the holes so that the bolt heads are flush with the floor of the trailer after the Cross chock is removed.
This will depend also on the thickness of your trailer floor.
Mounting the Steadystand Cross on a Trailer
Although the Cross wheel chock is designed to be mounted on the bed of a trailer, our flatbed trailer is in storage for the winter.
So we mounted it to a 4 foot by 8 foot sheet of 3/4″ plywood for evaluation, as you can see in some of the photos and in the video.

We also mounted it on a half-sheet of plywood, just to see if the Cross chock could be used as a floor mounted stand for the garage.
This works, but the nuts welded to the mounting straps hit the floor first, so it would take some extra fettling to make this all work.
It probably wouldn’t be too difficult to make a couple of wide metal straps to hold the Cross chock and give it extra stability for use as a garage front wheel stand.
We used the holes in the Cross chock as a template for drilling the plywood.
By the way, the extra set of holes towards the front can be used as an alternate for the bolts if needed; this allows the chock to extend over the front of a trailer floor if required on a short trailer.
Attaching the Cross chock to the straps underneath is easy because the nuts are welded to the straps.
So once you get a bolt started in the threads, there’s no need to have someone underneath holding the nut with a wrench.
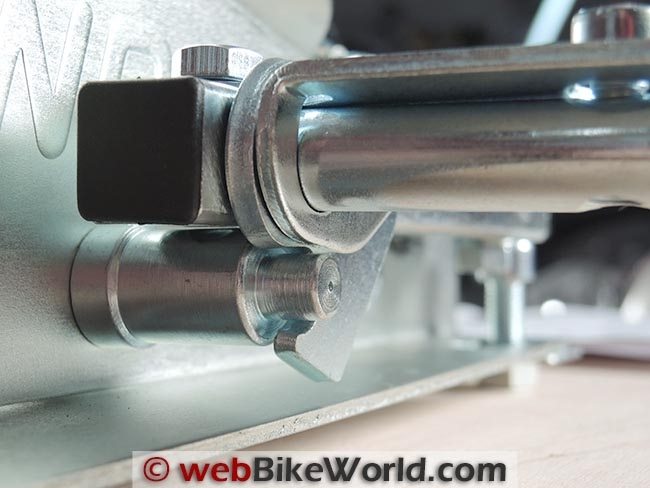
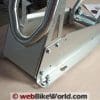
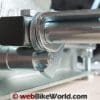
Foot pedal operates the rear hoop-shaped lock to hold the front tire in place.Using the Steadystand Cross Wheel Chock
Once the Cross wheel chock is mounted, it’s easy to use.
Flip the foot pedal back to lower the hoop-shaped rail in the rear, then push the bike on to the stand.
Reverse the direction of the foot pedal and press down to lock the rear of the tire into the stand.
Adjust the front bar to hold the tire; it has two threaded friction knobs on either side.
If the front bar is set to just clear the tire, it should not interfere when the bike is pulled back out of the chock.
The only problem is that the front bar or hoop has a set angle, so it can interfere with low-mounted fenders on some bikes.
We did not try it with the KTM 990 Adventure, for example, but it looks like it might interfere with the low-mounted fender on that bike.
It is not a problem with the Suzuki DR650, however.
Here’s a brief video that demonstrates how the bike is placed in the chock and then removed.
Again, note that we mounted the Cross chock on a piece of plywood for evaluation purposes because the flatbed trailer was not available.
This created a bit of play in the system that probably would not be there were it mounted on a trailer floor, but the concept is identical.
UPDATE: Note that the first time you use the Steadystand Cross, the front tube is adjusted using the two knobs. But this is only necessary for the first time.
Because the clamp construction lifts the wheel a little bit, it also lowers the wheel when released, this should give you just enough space to pull the bike out.
Conclusion
Conventional motorcycle wheel chocks are usually not compatible with the big, narrow front tire of a dirt bike.
The Steadystand Cross is a nicely designed solution. It’s relatively easy to assemble and it’s rugged and very well made.
It’s also easy to mount and the simple but clever keyhole-shaped mounting holes and mounting strap system make it easy to remove from the trailer if necessary.
The Steadystand Cross wheel chock is brand new to the Acebikes product line and is available in Europe and in the U.S.A. on the Wheels and Wings (Herman USA) website.
Pair a Steadystand Cross with the Acebikes Tyre Fix Hold-Down Strap (review) and you you have an easy, quick and secure system for hauling your dirt bike.
More webBikeWorld:
Owner Comments and Feedback
See details on submitting comments.