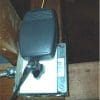
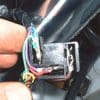
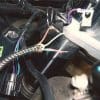
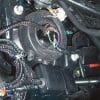
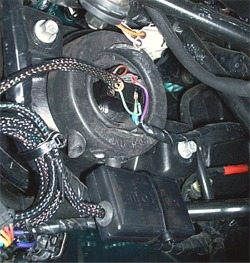
The Motofx remote garage door opener is specifically designed for use on small vehicles with 12 volt electrical systems, including motorcycles. The product is available from Motofx; it costs $74.95 (plus shipping); and it works with most modern garage door openers (see compatibility list below).
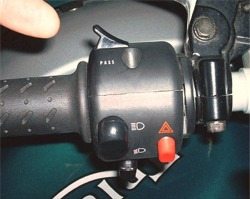
It activates by pressing the “flash to pass” switch on the Triumph’s clutch side switch cluster; it will also operate if the bike’s headlights are toggled from dim to bright or vice versa.
The opener remote is only active when the motorcycle key switch is on. There is no chance of battery drain because the remote is only on when the bike’s headlights are on.
If for some reason the headlight fuse happens to blow, the opener will not operate until the fuse is replaced.
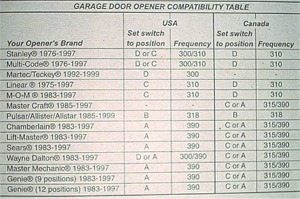
Instructions for programming the remote are included with the unit. Basically, dip switches inside the Motofx remote are set to match the switches in either your garage door opener or in the optional receiver (if your home has a newer opener with random code operation, you will need to purchase the separate receiver). The package containing the basic remote has a compatibility listing on the back (see below).
If you have a newer opener which does not have a single set code you will need to purchase and install a receiver from Motofx. Use the instructions included with your transmitter and receiver to set up these items.
Tests of the unit installed in the accompanying photos have shown the unit to work as much as 150 feet or roughly two houses away from the garage in an average suburban neighborhood. When you leave your garage, after closing the garage door you need to remember NOT to change your headlight setting until you are well away from your house, as it is possible for the remote to be triggered as you ride away although my tests seem to indicate the unit has less range when not pointed toward the receiver.
Happy Motoring!
Russ Ackley
The Triumph Sprint ST is typical of the modern Triumph line of bikes utilizing dual headlamps and a “flash-to-pass” button. The following instructions are meant as a guide only; your installation may vary.
Collect all the bits and pieces required for your installation. You will need a #2 Philips head screwdriver, a very small flat blade screwdriver, needle nose pliers, a pencil-type soldering iron and low temperature solder. Side cutting pliers may also come in handy.
CAUTION!! Turn off all electrical power to the garage door opener until you are finished with the receiver hook-up
Read the wBW Review of Posi-Lock No-crimp connectors; great for wire splicing and installing your Motofx unit on your bike! Purchase Posi-Lock connectors through the wBW link and get a discount, help support the site and donate to charity all at the same time!
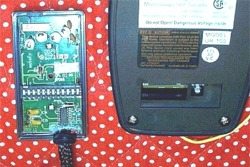
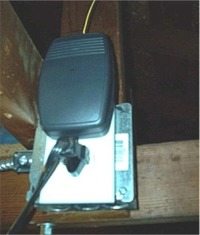
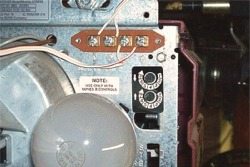
The receiver wires go on connections #1 & #2 in this installation. I put the solid colored wire from the receiver with the solid colored wire from the opener switch on connection #1; the wires with 2 colors on connection #2. Your installation may vary.
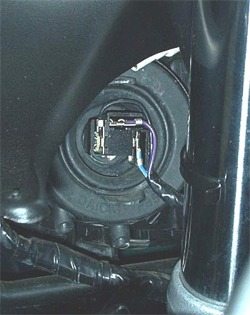
Park the bike in a well lighted area using the centerstand. You will probably need an extension cord for what comes next. Remove the left side fairing and set it aside.
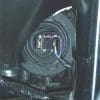
This will give you access to the left hand headlamp plug. Take care not to lose any of the cap screws or clip nuts from the fairing!
Remove the electrical plug from the headlamp by pulling back firmly. Using a small flat bladed screwdriver remove the (black) ground wire socket from the plug assembly by inserting the screwdriver blade from the front side of the plug into the small notch while holding the plug body and pulling the socket from the rear with needle nose pliers. An eyeglass screwdriver with a narrow thin blade works well for this.
Take care not to break anything!
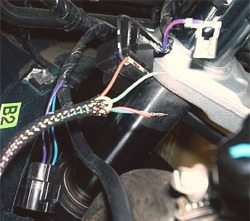
HINT: Use an alligator clip to hold the wires onto the sockets while soldering. Take care not to touch anything else with the hot iron!
Reinstall the socket just soldered and remove the center (top) socket. Attach the red AND the blue wires from the opener remote to the purple wire (shown above); reinstall that socket and go to the next.
Attach the green wire from the remote to the blue wire. When you have all the connections soldered, attach the transmitter to the harness, turn on the motorcycle key (headlight power must be on but you may leave the plug you just soldered unconnected to the headlight for the test) and test cycle your garage door.
If everything works well, proceed. If the opener does not operate go back and check to insure that you have turned the opener power back on and all connections you have made are secure.
Note that there will be a 2-3 second lag time between the time you flash your lights and when the opener actually starts. The opener is also triggered if you toggle from low beam to high or vice versa. Remove the transmitter while you tidy up the installation.
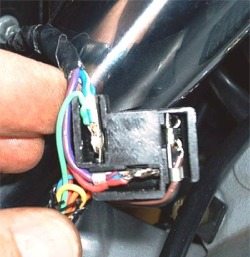
If you are not comfortable trying to solder these connections you can use clip-on splices (also available at Radio Shack) however these will cause minor damage to the insulation on the bikes harness and also will require that you remove some of the harness wrapping from the headlight harness. The finished plug assembly with the transmitter wires soldered on is shown below.

Motofx Garage Door Compatibility Table
Note: Smart Button, Learning Code, Intellicode, odd frequencies and brands require the Receiver, which costs $25.
Note: For informational use only. All material and photographs are Copyright © webWorld International, LLC – 2000-2011. All rights reserved. See the webBikeWorld® Site Info page. NOTE: Product specifications, features and details may change or differ from our descriptions. Always check before purchasing. Read the Terms and Conditions!
Owner Comments and Feedback
Not all comments will be published (details). Comments may be edited for clarity prior to publication.


