
The BMW Engine Guards are a good accessory for the S1000XR.
The bike is getting mixed road use and I can use all the extra protection possible.
That includes the multiple R&G protective accessory kits that been installed so far and more in process.
Like the S1000XR headlights, the BMW engine guards are not a matched set.
They’re asymmetric and very narrow, although they are almost the same height.
The differences are largely dictated by the engine specifics on each side of the bike.
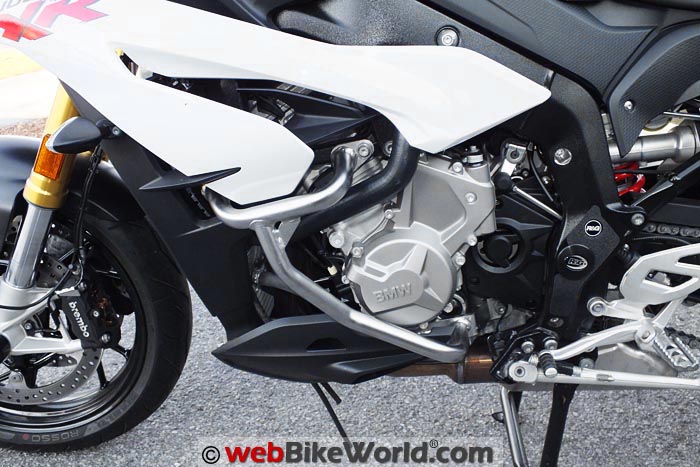
With four mounting points on the left and three on the right side, the lightweight engine guards are extremely strong and should be able to take a lot of punishment while protecting the bike’s vital points.
And the forward and upper tubing of the guards provides convenient mounting points for accessories like auxiliary lighting.
I have added the Clearwater Erica LED lights (review), which are ready for the upcomingClearwater CANopener (review) V5 harness for the S1000XR and a full reporting on that is pending.
I’ll also have reviews of more accessories for the S1000XR, including engine case covers.
BMW states that their lower case guards won’t co-exist with the engine case covers, so it will be interesting to see if the R&G engine case covers will.
All of this makes for good blog write-ups, so stay tuned.
Introduction
The BMW Engine Guards are lightweight, relatively easy to fit and have a low profile (good or bad depending on your point of view).
But they weren’t originally available in all markets and not long ago they were the only engine guards available.
That has now changed, however, with at least two more offerings now available from accessory suppliers.
Many owners who are contemplating adding a set of engine guards to their S1000XR seem to be losing sleep worrying about the asymmetry and the differences between the left and right guards.
Yes the two pieces are different and yes they mount differently. But…so what? This doesn’t make them defective or anything like it.
But getting back to the guards. They are very lightweight, constructed of stainless steel or an alloy with a superb look and feel and they fit perfectly to their assigned mounting points on the bike.
Due to their positioning and mounting location, some minor modifications to the large fairing side section panels are needed, especially the right side panel so that the guard and panel fit together in harmony. But the modifications are not nor should not be destructive.
The BMW Engine Guards for the S1000XR are admittedly new — like the motorcycle — and this is reflected somewhat in how the kit is (or isn’t) put together. In fact, the package just isn’t as refined as it could be, in my opinion.
Every piece of hardware was individually packed in a labeled parts bag, so there were lots of them sitting loose in the big box, along with two brackets without any identification — a packing slip or kit listing of the parts would have been useful.
Thankfully, the dealer had printed out their part order listing and I had a copy of the applicable BMW Motorrad component diagram (referenced below), so a cross-matching exercise verified that everything less one 8 mm flat washer was present and accounted for.
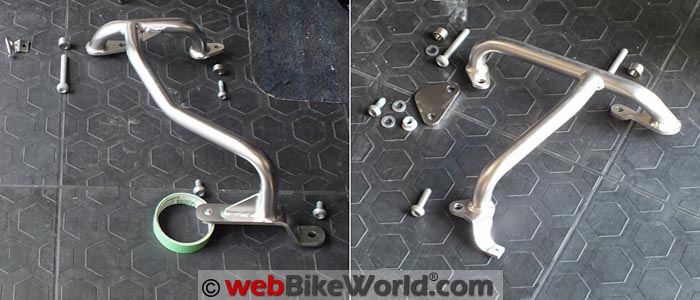
After making sure the missing washer was ordered and in taking the major pieces out of their bags, some visualization provided clues about the two brackets.
One has a separate retaining plate used on the right side and the other an add-on holder bracket for the left side.
Neither of these are reflected on the system anywhere, but they are shown in the Instructions.
And only after getting the kit home was the “for internal use only” marking on the Workshop Installation Instructions noted. As a kit seemingly meant for installation by a qualified technician, it is possible that some shortcuts in packaging and documentation were taken, but still…
BMW S1000XR Engine Guards Parts Listing
The following parts listing details exactly what was in the box, less the missing M8 flat washer that was ordered and received:
- Left Engine Protection Bar, P/N 77148548831.
- Right Engine Protection Bar, P/N 77148548832.
- Retaining Plate, right side, (diagram only, no P/N or description).
- Fillister Head Screw, M8 x 30, P/N 07129908487.
- Washer, 8 mm, P/N 07119905733 (left side).
- Countersunk Screws (3), M10 x 70, P/N 77149908731 (2 on right, 1 on left).
- Washers (4), 10-200, P/N 07119904168.
- Fillister Head Screw, M10 x 25, P/N 07129908279.
- Fillister Head Screw, M10 x 35, P/N 07129907428.
- Flange Nut, M10-10, P/N 07119904670.
- Fillister Head Screws (2), M10 x 20 mm, P/N 07129907393.
- Holder Bracket, left side, (diagram only, no P/N or description)).
- Body Screw, no shoulder, M5 x 10 mm, P/N 18518529128 (left side).
- Self-Locking Plug Nut, M5, P/N 46638532314 (left side).
Tools Required for Assembly
- Torx T25, T27, T40 and T50 sockets with medium/long ratchet or T-handles.
- 17 mm open or closed wrench.
- Medium thread locking compound (for hardware not already treated).
- Power drill and small craft saw or Dremel-type tool (for plastic work).
- Trim blade and sandpaper or appropriate power tool (for finishing edges).
Left side mounting points. Left side bracket mount.Preparatory Work
The BMW Motorrad Workshop Installation Instructions (printed in German and English) are easy to follow, with detailed step-by-step instructions and quite encompassing diagrams.
Preparatory removal of the engine spoiler, trim panels and right fairing side section panel (referred to as the side panels and badge carriers respectively) is covered in the Instructions, with the left fairing side section panel left in place. I took them both off.
For more information, readers can also refer to the ongoing BMW S1000XR Blog and my Prepping for Accessories: The BMW S1000XR report that details removal of these parts on the S1000XR.
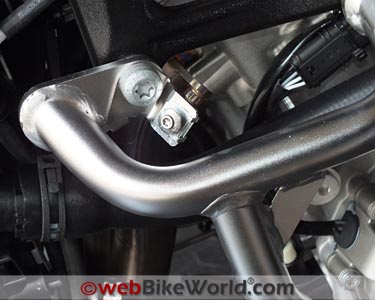
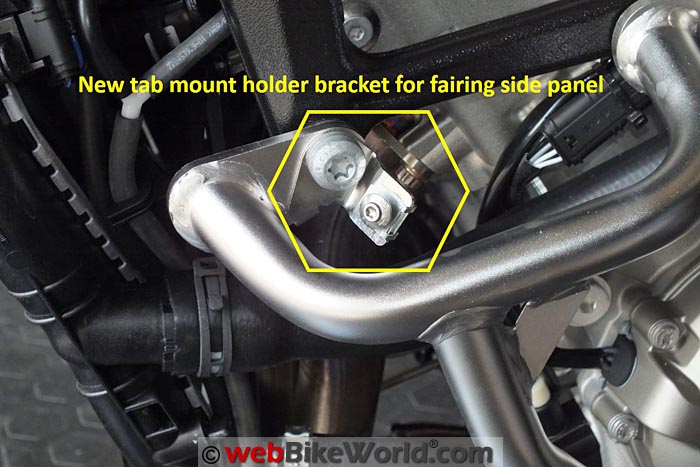
A small preparatory step (Step 18 of the Instructions) details how to add the small retaining (offset) bracket that bolts to the right upper rear engine guard tab and becomes part of the upper rear mount point.
And of course, the side panel modifications described below can be tackled now or during part of the actual fitment exercise.
Installation Notes
For S1000XR owners installing the engine guards, the instructions supplied by BMW will be more than sufficient in most instances.
However, the following notes and tips might clarify some information and resolve potential issues. And don’t forget, the left and right sides are (always) referenced as if sitting on the motorcycle.
Modifications
This section expands on the instructions provided in the engine guard kit.
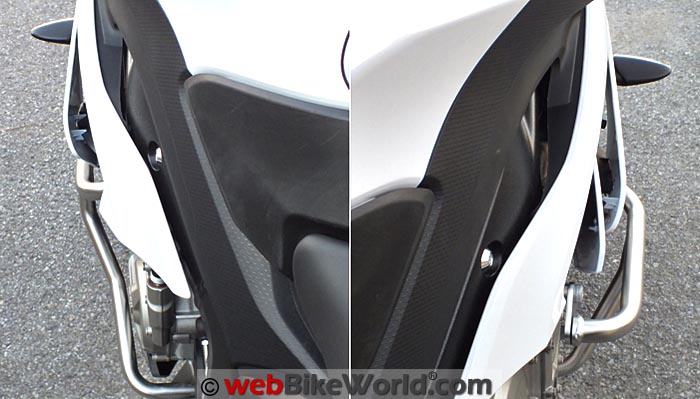
The first note regards required modifications to the left and right fairing side panels that entails some plastic cutting and edge trimming. The mods are needed in order to accommodate and allow the panels and guards to exist in harmony.
The instructions don’t cover removal of the left fairing panel. The instructions aren’t absolutely necessary given that this modification is actually quite simple, whereas the right side modification is more detailed and needs to be done with the panel off.
After reviewing the instructions again and walking through everything visually, the minimal cut lines are marked out on both panels.
The simple left side mod was completed first, then the right side surgery was tackled.
The diagram in the instructions doesn’t provide measurements of any sort, nor is the panel marked on the back side, which is something often done by manufacturers as a guide for installing their own accessories (this would be a big help here).
A Dremel tool with flex drive makes short work of the plastic cutting on both sides, although a drill for making pilot holes and a small straight craft saw would work well.
With the (minimal) cuts made, the panels are stood up on the work bench along with the respective engine guard pieces for a visual verification of how the so-far modified panels and metal guards would fit together. This exercise pays off in the end.
No matter when the cutting work is done, there is a caution: remove only the minimum amount of material and either do a bench verification or one, perhaps two test fittings of the panels vis-à-vis the engine guards.
The best example for this caution is the right side panel; removing all of the material shown in the BMW step diagram will result in a far larger opening than is actually needed.
My point is that the panels are quite flexible and the sections surrounding the engine guards need to be manipulated in and around the metal even with the modifications, so a bit of extra clearance is good, but too much and gaps will be visible — the choice is yours.
My mantra for the modification work was “cut once, fit twice and trim a little”.
And going back to the right side, it will seem like the edge of the plastic and the engine guard interfere. But in reality, this section of the panel can slip behind the upper front point of the guard, providing a conformal fit with clearance between the pieces.

One more right side point: the small spoiler piece fitted to the fairing side section panel that originally could be taken off as part of the larger panel removal process will now need to be removed separately once the engine guards are installed.
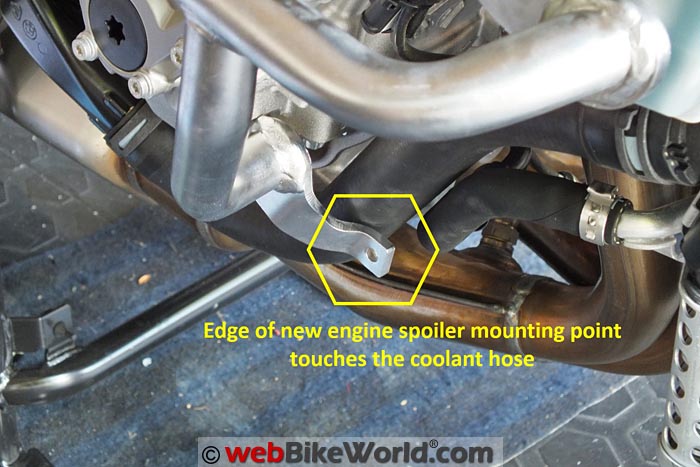
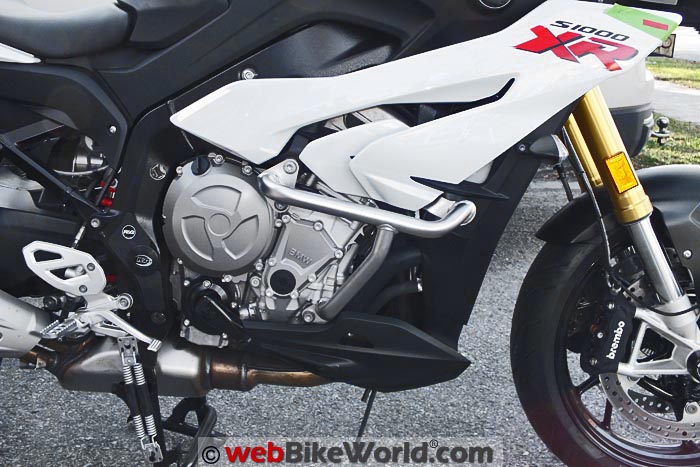
Right side mounting points. Right side spoiler mount.Coolant Hose Issue
After installing the right side engine guard, I noted that the right lower coolant hose was very close to the edge of the engine spoiler tab on the lower part of the newly installed engine guard.
After a week of monitoring this point, a small cut was evident on the hose.
I compressed the hose slightly while putting a small flat file to work on the engine guard and this had the edge cleaned up in short order.
I applied a small section of adhesive foam to the tab, which now keeps the hose away from the metal. A small section of wire mesh wrap around the hose would work as well.
The issue is easily addressed upon installation, but it shouldn’t have to be…
Keeping Things in Place: Torque Values
A lot of questions regarding torque values — especially for OE hardware — have been asked. Thankfully, BMW typically publishes values for applicable hardware in the instructions, as listed below.
Engine Guard, Left Side:
- 1 x upper front M10 x 70 mm = 60 Nm (44.25 ft. lb.)
- 1 x upper rear M8 x 30 mm = 28 Nm (20.65 ft. lb.)
- 2 x lower M10 x 20 mm = 28.0 Nm (20.65 ft. lb.)
- 1 x middle “holder” bracket M5 x 10 mm = 2 Nm (1.48 ft. lb.)
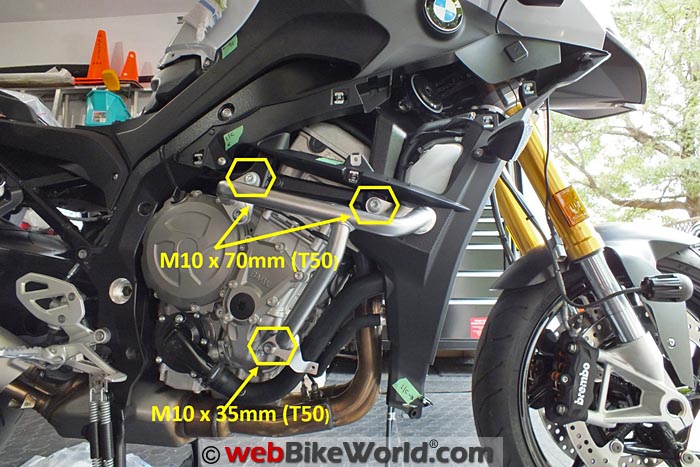
Engine Guard , Right Side:
- 2 x upper front and rear M10 x 70 mm = 60 Nm (44.25 ft. lb.)
- 1 x intermediate (retaining) plate M10x 25 mm = 38 Nm (28.0 ft. lb.)
- 1 x lower middle M10 x 35 mm = 38 Nm (28.0 ft. lb.)
Panels and Engine Spoiler:
- M5 x 14.5 mm, 3 mm collar (SC) = 2 Nm (1.48 ft. lb.)
- M5 x 17.5 mm, 6 mm collar (MC) = 2 Nm (1.48 ft. lb.)
- M5 x 20.5 mm, 9 mm collar (LC) = 2 Nm (1.48 ft. lb.)
References
The instructions that came with the engine guard kit were the primary source of information for this task and while they are complete overall, a couple of observations have been fed back to BMW on the content and layout, including the recommendation for a parts listing in the kit.
The primary diagram used was BMW Motorrad Diagram 77_0778 – Engine Protection Bar.
Conclusion
Remember that depending on the market, country or model variant involved, some differences in layout, components and hardware may be found.
There still aren’t a lot of major accessories readily available for the S1000XR, although with the new year more are appearing on the market.
And as I view engine guards (lower and upper) as essentials, having the official BMW Motorrad kit available early on was a very good thing.
Two of the newer engine guard kits available for the S1000XR would seemingly provide equal or better coverage than the BMW guards and both also seem to be more symmetrical from left and right perspectives.
Hopefully we will get a chance to try them on the wBW S1000XR test mule soon.
But until the opportunity to try another set of some kind comes along, the BMW engine guards are doing just what I want them to do — provide piece of mind, while awaiting a call into action (that hopefully never comes).
More: wBW BMW S1000XR Blog
Master Listing of All wBW Motorcycle Product Reviews
Owner Comments and Feedback
See details on submitting comments.