

Hinckley Triumph motorcycle owners have been complaining about ignition coil failures since, well, probably since the first Bloor Triumph sputtered off the assembly line.
This is Part 1 of this two-part series, which describes an ignition coil replacement on a Thunderbird Sport.
Part 2, Triumph Motorcycle Ignition Coil Replacement describes a slightly different procedure for the ignition coil replacement on the late and lamented Triumph Trophy.
Note that these tips can apply to most modern Triumphs and other brands of motorcycles.
I noticed over a period of several weeks that my ’98 Thunderbird Sport started hesitating and nearly stalling when accelerating from 1000 RPM to about 4000 RPM.
At first, fuel related problems were the suspected cause, since the engine acted as though starving for fuel.
Fuel changes seemed to make a difference, but occasionally the engine would still seem to stutter when running steady between 2500 and 3500.
If the engine were twisted up to 4000 RPM or above, the engine ceased stuttering. Also, the fuel mileage had dropped significantly, especially on long rides.
During a visit with Paul Zuniga of Born Again Bikes (see “Resources” section below) at a local motorcycle show, he recommended swapping the ignition coils for Nology units (also below). Not convinced, I continued working on the problem as a fuel-related issue, checking everything from carburetors to tank venting.
Ignition Coil Replacement for the Triumph Thunderbird Sport
Although numerous forums were full of comments by Triumph owners experiencing Gill coil failures (see below; Gill coils are original equipment on many Hinckley Triumphs), many owners were experiencing fuel-related issues as well. Besides, no one at the Triumph dealership had ever heard of such problems with coils, and the performance issue had subsided to an occasional irritation.
About a year later, ironically when riding over to another motorcycle show to meet Paul again, my Thunderbird Sport lost a cylinder completely. I managed to limp back home. I pulled the tank and verified that one coil was completely open with an ohmmeter.
I have read a lot of debate about whether you can actually test the Gill coil with an ohmmeter; I cannot confirm or deny whether you can, but I can simply say that the one coil out of the three on my Triumph that was not firing a spark plug read open with an ohmmeter. The other two coils did not read the same as the Nology replacements, but both yielded nearly the same ohmmeter readings.
If you are still unsure which coil is faulty or whether you have more than one coil faulty, you can pull the spark plugs and verify the firing conditions. As a final test, you can swap coil positions and verify whether poor plug firing conditions follow a specific coil.
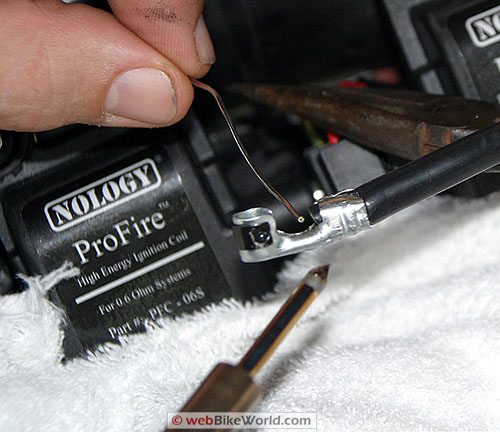
Soldering a right-angled connector to the spark plug wire.Nology Ignition Coils
J.C. Whitney listed a Nology replacement for my Sport at a much better price than any other source. I called and verified the coils were available, and “Customer Service” assured me that the coils were suitable for my application.
However, when the coils arrived, the coils were 3.0 ohm rather than the 0.6 ohm coils necessary fo the Thunderbird Sport ignition.
I later discovered the correct Nology coil for the Thunderbird Sport is their model number PFC-06S. I wrote Nology to verify the coil replacement, but the company responded with a note explaining the Nology replacements were not recommended for my application.
So, I returned the coils to J.C. Whitney and contacted Paul Zuniga for a replacement. Paul provided Nology replacements for all three coils at significant savings over the stock Gill units from Triumph. The cost of one stock Gill replacement was half the cost of all three Nology units from Born Again Bikes. I could have replaced the one failed unit, but worried the other two could — and probably would — fail as well.
How to Detect Ignition Coil Failure
Before the total coil failure, I experienced another odd occurrence related to my tachometer. While sitting a stop light, the tachometer stopped working completely. When I arrived home, I removed the tank and checked the wiring from the tachometer.
I opened the connector and discovered light green corrosion, so I cleaned the corrosion and the tachometer started working again. I mention the occurrence because many owners have stated in the various forums that their tachometers stopped working following the Nology replacements.
Before buying the Nology coils, I insisted Paul verify the replacements would not impact my tachometer operation, which he did. Paul explained that grounding and other wiring faults could impact the tachometer, in addition to the possibility of blown electronics in the tachometer itself.
The correct coils finally arrived and I replaced all three Gill coils with Nology units.
Difference Between Gill and Nology Ignition Coils
After replacement, the engine seemed stronger and the fuel mileage increased far beyond that with the original Gill setup. In the following photos and explanations, I will show you how I replaced them.
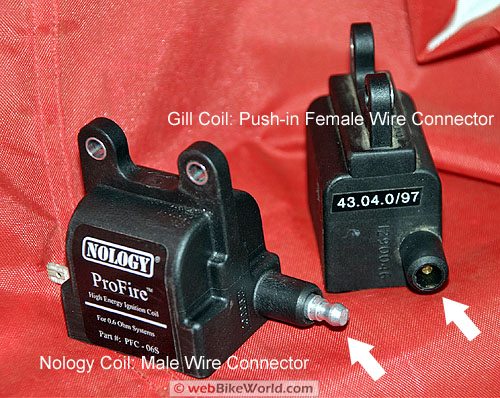
Perhaps the first thing you will notice (photo) about the Nology coils, besides their larger size, is the secondary tower, which differs greatly from the Gill coil.
The Nology coil tower is much larger and protrudes from the coil, instead of sitting inside of a well like the Gill coils. The original Triumph wires require modification for use with Nology replacement coils. The replacement coils include a replacement right-angled connector for adapting the original Triumph wires. If you are familiar with solder techniques, soldering the connections is recommended but not necessary.
Installing the Nology Ignition Coil
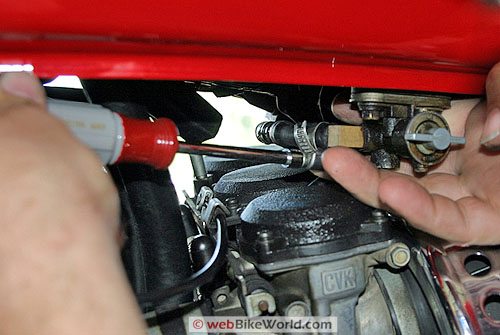
To start, the seat, right side panel and fuel tank must be removed. If you have the same difficulty I have in re-attaching the Thunderbird Sport seat, dealing with the seat is about the hardest part of this whole replacement!
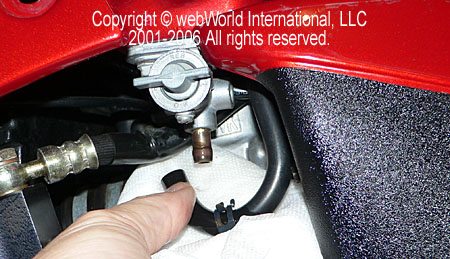
As you can tell from the photo, the leaking petcock has not been repaired. The O-rings were difficult to find, but I finally located a set. Others have abandoned the original petcocks completely for Pingle units. I understand they are much better, but not unlike other advice, I have ignored the idea for now and repaired the old one instead.
And While That Fuel Tank is Off…
By the way, after the fuel tank has been removed, I suggest taking note of the coolant condition. If nothing else, top off the coolant to the proper level.
If the coolant is neglected or if you would like more information on changing it, check out the wBW article “Changing the Coolant on a Triumph Thunderbird Sport” article.
| wBW Lightbox – Click photo to view. | ||
|---|---|---|
 |
 |
 |
| Cover for Coils | Stock Ignition Coils | Ohmmeter Reading. |
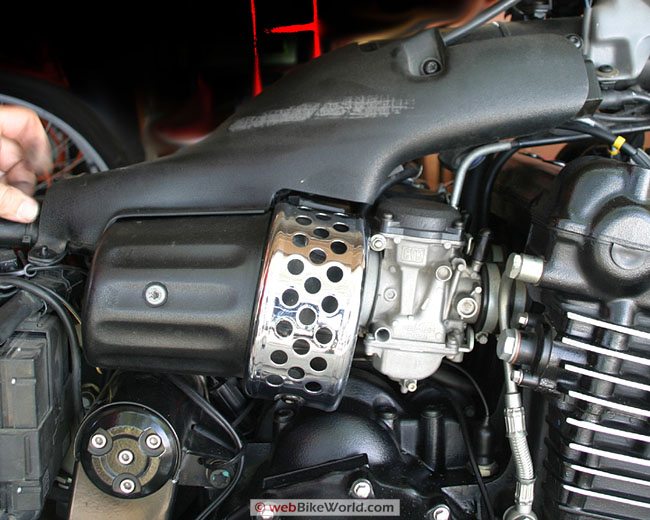
Next, remove the plastic shield covering all three coils (photo above). Note that you may want to label the wires (“front, middle, rear”) to ensure their correct location on reassembly. When the three coils are accessible, their condition can be checked with an ohmmeter.
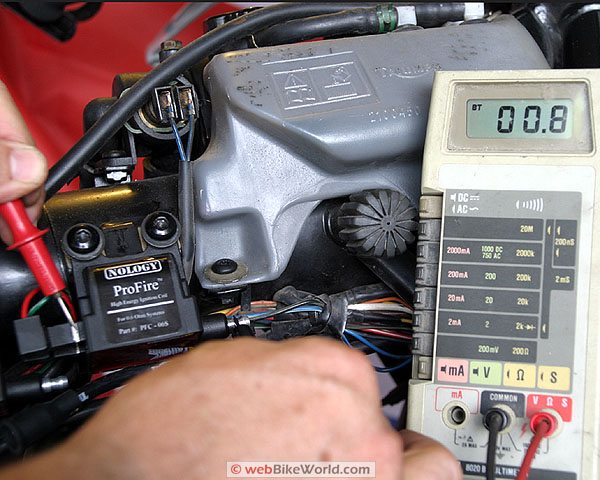
If one coil has failed completely, the coil will likely read open or shorted between the primary connector and secondary tower. My failed coil read completely open; the new coils read 0.8 ohms from primary to secondary tower and 0.0 across the primary terminals.
At this point you may discover that there is simply a poor connection on the primary wiring to one of the coils. When the coil wiring is pulled from the coils, check and ensure none of the connectors or primary terminals have any corrosion. Typically, the connectors and the primary terminal spades have grease applied to prevent corrosion.
After ensuring that each plug wire is marked with the proper cylinder number, you can remove and replace each coil one at a time. You may find that working from the rear coil to the front coil works out the easiest.
If the coils will be replaced with original equipment Gill units, or if Nology ignition wires as well as Nology coils will be installed, simply hook up the new wires and the fuel tank can be re-mounted.
If the stock Triumph wires are to be used with Nology coils, the wires must be modified to fit the male post on the Nology coil by adding a right-angle wire connector. The Nology coils are supplied with right-angled connectors, as well as replacement primary terminal connectors if needed.
Before starting the modifications, remove the existing boot and slip on the new right-angled boot. The boots slide up the wire easier if you apply a small dab of liquid soap to the outside of the wire. After the new boots are installed, the modifications to the connectors can begin.
Using cutting pliers and needle-nosed pliers, the end of the original ignition wire can be dressed to fit into the right-angled connector. After spreading the original barrel connector, flatten the original copper connector and trim to fit the backside of the right-angled connector.
I suggest inserting a spare spark plug to ensure that the connector won’t be trimmed too deep in the right-angled side before crimping. You do not want the trimmed tip to interfere or invade the small cup of the connector where the secondary tower clips into the wire connector.
Use a pair of good dedicated crimp pliers for this task (although any good pair of pliers should work if used carefully) and crimp the connector onto the wire, ensuring the small ears are firmly embedded into the ignition wire.
If you are comfortable with a soldering iron, the trimmed connector can be soldered in the backside of the right-angled connector for a better connection (see photo above). Finally, the connection between both ends of the ignition wire should be tested with a trouble lamp or ohmmeter.
With the right-angle connectors installed, slide the right-angle boots down over the connectors. Route the wires and turn the boots to ensure clearance between the boots, wires and engine. Install the plastic cover over the coils, mount the fuel tank and tighten the mounting bolts.
Fasten the fuel line and install the right side cover. Finally, install the seat back onto the frame. Like I mentioned before, hooking the seat and stabbing the seat lock is probably the most difficult part of the whole job.
Nology Motorcycle Ignition Coils InstalledAddendum
Recently I discovered — unfortunately after replacing my coils — that Nology supposedly has a direct replacement for the Gill coil that does not require modifications to the existing spark plug wiring. I could not confirm the existence of this product on the Nology web site or with other sources at this time.
I am following up on such coils because I will soon be replacing the ignition coils on my 1999 Triumph Trophy. The coil replacements are just as straight forward, differing only in construction. The Trophy ignition uses a twin secondary tower coil.
Although I have restored old trucks and cars for years — and I’ve even turned a few wrenches on a dirt bike or two — most of my street motorcycle repair was handled by someone else. I am not a motorcycle mechanic by any stretch of the imagination, but I was able to get my old “Ripper” going again. If you follow these simple instructions, you should be able to replace your ignition coils as well.
Resources
Part 2: Ignition Coil Replacement on a Triumph Trophy
Owner Comments and Feedback
See details on submitting comments.
From “M.D.” (April 2015): “I read Mike C.’s write up about replacing the Ignition Coils on his Triumph Sport. I have much the same bike and I thought much the same problem.
Cylinder #3 is not sparking on my 2003 Thunderbird when it is cold. Once I do get it started and have been running, the cylinder kicks in with a very noticeable JOLT of power. I checked for spark after riding a while, and the cylinder then shows to be firing fine. I replaced all three Gill Ignition Coils and the OE Spark Plug wires with NOLOGY and still the 3rd Cylinder is not sparking when cold.
I am not able to measure the Correct Ohms across the old or new Coils. The Nology and OE coil removed from 3rd cylinder does read differently from the other, working, cylinders so I don’t know if something in the bike is shorting out this coil or what. My multi-meter’s lowest setting is 200 Ohm.
I am going to use an OE Coil that was working on one of the other cylinders originally in the third cylinder position and see if that does anything.
The “intermittency” is what really has me confused, as well as the idea that one of the NEW coils was bad an put into the 3rd cylinder position. Is there anything that would cause the Coil to short out or damage it such that it would not run cold?? The only other items are the Ignitor, but that should not be selective as to which would work, and the Rotor gap which, again, should not be selective.
Please, Please let me know what else to think about here.”
Editor’s Reply: Can anyone help?
From “P.H.” (January 2013): “Read item on replacement of coils on 900 Trophy. I have two 900 Trophys. I bought the first in 1999 and have 58k on it. I had replaced all the coils over the first 10 years with Gill coils. They just kept dying.
Then discovered Nology and replaced the 3 in one go. Could not believe the difference. MPG went from 45-48 to 60 plus at constant 60 mph, or 53-55 when used a bit.
I bought another (1998) Trophy from the UK 3 years ago with 23K on it. Its a great bike now with 33K but I am going to change the coils as its starting to misfire. While the 3 Nology coils cost me €300 it was worth it. The low speed acceleration is far superior as well.”
From “Nasty Nick – Polk County Ton-up Boys” (02/11): “To test original Gill coils Low tension (primary) 0.63 ohms, High tension ( secondary) 10.5Kohms. All switching is in the negative wiring. Positive ( Red) is common on Low tension side. ( Per Triumph workshop manual).
Replacement Nology coils: Low tension (primary) 0.76 ohms, High tension (Secondary) 8kohms. These measurements are static resistances only.
Make sure Low voltage and plug wires are disconnected on bike before testing. My original coils read in exceptionally high (above 20K ohm) on the secondary. (by the way- K= thousands). The bike still ran, and performed per the observations stated in the previous report. My Triumph Adventurer now runs better than ever.
Another recommendation is to strip the carburetors, clean the jets and carefully polish the piston guides. for the CVK 36 carburetors. My carburetor parts had been stamped out, but never properly finished. I recommend buying a set of K&N jet cleaning wires. Be very careful when using these, you don’t want to enlarge the jet diameters.
Triumph USA were very well mannered, but not very helpful with technical information. I also found that the dealerships are generally not much use when it comes to giving technical advice — it is not in their interests after all.
Beware of the carburetor assembly diagrams in the factory repair manual — the drawing show the wrong assembly sequence. I bought replacement jets from Triumph–they supplied wrong ones because their assembly drawings in their computer is incorrect.
After all the work on the ignition and carburation systems, the bike now runs a little rich which is ok. No back firing now.”
From “J.B.” (3/10): “I was having a similar problem with my 03′ Tbird, the right cylinder wasn’t combusting. When I pulled the wire and plug to test I was getting no spark. So I ordered the Nology replacement coils. I was able to obtain the direct replacement from www.newlevelmotorsports.com:
Nology ProFire Ignition 152-001-060T 3
$69.99
Style = Single Outlet 152-001-060T
Coil for Triumph PFC-06S
They are the same pfc-06s but if you look under the model “code” number there is a “T” at the end signifying that they are for Triumph motorcycles. Called Nology to get this info they directed me to new level motor sports. Hope this helps.”