When I first started shooting cars and bikes professionally, I got myself a highly-regarded book on small business. It was full of wisdomful pearls that explained everything in excruciating detail. And while I didn’t read it from cover-to-cover (it was eye-gougingly boring), I’m sure that at no point did it say anything about explaining in detail how you make money so that any blow-in who wants to copy your schtick can do so.
But you know what? That’s exactly what I’m gonna do. So read on as I stupidly explain all my little tips, tricks and secrets to you in the hope that you will send me out of business, or at the very least, figure out just how fun and rewarding automotive photography can be.
Step 1: What You’ll Need
If you’re thinking that they will be an expensive exercise, you’ll be pleasantly surprised right about now. All you’ll really need are four key things and thankfully, two of these four things are completely and utterly free. That’s right, free. Like the air you breathe, a good sunset and laughing at the Kardashians. Come to think of it, one of them IS actually a sunset. The other freebie here is a great location.
 Photos courtesy of Nikon USA & Canon USA
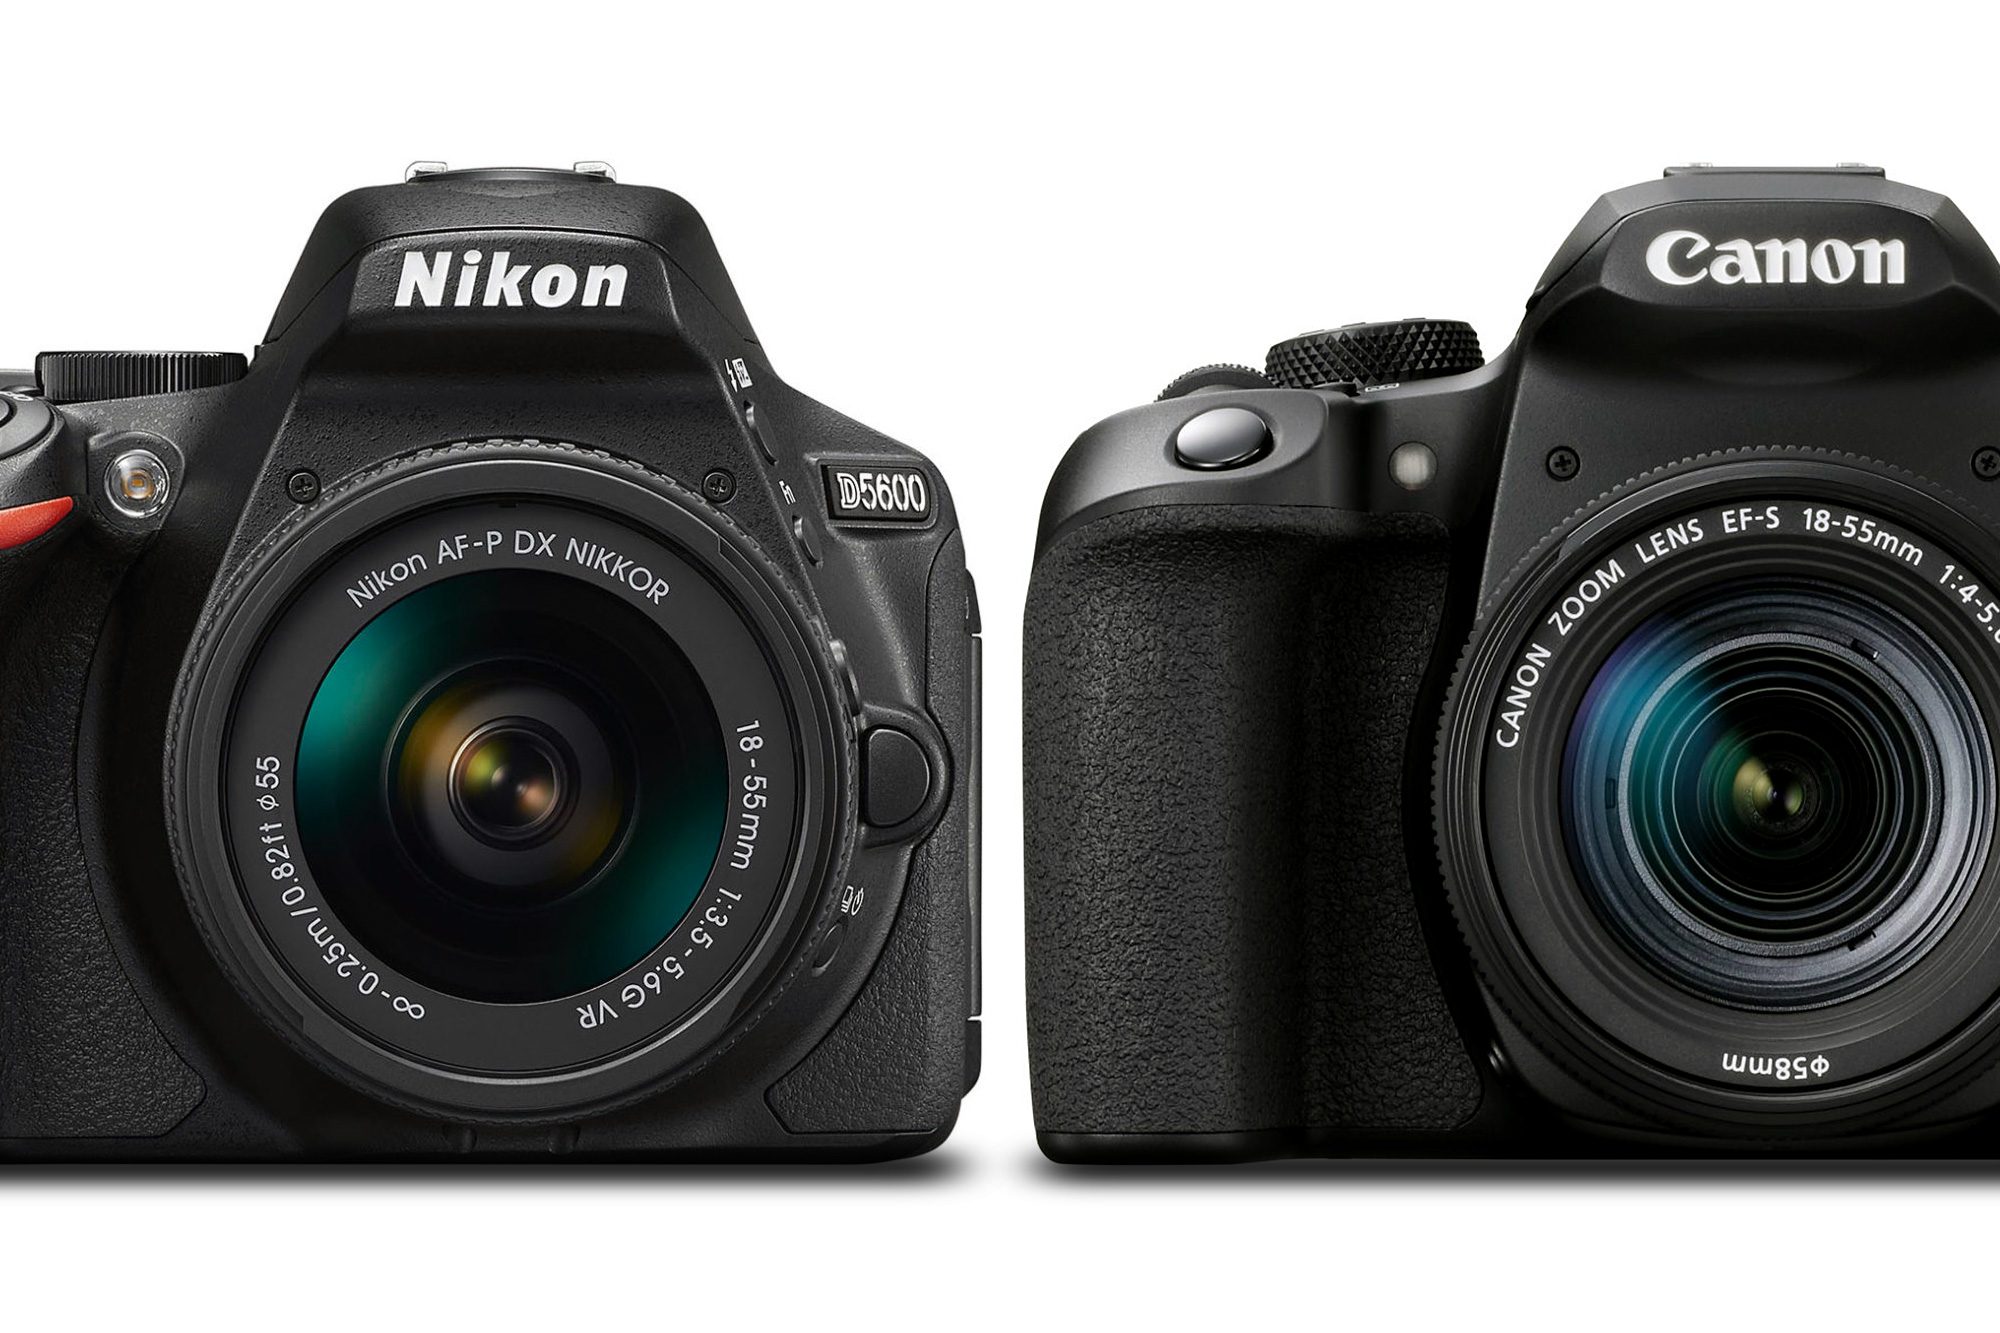
Luckily, I’ve already gone to great lengths to describe these so the only other things you need are a motorcycle and a camera with manual settings. What’s that mean? Put simply, a manual camera is one that allows you to set your own f-stop, shutter speeds and focus. They are a dime a dozen, and I’d be surprised if you don’t have one already. Think of the Canon EOS Rebel series or the Nikon D5600. But if you don’t have one, just ask a relative or friend if you can borrow theirs.
Remember, do not use your phone. I can’t stress this enough. You won’t get decent shots if you use your phone; show me a pro that uses an iPhone and I’ll show you an Instagrammer with a big head.
Step 2: Get Prepared
Wash the bike. Next up, you’ll need to get meteorological and check for a decent sunset. You’ll need to know what time the sun goes down and you’ll also need to make sure the weather will be clear so your sunset isn’t hidden behind the clouds.
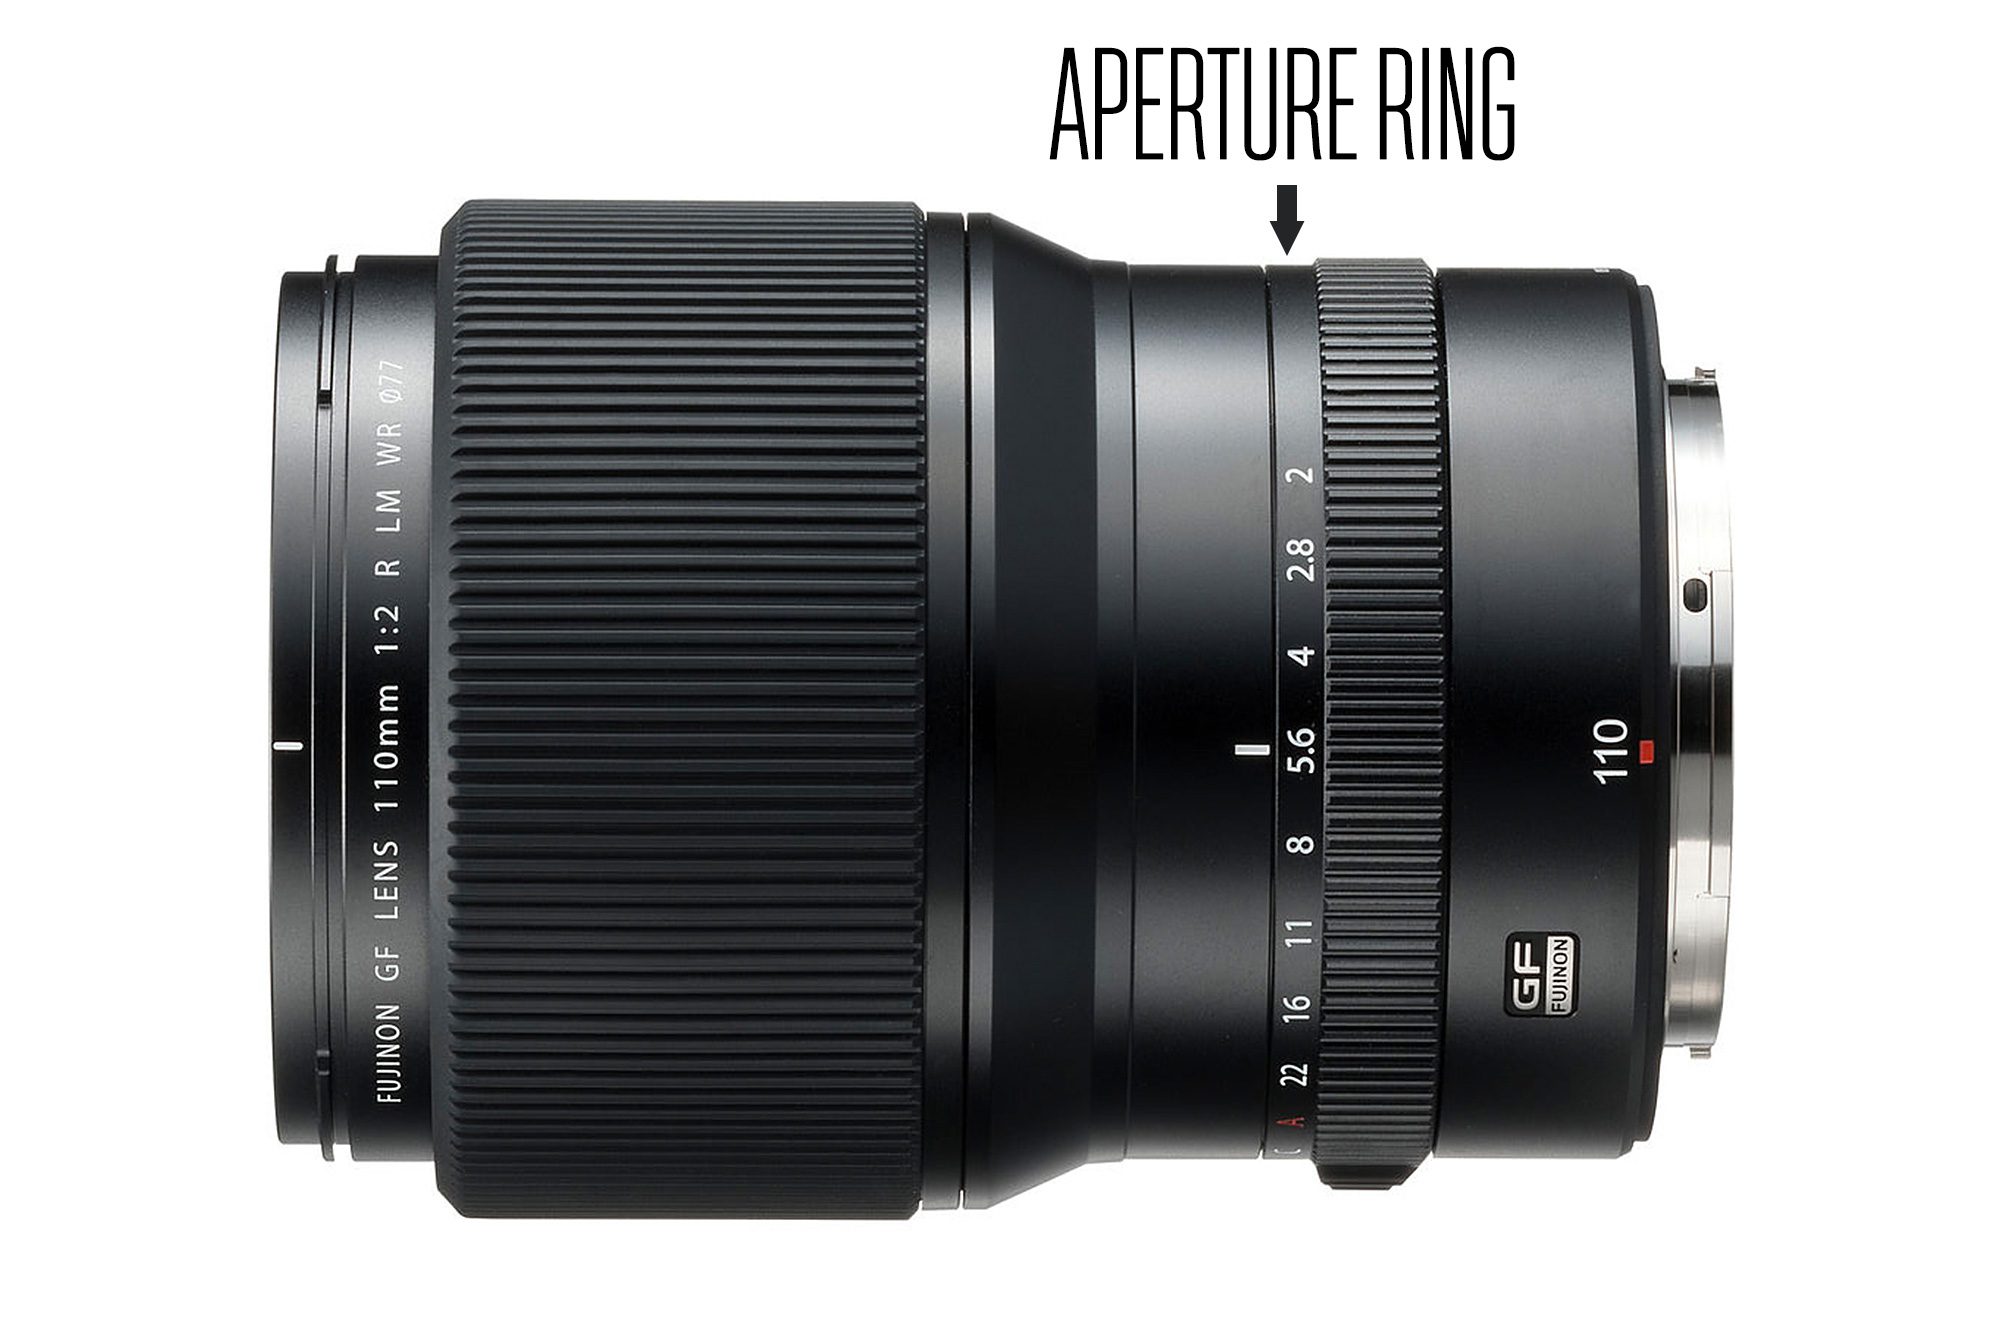
Now figure out how to work the camera in manual mode. More specifically, put it in ‘aperture priority’ mode and pick the widest possible aperture you can. It’ll be something like f2.8, f2, or even f1.8. This is the mode where the camera will lock its aperture (the part of the camera’s lens that opens and closes like the iris in your eye) to one specific value and vary all the other settings like shutter speed to work around that.
 Photos courtesy of FujiFilm America
Now it’s time to plan out the shoot. If the sun on the day sets at (say) 7pm, you’ll need to arrive at the location 90 minutes beforehand to make sure you are good to go when the light gets golden. And for the love of all things that are right and holy, clean the camera’s lens with a proper cloth so it’s crystal clear.
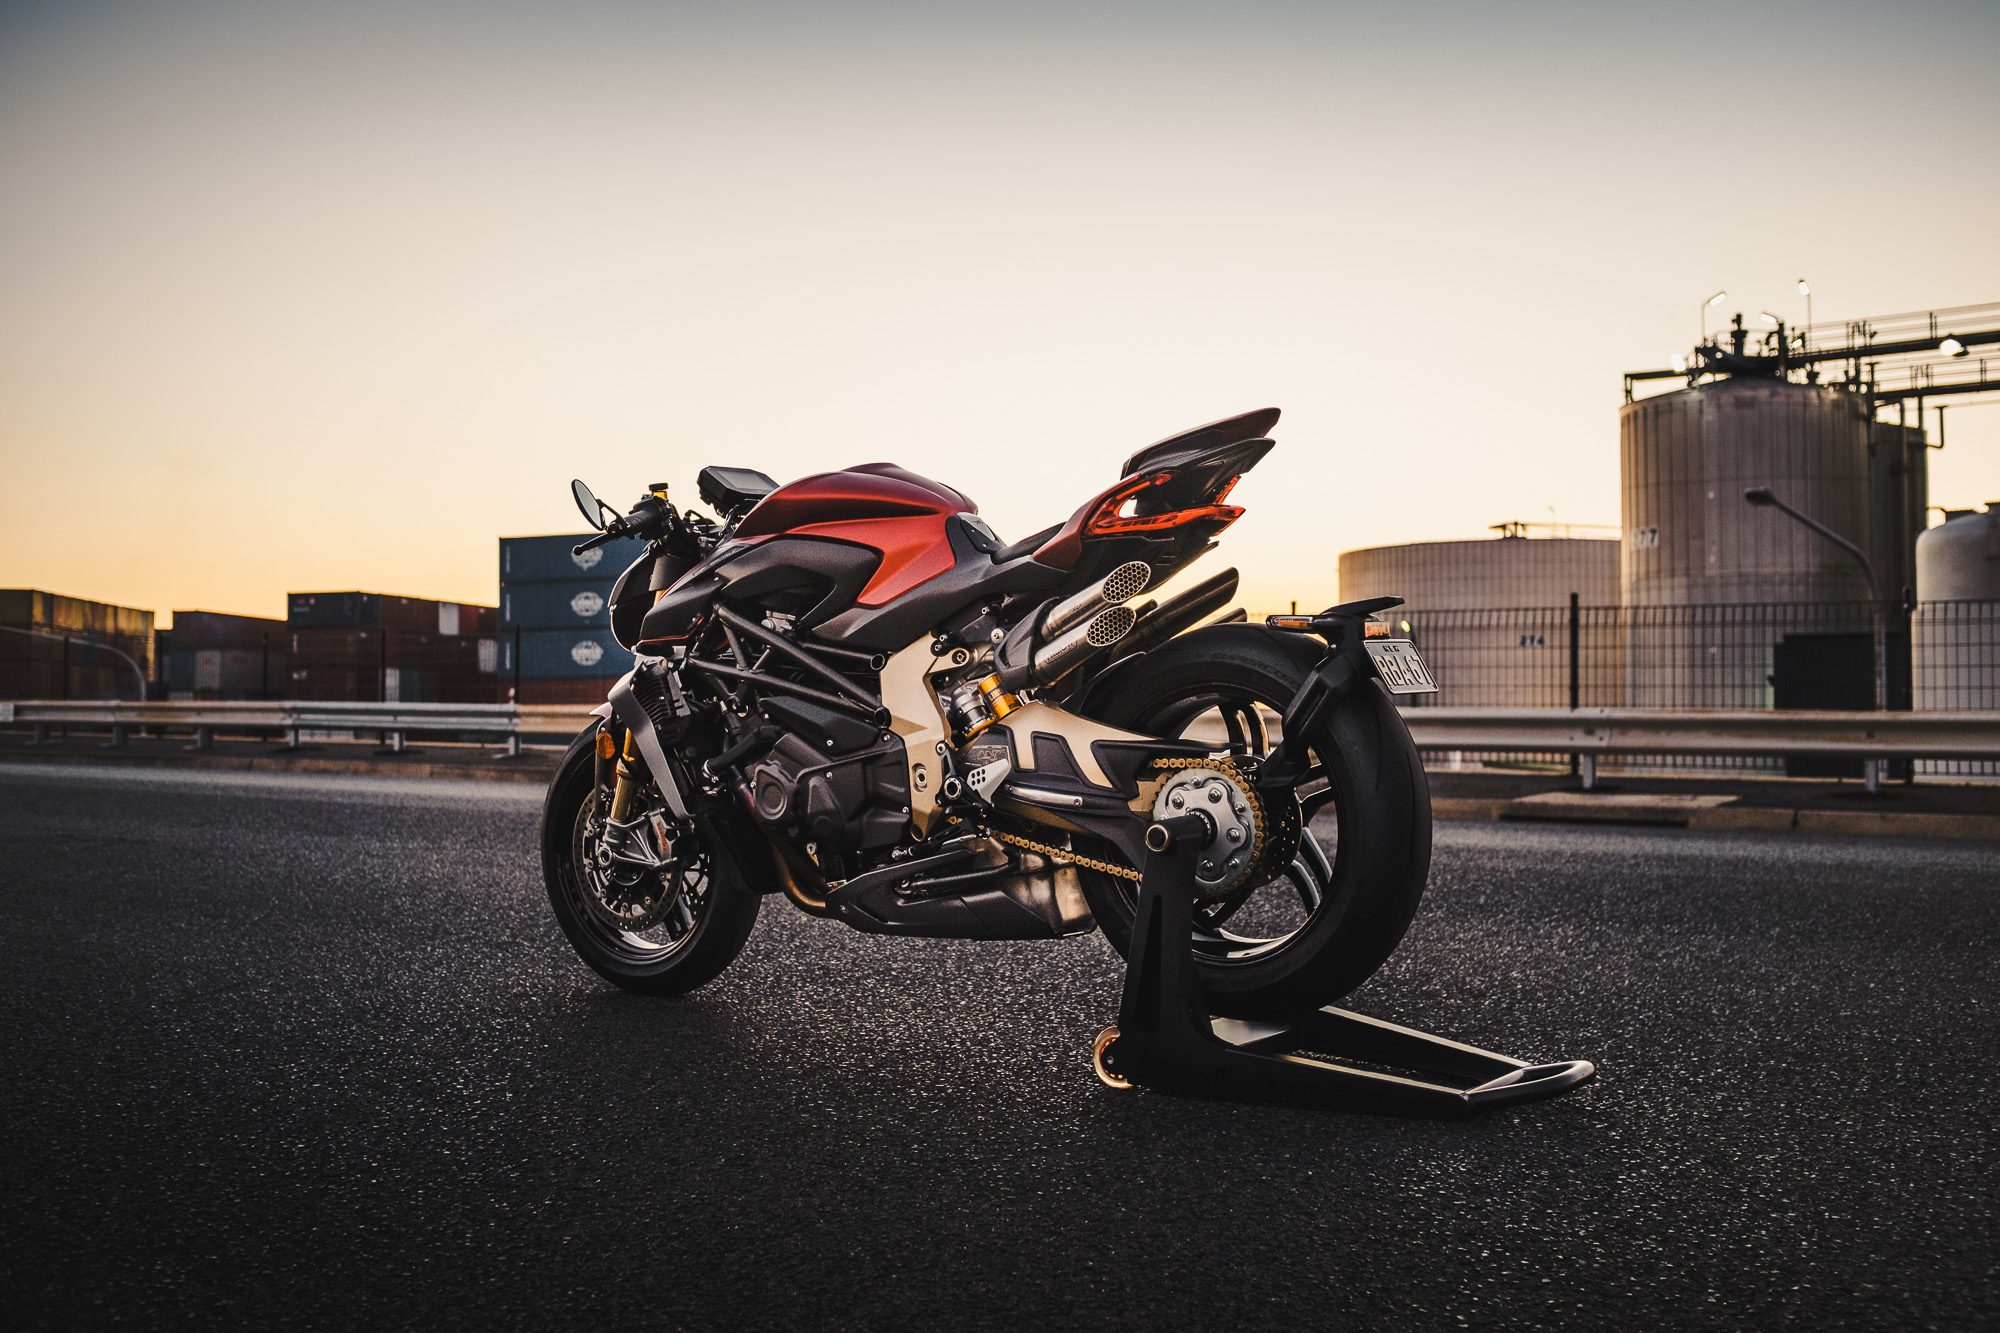
Step 3: The Set-up
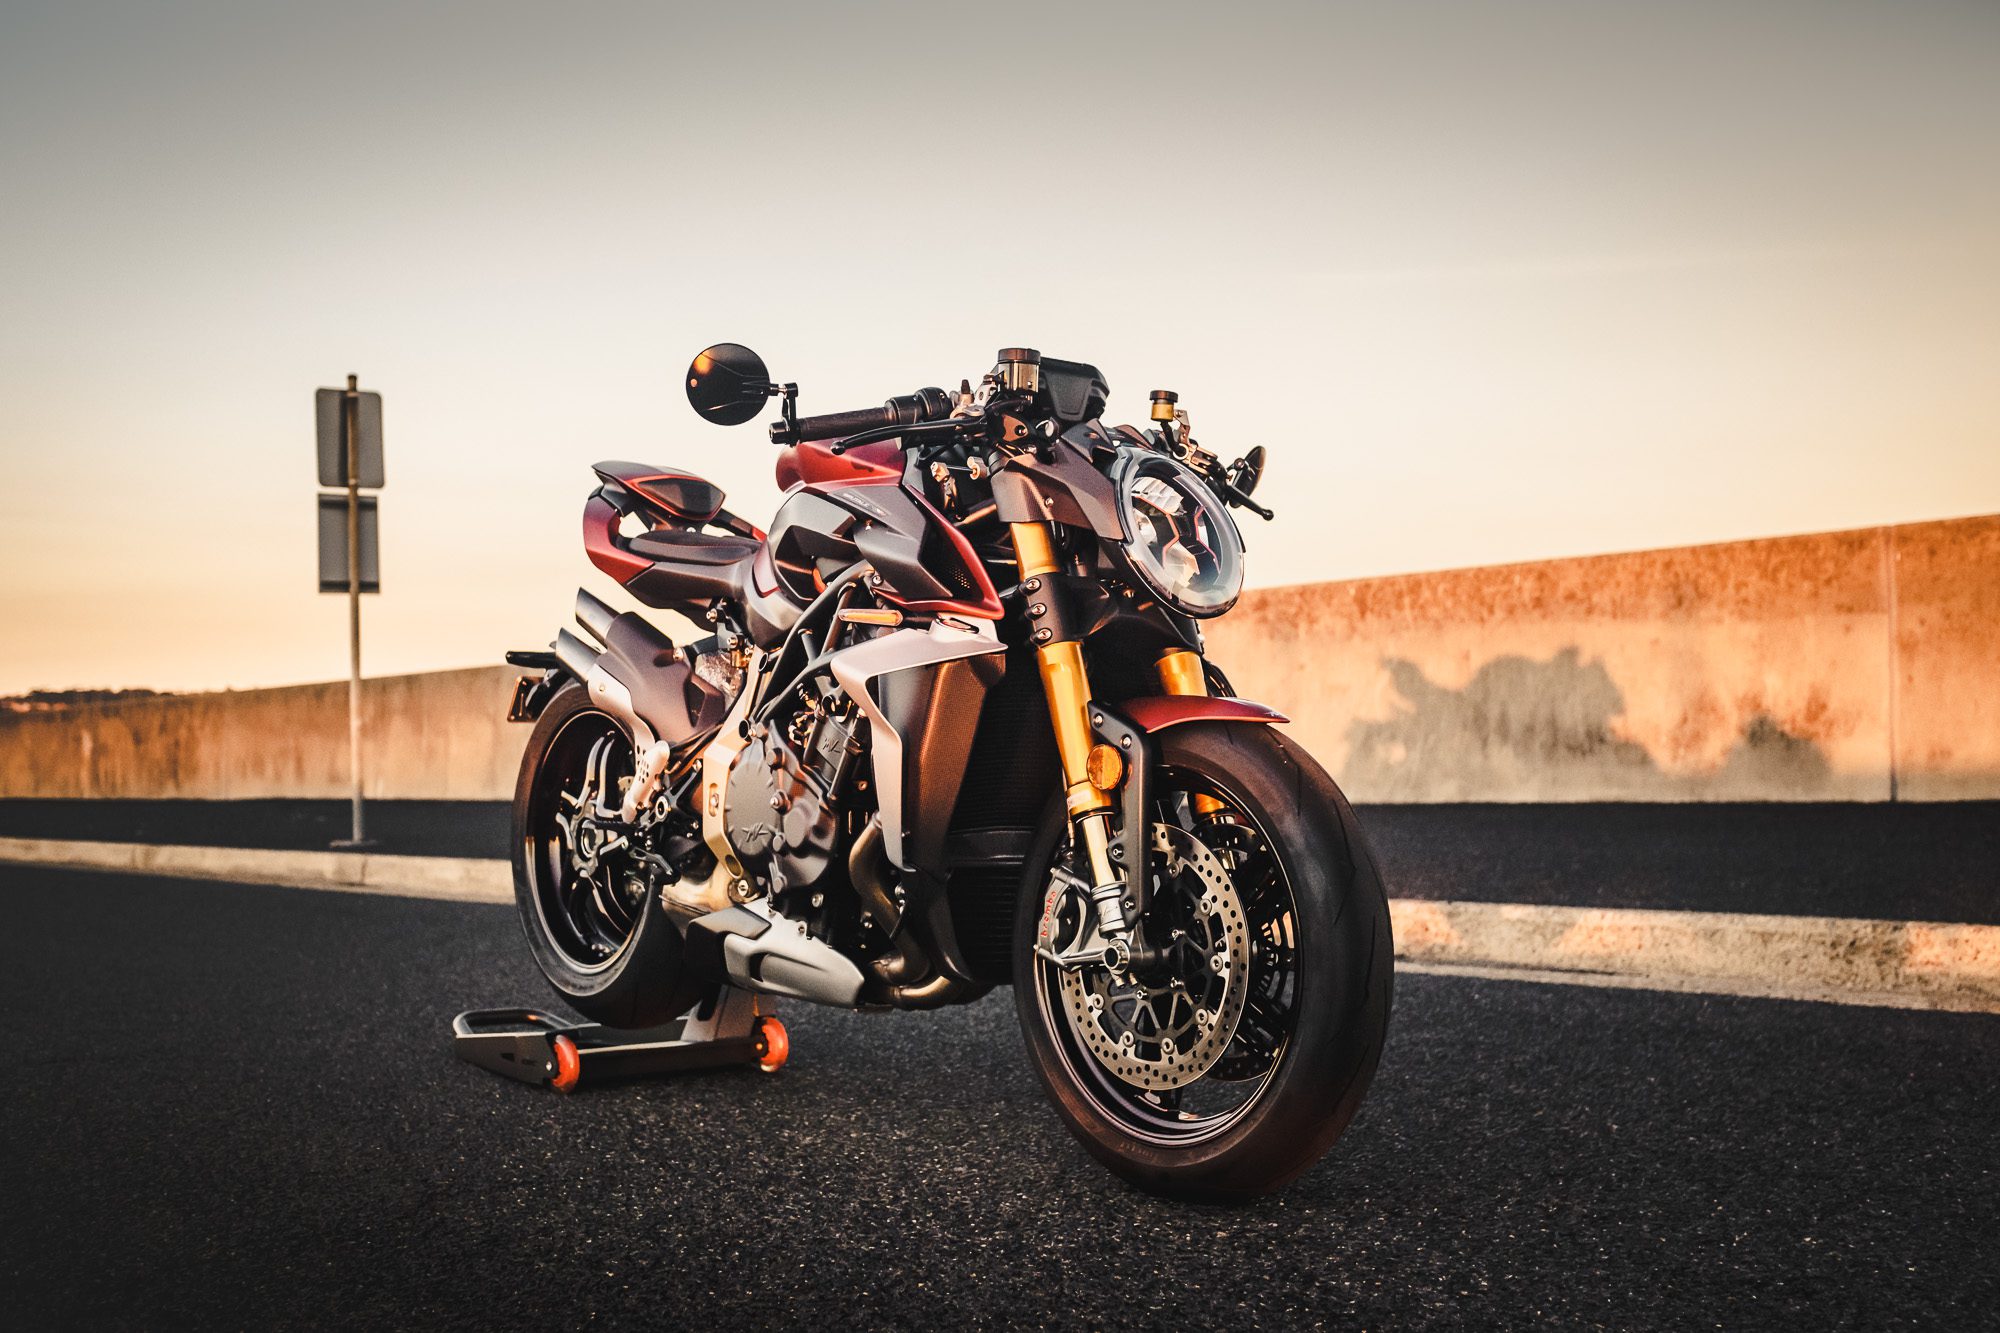
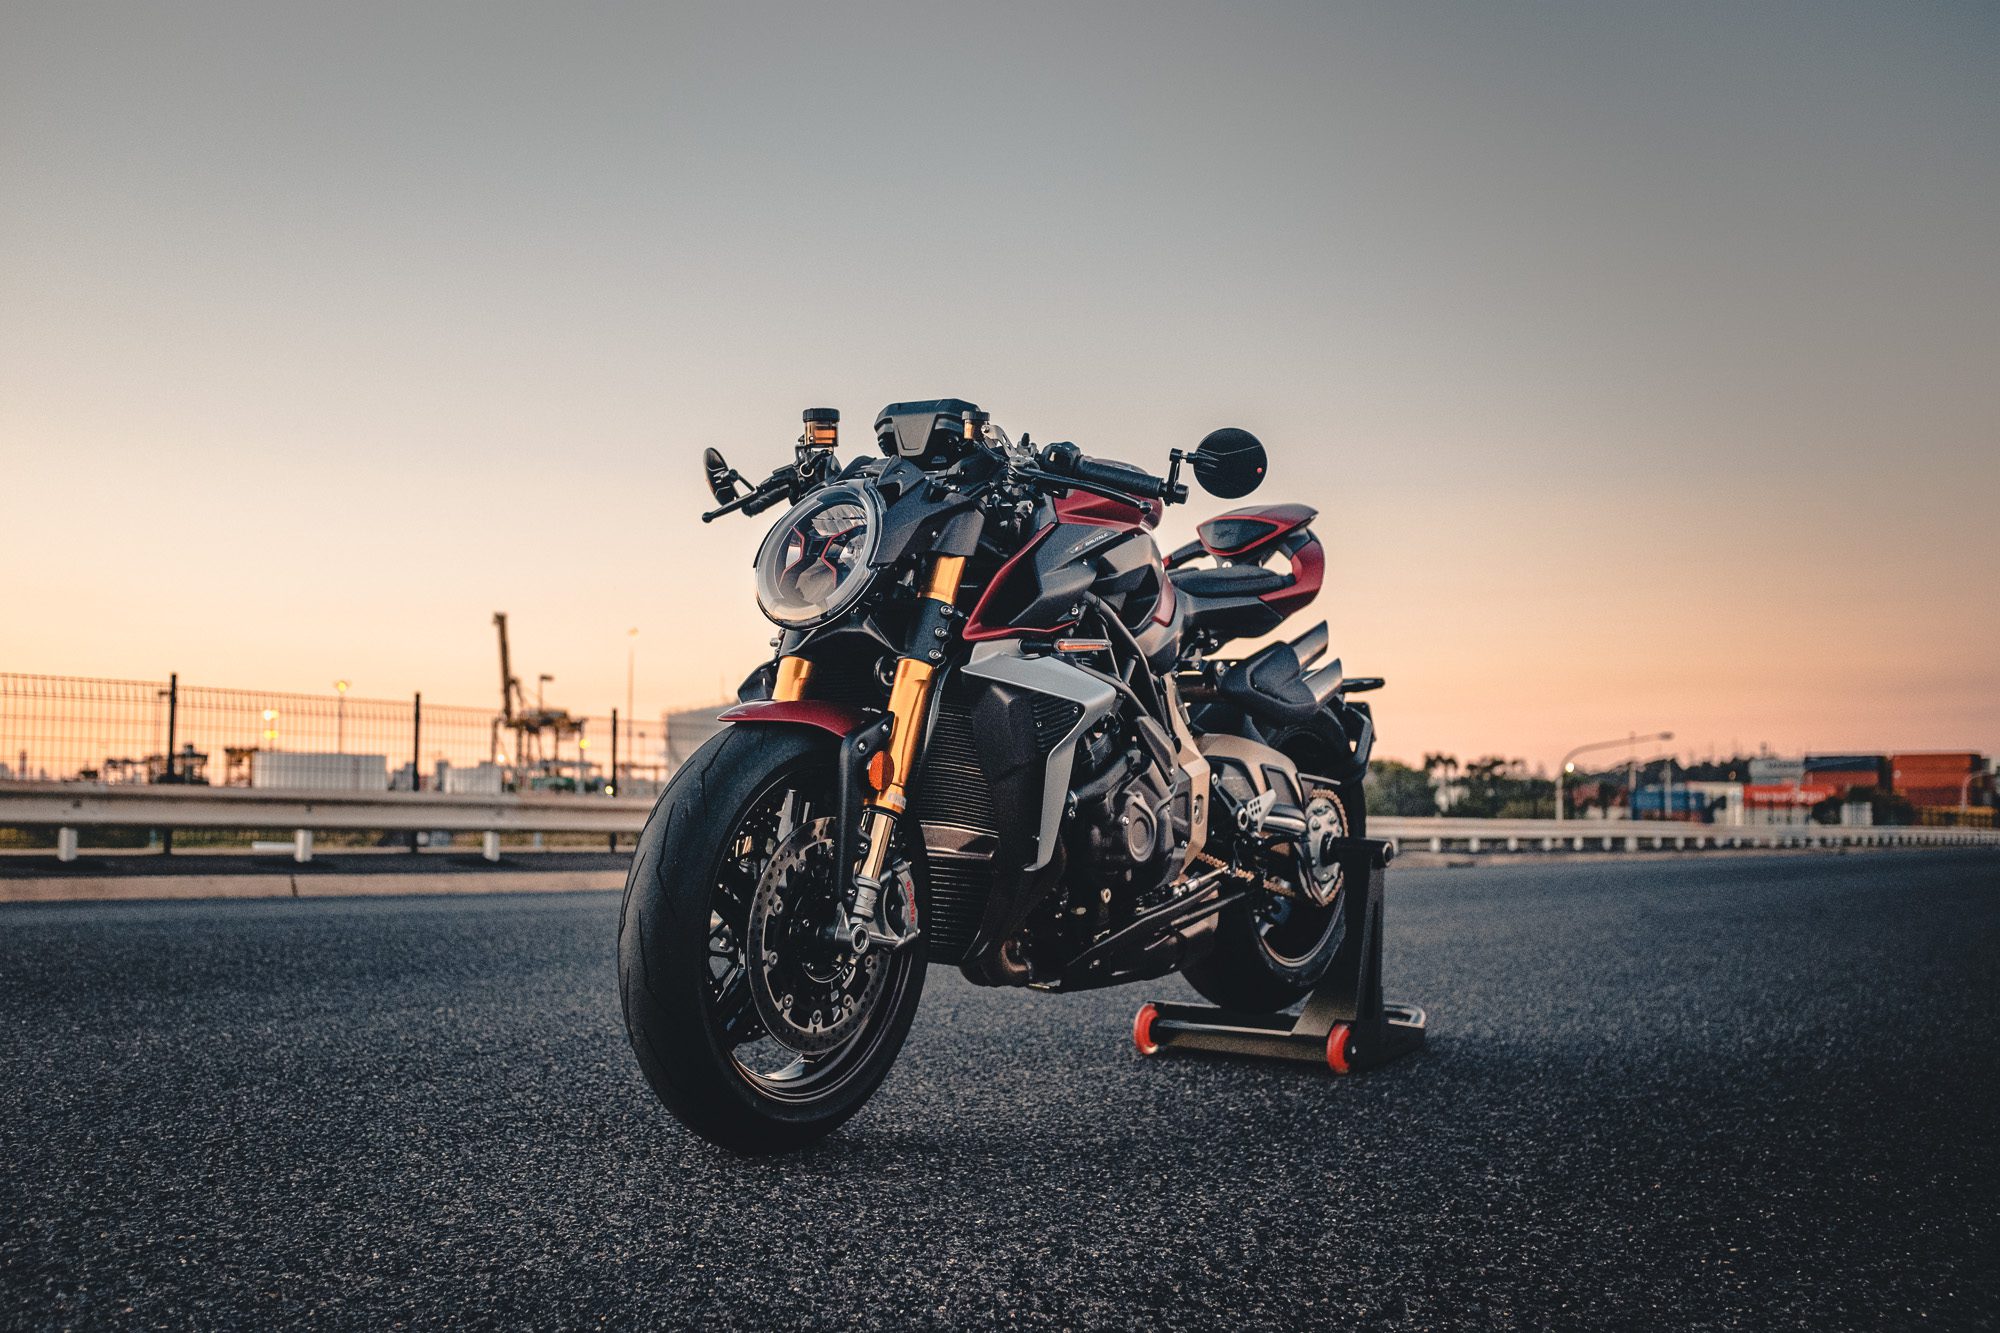
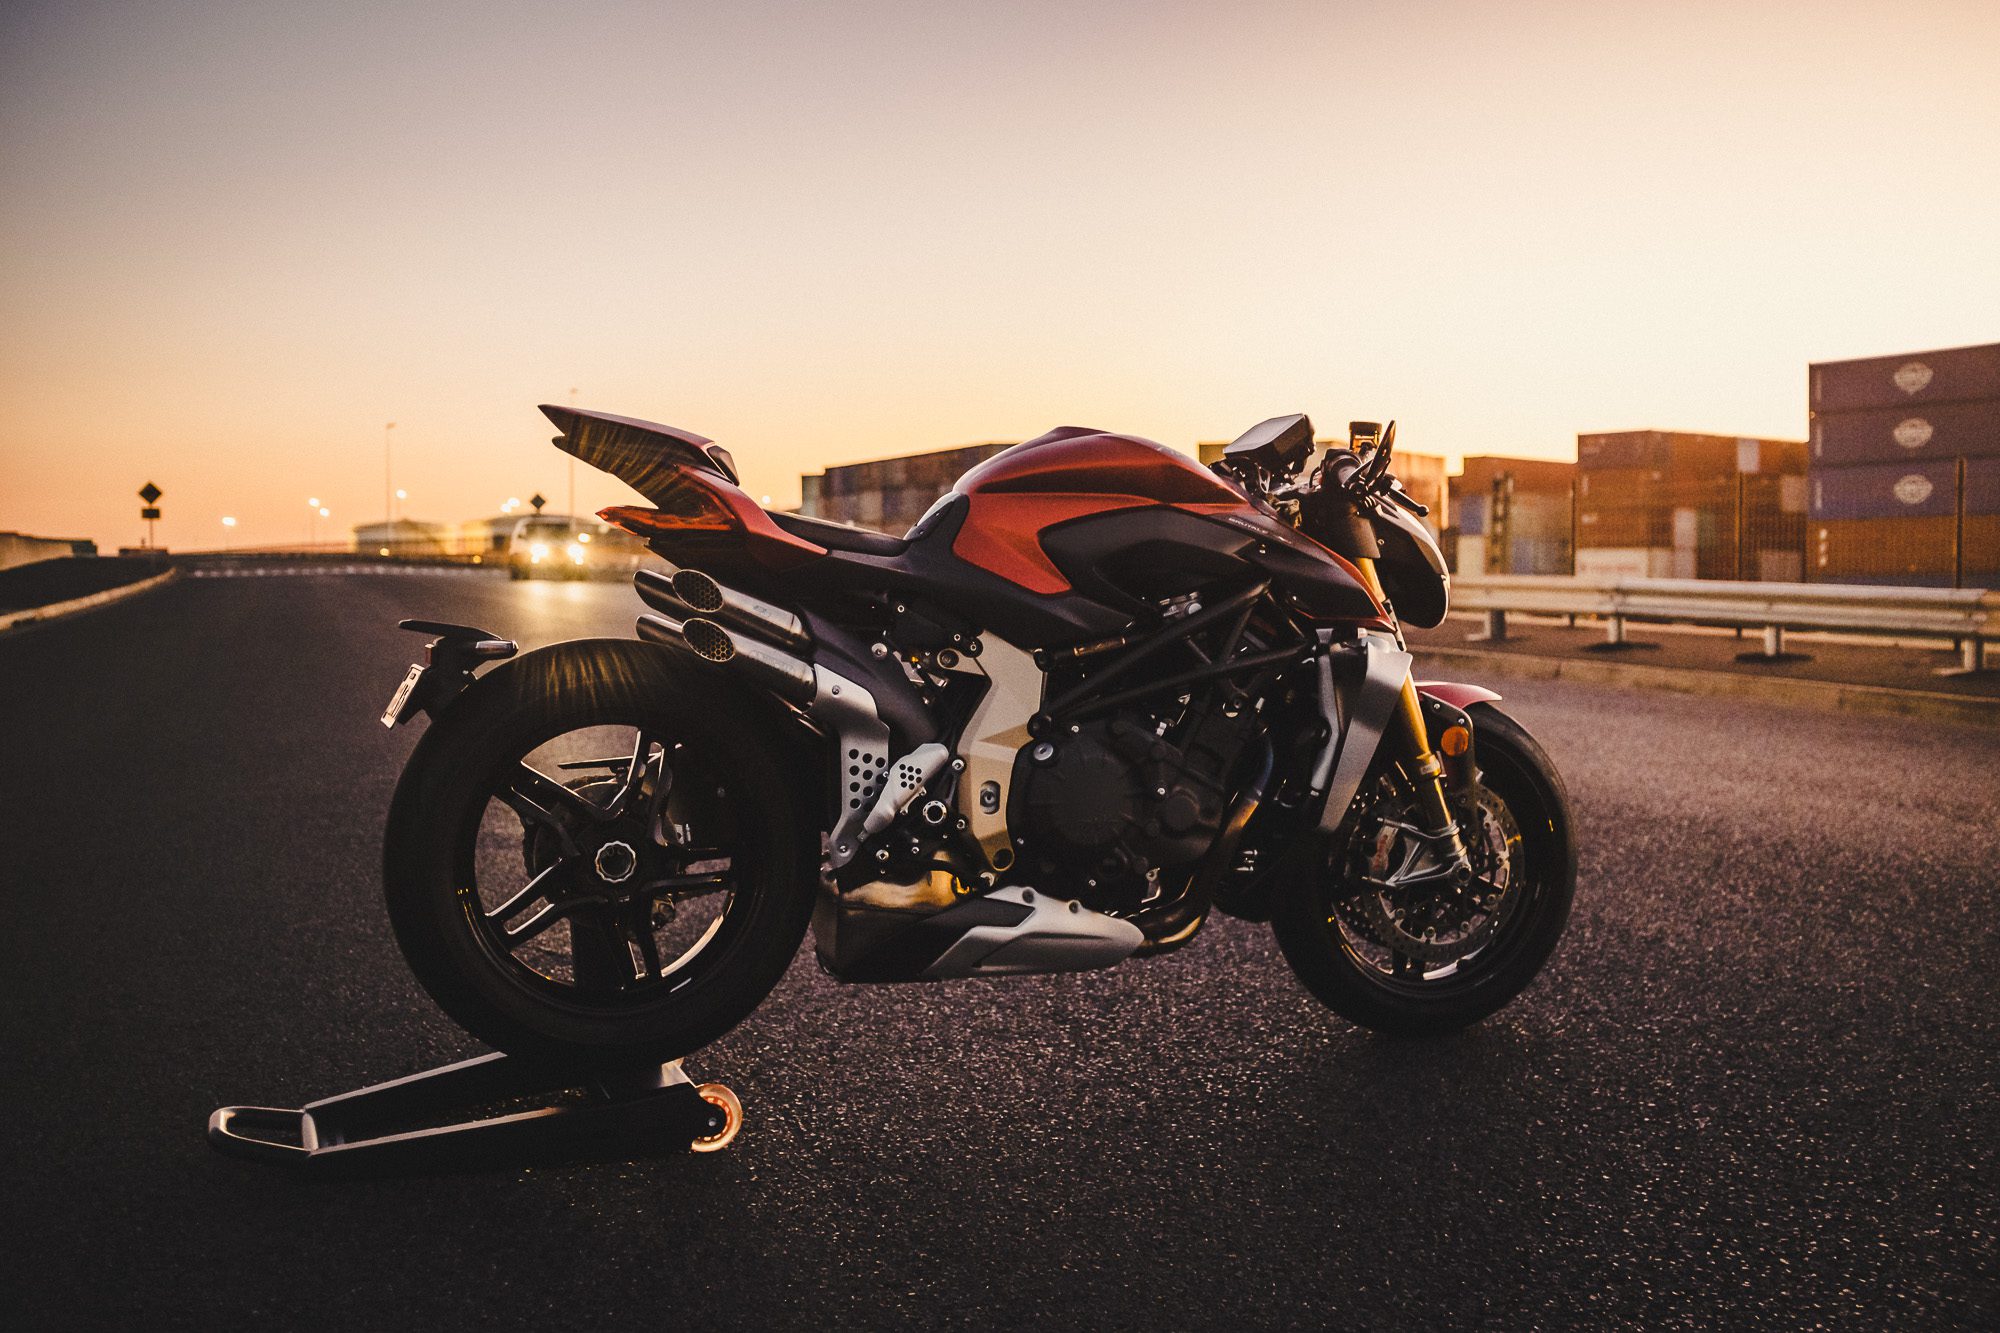
OK. The day’s arrived and you’re at the chosen location with the bike, the camera, great weather and the sunset due in an hour and a half. Now you’ll need to position the bike. Let’s use a clock face metaphor to make this as easy as possible. Place the bike at the twelve o’clock position with its ‘exhaust side’ facing directly at you. Position yourself at the six o’clock position with a good 5 metres (or 15 feet) between you and it, and make sure that the setting sun is either at the 3 or 9 o’clock position.
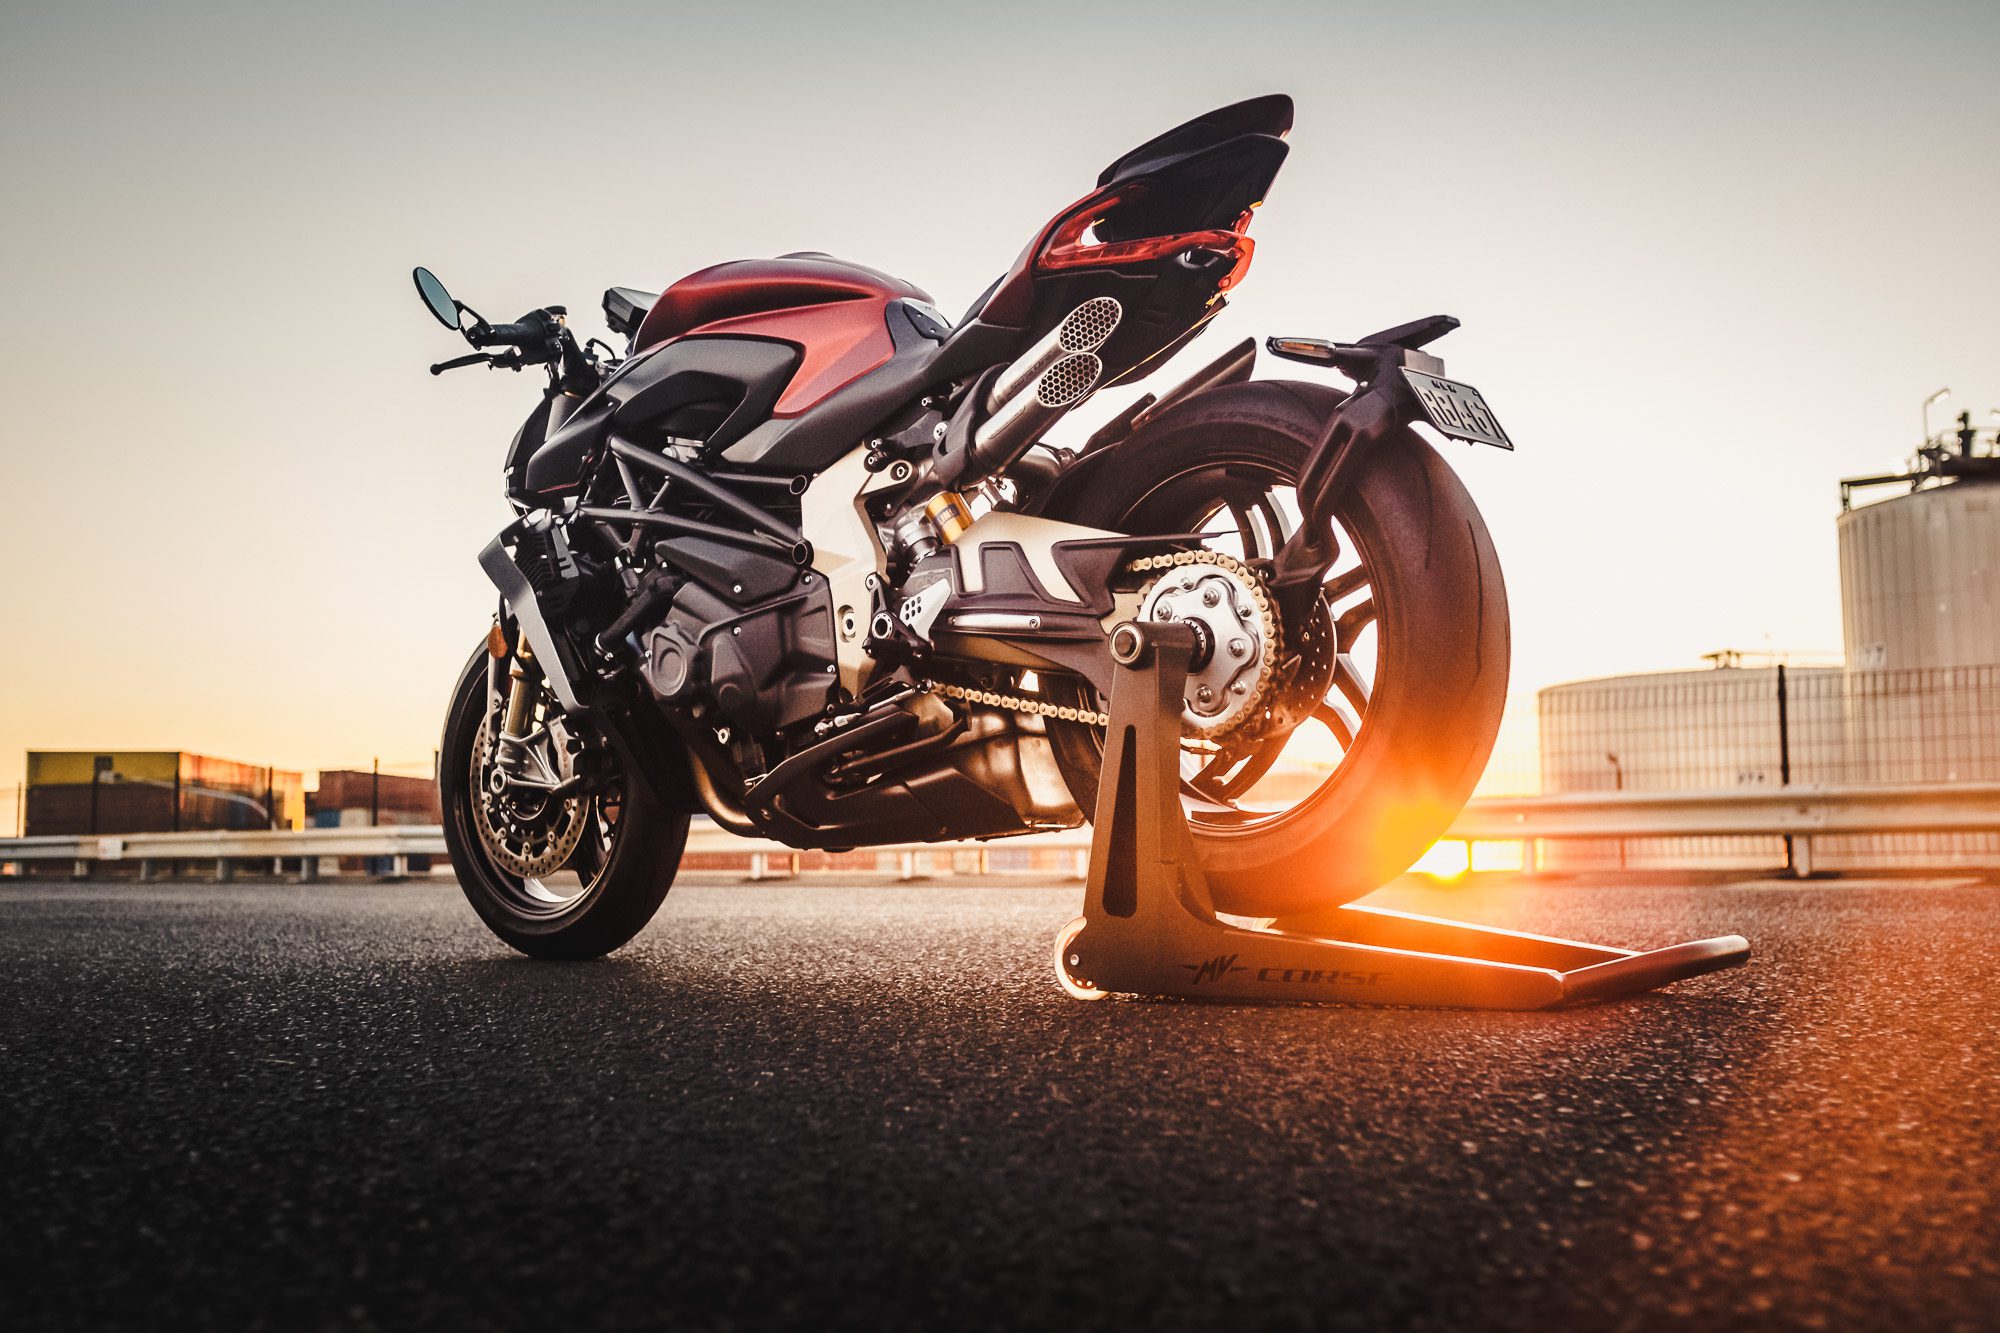
Time to turn that camera on and frame up the shot. I won’t go into excessive detail, but take a look at the photos here and try to copy what I’ve done in terms of how big the bike is in the shot and how much space is around it. Hot tip – it’s better to be a little too far away than too close; you can always crop your photos if you want but you can’t add space to a photo that’s too tight without the help of a Rocket Scientist, Pixar Studios and a supercomputer.
Step 4: The Shoot
Look through the viewfinder again, make sure the camera is level and the bike is positioned nicely in the centre of the frame. Now take a photo or three. Next, review the photos you just took. The absolute best thing about digital cameras is this thing right here; you can actually look at what you’ve just taken and see whether or not it’s any good.
Is it in focus? Is it exposed OK? Is everything behind and in front of the bike nice and blurry? Is the bike itself nice and sharp? Also check to see if you have details in the shadows and the highlights, like the sky behind the bike. With less than an hour to go before sunset, you should be seeing colours in the sky rather than pure white and no super black shadows, either.
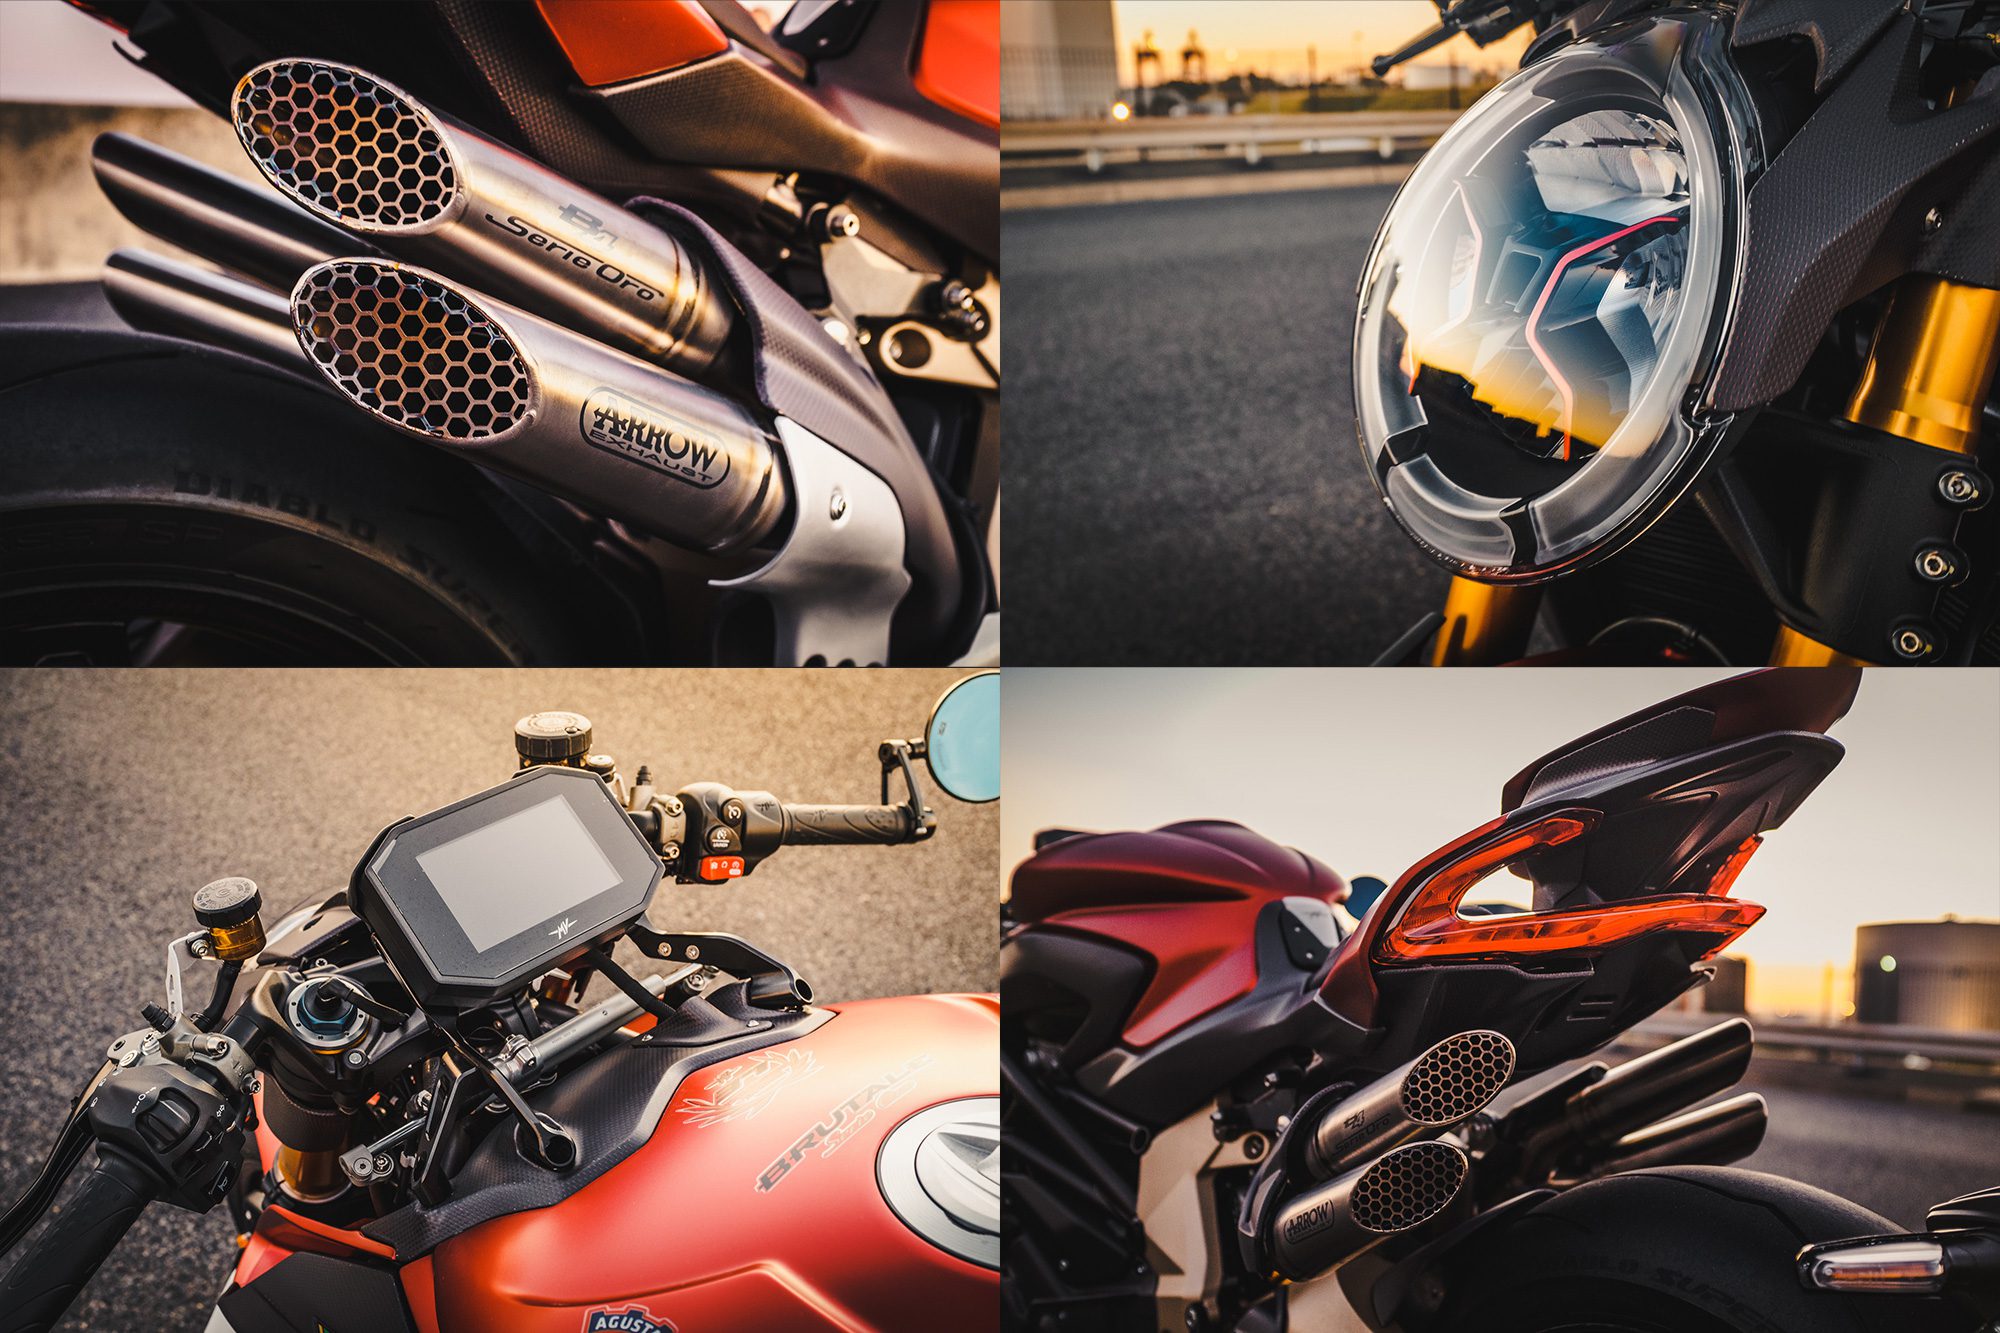
Once you’re sure that everything’s hunky dory, it’s your time to shine. You’ll need to take three to four photos of the following scenes. First, shoot the bike by walking around it and – to use the clock metaphor again – shoot it from every ‘hour’ until you have 12 sets of angles. These photos should be taken at the same height as the bike’s headlight for the best results. Trust me on this one. Now get close, change the aperture to f5.6 or thereabouts and shoot the following details: the tank, the seat, the headlight and taillight, the speedo, the exhaust, both wheels and both sides of the engine.
Step 5: Download and Grade
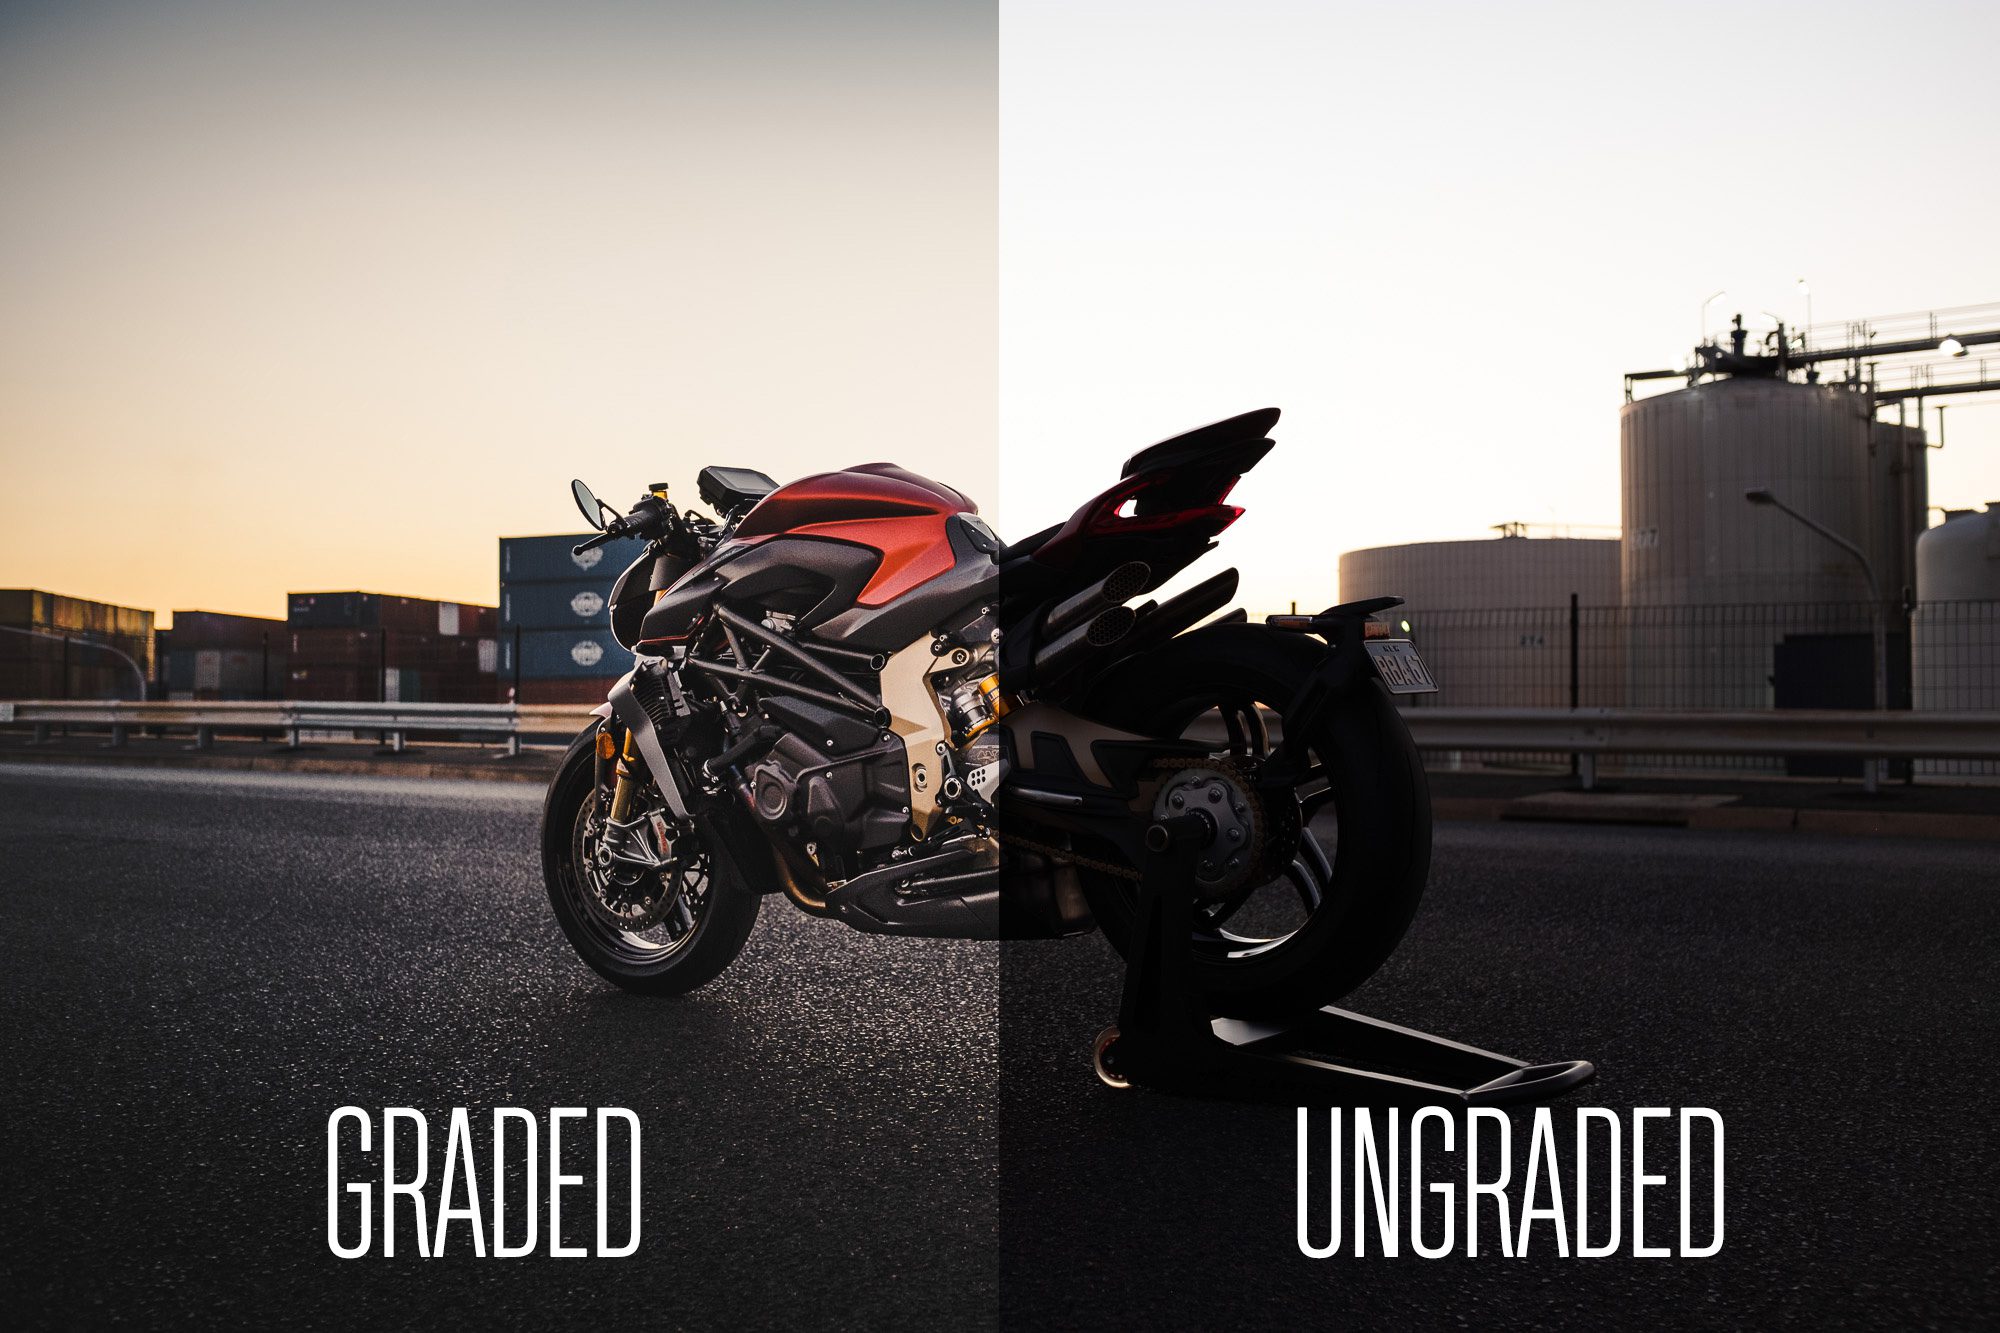
By now you will have noticed that despite all your best intentions and efforts, the photos still don’t look like what I’ve got. This is probably the biggest secret to how pros get their shots looking the way they do. They know that for all the effort and time you’ve put into the bike shoot, a cool-looking bike photo needs a heap of love in ‘post’ to really make it shine. I never cease to be amazed at how grading can turn an OK photo into something really, really cool. Especially if your camera can shoot in RAW format, as this vastly increases the photos’ ‘tweakability’.
There’s no single ‘proper’ way to do this, but the one I have selected is not only free, but it’s quick and it should result in some pretty impressive results. Step one is to download Adobe Lightroom on your phone. Note that I also use Lightroom, but on my laptop. This is a better option, but it also costs you so there’s that. And no, they didn’t pay me to say this. Like the OG Photoshop software, It’s a genuinely good product that many pros use.
Now you should be able to open the photos you’ve just shot, get them into the Lightroom app and go nuts. As for how exactly to ‘get them looking cool’, this depends entirely on things like what camera you’ve used, the colours in the photos and the light at the time you took the shot. It’s also down to your personal preferences, too.
But a good place to start is to download some free Lightroom presets and try them out. Another great option here is to hit up YouTube and watch some vids. Here’s one. Here’s another. Watch and learn. And be patient, too. You won’t get it immediately.
Step 5: Do It Again
OK, so by now you will have probably figured out my sneaky little ruse. Like most things in life that are worth doing, there’s pretty much zero chance that you’ve followed these amazing and beautifully worded instructions and absolutely nailed it. I’ll admit to knowing that before I started.
Please don’t hate me; I have a wife and three kids to feed. The truth here is that like most genuinely cool things in this world – take riding a motorcycle, for instance – this isn’t something you can get right the first time. Or the fifteenth. And if it was, then everyone would be doing it and you’d be bored in five minutes flat.
Taking truly great photos of cars and bikes is something people spend a lifetime perfecting. But you know what? Even after doing it for more than a decade, I still get a real buzz when I start fiddling around in Lightroom and realise that I have managed to capture an amazing shot of a beautiful vehicle. There’s not much else on this mortal coil that beats it and I strongly suggest that you give it a go.
All bike photos by Andrew Jones from Machines That Dream