Home Made Frame Brace for the Suzuki DR-Z400S
In this series, I have been preparing my 2003 Suzuki DR-Z400S for a ride on the second half of the Trans-America Trail.
In a previous article, I installed the IMMIX Racing luggage rack (review) on the bike.
But I became concerned about how much weight the Suzuki’s frame would be able to hold.
My riding companion Glen did a lot of research about the problems that other riders have encountered on the Trans-America Trail, to better prepare us for the unknown.
One failure that has occurred on more than one occasion is fracturing — or sometimes a complete failure — of the rear sub-frame on some of the dual-sport motorcycles during this punishing ride.
Notably, this has happened on the Kawasaki KLX250S and also the KLX300 that Glen will be riding. This has become a real concern for him and, I have to admit, it got me thinking.
Glen’s KLX has what appears to be a tubular steel sub-frame in the rear, while the sub-frame on my DRZ is a square-boxed aluminum type. Which is stronger I have no idea, but I know mine should be lighter in weight.
The general consensus is that the rear sub-frame fails due to the additional weight on the rear of the bike from carrying the extra fuel, camping gear, tools and clothing needed for long-distance off-road adventures.
The weight causes the rear sub-frame to flex up and down slightly like a “spring-board” while riding on the rough roads.
Over time, this up-and-down motion fatigues the metal, much like repeatedly bending a coat hanger at one spot, causing the metal to crack or fail completely, usually under the rear of the rider’s seat.
One rider reported a complete breakage of his rear sub-frame while in the wilds of Utah.
He had to use his riding partner’s tent poles as a temporary fix until they reached a town where they were able to find a welding shop that could fix it.
Since I will be carrying an additional two gallons of fuel on my DRZ during part of the ride, in addition to my camping gear, the more I thought about it the more concerned I became about experiencing a sub-frame failure on my bike which, according to Murphy’s Law, would happen in the middle of nowhere.
 The stock Suzuki DR-Z400S does not have a sub-frame brace.
Where to Buy Suzuki DR-Z400S Frame Brace
Check Reviews & Prices on AmazonSee More: Motorcycle Accessories, Motorcycle Tire, Motorcycle Helmets
Weight Causes a Sub-Frame Failure?
By the way, I also weighed all of the items that I will be carrying on the rear of the bike.
So far, when the RotopaX fuel cell (review pending) is full, there will be a total of 17 kg (38 lbs.) behind me or 4.5 kg (10 lbs.) less when the fuel cell is empty.
So, what could I do to possibly prevent the dreaded sub-frame failure?
I found an article that mentioned installing an auxiliary brace on a dual-sport bike that could minimize the “spring-board” effect.
This idea piqued my interest and the author had included a photograph of a motorcycle frame indicating where a brace might be installed.
The sub-frame on the DRZ-400S starts near the rider’s footrests and it is attached under the seat, where it forms an arc ending near the tail light. Any weight that’s applied to the rear of the sub-frame places stress on this arc as a whole.
So, if I could install a brace of some sort that could relieve some of the stress on the arc, I thought perhaps I could minimize or even eliminate the up and down flexing and subsequent damage to the sub-frame.
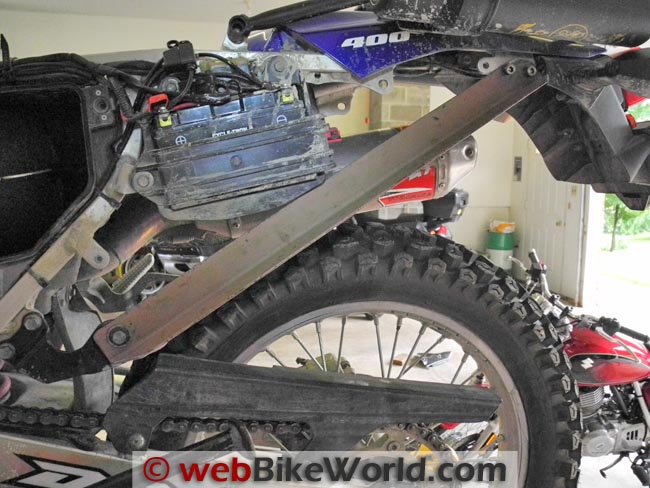
 The section of “L” shaped steel angle stock I used for the frame brace.
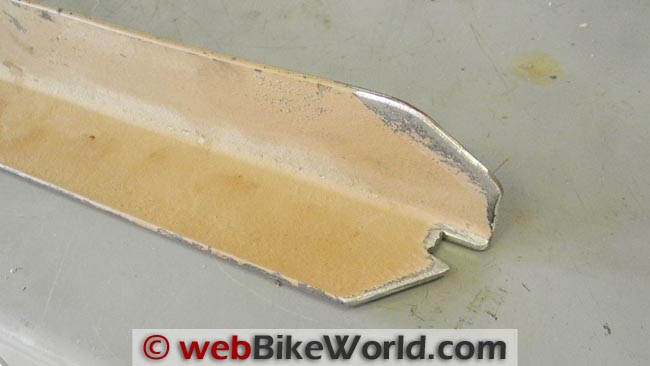 I cut and notched one end to fit the upper rear.
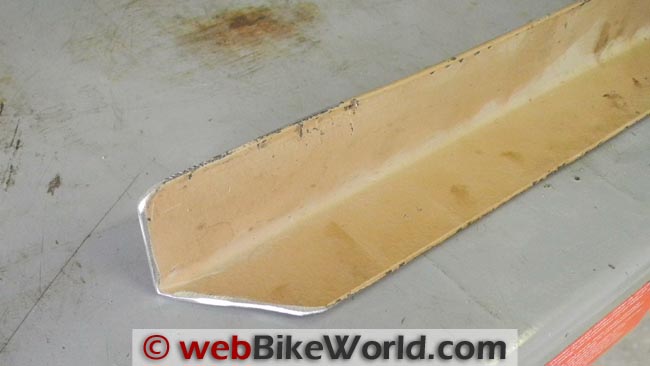 The lower end was rounded off to prevent it from catching my foot.
Designing a Brace
What I had in mind was a brace that would act like the hypotenuse of a triangle, with the rest of the sub-frame on the Suzuki forming the other two sides of the triangle.
At first I had planned to use some 1″ wide by ¼” thick aluminum bar stock, but I changed my mind and chose to go with a piece of 1.5″ by 1.5″ steel “L” angle stock, which had actually been part of an old bed frame I had cut up.
I saved the metal thinking it might come in handy some day.
Although the aluminum was a fraction of the weight of the steel piece, I had reservations about it and figured the aluminum would flex too much, which could compromise the intent of the brace.
 The passenger foot peg had to be removed to locate the frame brace.
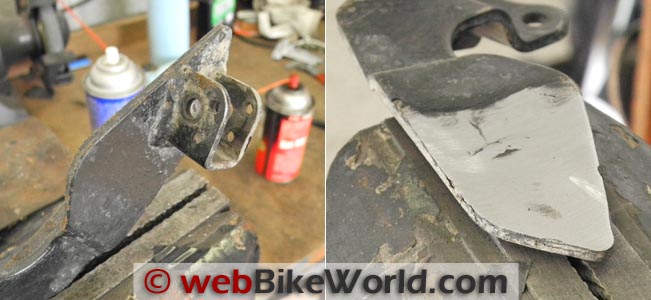 The passenger foot rest bracket before and after modifications.
Where to Buy Suzuki DR-Z400S Frame Brace
Check Reviews & Prices on AmazonSee More: Motorcycle Accessories, Motorcycle Tire, Motorcycle Helmets
Locating the Brace
But if I were to install a brace, where could I attach it?
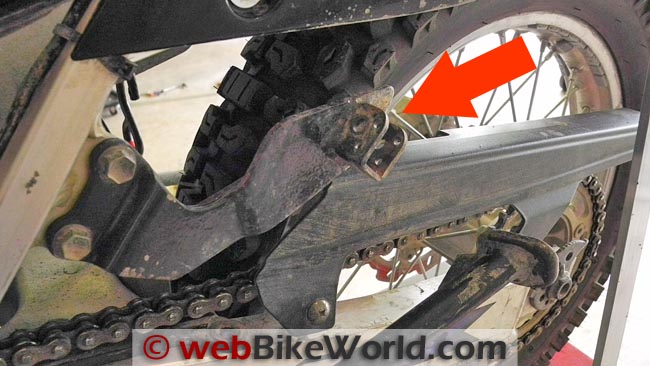
On each side of the Suzuki’s sub-frame, near the tail end of the rear fender, there are flanges with threaded holes where I could fasten the upper (rear) end. But the lower, forward anchor point gave me two obstacles to deal with.
On the left side there’s the battery and on the right the exhaust. The exhaust looked like it was going to be difficult to work around so I chose to concentrate on the battery side. .
Holding a piece of metal at the rear upper anchor point, I slowly swung the front end in an arc until it came close to the battery, where I found it pointed right to the left passenger foot peg mount bracket.
I would have preferred a point on the frame itself, but that was just not going to happen.
On closer inspection, I found the back of the foot peg bracket had a stiffener piece welded on, so I felt it would be rigid enough to secure the bottom part of the brace.
At first I thought I could fabricate some sort of mount that would allow me to keep the foot peg bracket intact, but I gave up on that idea and decided to simply cut off the U-shaped piece that the left passenger foot peg is pinned to.
A little grinding to take off the edges and I had a nice flat place to bolt the brace.
The “L” angle stock was cut to length and I trimmed off the ends for clearance at the upper end and rounded off the sharp angle on the lower end to prevent my boot heel from catching, which might result in a foot, ankle or lower leg injury.
I also had to bend the brace a little on each end so it would sit flush on both the foot-rest and the sub-frame. Holes were then drilled in both the brace and foot-rest bracket.
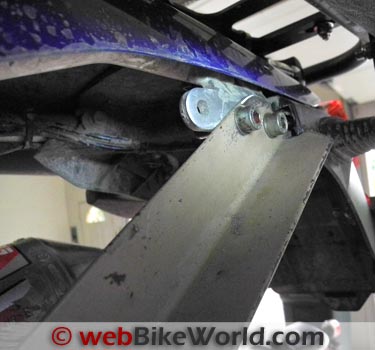
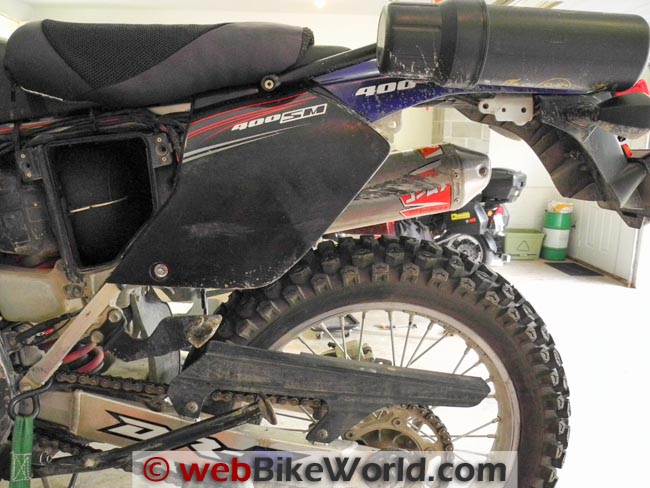
 The unpainted frame brace mounted on the DR-Z400S.
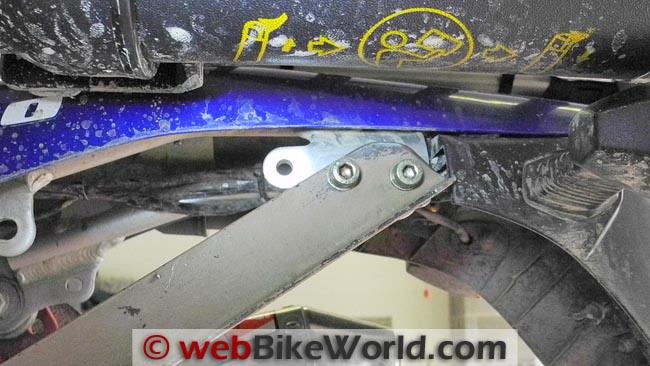 Close-up of the upper end of the frame brace attachment point.
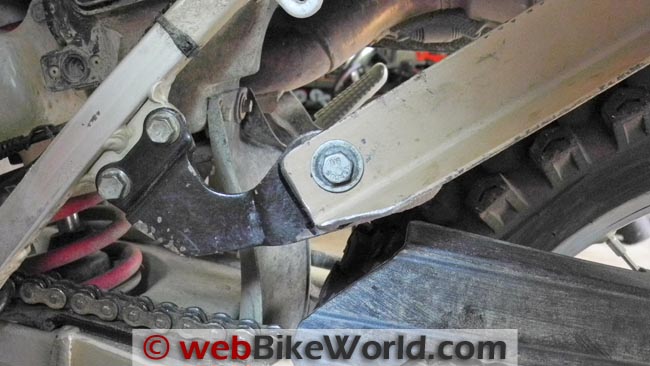 Close-up of the lower end of the frame brace attachment point.
Where to Buy Suzuki DR-Z400S Frame Brace
Check Reviews & Prices on AmazonSee More: Motorcycle Accessories, Motorcycle Tire, Motorcycle Helmets
Securing the Frame Brace
Everything was temporarily bolted in place to ensure proper fit, after which I gave all of the bare metal parts a coat of black rust-proofing paint.
Using some 8 mm bolts I had on hand, along with self-locking nuts to help keep things from shaking apart, everything was bolted together and tightened down. It looks good; in fact, when Rick stopped by afterwards he mistook it to be a normal part of the bike.
I have road-tested the bike with the brace, both with and without a load, and so far there are no adverse effects to the handling or suspension movement that I can feel.
 Mounting the stash box on the DR-Z400S.
An Unexpected Bonus!
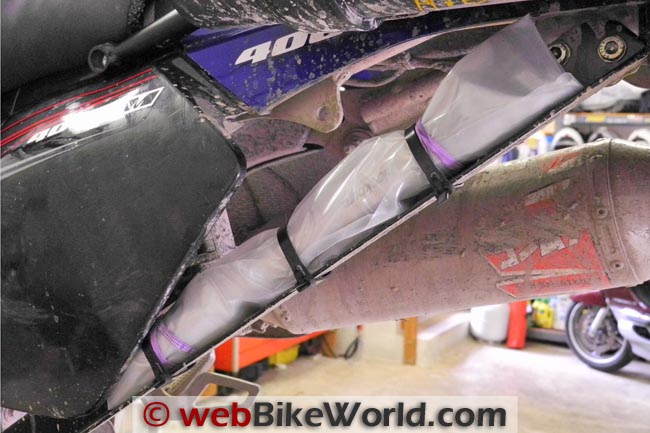
I discovered an unexpected benefit that resulted from using the “L” angle stock for the frame brace.
I found that I could zip-tie my hand air pump (reviews) to the inside angle of the brace to keep it secure. I first wrapped it in heavy plastic sheeting to keep the dust and dirt out, then used cable ties to attach it directly to the brace, where it is readily available.
Conclusion
I’m no engineer and I’m sure there are some out there who will probably point out all of the reasons why this is going to fail or cause more problems, but I think of it primarily as a stabilizer.
As designed, my home-made brace moves some of the stress to another part of the frame that I think is a more stable and rigid point. I suspect that time, mileage and my upcoming Trans America Trail ride will either prove me right or wrong.
More wBW: Suzuki DR-Z400S Blog | Suzuki DR650 Blog
Master Listing of All wBW Motorcycle Product Reviews
Where to Buy Suzuki DR-Z400S Frame Brace
Check Reviews & Prices on AmazonSee More: Motorcycle Accessories, Motorcycle Tire, Motorcycle Helmets
Owner Comments and Feedback
See details on submitting comments.