

As identified in Part 1 of the SHAD motorcycle top case review, four complete top case kits along with a Top Master rack kit yielded a multiple mounting options on a variety of motorcycles.
Of the four planned installations, three have been completed.
The last will be completed before the truck, trailer and motorcycle ensemble is pointed south for Daytona at the end of February.
The Top Master rack for the Kawasaki Versys (review) was installed first.
With only one Versys in the current stable it has become a default test mule of sorts.
The second and third installations were completed on the 2008 R1200GS Adventure and the 2009 BMW F800GS (review).
The last installation was just finished before submitting the article…timing is everything.
The Essentials
The adaptable bottom rack is indeed versatile.
For the basic SHAD top cases it comes in two models, the D1B8PA used for the SH-40 (CA), SH-45 and SH-46 top cases, and the heavier duty D1B50PA that is used exclusively for the SH-50 case.
While SHAD offers specific installation kits for many popular motorcycles, the generic components in each kit will work for many applications.
The most versatile items in the hardware bag are the four fastening clips or clamps which are similar to those found in other universal mounting kits provided with other brands.
These small “Wide-W” brackets can be used with grid, slotted or tube style racks to provide a secure installation of the bottom plate/rack.
Also in the bag are M6 x 30 mm and M6 x 20 mm bolts, self-locking nuts and smaller M5 x 12 mm bolts used to secure the plastic cover plate to the bottom rack.
The basic tool list for assembly is pretty simple.
Allen head sockets or wrenches, a 10mm wrench and a medium-head Philips screwdriver, along with anything needed to prepare the host machine.
Kawasaki Versys 650 Installation
Somewhat fresh off the production line is the top case mounting rack kit for the Kawasaki 650 Versys, that most versatile and capable twin that continues to impress old and new owners alike.
With the Ebony Versys test mule regretfully traded for the F800GS early last fall, the Burnt Orange Versys has been pining away in the garage, so it was time to give it something new.
Besides, it is now a default test mule.
The SHAD Top Master kit comprises a left and right support bracket, four metal plate spacers and four washers.
All in all it is a pretty simple but effective mounting system with far less material, pieces, and weight, than most others, including the GIVI kit that was already installed on the Versys.
The full details of just how the Top Master got fitted (with and without the GIVI pannier brackets) are being written up for the next Versys installment.
It is sufficed to say that the SHAD Top Master kit did not take long to install even though the GIVI PLX side pannier brackets had to be removed for this initial installation (there is a workaround).
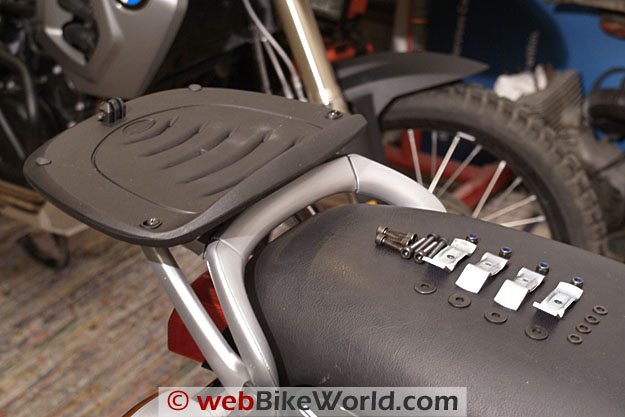
SHAD SH40 Top Case on a Kawasaki Versys.Nothing else is needed for the Versys installation outside of the basic tools. The instructions are complete and far better written and illustrated than some other accessory kit instructions.
Along with some spacers from the kit, the original hardware is used to mount the rack assemblies using the four hand-guard mounting points.
If nothing other than mounting up the top rack needs to be considered, then this is a simple task using a well thought out kit. The only issue that I ran into was that the left and right bracket top plates were a bit out of alignment when mounted.
Drilling out the two appropriate holes on each surface to one size over allowed a bottom rack from one of the top case kits to be bolted on with only a little twisting. I was glad that this issue was resolvable without compromising the integrity of the assembly.
BMW R1200GS Adventure Installation
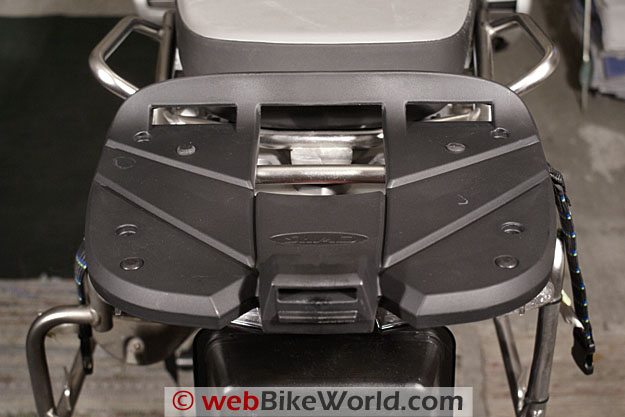
The SHAD kit includes everything needed to mount the SHAD top case to the ‘08 GS Adventure with minimal hassle.
The four universal clamps along with the 30mm bolts and self-locking nuts made short work of getting the adapter plate mounted up.
The flexibility of the mounting components allows the top case to be mounted further forward which would put it up against the rear seat section (as installed) or back about one and a half inches (which then allows the optional light bar housing to be installed).
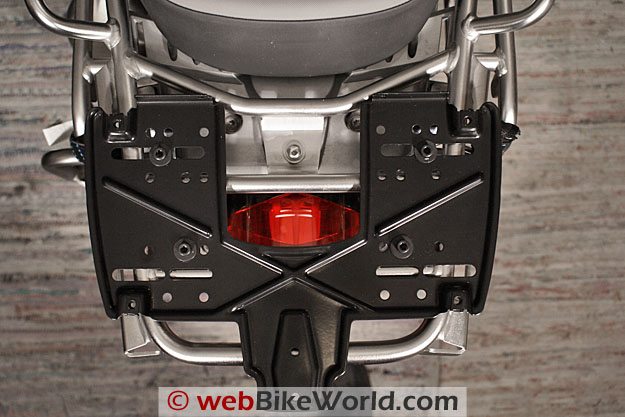
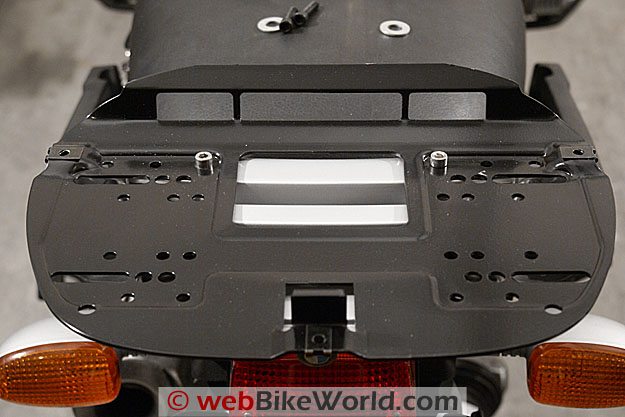
SHAD mounting plate for the BMW R1200GS. SHAD mounting bracket, BMW R1200GSAll the bolts were treated to a dip in medium strength thread-locking compound before assembly. Neither installation required or will require any drilling, cutting or other modifications.
Factoring in some test-fitment time the GS Adventure components were installed and the top case snapped into place in under one hour. Admittedly the Adventure’s long, wide tubular style rack is tailor made for this type of installation.
I was going to mount the optional light bar kit that had been included with the SH-50 top case, but the same long tubular rack that facilitates mounting of the bottom plate precludes easy mounting of the light bar kit.
With the bottom plate mounted forward, this positioning prevents the light bar from being bolted to the rear of the bottom plate/cover plate assembly.
Interfacing the power harness to the BMW CANBUS system is a secondary issue here as well…
To make expedient use of the light bar, I have plans to do some minor modifications that will allow it to be used on the smaller bottom plates used on the Versys or the BMW R1100R.
BMW F800GS Installation
Getting one of the SHAD top cases installed on the F800GS was relatively easy in its own way and didn’t involve mounting a SHAD top case kit.
I cheated actually; one of my initial purchases for the F800GS had been the SW-Motech Quick-Lock Adapter rack kit along with a SHAD adapter plate.
The SW-Motech rack mounts directly to the back of the 8GS using the four rear platform mounts. While it looks like and is a simple rack, it can do much more.
Fitted with the supplied Quick-Lock components before installation, the rack can then host a number of SW-Motech adapters that use the three-point Quick-Lock and Cam-Lock fastener system.
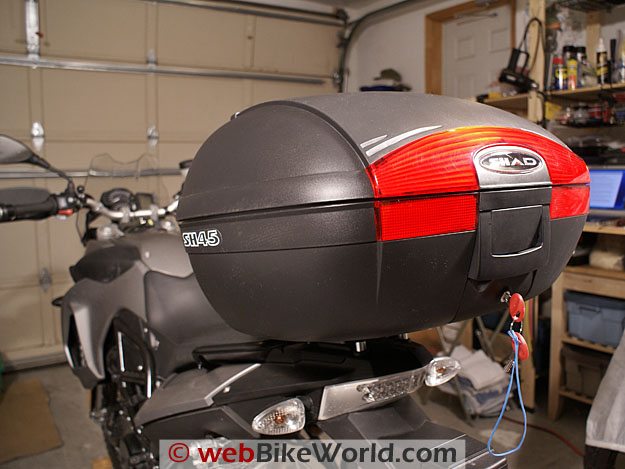
SW-Motech adapter plate on a BMW F800GS. SHAD SH45 Top Case on a BMW F800GS.Once I had dug out a Givi Monolock adapter plate originally used on a K1200S, three plates were available for use – the Givi plate and the two new items, a wide platform plate and the SHAD adapter plate.
The SHAD adapter works well. Once locked in place by securing each of the Cam-Lock fasteners in its receptacle on the rack using a large flat blade screwdriver it is very secure.
Some minor side to side play at the rear can be induced if enough pressure is applied: this is due to the two up/one back layout of the fasteners. But it does not detract from security of the system.
First issue found. ..there are actually two pieces to the adapter – the plate itself and a small light-weight carrier bracket that bolts towards the front of the plate.
This carrier bracket provides the fitting for the top case moulding. However, when installed, as it was when received, the bracket covers two of the Cam-Lock fasteners.
This small bracket therefore has to be taken off whenever the adapter plate is going to be mounted or removed. Not a major issue, but something that could and should have been addressed before final production and distribution.
Needless to say, it will be modified.
The only other issue identified with this plate regards the snap fitting clip that engages the bar latch at the back of the trunk – it is one or two mm out of alignment.
None of the three cases would fit over the clip and lock in to place. I chamfered out the two clip mounting holes on the bottom plate and re-installed the clip, which did the trick.
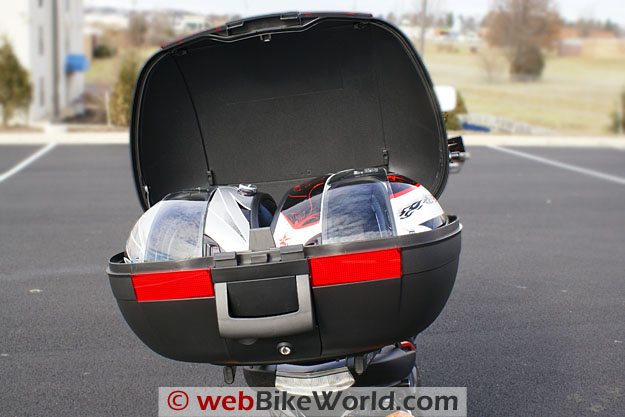
With the issues addressed and the adapter plate mounted, the SH-40, SH-45 and SH-46 top cases can all be mounted and dismounted in seconds, providing three different cargo carrying options.
Both the 40 and 45 litre cases are more than adequate and well suited for this lighter member of the GS clan.
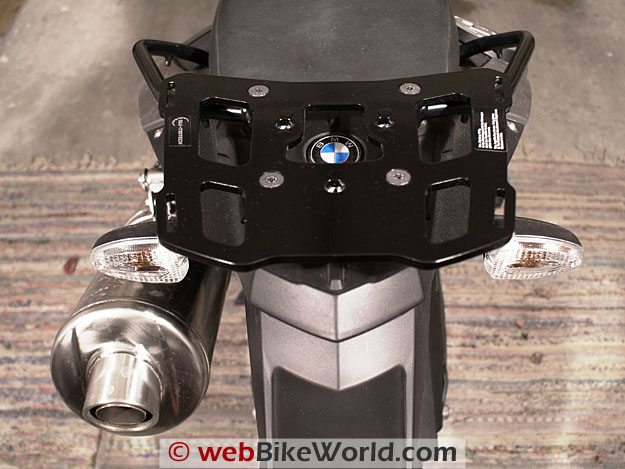
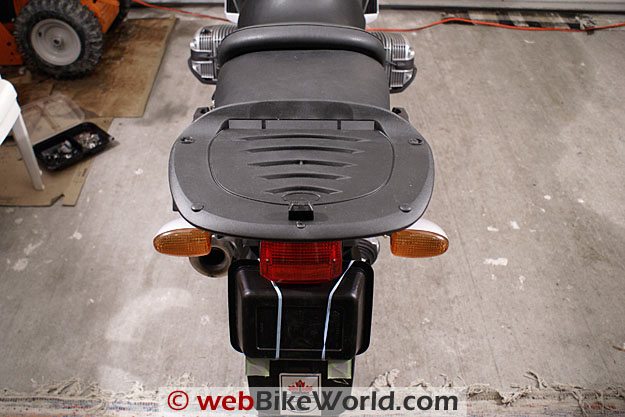
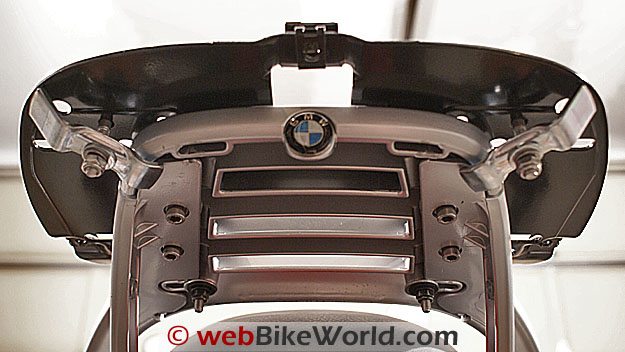
SHAD top case mounting plate and hardware, BMW R1100R. BMW R1100R mounting plate. Rear mounting plate for top box. Underside view of the mounting plate, BMW R1100R.1998 BMW R1100R Installation
I had been thinking that for this installation, just completed, nothing other than the standard SHAD kit components would be needed. In a way I was both right — and wrong.
With warmer temperatures outside making working in the garage even more comfortable, I had the GIVI universal plate removed in about two minutes flat.
With one of the SHAD D1B8PA bottom plates set on to the BMW aluminum rack in the desired position, two holes at the front lined up nicely with two cut-outs in the surface of the rack.
But, it was evident that the back mounts were going to take a little bit longer – none of the pre-drilled holes or cut-outs on the bottom plate were lining up with any cut-outs on the Beemer rack.
In scoping the whole thing out, it became obvious that a one inch flat steel or aluminum bar run across the back underside of the rack and then secured to the SHAD bottom plate with hardware would provide an extremely solid clamp-style mount.
Not having this type of bar on hand for drilling, I elected to utilize two of the kit ‘W’ clamps to secure the back end for now.
The only hardware change needed was to use two stainless steel M6 x 30mm bolts up front and two more of 40mm length at the back.
Each bolt got a small washer for the top surface, and both a large and small washer for the bottom. Self-locking nuts, along with a medium strength thread-locker should keep everything secured.
Total time taken = one hour. Results = good, for the initial mounting. The current mounts would likely work well as they are, but…
Conclusion
Four different top case kits and Top Master kit equals four different motorcycles wearing SHAD bottom plate and cover assemblies and able to share the top cases – this is good.
Installations for the most part were completed using the parts provided, with minimal stress and no bruised or bloody knuckles (even with wearing work gloves).
A couple of the installations will get some further attention later, but for a first effort everything is on and secure.
The bottom plate and cover assembly is strong and stylish, much more so than most other specific or universal kit offerings from other brands.
The multi-language installation instructions are basic, but still easy to understand and use, although the simplicity of the mounting components makes assembly pretty straight forward, depending on the motorcycle of course.
The light kits are worthwhile, for obvious reasons. While I have concerns about the power connection on the internally mounted kit, I regret not getting either one of them mounted up yet and put to use.
In looking at workarounds, I think both kits could benefit from some constructive user feedback.
Part 1: SHAD Motorcycle Luggage Review
Owner Comments and Feedback
See details on submitting comments.