Daypack II Installation: What’s Included
This article illustrates a typical installation of the Bags-Connection Quick-Lock system and tank bag.
Remember that every motorcycle may be different and you should follow the instructions provided by Bags-Connection.
The information here is for illustrative purposes only. The Daypack tank bag shown here is being installed on a 2006 Suzuki SV650s.
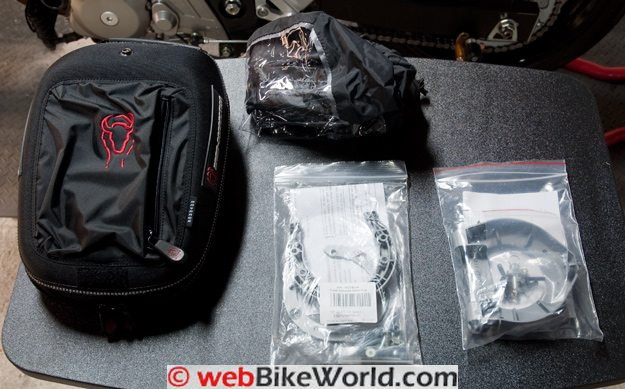
The Bags-Connection Daypack tank bag includes the a removable clear top rain cover and the Quick-Lock ring (with lanyard) that attaches to the bottom of the bag.
To install the Bags-Connection Daypack tank bag on the motorcycle, the Quick-Lock tank ring kit that is specific to the motorcycle must also be ordered.
The parts that are provided with the Quick-Lock tank ring kit include the metal tank ring adapter specific to the motorcycle and the tank ring that connects to the bottom of the tank bag. Both are made from plastic.
The hardware required for mounting the ring to the fuel tank filler assembly is also included in the Quick-Lock kit.
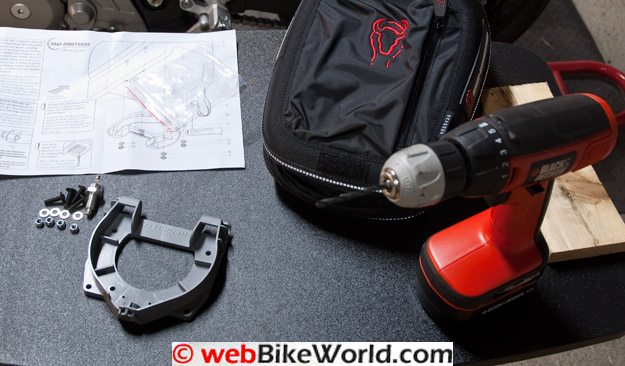
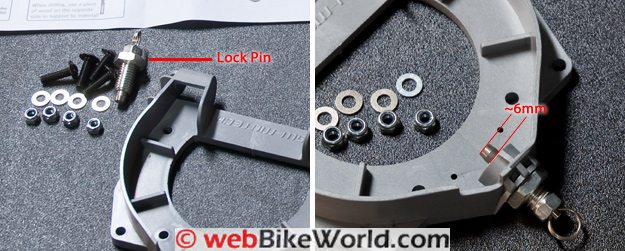
All of the items from the tank bag kit and the Quick-Lock kit are shown in the photo below. The parts arrived well packed and the included instructions are clear and concise.
I am fairly mechanically inclined and I feel that most owners should be able to complete the assembly in less than the hour it took me (I was pausing to take the photos.
The tools that were required for my installation included a set of metric Allen wrenches; an 8 mm socket and driver (1/4″ drive will be easiest to fit); and 10 mm and 15 mm box wrenches for the lock pin installation.
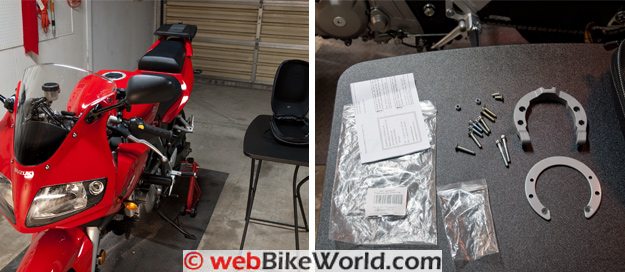
The Daypack II and tank ring ready to be installed on the SV650s.Installing the Quick-Lock Tank Ring
I began the installation by unpacking the Bags-Connection Quick-Lock tank ring components and laying them out. The Quick-Lock fuel tank portion of the assembly was in the bag containing both the metal and plastic horseshoe shaped rings as well as several hex type fasteners of varying lengths.
My installation kit from Bags-Connection had a variety of extra fasteners, which were probably included perhaps because this particular kit may also fit other motorcycle brands or models.
On the left is our victim, on the right are the parts that make up the tank ring.The Quick-Lock tank ring itself consists of two main pieces, a metal base ring that will attach directly to the fuel filler surround, and the plastic Quick-Lock ring which is mounted to the plate under the tank bag.
At first, plastic seemed like a less than ideal choice for making a secure connection, but it seems very durable. It makes sense considering the ring that mates to it on the bag is also plastic, and as such that ring is less likely to damage paint if it comes into contact with it (Editor’s Note: Plastic may have been used to eliminate the possibility of sparks near the fuel tank).
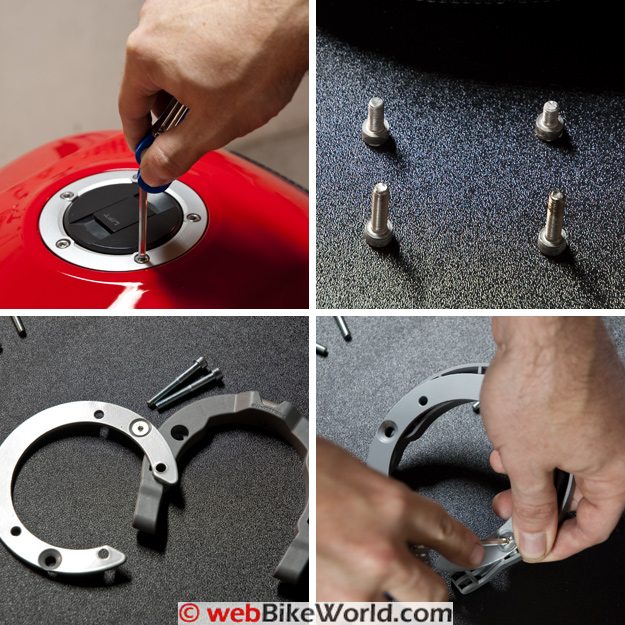
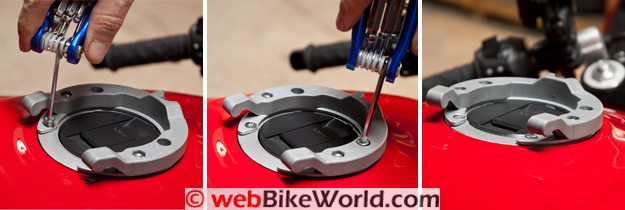
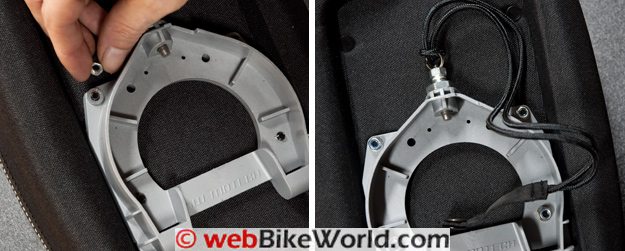
The best advice is to follow the instructions provided by Bags-Connection. I started my installation by removing the necessary screws from around the fuel filler. In the case of the SV650s, I needed to remove all but one of the screws, leaving just the rearmost one in place.
Note that the screws holding the fuel filler assembly might be different lengths as shown here. Keeping the screws loosely placed in their holes can make it easier to match the length with the new fastener that will replace it.
Removal of the fuel filler screws and attaching together the pieces of the tank ring assembly.Next, I assembled the Quick-Lock tank ring by first attaching the metal base ring to the Quick-Lock mount. Two screws were used to hold the two rings together in this case. The two countersunk holes that are nearly opposite each other were correct for this installation; the countersunk holes at the tips of the ring attach only to the tank.
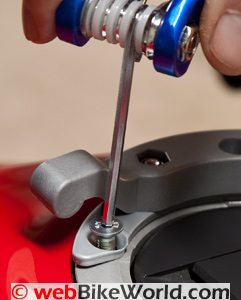
Next, I attached the tank ring assembly to the tank using provided hardware. The two screws closest to the rider are counter-sunk and the screw that was provided fit flush in these.
The remaining two screws (or more depending on your motorcycle) may be the more “standard Allen head” style. You may find you need to reuse some of the original screws removed earlier, depending on how yours fit. I kept my originals nearby until I had completed the installation.
Tightening the tank ring screws using the star method helps ensure equal pressure all the way around.Attaching the Quick-Lock Ring to the Tank Bag
With the tank ring installation complete, the next task is to attach the Quick-Lock ring to the base of the Daypack II.
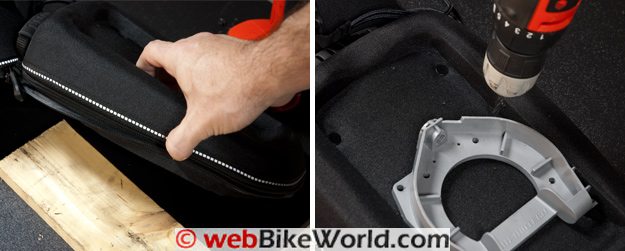
For this step, I used a drill and a 5 mm drill bit — which I didn’t have. So I used a 3/16″ bit and “wallowed” out the how a bit to get the necessary clearance. It’s a good idea to use a small piece of scrap wood to place under the bag while drilling the holes.
Top view of the Daypack II. The lanyard to release the bag is snapped to the top.The underside of the Daypack II has a large channel where the Quick-Lock ring is to be installed. The channel is several inches long, allowing the bag to be positioned when it is attached to the tank.
For a motorcycle like the SV650s with its clip-on handlebars, moving the bag forward allows the rider to tuck in close to the tank when necessary, so locating the Quick-Lock ring towards the back of the bag is what was needed here.
Once I decided the correct positioning, I placed a piece of scrap wood underneath the bag and drilled the four holes needed to attach the ring.
My advice is to take your time here since you are drilling through fabric and plastic. You may find you get a lot of plastic “strings” and other debris wrapped around your drill bit pretty quickly.
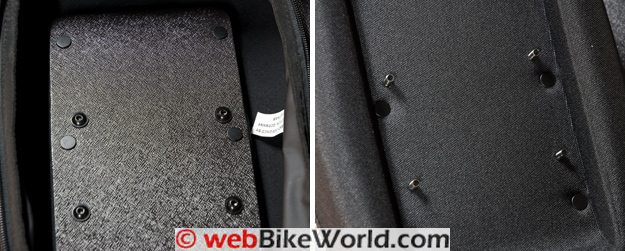
Position the Quick-Lock ring and drill holes for the mounting hardware. Be sure to place some scrap wood underneath to avoid damaging your work surface.After I drilled the holes, I located the four black round-headed screws and inserted them into the holes from the inside of the bag, protruding out the bottom.
Next, I was ready to mount the Quick-Lock plate, but before that I installed the locking mechanism into the plate. The lock does not come pre-installed on the plate so it must be installed first; this is a bit easier to do before the ring is mounted on the bag. Simply thread the lock into the hole at the front of the ring.
Insert the screws from the inside of the bag.The pin must protrude out from the plate about at least 6 mm for it to attach and release correctly. I found that mine needed a bit extra length to make the connection as solid as I liked.
At 6 mm, it only required a pretty light tug on the lanyard to release the bag, so some adjustment may be necessary for other installations. Once it was located in far enough, I used a box wrench to tighten the locking nut to keep it secured. This is also be a good time to attach the lanyard to the lock mechanism.
Install the lock pin mechanism into the Quick-Lock ring. Make sure the pin sticks out about 6mm.Now for the last step, I lined up the Quick-Lock plate with the screws and used the supplied washers and lock nuts to attach the Quick-Lock ring to the bag.
The area around the holes was pretty tight and I found my 3/8″ drive/8 mm socket didn’t sit well on the lock nuts to tighten them, so I found a 1/4″ drive 8 mm socket, which fit cleanly and allowed me to get them nice and tight.
You may find a little trouble getting the nuts to thread initially because of the thickness of the material. Once started though, the rest was pretty easy. Make sure the nuts are tightened enough for the nut to “lock-in” so they don’t some loose later on down the road.
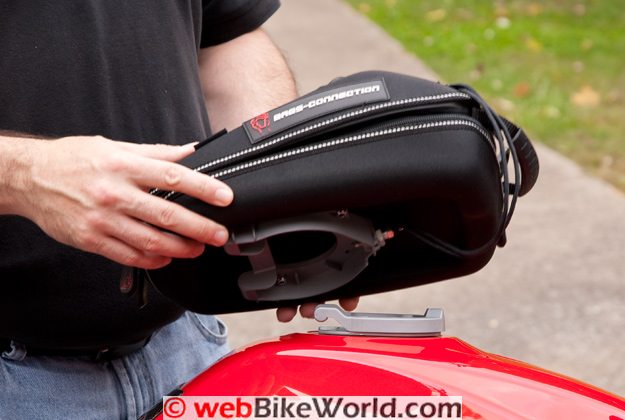
Attach the Quick-Lock ring to the underside of the bag. The Daypack II ready to be mounted on the SV650s.That’s a Wrap…
Now the Daypack II is ready for use. I found the installation was pretty simple as long as all the right tools were at hand.
I didn’t anticipate the need for a drill when I ordered the bag, but I already owned one. If you don’t have a drill, you may want to make sure you have access to one when you are ready to install the Quick-Lock system. The scrap wood is something else you might not anticipate needing so keep that in mind.
Part 1: Bags-Connection Daypack II Review
Bags-Connection Installation on Suzuki V-Strom
Owner Comments and Feedback
See details on submitting comments.