The concept: find a COTS* motorcycle LED light dimmer that can be spliced into an auxiliary LED light array to vary the light output.
We found this “Rotary LED Dimmer”, made by ADVmonster and designed primarily for their auxiliary lights.
We then customized the dimmer’s wiring harness and spliced it into the harness for the Denali D4 vs. DR1 LED Light Review to see if it would work and it was successful.
(*COTS: Commercial Off-The-Shelf.)
The inspiration for this “proof of concept” came from the rotary “rheostat”-type dimmer that comes with the Clearwater Krista lights (review) and the Clearwater Erica lights (review).
The Clearwater lights are expensive, but if you want nuclear-style light output, outstanding build quality and an OE light dimmer, they’re the way to go.
The idea was this: is it possible to add some type of LED dimmer to other brands of (less expensive) LED auxiliary lights?
You may ask, “Why would you want to do this?” The answer is simple…but lengthy. First of all, we’re using the Denali LED lights as an example because they’re the only other lights of this type we had on hand, but if this proof of concept works, then any LED auxiliary light set might benefit.
The Denali D4 LED lights were already installed on the current webBikeWorld project bike, the2014 Suzuki V-Strom 1000 ABS (Blog).
The square-shaped D4 lights look good on the V-Strom and while they aren’t as powerful as the Clearwater lights, they do work nicely (and they cost about half as much). They are mounted to the V-Strom Adventure’s crash bars.
If you recall, the D4 lights are unique because each light module has four 5-watt LEDs; two long-distance LEDs on top with two wide-view LEDs on the bottom.
While we originally though that the D4 lights would have a switch to go from the top pair to the bottom for long distance or fog/wide spread, that isn’t the case. Also, the D4 lights do not have a dimmer (which probably accounts for some of the price difference).
Like many/most of the brands of LED auxiliary lights, the D4’s are either on full power or off. There’s no in-between.
This means you can either wire them to turn on and off with a separate handlebar-mounted switch or you can wire them to turn on and off with the high beams. But they do not have the very useful variable dimming function.
Without the ability to dim the D4 lights, they can’t be used during the daytime as visibility lights.
That’s a shame and it limits the usefulness of the lights. Daytime visibility lights can serve a very important purpose to make the motorcycle stand out from the traffic to oncoming vehicles.
We wanted to find a way to dim the D4 lights so that they could also be used as daytime visibility lights, thus the search for an LED dimmer switch that would do the job. There — I told you it was a simple but long explanation!
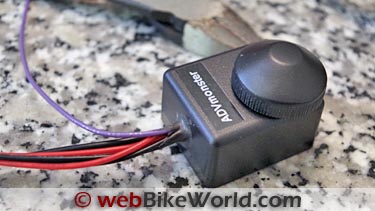
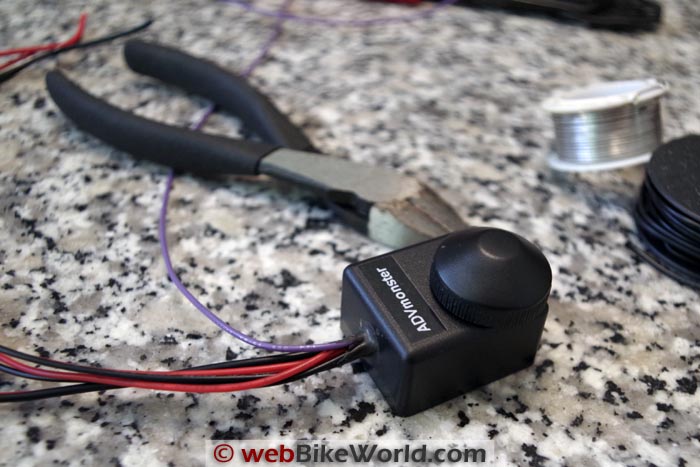
The ADVmonster motorcycle “Rotary LED Dimmer” switch with original wiring harness.A COTS Solution: The ADVmonster Rotary LED Dimmer
There aren’t many choices for an LED dimmer, at least that we could find. Rick came across theADVmonster Rotary LED Dimmer and bought one for $59.95 (ouch!).
This is a rotary dial-type switch designed for use with the ADVmonster LED branded lights but a couple of quick emails to the owner determined that this might work for the D4 lights.
The D4 lights are just 20 watts each (40 watts for the pair).
They draw just 3 amps for the pair and use a tiny 5 amp fuse. This makes them a good candidate for the ADVmonster dimmer, which is rated at 6 amps, 72 watts maximum.
It’s relatively small, measuring 38 mm by 33 mm by 20 mm. It’s also IP67 rated water resistant.
Alas, the wiring harness for the ADVmonster dimmer is a bit crude, at least for our purposes. It doesn’t have a protected wiring harness. The wires simply trail out the back of the housing (which made us wonder how it could get an IP67 rating).
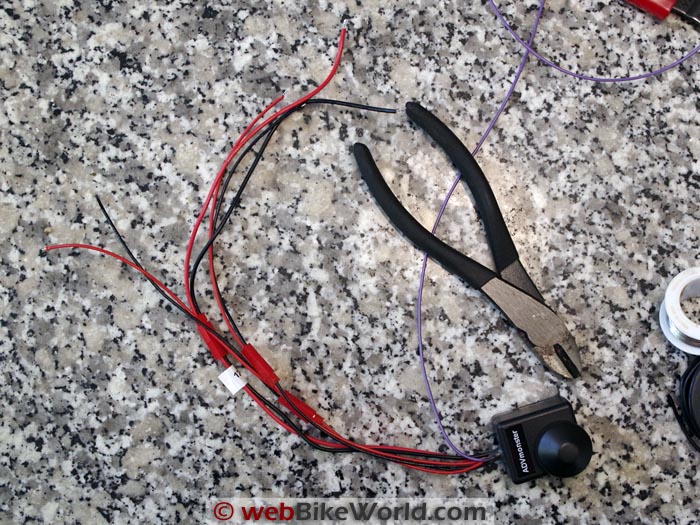
It has 7 wires total: two pairs of red and black wires, one for each auxiliary light are labeled; a red and black wire pair for power and one optional blue wire for switched power to activate the lights to their brightest output when high beams are selected.
For our purposes, to splice the dimmer into the Denali wiring harness, the wires that came with the rotary dimmer were about 60 cm too short.
That’s because we wanted to mount the dimmer along with the Denali D4 lights on/off switch up near the handlebar, routing the wires under the tank and back to where we could splice them into the Denali wiring harness.
So the first thing we did was to remove the plastic connectors on the ADVmonster harness and solder on some longer leads.
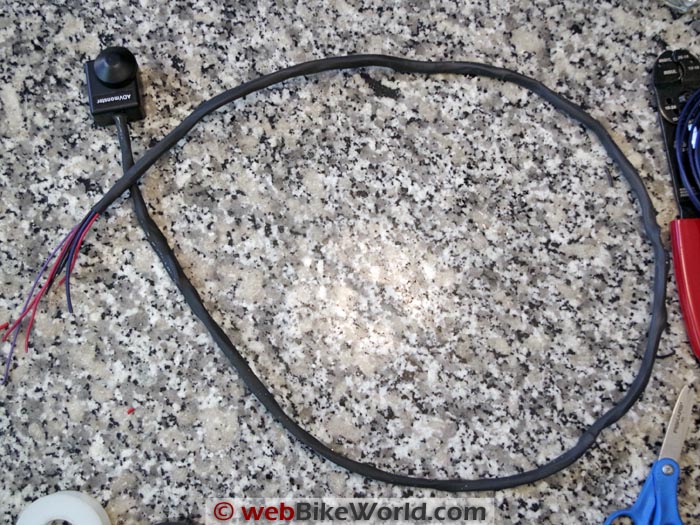
We then covered this entire bundle with a large diameter shrink tubing and shrunk ’em down with hot heat (is there any other kind?) from the very useful Steinel heat gun (review).
Here’s a full view of the 7-wire harness on the ADVmonster LED dimmer. Note the plastic wire connectors located about half-way down the length of the harness. We removed the connectors and soldered longer leads on each wire to fit the harness under the fuel tank. Here’s the same harness after soldering the extensions on and covering the entire length in shrink tubing.Connecting the Dimmer
Think of the LED dimmer as basically replacing the on/off switch for the LED auxiliary lights.
This means cutting into the nicely made Denali wiring harness and running the red/black pair of wires from each D4 light to the rotary dimmer switch.
Then the red/black power wires have to run from the dimmer switch back to just before the 5 amp fuse on the Denali harness.
We did not need the switched high beam power lead on the ADVmonster rotary LED dimmer so it was capped off with a Posi-Twist. Instead, we used the switched power wire already connected to the Denali harness.
We did not use the blue wire on the ADVmonster harness. Here’s a hard-to-read wiring diagramon the ADVmonster website.
Sounds easy, but it took quite a lot — quite a lot — of head-scratching before we stumbled upon the formula. Then we connected it all together using, of course, Posi-Lock connectors (buy ’em here!).
It’s kind of a shame to have to butcher the heavy-duty Denali harness, but as always, we did it for science.
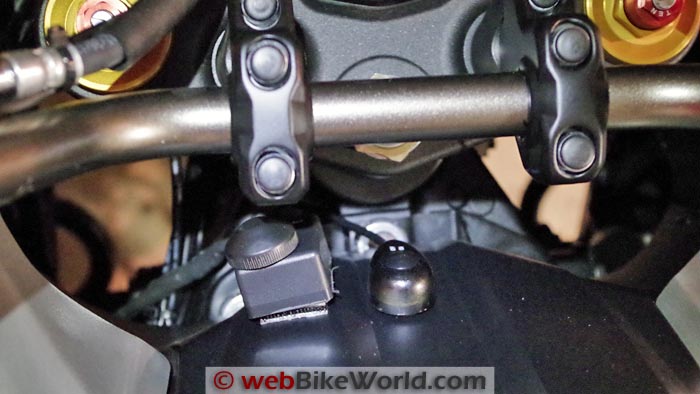
Rick opted to mount the ADVmonster LED dimmer (L) and Denali D4 lights on/off switch (R) on the fuel tank cover.Mounting the Dimmer
Mounting options are up to you. On the big V-Strom, the fuel tank is so big and long that mounting the switches up on the instrument panel would be too far of a reach.
Also, we didn’t want to make the mounting too permanent because we still weren’t sure this was going to work.
Rick decided to mount the LED dimmer and the D4 on/off switch on the front of the plastic section that covers the V-Strom’s fuel tank, using 3M Dual Lock stick-on fastener, a super-heavy-duty hook-and-loop type fastener.
The Denali D4 on/off switch has double-sided tape on back, so we used that. It doesn’t look great, but it works and it’s easy to reach and the handlebar just clears it.
Here’s a .gif showing the three power settings that are the result of using the ADVmonster LED dimmer with the Denali D4 LED lights.
We ended up with 3 power levels and not a continuous graduation, but that works fine for visibility.Does It Work?
The ADVmonster LED dimmer is designed to work with ADVmonster LED lights.
ADVmonster told us that the LED dimmer “works using PWM (Pulse Width Modulation), which essentially is a fast digital switch that cycles power on/off. It does not create heat like a rheostat.”
They also said that the relatively thin wire gauge used in the dimmer harness “is more than enough to support the rated amperage (6A) of the dimmer.”
The ADVmonster dimmer doesn’t give the D4 lights a smooth gradation of light intensity like the built-in dimmer does on the Clearwater LED lights.
This is because the Denali lights and the ADVmonster dimmer weren’t designed to work together.
Using the ADVmonster dimmer gives the D4 lights 3 ranges: low, medium and high. This works just fine in practice and the low setting is perfect for using the D4 lights during the daytime as visibility lights.
The three settings correspond closely to the distance that the round dial on the ADVmonster LED dimmer is turned; e.g., first third is low; second third of a turn is medium and the last twist is high.
Although the ADVmonster LED dimmer will also turn the lights off, we still use the on/off button from the Denali lights harness just in case.
Also, the on/off button housing for the Denali lights has a tiny on/off LED light built in, which indicates whether the D4 lights are on or off and that’s useful.
Also, once the ADVmonster LED dimmer is set for the low power setting, the D4 lights can be turned on and off using the Denali on/off button, so the ADVmonster dimmer doesn’t have to be touched again unless you want to change the power setting for night riding.
And finally, it’s much easier to simply push the Denali on/off button to turn the D4 lights off when you’re riding at night. The D4 lights can also be wired to turn on or off with the high beam but we opted not to do that for more flexibility.
Conclusion
This was more or less a “proof of concept” to see if we could cobble together a system that would provide the same type of LED dimmer system as the Clearwater lights.
Because of the electronics in the D4 lights, we didn’t get a smooth graduated light output but instead we have three defined light levels.
This works perfectly fine because the low setting is just enough to have the D4 lights act as daytime visibility lights.
Your results may vary, depending on the type of LED auxiliary lights you’re using, but this does prove that it can be done.
More wBW: Suzuki V-Strom 1000 ABS Blog | wBW Motorcycle Lighting Reviews
Owner Comments and Feedback
See details on submitting comments.
From “P.A.” (July 2016): “Although this article may be a couple years old I still found it valuable when looking for a dimmer for my LED enclosure on my Gold Wing.
However, I would like to share one issue uncovered during my installation.
I purchased a pair of Baja Design S2 Pro LED lights and the ADVMonster Dimmer Switch. Everything worked as advertised when testing on the bench.
Once connected to the motorcycle the lights only worked at 100% brightness (regardless of dimmer switch position — off or on).
I found that even though the LED lights had a ground wire to the connector it also grounded the LED light enclosure to my motorcycle mounting bracket. This is what caused the switch to not function initially.
After isolating the LED enclosure (using nylon washers and spacers) the dimmer switch is working flawlessly. It appears that you have to have isolated ground to the switch only.
Side note: Unlike your test with only having low-medium-high setting, the dimmer does work gradually from off to high. Pleasant surprise. Great combination! Thanks for the article.”
From “M.S.” (March 2015): “I think I have ample qualifications to speak from a position of authority about your daytime running lights observations and the proposition that lights designed for night time use ought to be “throttled back” for daytime application.
My credentials consists of 50 years of motorcycle riding, 20 years as an electronics industry specialist dealing in audio and visual display technologies.
And last, but not least, as an experienced instructor of the Canada Safety Council Gearing Up Motorcycle Training program (the “up North” version of the American Motorcycle Safety Foundation course).
Your comment at the bottom of the subject page, “much too bright for daytime use” exhibits a lack of understanding of the principles of ambient light, which, as we know is the term used to refer to “environmental”, “surrounding” or “situational” light.
The principles at work in determining the “proper” amount of light to perform any given task (in this case, the task of simply “being seen” by oncoming traffic), include phenomena as diverse as the physiology of the human eye as well as the properties of particular light spectra as they are produced within the existing aura (ambiance) of other light sources.
What it boils down to simply, is the question “How much light is required to differentiate an oncoming object in the dark (night time) vs. how much is required to “notice” that same object in “lighted surroundings” (i.e. daylight) without causing undue/dangerous visual stimuli.
Without boggling anyone’s mind with scientific data, I think it’s probably easiest if you just park any two vehicles (facing each other) a city block apart and put their headlights on high, then low.
Do this in daylight. Wait X hours, then do it in darkness.
I think you’ll see (and agree with) my point, which is, that brighter lights (high beams) are not only safe but required in daylight riding conditions in order to provide the required visual “breakthrough” that motorcyclists want, need and deserve in order to attain the conspicuity (yes it’s a new word) required to be “noticed” by oncoming traffic.
Bottom line? Well, a good friend of mine used to say “Smoke ’em if ya got ’em”. (My personal favourite motto is actually: Better to have a gun and not need it than to need a gun and not have it. But, I digress…)
In this case, my advice is: while riding a motorcycle in daylight, turn on every light you’ve got…on high!
Rick’s Reply: Can’t say I agree. Yes, technically if you put a couple of vehicles together and stand back and one has brighter lights, it will probably be more visible or noticeable.
But the key is to have just enough light to make the motorcycle visible in traffic without becoming an annoyance.
More isn’t necessarily better and I believe there’s even the possibility that as the attention of an oncoming driver is diverted when trying to figure out what that bright thing is coming at them and what it means, that they could actually end up with “target fixation” and drive right into the distraction they’re trying to avoid.
It’s also a fact that too-bright lights on the front of a motorcycle can make it difficult or even impossible for oncoming traffic to see what the turn signals are indicating on the motorcycle.
I have witnessed this numerous times and that’s one of the main reasons I’m convinced that too much light is…too much.
Lights that are too bright can cause distractions and annoyances to oncoming traffic. This is why most states have (admittedly difficult to quantify) laws preventing “glaring” or “dazzling” lights.
From “H.D.” (March 2015): “I just recently purchased the Rotary LED dimmer after reading your review. After all the effort to dismantle the front of my bike and wire in the dimmer, I find the LED lights are still at 100% output with no dimming effect at all.
I than had to remove the dimmer module and re-splice all my LED light connections which took me the best part of a day to do. After contacting ADVmonster I was told that the dimmer module will not function with Rigid LED lights.
I told then they should have mentioned that fact on their webpage as to whether their unit is compatible or not with the various manufactures of LED lights.
ADVmonster will not refund my money back as I cut the wire connectors off and spliced/soldered the connections directly to the LED light wires (understandable).
But my issue is if they would have listed their unit is not compatible with the Rigid lights, I would have never purchased them in the first place!
Instead they let you purchase and install the dimmer unit, than have to remove the unit totally wasting one’s time, not to mention I can’t get my money back as they tell me the unit is no longer sellable!”
From “M” (December 2014): “I read your review of the LED dimmer and was curious for the reasoning of not using the Denali D4 lights at full intensity during the day?”
Editor’s Reply: We discussed this in the D4 review also, the lights are not designed as visibility lights and they are much too bright for daytime use.
At full power, the lights would certainly annoy and possibly blind oncoming traffic and also make it more difficult for them to see the turn signals on the motorcycle. It’s not a good idea (and possibly illegal) to use very bright lights during the day.